Vizio SV470XVT1A SV470XVT HDTV User Manual - Page 10
Basic Controls and Connections - tv
 |
UPC - 857380001413
View all Vizio SV470XVT1A manuals
Add to My Manuals
Save this manual to your list of manuals |
Page 10 highlights
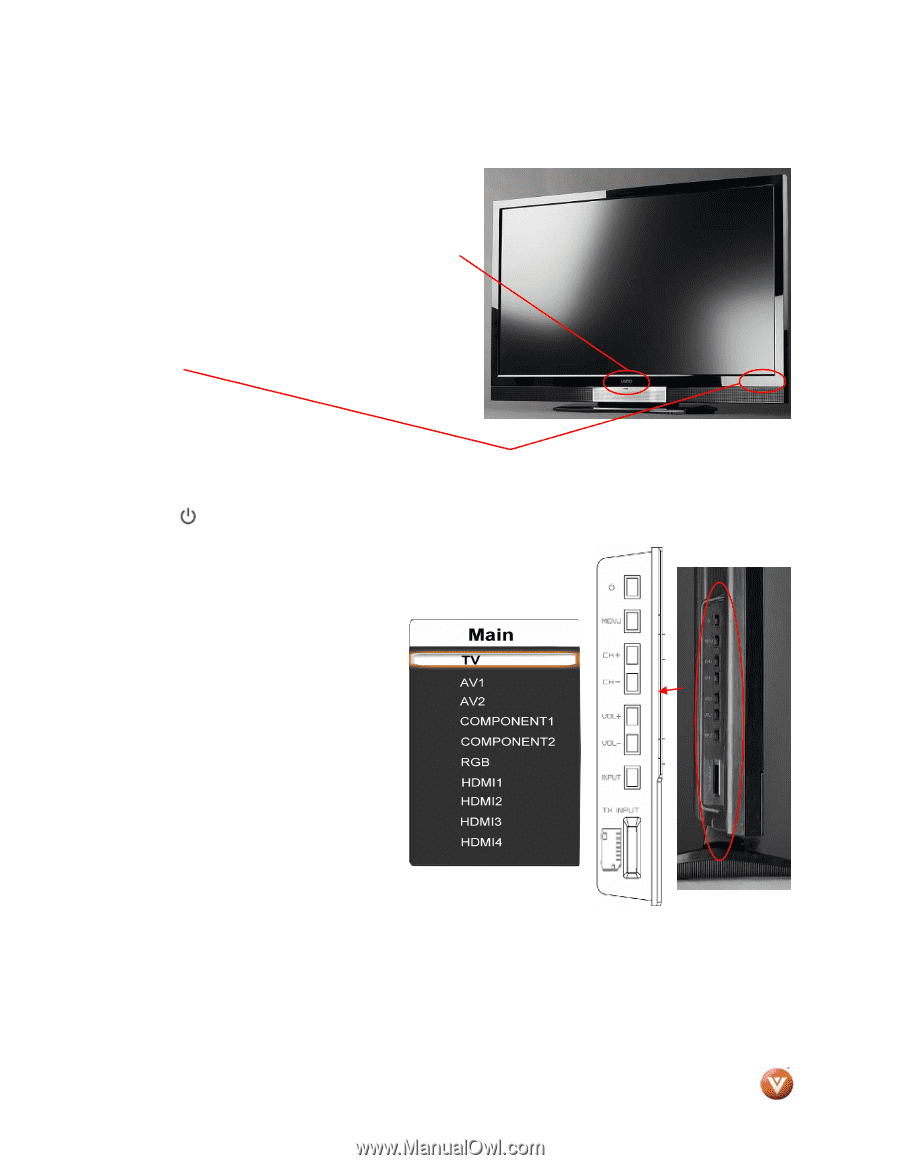
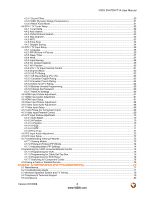
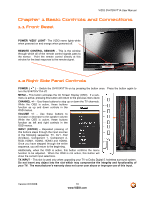
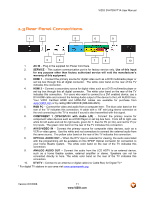
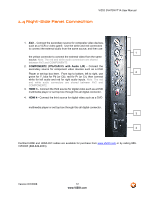
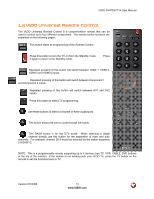
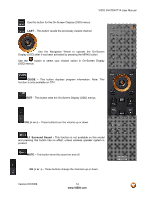
VIZIO SV470XVT1A User Manual Chapter 1 Basic Controls and Connections 1.1 Front Bezel POWER 'VIZIO' LIGHT- The VIZIO name lights white when powered on and orange when powered off. REMOTE CONTROL SENSOR - This is the window through which all of the remote control signals pass to the sensor. Point the remote control directly at this window for the best response to the remote signal. 1.2 Right Side Panel Controls POWER ( ) - Switch the SV470XVT1A on by pressing the button once. Press the button again to turn the SV470XVT1A off. MENU - This button activates the On Screen Display (OSD). If a submenu is active, pressing this button will return to the previous menu level. CHANNEL +/- - Use these buttons to step up or down the TV channels. While the OSD is active, these buttons function as up and down controls in the OSD menus. VOLUME +/- - Use these buttons to increase or decrease to the speaker volume. While the OSD is active, these buttons function as left and right controls in the OSD menus. INPUT (ENTER) - Repeated pressing of this buttons steps through the input sources in the following sequence: TV, AV1, AV2 (S-Video), Component 1, Component 2, RGB, HDMI1, HDMI2, HDMI3 and HDMI4. Once you have stepped through the entire sequence, you will return to the beginning. Additionally, when the OSD is active, this button confirms the menu function to be adjusted. When the OSD is not active, this button will show the current input selections. TX INPUT - This slot is used only when upgrading your TV to Dolby Digital 5.1wireless surround system. Do not insert any object into the slot which may compromise the integrity and functionality of your TV. The manufacturer's warranty does not cover user abuse or improper use of this input. Version 6/2/2008 10 www.VIZIO.com
-
 1
1 -
2
-
3
-
4
-
 5
5 -
 6
6 -
 7
7 -
 8
8 -
 9
9 -
 10
10 -
 11
11 -
 12
12 -
 13
13 -
 14
14 -
 15
15 -
16
-
17
-
18
-
19
-
20
-
21
-
22
-
23
-
24
-
25
-
26
-
27
-
28
-
29
-
30
-
31
-
32
-
33
-
34
-
35
-
36
-
37
-
38
-
39
-
40
-
41
-
42
-
43
-
44
-
45
-
46
-
47
-
48
-
49
-
50
-
51
-
52
-
53
-
54
-
55
-
56
-
57
-
58
-
59
-
60
-
61
-
62
-
63
-
64
-
65
-
66
-
67
-
68
-
69
-
70
-
71
-
72
-
73
-
74
-
75
-
76
-
77
-
78
-
79
-
80
-
81
-
82
-
83
-
84
-
85
-
86
-
87
-
88
-
89
-
90
-
91
-
92
-
93
-
94
-
95
-
96
-
97
-
98
-
99
-
100
-
101
-
102
-
103
-
104
 |
 |