Vtech Go Go Smart Wheels Cheerful Cement Truck User Manual
Vtech Go Go Smart Wheels Cheerful Cement Truck Manual
 |
View all Vtech Go Go Smart Wheels Cheerful Cement Truck manuals
Add to My Manuals
Save this manual to your list of manuals |
Vtech Go Go Smart Wheels Cheerful Cement Truck manual content summary:
- Vtech Go Go Smart Wheels Cheerful Cement Truck | User Manual - Page 1
, cords and packaging screws are not part of this toy, and should be discarded for your child's safety. NOTE: Please save this Instruction Manual as it contains important information ATTENTION : Pour la sécurité de votre enfant, débarrassez-vous de tous les produits d'emballage tels que rubans - Vtech Go Go Smart Wheels Cheerful Cement Truck | User Manual - Page 2
moisture or water. TROUBLESHOOTING If for some the problem persists, please call our Consumer Services Department at 1-800-521-2010 in the U.S., 1-877-352-8697 in Canada, or by going to our website vtechkids.com and filling out our Contact Us form located under the Customer Support - Vtech Go Go Smart Wheels Cheerful Cement Truck | User Manual - Page 3
installation. This equipment generates, uses and can radiate radio frequency energy and, if not installed and used in accordance with the instructions, may cause harmful interference to radio communications. However, there is no guarantee that interference will not occur in a particular installation
-
 1
1 -
 2
2 -
 3
3
 |
 |

Go! Go! Smart Wheels
®
Instruction Manual
Battery Removal and Installation
1.
Make sure the unit is turned
Off
.
2.
Find the battery cover located on the
bottom of the unit, use a screwdriver
to loosen the screw and then open the
battery cover.
3.
Remove old batteries by pulling up on
one end of each battery.
4.
Install 2 new AAA (AM-4/LR03)
batteries following the diagram inside
the battery box. (For best performance,
alkaline batteries or fully charged Ni-MH
rechargeable batteries are recommended.)
5.
Replace the battery cover and tighten the screw to secure.
IMPORTANT: BATTERY INFORMATION
•
Insert batteries with the correct polarity (+ and -).
•
Do not mix old and new batteries.
•
Do not mix alkaline, standard (carbon-zinc) or rechargeable
batteries.
•
Only batteries of the same or equivalent type as recommended are
to be used.
•
Do not short-circuit the supply terminals.
•
Remove batteries during long periods of non-use.
•
Remove exhausted batteries from the toy.
•
Dispose of batteries safely. Do not dispose of batteries in fire.
RECHARGEABLE BATTERIES
•
Remove rechargeable batteries (if removable) from the toy before
charging.
•
Rechargeable batteries are only to be charged under adult
supervision.
•
Do not charge non-rechargeable batteries.
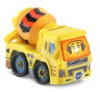
PRODUCT FEATURES
1. On/Off Switch
To turn the unit
On
, slide the
On/Off Switch
to the
On
position. To turn the unit
Off
, slide
the
On/Off Switch
to the
Off
position.
1
2
91-004177-011
CA
WARNING:
All packing materials such as tape, plastic sheets,
packaging locks, removable tags, cable ties, cords and
packaging screws are not part of this toy, and should be
discarded for your child’s safety.
NOTE:
Please save this Instruction Manual as it contains
important information
ATTENTION :
Pour la sécurité de votre enfant, débarrassez-vous de
tous les produits d’emballage tels que rubans adhésifs,
feuilles de plastique, attaches, étiquettes, cordons et vis
d’emballage. Ils ne font pas partie du jouet.
NOTE :
Il est conseillé de sauvegarder ce manuel d’instructions
car il comporte des informations importantes.
WARNING:
Adult assembly required for battery installation.
Keep batteries out of reach of children.
ATTENTION :
Les piles ou accumulateurs doivent être installés par un adulte.
Tenir les piles ou accumulateurs hors de portée des enfants.
Turn the packaging lock counterclockwise
several times.
Pull out and discard the packaging lock.
Unlock the packaging locks: