Weber Summit S-470 LP Owner Manual - Page 14
Gas Instructions
 |
View all Weber Summit S-470 LP manuals
Add to My Manuals
Save this manual to your list of manuals |
Page 14 highlights
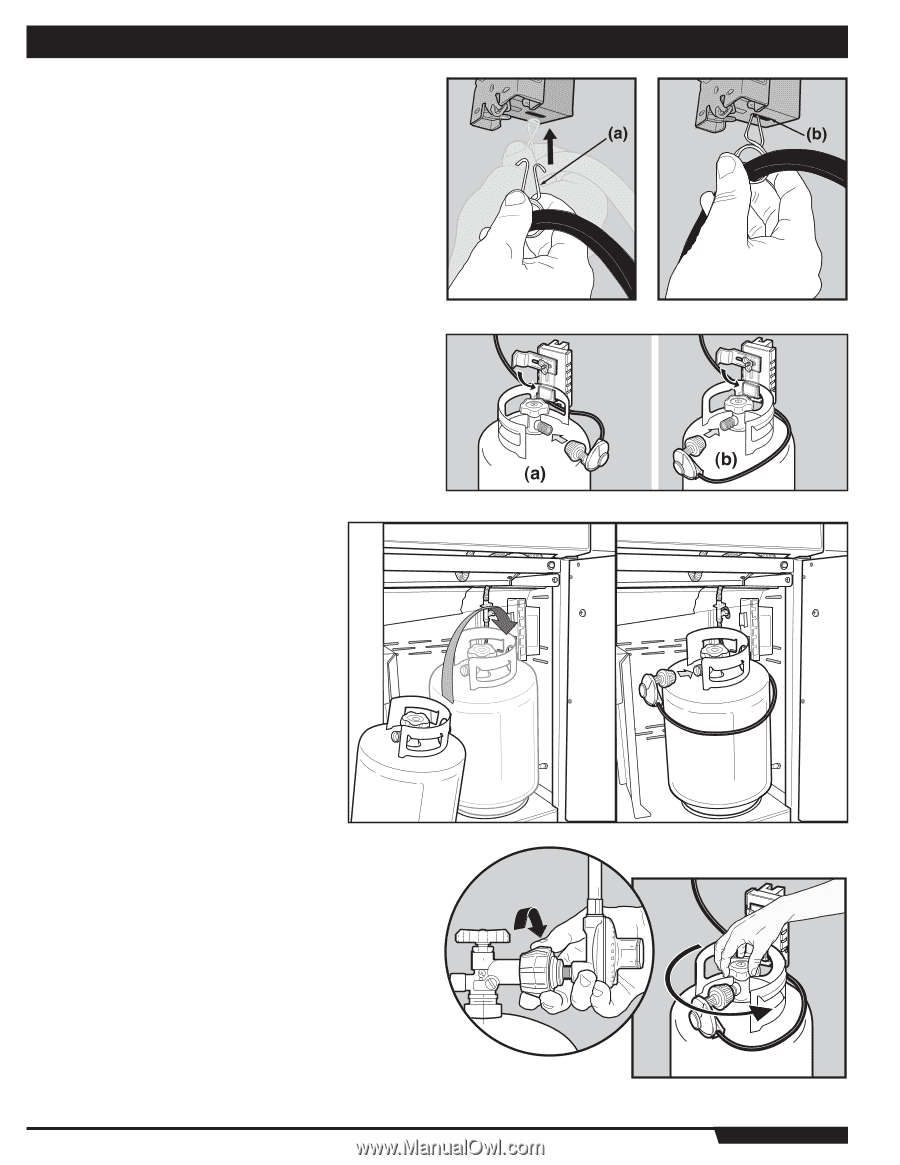
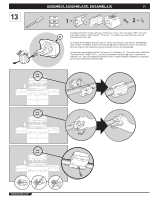
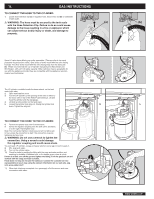
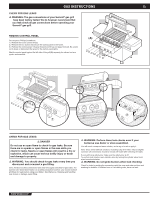
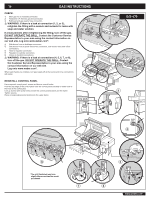
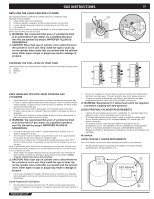
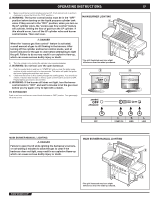
14 GAS INSTRUCTIONS GAS INSTRUCTIONS TO CONNECT THE HOSE TO THE CYLINDER: 1) Locate hose retention clip (a) on regulator hose. Secure into slot (b) on underside of tank scale. ƽ WARNING: The hose must be secured to the tank scale with the Hose Retention Clip. Failure to do so could cause damage to the hose resulting in a fire or explosion which can cause serious bodily injury or death, and damage to property. Some LP tanks have differing top collar assembles. (The top collar is the metal protective ring around the valve.) One series of tanks mount with the valve facing front (a). The other tanks mount with the valve facing away from the fuel scale (b). Weber recommends the use of cylinder manufacturer's Manchester and Worthington, with a 47.6 lb water capacity. Other cylinders may be acceptable for use with the appliance provided they are compatible with the appliance retention means (see illustrations). The LP cylinder is installed inside the base cabinet, on the tank scale (right side). 2) Open base cabinet doors. 3) Turn the LP cylinder so the opening of the valve is either to the front, side or rear of the Weber® gas barbecue. Lift and hook the cylinder onto the fuel gauge. 4) Lift tank up into position on the tank scale. 5) Loosen the cylinder lock wing nut. Swing the cylinder lock down. Tighten the wing nut. TO CONNECT THE HOSE TO THE CYLINDER: 6) Remove the plastic dust cover from the valve. 7) Screw the regulator coupling onto the tank valve, clockwise, or to the right. Hand-tighten only. Note: This connection tightens clockwise and will not allow gas to flow unless the connection is tight. The connection requires tightening by hand only. ƽ WARNING: Do not use a wrench to tighten the connection. Using a wrench could damage the regulator coupling and could cause a leak. You will need: LP cylinder, a soap and water solution and a rag or brush to apply it. 8) Mix soap and water. 9) Turn on the cylinder valve. 10) Check for leaks by wetting the fitting with the soap and water solution and watching for bubbles. If bubbles form, or if a bubble grows, there is a leak. If there is a leak, turn off the gas and tighten the fitting. Turn the gas back on and recheck with the soap and water solution. If leak does not stop do not use the barbecue. Contact the customer service representative in your area using the contact information on our web site. Log onto www.weber.com®. 11) When leak checking is complete, turn gas supply off at the source and rinse connections with water. WWW.WEBER.COM®
-
 1
1 -
2
-
3
-
4
-
5
-
6
-
7
-
8
-
 9
9 -
 10
10 -
 11
11 -
 12
12 -
 13
13 -
 14
14 -
 15
15 -
 16
16 -
 17
17 -
 18
18 -
 19
19 -
20
-
21
-
22
-
23
-
24
-
25
-
26
-
27
-
28
-
29
-
30
-
31
-
32
-
33
-
34
-
35
-
36
-
37
-
38
-
39
-
40
-
41
-
42
-
43
-
44
-
45
-
46
-
47
-
48
-
49
-
50
-
51
-
52
-
53
-
54
-
55
-
56
-
57
-
58
-
59
-
60
-
61
-
62
-
63
-
64
-
65
-
66
-
67
-
68
-
69
-
70
-
71
-
72
-
73
-
74
-
75
-
76
-
77
-
78
-
79
-
80
-
81
-
82
-
83
-
84
-
85
-
86
-
87
-
88
-
89
-
90
-
91
-
92
 |
 |