Weider Pro 250x English Manual
Weider Pro 250x Manual
 |
View all Weider Pro 250x manuals
Add to My Manuals
Save this manual to your list of manuals |
Weider Pro 250x manual content summary:
- Weider Pro 250x | English Manual - Page 1
. CUSTOMER HOT LINE: 1-800-999-3756 Mon.-Fri., 6 a.m.-6 p.m. MST CAUTION Read all precautions and instructions in this manual before using this equipment. Save this manual for future reference. USER'S MANUAL Visit our website at www.nordictrack.com new products, prizes, fitness tips, and much more! - Weider Pro 250x | English Manual - Page 2
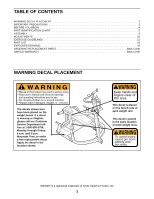
DECAL PLACEMENT The decals shown here have been placed on the weight bench. If a decal is missing or illegible, please call our Customer Service Department tollfree at 1-800-999-3756, Monday through Friday, 6 a.m. until 6 p.m. Mountain Time, to order a free replacement decal. Apply the decal in the - Weider Pro 250x | English Manual - Page 3
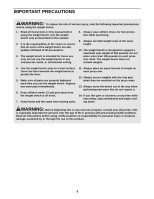
instructions in this manual before using the weight bench. Use the weight bench only as described in this manual same height. 10. The weight bench is designed to support a maximum user weight of 250 pounds. Do not with pre-existing health problems. Read all instructions before using. ICON assumes - Weider Pro 250x | English Manual - Page 4
achieve the specific results you want. tions, please call our Customer Service Department toll-free at 1-800-999-3756, Monday through Friday, weight bench (see the front cover of this manual). For your benefit, read this manual carefully before Before reading further, please familiarize yourself - Weider Pro 250x | English Manual - Page 5
PART IDENTIFICATION CHART Refer to the drawings below to identify small parts used in assembly. The number in parentheses by each drawing is the key number of the part, from the PART LIST on page 14. Note: Some small parts may have been pre-attached. If a part is not in the parts bag, check to see - Weider Pro 250x | English Manual - Page 6
for Yourself This manual is designed to ensure that the weight bench can be assembled successfully by anyone. Most people find that by setting aside plenty of time, assembly will go smoothly. Before beginning assembly, carefully read the following information and instructions: • Assembly requires - Weider Pro 250x | English Manual - Page 7
Left Upright so that the latch is on the side shown. Attach the Left Upright (6) to the Left Base (2) with two M8 x 67mm Bolts (27), a Support Plate (38), and two M8 Nylon Locknuts (33). Attach the Right Upright (not shown) to the Right Base (3) in the same manner. 2 3 Latch 6 33 Bracket - Weider Pro 250x | English Manual - Page 8
7. Attach the eyelet on the Cable (43) to the indicated hole in the Adjustment Carriage (12) with an M5 x 7 10mm Self-tapping Screw (34). Orient the Adjustment Carriage (12) so the decal and tube are in the positions shown. Slide the Adjustment Carriage onto the Center Upright (4). Insert the - Weider Pro 250x | English Manual - Page 9
10. Press the two 50mm Round Outer Caps (26) onto the ends of the Bench Leg (13). Orient the Bench Leg (13) as shown. Attach the Bench Leg to the Bench Frame (14) with two M8 x 77mm Bolts (48) and two M8 Nylon Locknuts (33). 11. Orient the Seat (15) so that the holes that are closer to the edge of - Weider Pro 250x | English Manual - Page 10
ADJUSTMENTS This section explains how to adjust the weight bench. Refer to the accompanying exercise guide to see the correct form for each exercise. See the EXERCISE GUIDELINES on page 12 for important information about how to get the most benefit - Weider Pro 250x | English Manual - Page 11
ADJUSTING THE WEIGHT REST To adjust the height of the left Weight Rest (8), pull the Weight Rest up so that the Latch (39) engages the desired hole in the Left Upright (6). When the Weight Rest (8) reaches the top of the Left Upright (6), the Latch will disengage. Slide the Weight Rest to the bottom - Weider Pro 250x | English Manual - Page 12
, and moving only the appropriate parts of the body. Exercising in an uncontrolled manner will leave you feeling exhausted. On the exercise guide accompanying this manual you will find photographs showing the correct form for several exercises, and a list of the muscles affected. Refer to the muscle - Weider Pro 250x | English Manual - Page 13
Rest for a short period of time after each set. The ideal resting periods are: • Rest for three minutes after each set for a muscle building workout. • Rest for one minute after each set for a toning work- out. • Rest for 30 seconds after each set for a weight loss workout. Plan to spend the first - Weider Pro 250x | English Manual - Page 14
4 M6 x 20mm Screw 36 4 M6 Nylon Locknut 37 7 Rubber Pad 38 2 Support Plate 39 2 Latch 40 2 M8 x 20mm Bolt 41 2 50mm Round Inner Cap M8 x 77mm Bolt 49 7 M4 Washer # 1 User's Manual # 1 Exercise Guide Note: "#" indicates a non-illustrated part. Specifications are subject to - Weider Pro 250x | English Manual - Page 15
15 15 45 33 48 28 14 16 33 28 26 30 33 13 26 8 46 29 23 33 39 36 40 23 33 9 1 5 35 9 9 46 6 2 33 27 49 37 42 27 38 37 49 42 27 37 42 49 27 46 29 8 5 33 44 40 39 23 36 9 35 46 23 9 49 37 9 42 18 27 3 27 38 17 7 41 37 49 42 33 33 11 4 49 37 25 42 47 - Weider Pro 250x | English Manual - Page 16
LIST and EXPLODED DRAWING on pages 14 and 15 of this manual). LIMITED WARRANTY LIMITED WARRANTY ICON Health & Fitness, Inc. (ICON), warrants this product to be free from defects in workmanship and material, under normal use and service conditions, for a period of ninety (90) days from the date of
-
 1
1 -
 2
2 -
 3
3 -
 4
4 -
 5
5 -
 6
6 -
 7
7 -
8
-
9
-
10
-
11
-
12
-
13
-
14
-
15
-
16
 |
 |

Visit our website at
www.nordictrack.com
new products, prizes,
fitness tips, and much more!
CAUTION
Read all precautions and instruc-
tions in this manual before using
this equipment. Save this manual
for future reference.
Model No. WEBE28410
Serial No.
Write the serial number in the
space above for future reference.
Serial Number Decal (Under Seat)
QUESTIONS?
As a manufacturer, we are com-
mitted to providing complete
customer satisfaction. If you
have questions, or if there are
missing parts, we will guarantee
complete satisfaction through
direct assistance from our
factory.
TO AVOID DELAYS, PLEASE
CALL DIRECT TO OUR TOLL-
FREE CUSTOMER HOT LINE.
The trained technicians on our
customer hot line will provide
immediate assistance, free of
charge.
CUSTOMER HOT LINE:
1-800-999-3756
Mon.–Fri., 6 a.m.–6 p.m. MST
USER’S MANUAL