Weider Pro 5500 User Manual - Page 10
Attach the Left Shroud 21 to the Top Frame 4
 |
View all Weider Pro 5500 manuals
Add to My Manuals
Save this manual to your list of manuals |
Page 10 highlights
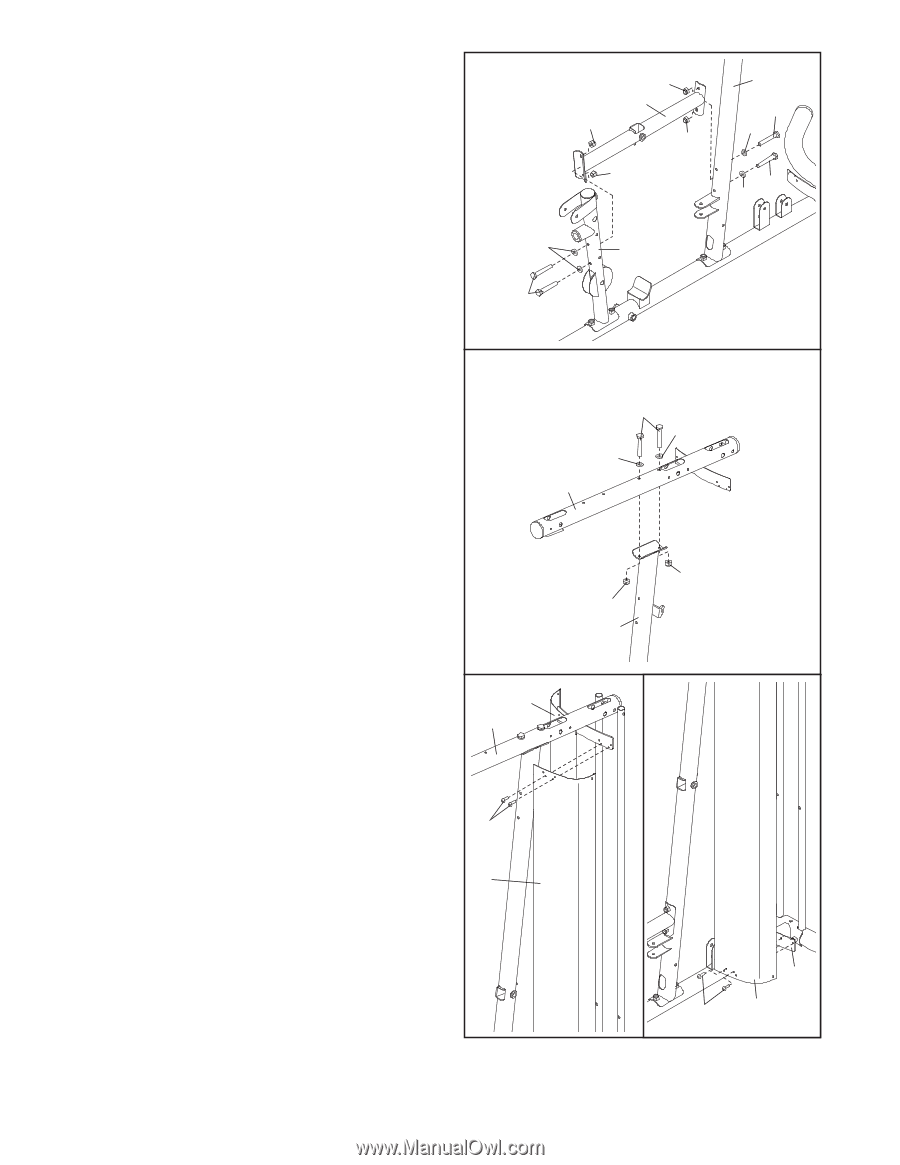
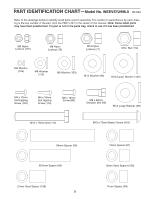
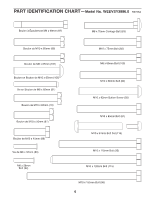
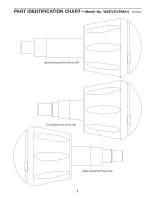
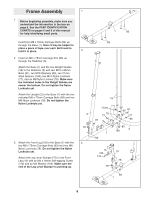
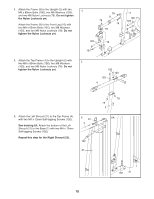
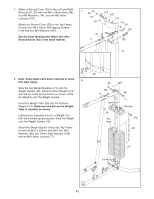
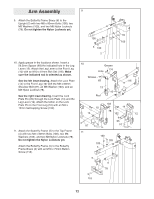
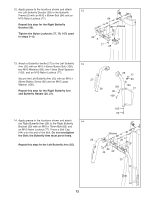
4. Attach the Frame (9) to the Upright (2) with two M8 x 80mm Bolts (100), two M8 Washers (103), and two M8 Nylon Locknuts (78). Do not tighten the Nylon Locknuts yet. Attach the Frame (9) to the Front Leg (10) with two M8 x 65mm Bolts (101), two M8 Washers (103), and two M8 Nylon Locknuts (78). Do not tighten the Nylon Locknuts yet. 4 78 2 9 78 78 100 103 78 100 103 103 10 101 5. Attach the Top Frame (4) to the Upright (2) with two M8 x 80mm Bolts (100), two M8 Washers 5 (103), and two M8 Nylon Locknuts (78). Do not tighten the Nylon Locknuts yet. 100 103 103 4 6. Attach the Left Shroud (21) to the Top Frame (4) with two M4 x 12mm Self-tapping Screws (102). See drawing 6A. Attach the bottom of the Left Shroud (21) to the Base (1) with two M4 x 12mm Self-tapping Screws (102). Repeat this step for the Right Shroud (22). 6 22 4 102 21 78 78 2 6A 1 102 21 10
-
 1
1 -
2
-
3
-
4
-
 5
5 -
 6
6 -
 7
7 -
 8
8 -
 9
9 -
 10
10 -
 11
11 -
 12
12 -
 13
13 -
 14
14 -
 15
15 -
16
-
17
-
18
-
19
-
20
-
21
-
22
-
23
-
24
-
25
-
26
-
27
-
28
-
29
-
30
-
31
-
32
-
33
-
34
-
35
-
36
 |
 |