Weider Pro 5500 User Manual - Page 17
Thin Pulley inside the Top Frame. Insert an M10 x
 |
View all Weider Pro 5500 manuals
Add to My Manuals
Save this manual to your list of manuals |
Page 17 highlights
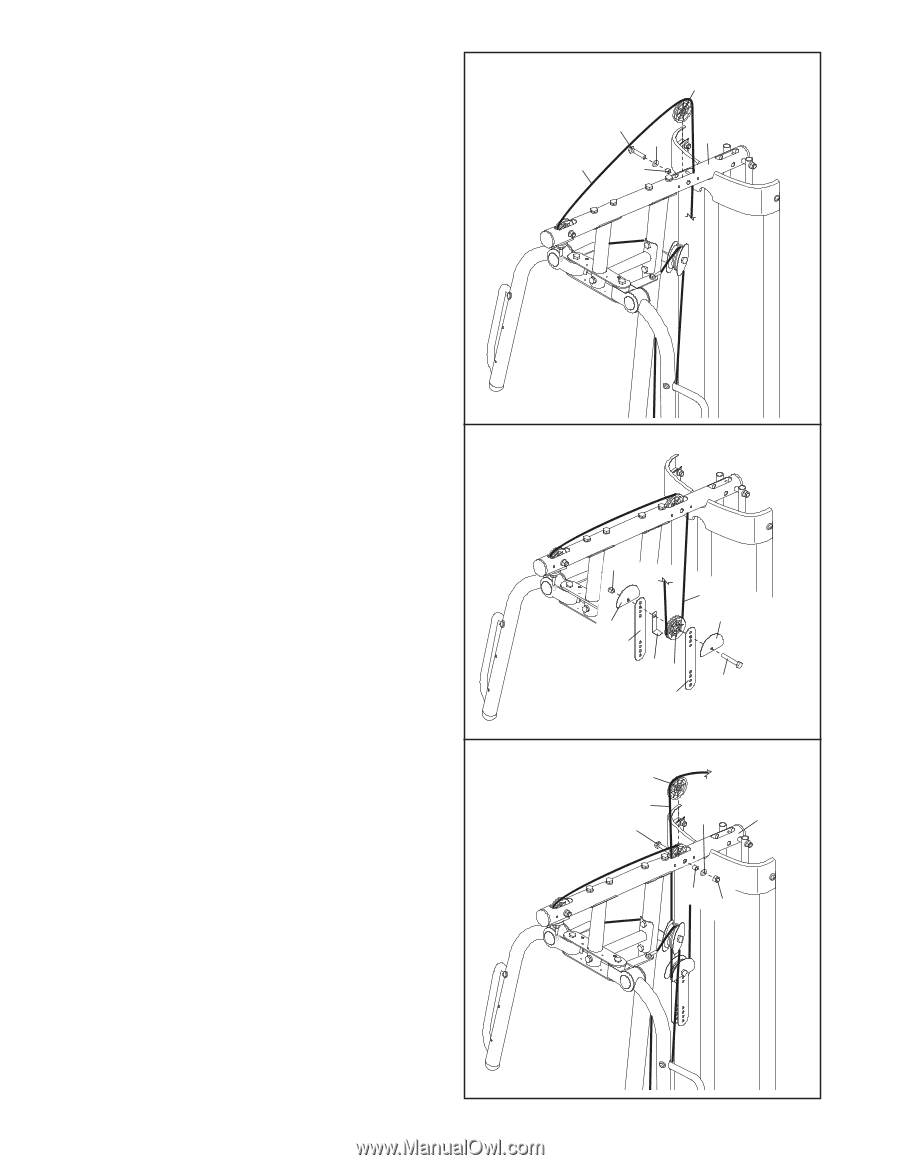
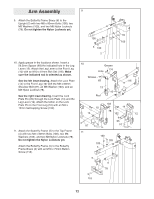
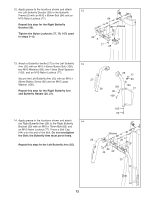
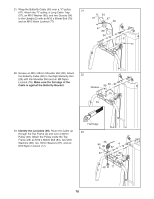
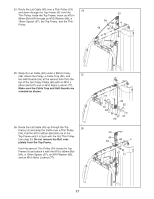
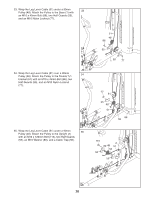
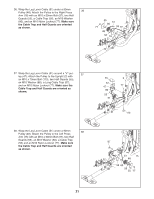
24. Route the Lat Cable (49) over a Thin Pulley (24) and down through the Top Frame (4). Hold the 24 Thin Pulley inside the Top Frame. Insert an M10 x 80mm Bolt (84) through an M10 Washer (80), a 19mm Spacer (67), the Top Frame, and the Thin Pulley. 24 84 80 4 49 67 25. Wrap the Lat Cable (49) under a 90mm Pulley (48). Attach the Pulley, a Cable Trap (56), and 25 two Half Guards (55) at the second hole from the top of the two Pulley Plates (60) with an M10 x 50mm Bolt (97) and an M10 Nylon Locknut (77). Make sure the Cable Trap and Half Guards are oriented as shown. 26. Route the Lat Cable (49) up through the Top 26 Frame (4) and wrap the Cable over a Thin Pulley (24). Pull the M10 x 80mm Bolt (84) out of the Top Frame until it is flush with the first Thin Pulley from step 24. Do not remove the Bolt com- pletely from the Top Frame. Hold the second Thin Pulley (24) inside the Top Frame (4) and attach it with the M10 x 80mm Bolt (84), a 19mm Spacer (67), an M10 Washer (80), and an M10 Nylon Locknut (77). 77 49 55 55 60 56 48 97 60 24 49 84 80 4 67 77 17
-
 1
1 -
2
-
3
-
4
-
5
-
6
-
7
-
8
-
9
-
10
-
11
-
 12
12 -
 13
13 -
 14
14 -
 15
15 -
 16
16 -
 17
17 -
 18
18 -
 19
19 -
 20
20 -
 21
21 -
 22
22 -
23
-
24
-
25
-
26
-
27
-
28
-
29
-
30
-
31
-
32
-
33
-
34
-
35
-
36
 |
 |