Weider Pro 9625 English Manual
Weider Pro 9625 Manual
 |
View all Weider Pro 9625 manuals
Add to My Manuals
Save this manual to your list of manuals |
Weider Pro 9625 manual content summary:
- Weider Pro 9625 | English Manual - Page 1
TM PATENT PENDING WEIDER Model No. 831.159361 Serial No. The serial number can be found in the location shown below. Write the serial number in the space above. of USER'S MANUAL Serial Number Decal E. QUIP M E NT QUEST IONS HEL_PL_INE! 1-800-736-6879 CAUTION Read all precautions and instruc - Weider Pro 9625 | English Manual - Page 2
of the owner to ensure that all users of the home gym system are adequatety informed of all precautions 2 Read all instructions in this manual and in the accompanying literature before using the home gym system. 3 If you feel pain or dizziness at any time while exercising, stop immediately - Weider Pro 9625 | English Manual - Page 3
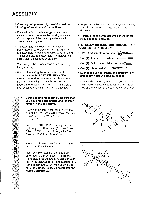
your benefit, read this manual carefully before using the WEIDER® PRO 9625 Home Gym System. If you have additional questions, please call our toll- Before reading further, please review the drawing below and familiarize yourself with the parts that are labeled. ASSEMBLED DIMENSIONS: Height: 76 in - Weider Pro 9625 | English Manual - Page 4
and instructions: • Place all parts of the home gym system in a cleared area and remove the packing materials; do not dispose of the packing materials until assembly is completed. • The assembly is divided into four stages: 1) frame assembly, 2) press, squat, and butterfly arm assembly, 3) cable and - Weider Pro 9625 | English Manual - Page 5
Press a 2" Square Inner Cap (27) into the Rear Upright (56). 3 Attach a Rubber Bumper (90) to the Rear Upright (56) with a #8 x 1/2" Tap Screw (89). Slide the Rear Upright (56) onto the 5/16" x 2 1/2" Carriage Bolts (1) in the Rear Base (51). Hand tighten a 5/16" Nylon Locknut (3) onto each - Weider Pro 9625 | English Manual - Page 6
at the top, as shown. Press a 1" Round Cover Cap (70) onto the bottom of each Weight Guide (62). Slide eight Weights (25) on the Weight Guides (62). Be sure that all of the Weights are turned so the pin grooves are on the same side. Drilled holes must be at the top 62 Pin Grooves must - Weider Pro 9625 | English Manual - Page 7
Attach the upper ends of the Weight Guides 8 (62) to the Top x 2 1/2" Bolts (22) and two 5/16" Nylon Locknuts (3). Assemble the other Press Arm (46) in the same manner. 11. Identify the for step 12. Attach a "V"-Pulley (6) and a Long Cable Trap (50) to the Right Arm (48) with a 3/8" x 2 1/2" - Weider Pro 9625 | English Manual - Page 8
12. Lubricate both axles on the Top Frame (55). Slide the Right Arm (48) onto the right axle. Note: Be careful not to confuse the Right Arm with the Left Arm (47); refer to step 11 to identify the Right Arm. Be sure that the upper end of the Right Arm is behind the indicated bracket on the Top Frame - Weider Pro 9625 | English Manual - Page 9
to the CABLE DIAGRAM on page 23 of this manual to verify proper cable routing. Before beginning this section, identify the Long Cable (86), the Medium Cable (23), and the Short Cable (58) by comparing the lengths and ends of the cables. IMPORTANT: While assembling the cables, do not overtighten - Weider Pro 9625 | English Manual - Page 10
(23) around the 3 1/2" Pulley (15) attached to the Pulley 19 Bracket (20). Be sure that the Cable is in the groove of the Pulley and that the Cable Trap (66) is turned to hold the Cable in place. Tighten the 3/8" x 2" Bolt (12) and the 3/8" Nylon Locknut (not shown). Be sure that the 5/16 - Weider Pro 9625 | English Manual - Page 11
Top Frame (55) with a 3/8" x 1 3/4" Bolt (87) and a 3/8" Nylon Locknut (21). 21 ..." 87- - . - .\ ► 55 c -21 lwjJ 15 ----ftr. 22. Wrap the Medium Cable (23) around a 3 1/2" Pulley (15). Attach the Pulley to the Top 22 Frame (55) with a 3/8" x 1 3/4" Bolt (87) and a 3/8" Nylon Locknut (21). 23 - Weider Pro 9625 | English Manual - Page 12
- Weider Pro 9625 | English Manual - Page 13
to the Press Frame (17) with a 3/8" x 3 1/2" Bolt (16), a 3/8" Flat Washer (9) and a 3/8" Nylon Locknut (21). Be sure that the Cable Trap is turned to hold the Cable in place and that the Cable is routed around the Pulley as shown. 28 E3 66 21 0 , . ,-- @ 86 15 ,. ..„ - . - 9 42 71 6 29 - Weider Pro 9625 | English Manual - Page 14
is routed around the Pulley as shown. 31 a a 86 9 16 17 15 21 66 32. Wrap the Long Cable (86) around a 3 1/2" Pulley (15). Attach the Pulley and a Cable 32 Trap (66) to the indicated hole in the Front Upright (42) with a 3/8" x 3 3/4" Bolt (71), a 3/8" Flat Washer (9), and a 3/8" Nylon - Weider Pro 9625 | English Manual - Page 15
Pulley move smoothly. 15 Attach the end of the Long Cable (86) to the Front Base (4) with a 5/16" x 2 3/4" Bolt (11), a 5/16" Flat Washer (8), and a 5/16" Nylon Locknut (3). cn 86 4 11 8 < 36. Attach the Small "U"-Bracket (67) to the Weight Tube (63) with the 5/16" x 1 3/4" Bolt 36 (72) and - Weider Pro 9625 | English Manual - Page 16
38. Press a 1 3/4" Square Inner Cap (44) into the Rear Seat Frame (77). Insert the 1/4" x 2 1/2" Carriage Bolt (91) into the center hole in a Seat Plate (37). Attach the Seat Plate to a Seat (13) with two 1/4" x 1/2" Screws (18). Insert the 1/4" x 2 1/2" Carriage Bolt (91) into the indicated hole in - Weider Pro 9625 | English Manual - Page 17
41. Press a 1 1/2" Square Inner Cap (32) into the Front Seat Frame (36). Insert the 1/4" x 2 1/4" Carriage Bolt (38) into the center hole in a Seat Plate (37). Attach the Seat Plate to the Seat (13) with two 1/4" x 1/2" Screws (18). Insert the 1/4" x 2 1/4" Carriage Bolt (38) into the indicated - Weider Pro 9625 | English Manual - Page 18
from the PRO 9625 decal and apply it to the home gym system as 45 shown. Make sure that all parts have been properly tightened. The use of the remaining parts will be explained in ADJUSTMENT, beginning on page 19 of this manual. Before using the home gym system, pull each cable a few times - Weider Pro 9625 | English Manual - Page 19
ADJUSTMENT The instructions below describe how each part of the home gym system can be adjusted. Refer to the exercise poster accompanying this manual to see how the home gym system should be set up for each exercise. IMPORTANT: When attaching the lat bar or nylon strap, make sure that the - Weider Pro 9625 | English Manual - Page 20
(52) to the Long Cable (86) with a Cable Clip (53). Attach the other end of the Chain to the Eyebolt (35) with a Cable Clip. Always remove the the 5/16" x 2 3/4" Carriage Bolt (14) and the Seat Knob (40). For some exercises, the Rear Seat Frame (77) must be removed. Remove the Seat Knob (40) and the - Weider Pro 9625 | English Manual - Page 21
98 169 6 162 94 116 106 117 196 7 191 118 140 121 128 204 8 210 126 169 134 147 215 The actual resistance at each weight station may vary due to differences in individual weight plates, as well as friction between the cables, pulleys, and weight guides. 21 - Weider Pro 9625 | English Manual - Page 22
TROUBLE-SHOOTING AND MAINTENANCE Inspect and tighten all parts each time you use the home gym system. Replace any worn parts immediately. The home gym system can be cleaned using a damp cloth and mild non-abrasive detergent. Do not use solvents. TIGHTENING THE CABLES 1 Woven cable, the type of - Weider Pro 9625 | English Manual - Page 23
DIAGRAM The cable diagram below shows the proper routing of the Short Cable (58), the Medium Cable (23), and the Long Cable (86). Use the diagram to be sure that the three cables and the cable traps have been assembled correctly. If the cables have not been correctly routed, the home gym system - Weider Pro 9625 | English Manual - Page 24
(WEIDER® PRO 9625 Home Gym System). • The PART NUMBER of the PART (see the PART LIST and the EXPLODED DRAWING at the center of this manual). • The DESCRIPTION of the PART (see the PART LIST and the EXPLODED DRAWING at the center of this manual). If parts become worn and need to be replaced, call
-
 1
1 -
 2
2 -
 3
3 -
 4
4 -
 5
5 -
 6
6 -
 7
7 -
8
-
9
-
10
-
11
-
12
-
13
-
14
-
15
-
16
-
17
-
18
-
19
-
20
-
21
-
22
-
23
-
24
 |
 |

TM
PATENT
PENDING
WEIDER
Model
No.
831.159361
Serial
No.
The
serial
number
can
be
found
in
the
location
shown
below.
Write
the
serial
number
in
the
space
above.
o
f
Serial
Number
Decal
E. QUIP
M
E
N
T
QUEST
IONS
HEL_PL_INE!
1-800-736-6879
CAUTION
Read
all
precautions
and
instruc
,
tions
in
this
manual
before
using
this
equipment.
Save
this
manual
for
future
reference.
USER'S
MANUAL
II
I
I
4
440
0
,
6
.
SEARS
SEARS,
ROEBUCK
AND
CO.,
HOFFMAN
ESTATES,
IL
60179