Weslo Cadence Ct10 English Manual
Weslo Cadence Ct10 Manual
 |
View all Weslo Cadence Ct10 manuals
Add to My Manuals
Save this manual to your list of manuals |
Weslo Cadence Ct10 manual content summary:
- Weslo Cadence Ct10 | English Manual - Page 1
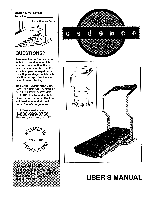
customer satisfaction. If you have questions, or find that there are missing or damaged parts, we will guaranteq complete satisfaction through direct assistance from our factory. TO AVOID - Weslo Cadence Ct10 | English Manual - Page 2
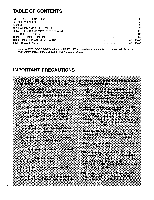
FOLD AND MOVE THE TREADMILL TROUBLE-SHOOTING CONDITIONING GUIDELINES ORDERING REPLACEMENT PARTS LIMITED WARRANTY 2 4 5 7 11 12 14 Back Cover Back Cover Note: An EXPLODED DRAWING and a PART LIST are attached to the center of this manual. Save the EXPLODED DRAWING and PART LIST for future reference - Weslo Cadence Ct10 | English Manual - Page 3
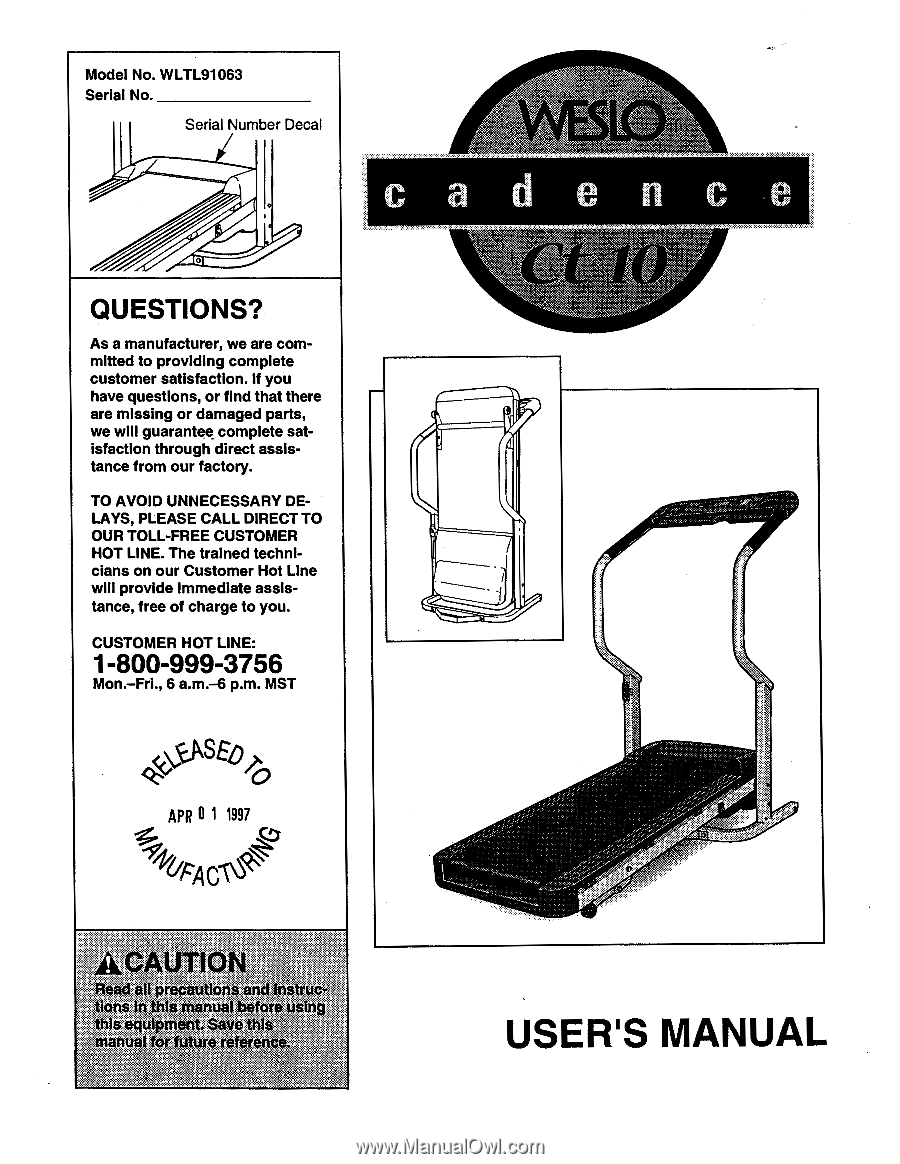
shown at the right has been placed on your treadmill. If the decal is missing, or if it is not legible, please call our Customer Service Department, tollfree, to order a free replacement decal (see ORDERING REPLACEMENT PARTS on the back cover of this manual). Apply the decal In the location shown - Weslo Cadence Ct10 | English Manual - Page 4
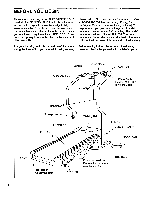
you're not exercising, the unique CADENCE Ct10 can be folded up, requiring less than half the floor space of other treadmills. For your benefit, read this manual carefully before using the treadmill. If you have additional questions, please call our Customer Service Department toll-free at 1-800 - Weslo Cadence Ct10 | English Manual - Page 5
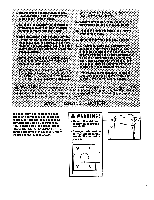
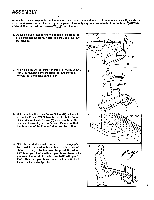
: Be careful not to overtighten the Screws. Make sure that the thick end of the Frame Guide is at the bottom. 56 58 Thick end 3 4. Next, the treadmill should be raised to the storage position. Hold the treadmill with your hands in the locations shown at the right. To decrease the possibility of - Weslo Cadence Ct10 | English Manual - Page 6
treadmill slightly until the Frame Guide (64) is past the Storage Latch. Hold the treadmill with both hands in the locations shown ( at the right. Lower the treadmill . Make sure that all parts are tightened before you use the treadmill. Note: To protect the floor or carpet, place a mat under - Weslo Cadence Ct10 | English Manual - Page 7
THE PERFORMANT LUBET'A WALKING BELT Your treadmill features a walking belt coated with PERFORMANT LUBETM, a high-performance lubricant. IMPORTANT: Never apply silicone spray or other substances to the walking belt or the walking platform. They will deteriorate the walking belt and electric shock - Weslo Cadence Ct10 | English Manual - Page 8
DIAGRAM OF THE CONSOLE THUMB PULSE ) b a) -' RIP Prnr TIME 2Et PULSE 1LI -I CAL/FAT CAL Monitor Displays Speed Control DIST E 5. LI S ED YPM .1 LI HEART RATE TRAINING ZONES m MIN IIPM mAx erm r) ........ 7C11 ..*..m- e•z1•mmm.6to.ao0sif- 1 asrr - FAST SLOW ON/RESET IA WARNIN5Lar.: - Weslo Cadence Ct10 | English Manual - Page 9
walking belt, step onto the foot rails and slide the speed control to the RESET position. 4 Follow your progress with the monitor displays. TIME display-This display shows the total time that you have walked or run on the treadmill at this level. After 5 to 10 seconds, your pulse will be shown. - Weslo Cadence Ct10 | English Manual - Page 10
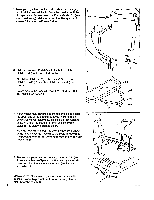
TREADMILL The incline of the treadmill can be changed by raising or lowering the back end. Before changing the incline, remove the key and unplug the power cord. Note: Any time that the walking belt the back end of the treadmill is in the lowest position, the incline is about 10%. Raise the back end - Weslo Cadence Ct10 | English Manual - Page 11
. 2. Move your right hand to the position shown at the right, and hold the treadmill firmly. Raise the treadmill until the storage latch closes over the frame guide. Make sure that the storage latch closes fully over the frame guide. To protect the floor or carpet from damage, place a mat under the - Weslo Cadence Ct10 | English Manual - Page 12
your back straight. ( - 6- TROUBLE-SHOOTING Most treadmill problems can be solved by following the steps below. Find the symptom that applies, and follow the steps listed. If further assistance is needed, please call our Customer Service - Weslo Cadence Ct10 | English Manual - Page 13
8.) Most problems are the walking belt still slows when walked on, please call our Customer Service Department, toll-free. 5. SYMPTOM: THE WALKING BELT IS OFF-CENTER WHEN WALKED ON a. If the walking belt treadmill for a few minutes. Repeat until the walking belt is centered. b. If the walking belt - Weslo Cadence Ct10 | English Manual - Page 14
be found by using your heart rate as a guide. The chart below shows recommended heart rates for fat or too low, adjust the speed or incline of the treadmill until your heart rate is at the proper level. Fat each workout by warming up for 5 to 10 minutes. Begin with slow, controlled stretches, and - Weslo Cadence Ct10 | English Manual - Page 15
exercise-never hold your breath. Cool-down Finish each workout with 5 to 10 minutes of stretching to cool down. This will increase the flexibility of your muscles and will help to prevent post-exercise problems. Exercise Frequency To maintain or improve your condition, complete three workouts each - Weslo Cadence Ct10 | English Manual - Page 16
The NAME OF THE PRODUCT (WESLO® CADENCE Ct10 treadmill). • The SERIAL NUMBER OF THE PRODUCT (see the front cover of this manual). • The KEY NUMBER OF THE PART(S) (see the EXPLODED DRAWING and PART LIST attached to the center of this manual). • The DESCRIPTION OF THE PART(S) (see the EXPLODED DRAWING - Weslo Cadence Ct10 | English Manual - Page 17
REMOVE THIS EXPLODED DRAWING AND PART LIST FROM THE MANUAL Save this EXPLODED DRAWING and PART LIST for future reference. Note: Specifications are subject to change without notice. For information about ordering replacement parts, see the back cover of the User's Manual. - Weslo Cadence Ct10 | English Manual - Page 18
EXPLODED DRAWING-Model No. WLTL91063 R0397A 48 10 14 12* 13 26 29 27 28 115 31 32 25 16* 24 1 20 39 20 17 41 42 93C 94 92 55 26 26 - Weslo Cadence Ct10 | English Manual - Page 19
Bolt Stabilizer Pad Stabilizer Frame Guide Frame Cover Right Foot Rail Front Roller/Pulley Walking Platform Walking Belt Frame Incline Leg Bolt Ratchet Screw Sleeve Belt Tension Nut/Cover Nut Isolator 9" Black Wire, Male/Female 8" White Wire, Male/Female User's Manual Includes all parts shown
-
 1
1 -
 2
2 -
 3
3 -
 4
4 -
 5
5 -
 6
6 -
 7
7 -
8
-
9
-
10
-
11
-
12
-
13
-
14
-
15
-
16
-
17
-
18
-
19
 |
 |
Model
No.
WLTL91063
Serial
No.
Serial
Number
Decal
e
n
c
e
O
QUESTIONS?
As
a
manufacturer,
we
are
com-
mitted
to
providing
complete
customer
satisfaction.
If
you
have
questions,
or
find
that
there
are
missing
or
damaged
parts,
we
will
guaranteq
complete
sat-
isfaction
through
direct
assis-
tance
from
our
factory.
TO
AVOID
UNNECESSARY
DE-
LAYS,
PLEASE
CALL
DIRECT
TO
OUR
TOLL
-FREE
CUSTOMER
HOT
LINE.
The
trained
techni-
cians
on
our
Customer
Hot
Line
will
provide
Immediate
assis-
tance,
free
of
charge
to
you.
CUSTOMER
HOT
LINE:
1-800-999-3756
Mon.
—Fri.,
6
a.m.-6
p.m.
MST
e,
\96ED
<k*"
09
APR
0
1
1997
r(
IA
yr.
n.
doirdia,
.
r
rtio;
IWO
refe
ti
sir
4.§4
1.1,1
USER'S
MANUAL