Weslo Cadence Sl30 English Manual
Weslo Cadence Sl30 Manual
 |
View all Weslo Cadence Sl30 manuals
Add to My Manuals
Save this manual to your list of manuals |
Weslo Cadence Sl30 manual content summary:
- Weslo Cadence Sl30 | English Manual - Page 1
satisfaction. If you have questions, or if there are missing or damaged parts, we will guarantee complete satisfaction through direct assistance from our factory. TO AVOID .ÐFri., 6 a.m.Ð6 p.m. MST CAUTION Read all precautions and instructions in this manual before using this equipment. Save this - Weslo Cadence Sl30 | English Manual - Page 2
7 HOW TO FOLD AND MOVE THE TREADMILL 11 MAINTENANCE AND TROUBLE-SHOOTING 12 CONDITIONING GUIDELINES 14 ORDERING REPLACEMENT PARTS Back Cover LIMITED WARRANTY Back Cover Note: An EXPLODED DRAWING and PART LIST are attached in the center of this manual. Please save them for future reference - Weslo Cadence Sl30 | English Manual - Page 3
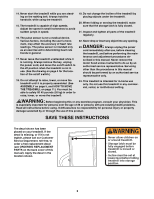
. SAVE THESE INSTRUCTIONS The decal shown has been placed on your treadmill. If the decal is missing, or if it is not legible, please call our Customer Service Department, toll-free, to order a free replacement decal (see ORDERING REPLACEMENT PARTS on the back cover of this manual). Apply the - Weslo Cadence Sl30 | English Manual - Page 4
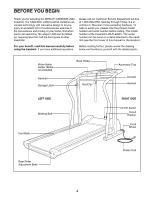
the treadmill. If you have additional questions, Before reading further, please review the drawing below and familiarize yourself with the labeled parts. Water Bottle Holder (Bottle not included) Handrail Storage Latch Book Holder Key/Clip Accessory Tray Console Handrail LEFT SIDE Walking Belt - Weslo Cadence Sl30 | English Manual - Page 5
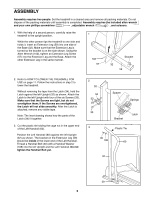
2. Refer to HOW TO LOWER THE TREADMILL FOR USE on page 11. Follow the instructions in step 2 to lower the treadmill. Without removing the tape from the Latch attached, remove any visible tape. Note: The inset drawing shows how the parts of the Latch (34) fit together. 3. Cut the plastic tie holding - Weslo Cadence Sl30 | English Manual - Page 6
STORAGE on page 11. Follow the instructions in step 2 to fold the treadmill. Attach the lower end of the Right Handrail (62) to the right Extension Leg (59) with a Screw (33). Attach the lower end of the Left Handrail (60) in the same way. Tighten all parts used in steps 3, 4, 5 and 6. 7. Remove the - Weslo Cadence Sl30 | English Manual - Page 7
electric shock. This product is equipped with a cord having an equipment-grounding conductor and a Your treadmill features a walking belt coated with grounding plug. Plug the power cord into a surge PERFORMANT LUBETM, a high-performance lubricant. protector, and plug the surge protector into - Weslo Cadence Sl30 | English Manual - Page 8
walking belt when turning on the power. ¥ Always wear the clip (see the drawing above) while operating the treadmill manual mode and four workout programs. When the manual mode is selected, the speed and incline of the treadmill console will automatically control the speed as it guides you through an - Weslo Cadence Sl30 | English Manual - Page 9
walking belt will begin to move. Hold the handrails and carefully begin walking. If the manual mode is selected: As you exercise, change the speed of the walking belt , and then reinsert the key. 5 Change the incline of the treadmill, if desired. To change the incline, press the incline buttons. Each - Weslo Cadence Sl30 | English Manual - Page 10
the time remaining in the program. ¥ SPEED displayÑ This display shows the speed of the walking belt, in miles per hour or kilometers per hour. The KPH indicator will light when the total number of hours the treadmill has been used. The SPEED display will show the total number of miles accumulated on - Weslo Cadence Sl30 | English Manual - Page 11
in the storage position in temperatures above 85¡ Fahrenheit. Open Storage Latch Frame Guide Closed HOW TO MOVE THE TREADMILL 3 Before moving the treadmill, convert the treadmill to the storage position as described above. Make sure that the storage latch is closed fully over the catch. Book - Weslo Cadence Sl30 | English Manual - Page 12
MAINTENANCE AND TROUBLE-SHOOTING Most treadmill problems can be solved by following the steps below. Find the symptom that applies, and follow the steps listed. If further assistance is needed, please call our Customer Service Department tollfree at 1-800-999-3756, Monday through Friday, 6 a.m. - Weslo Cadence Sl30 | English Manual - Page 13
the key and run the treadmill for a few minutes. Repeat until the walking belt is properly tightened. b 3ÓÐ4Ó Rear Roller Adjustment Bolts c. If the walking belt still slows when walked on, please call our Customer Service Department, tollfree. PROBLEM: The walking belt is off-center when - Weslo Cadence Sl30 | English Manual - Page 14
with preexisting health problems. The pulse sensor heart rate as a guide. The chart below shows treadmill until your heart rate is near the highest number in your training zone, or set the speed control incline of the treadmill. Each workout should include the following three parts: A Warm-up - Weslo Cadence Sl30 | English Manual - Page 15
flexibility of your muscles and will help prevent post-exercise problems. Exercise Frequency To maintain or improve your condition, complete . The key to success is to make exercise a regular and enjoyable part of your everyday life. SUGGESTED STRETCHES The correct form for several basic - Weslo Cadence Sl30 | English Manual - Page 16
Spacer Reading Rack Rear Platform Screw Motor/Controller Wire Small Nut Small Star Washer 20Ó White Wire, Pig Tail 8Ó White Wire, Male/Female 8Ó White Wire, 2 Female 8Ó Blue Wire, 2 Female 6Ó Green Wire, Female/Ring 2Ó Black Wire, 2 Female UserÕs Manual * Includes all parts shown in the box # These - Weslo Cadence Sl30 | English Manual - Page 17
EXPLODED DRAWINGÑModel No. WLTL42081 R0299A 21 15 15 9 10 7 6 8 20 23 110 64 5 4 3 27 6 2 111 5 1 12 12 13 14 13 26 25 15 16 102 101 106 107 75 104 108 77 103 104 104 63 108 107 104 104 106 105 15 78 100 99 46 11 17 27 15 28 7 79 90 17 15 80 58 78 15 31 97 2 87 - Weslo Cadence Sl30 | English Manual - Page 18
WESLO¨ CADENCE LS30 treadmill). ¥ The SERIAL NUMBER OF THE PRODUCT (see the front cover of this manual). ¥ The KEY NUMBER AND DESCRIPTION OF THE PART(S) (see the EXPLODED DRAWING and PART replacing or repairing, at ICON's option, the product at one of its authorized service gives you specific legal
-
 1
1 -
 2
2 -
 3
3 -
 4
4 -
 5
5 -
 6
6 -
 7
7 -
8
-
9
-
10
-
11
-
12
-
13
-
14
-
15
-
16
-
17
-
18
 |
 |
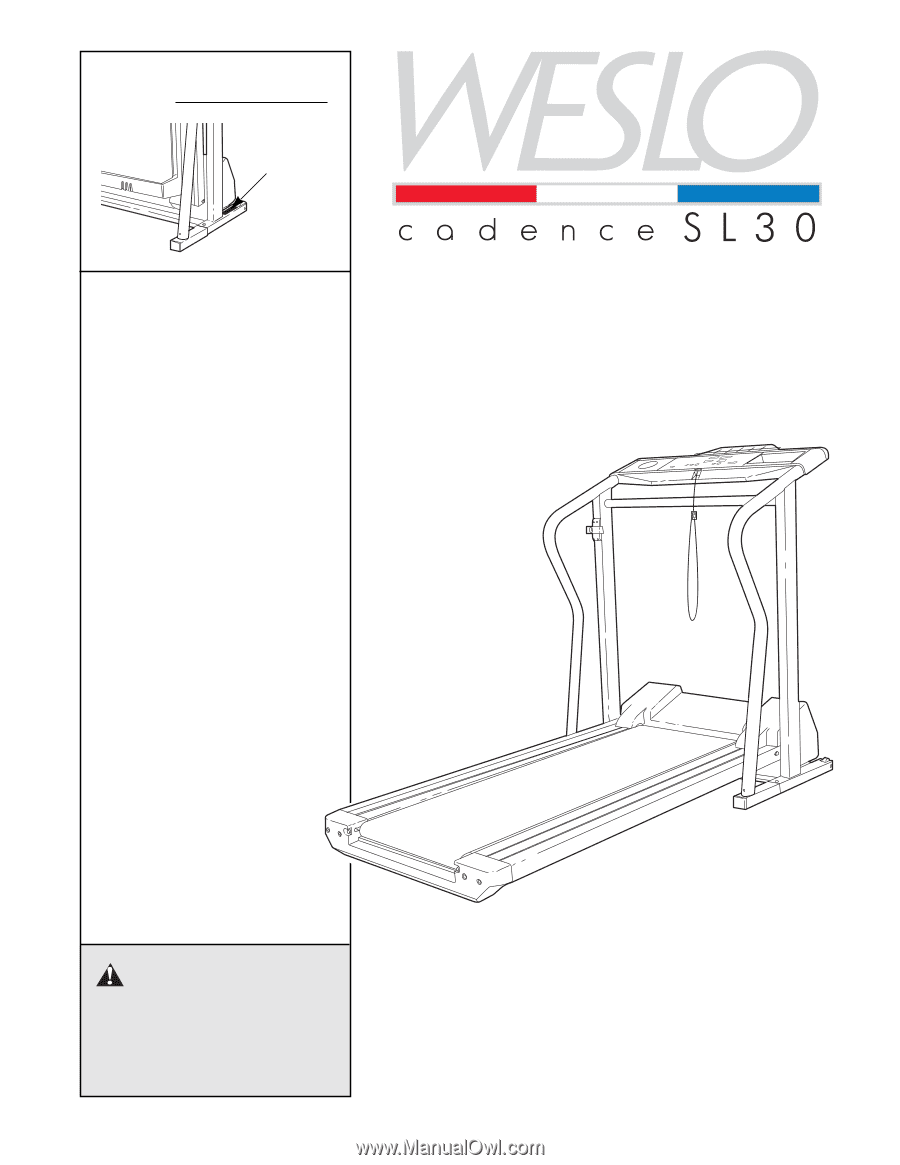
USER’S MANUAL
¤
Serial
Number
Decal
Model No. WLTL42081
Serial No.
QUESTIONS?
As a manufacturer, we are com-
mitted to providing complete
customer satisfaction. If you
have questions, or if there are
missing or damaged parts, we
will guarantee complete satis-
faction through direct assistance
from our factory.
TO AVOID UNNECESSARY DE-
LAYS, PLEASE CALL DIRECT TO
OUR TOLL-FREE CUSTOMER
HOT LINE. The trained techni-
cians on our Customer Hot Line
will provide immediate assis-
tance, free of charge to you.
CUSTOMER HOT LINE:
1-800-999-3756
Mon.—Fri., 6 a.m.—6 p.m. MST
CAUTION
Read all precautions and instruc-
tions in this manual before using
this equipment. Save this manual
for future reference.