Weslo Pro 11.2x Bike English Manual - Page 8
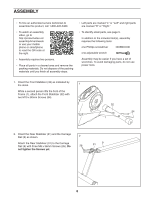
Slide the Carriage Rail 9 onto the Frame 1.
 |
View all Weslo Pro 11.2x Bike manuals
Add to My Manuals
Save this manual to your list of manuals |
Page 8 highlights
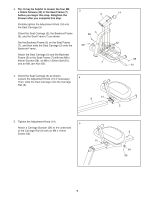
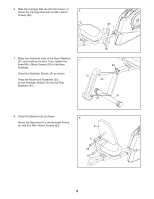
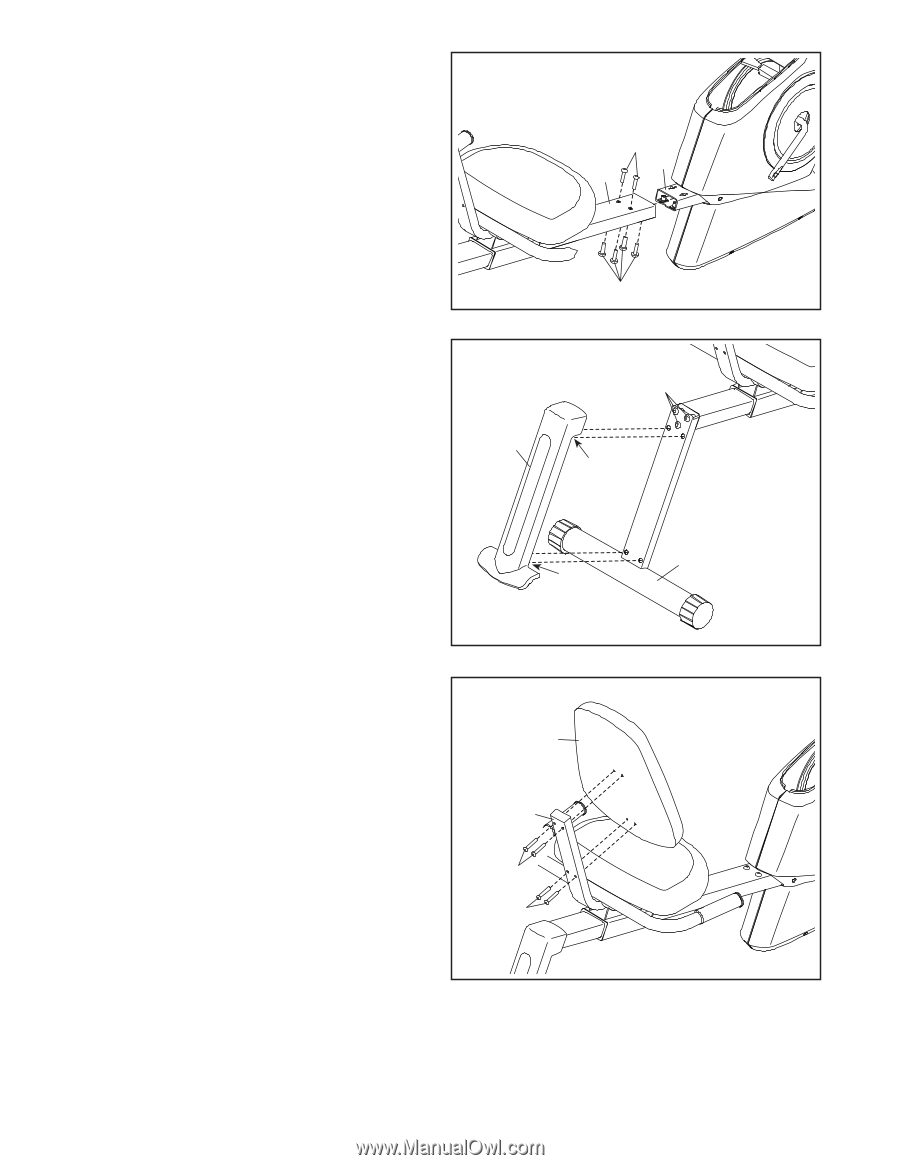
6. Slide the Carriage Rail (9) onto the Frame (1). Attach the Carriage Rail with six M8 x 20mm 6 Screws (55). 55 1 9 7. Make sure that both ends of the Rear Stabilizer (31) are touching the floor. Then, tighten the three M8 x 36mm Screws (26) in the Rear Stabilizer. Orient the Stabilizer Shield (15) as shown. Press the Mushroom Fasteners (25) on the Stabilizer Shield (15) into the Rear Stabilizer (31). 7 15 55 26 25 31 25 8. Orient the Backrest (6) as shown. 8 Attach the Backrest (6) to the Backrest Frame (5) with four M6 x 36mm Screws (63). 6 5 63 63 8
-
 1
1 -
2
-
 3
3 -
 4
4 -
 5
5 -
 6
6 -
 7
7 -
 8
8 -
 9
9 -
 10
10 -
 11
11 -
 12
12 -
 13
13 -
14
-
15
-
16
-
17
-
18
-
19
-
20
-
21
-
22
-
23
-
24
 |
 |
8
6
8
6.
Slide the Carriage Rail (9) onto the Frame (1).
Attach the Carriage Rail with six M8 x 20mm
Screws (55).
8.
Orient the Backrest (6) as shown.
Attach the Backrest (6) to the Backrest Frame
(5) with four M6 x 36mm Screws (63).
9
1
55
55
5
63
6
63
7
31
25
15
25
7.
Make sure that both ends of the Rear Stabilizer
(31) are touching the floor. Then, tighten the
three M8 x 36mm Screws (26) in the Rear
Stabilizer.
Orient the Stabilizer Shield (15) as shown.
Press the Mushroom Fasteners (25)
on the Stabilizer Shield (15) into the Rear
Stabilizer (31).
26