Westinghouse LVM-37W1 User Manual
Westinghouse LVM-37W1 Manual
 |
View all Westinghouse LVM-37W1 manuals
Add to My Manuals
Save this manual to your list of manuals |
Westinghouse LVM-37W1 manual content summary:
- Westinghouse LVM-37W1 | User Manual - Page 1
37" HD VIDEO MONITOR Model LVM-37w1 - Westinghouse LVM-37W1 | User Manual - Page 2
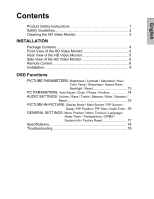
/ Speaker / Reset 15 PICTURE-IN-PICTURE: Display Mode / Main Source / PIP Source / Swap / PIP Position / PIP Size / Audio From.. 16 GENERAL SETTINGS: Menu Position / Menu Timeout / Language / Sleep Timer / Transparency / DPMS / System Info / Factory Reset 17 Specifications 18 Troubleshooting 19 - Westinghouse LVM-37W1 | User Manual - Page 3
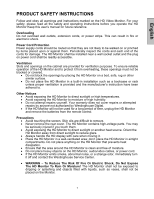
of moisture. • Do not place heavy objects on the HD Monitor, audio/video cables, or power cord. • If the HD Monitor emits smoke, abnormal noise, or a strange odor, immediately turn it off and contact the Westinghouse Service Center. • WARNING - To Reduce The Risk Of Fire Or Electric Shock, Do Not - Westinghouse LVM-37W1 | User Manual - Page 4
the receiver is connected. • Consult the Westinghouse Service Center or an experienced radio/Monitor technician for assistance. FCC Warning To assure continued FCC compliance, the user must use a grounded power supply cord and the provided shielded video interface cable with bonded ferrite cores - Westinghouse LVM-37W1 | User Manual - Page 5
-free cloth, then wipe the surface. Disclaimer Westinghouse Digital does not recommend the use of any ammonia or alcohol-based cleaners on the HD Monitor screen or case. Some chemical cleaners have been reported to damage the screen and/or HD Monitor case. Westinghouse Digital will not be liable for - Westinghouse LVM-37W1 | User Manual - Page 6
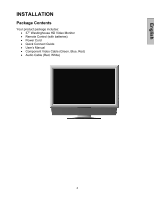
English INSTALLATION Package Contents Your product package includes: • 37" Westinghouse HD Video Monitor • Remote Control (with batteries) • Power Cord • Quick Connect Guide • User's Manual • Component Video Cable (Green, Blue, Red) • Audio Cable (Red, White) 4 - Westinghouse LVM-37W1 | User Manual - Page 7
the remote control to display the On Screen Display (OSD). The OSD controls are defined in "OSD Functions" on page 12. Rear View of the HD Video Monitor "IR" receiver and LED indicator Speakers Screws To Detach the Speaker from the Video Monitor 1. Turn off the monitor and unplug the power supply - Westinghouse LVM-37W1 | User Manual - Page 8
OFF 2. Volume + / - Increase/Decrease sound volume or adjust a highlighted control while in the OSD Menu. 3. OSD Selection T/S Highlight Menu. a control while in the OSD 4. Input Select Active Video Input or choose a selection while in the OSD MENU. 5. Power Button Turn Power ON/OFF 6 - Westinghouse LVM-37W1 | User Manual - Page 9
out (Green) from a computer. 8. VGA Using a 15-pin VGA cable, connect to a computer or other device with a VGA output. 9. DVI1 Audio Input (Right / Left) Connect an external audio source to this jack. 10. DVI1 (Supports up to 1080p) Using a 20-pin DVI cable, connect to a computer or other device - Westinghouse LVM-37W1 | User Manual - Page 10
"FILL", or "ZOOM" 7. T / S / W / X OSD MENU control 8. Enter Execute a command 9. MUTE Turn the Sound On/Off 10. INFO Display the source and channel information 11. PIP Display sub-picture On/Off 12. FREEZE Freeze main screen 13. VOL - / + Volume Up/Down adjustment 14. SOURCE T / S Source selection - Westinghouse LVM-37W1 | User Manual - Page 11
English Installation 1. Insert Remote Control Batteries 1) Remove the battery cover. 2) Insert the batteries corresponding to the (+) and (−) marks on the battery compartment. 3) Re-attach the battery cover. CAUTION: • Only use AAA batteries. • Do not mix new and old batteries. This may result in - Westinghouse LVM-37W1 | User Manual - Page 12
back of the HD Monitor IMPORTANT: Before beginning, make sure all devices are turned off. VGA CONNECTION: Connect an analog VGA cable from your PC VGA OUT port to the HD Monitor VGA IN port. DVI1/DVI2 CONNECTION: Connect a Digital DVI cable from your PC or DVD DVI OUT port to the HD Monitor DVI-HDCP - Westinghouse LVM-37W1 | User Manual - Page 13
. 5. Turn Power On Press the Power ON button on the right side of the HD Monitor, or press the Power ON (Red) button on the remote control. 6. Select input source for the HD Monitor using the OSD menu or remote control 7. If connecting to a PC (VGA/DVI1/DVI2): For the best picture quality, set the - Westinghouse LVM-37W1 | User Manual - Page 14
OSD Function All the OSD function settings are controlled either by the remote control or using the control keys on the right right side of front control keys of the HD Monitor or the MENU key on the remote control. Use 3/4 arrow keys to highlight the desired OSD sub-menu. Main Menu To select a sub - Westinghouse LVM-37W1 | User Manual - Page 15
PICTURE PARAMETERS: English Function Name Function Brightness Brightness adjustment Contrast Contrast Color 2, Color 3) Sharpness adjustment (Sharpness cannot be adjusted in PC mode) Set display to "STANDARD" / "FILL" / "ZOOM" Backlight Backlight adjustment Reset Reset video settings 13 - Westinghouse LVM-37W1 | User Manual - Page 16
English PC PARAMETERS: Function Name Auto Adjust Clock Phase Position Function Automatically adjust the horizontal phase of the image Clock adjustment Phase adjustment Adjust the horizontal and vertical position of the image NOTE: The GRAPHIC menu is only available when VGA source is selected. - Westinghouse LVM-37W1 | User Manual - Page 17
AUDIO SETTINGS: English Function Name Function Volume Volume adjustment Bass Bass adjustment Treble Treble adjustment Balance Balance adjustment Mute Select Audio OFF or ON Speaker Select internal or external speaker Reset Reset audio settings 15 - Westinghouse LVM-37W1 | User Manual - Page 18
-IN-PICTURE: English Function Name Function Display Mode Main Source PIP Source Swap OFF --> PIP --> PBP --> POP Select main screen sources VGA --> DVI1--> DVI2 --> AV --> S-Video--> YPbPr1 --> YPbPr2 Select sub screen sources Please see PIP/PBP/POP specification in Table 1 Swap main screen and - Westinghouse LVM-37W1 | User Manual - Page 19
turn off the OSD automatically Language OSD language selection Sleep Timer Set sleep timer to turn off the power automatically Transparency Set OSD transparency level DPMS Select DPMS On/Off System Info Display Input source, type and signal Factory Reset Restore factory default settings - Westinghouse LVM-37W1 | User Manual - Page 20
Specifications Panel Type 37" (37.07" viewable diagonal area), TFT (Thin Film Transistor), Active Matrix WXGA LCD, Power On (Normal) 270W (Blue LED) Power Off - Westinghouse LVM-37W1 | User Manual - Page 21
English Troubleshooting No Power • Make sure power button is ON (Blue LED). • Make sure AC power cord is securely connected to the AC socket. • Plug another electrical device (such as a radio) to the power outlet to verify that the outlet is supplying the proper voltage. AUDIO Interconnection - Westinghouse LVM-37W1 | User Manual - Page 22
SE-UM-3701-0501
-
 1
1 -
 2
2 -
 3
3 -
 4
4 -
 5
5 -
 6
6 -
 7
7 -
8
-
9
-
10
-
11
-
12
-
13
-
14
-
15
-
16
-
17
-
18
-
19
-
20
-
21
-
22
 |
 |
37” HD VIDEO MONITOR
Model LVM-37w1