Westinghouse W32001 User Manual
Westinghouse W32001 Manual
 |
View all Westinghouse W32001 manuals
Add to My Manuals
Save this manual to your list of manuals |
Westinghouse W32001 manual content summary:
- Westinghouse W32001 | User Manual - Page 1
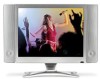
20.1" LCD Display - Westinghouse W32001 | User Manual - Page 2
- Westinghouse W32001 | User Manual - Page 3
Manual This manual is designed to assist you in setting up and using your LCD with the limits for a Class B digital device, pursuant to part 15 of the FCC Rules. These computing device, always use the signal cord and power cord supplied with this unit. The Federal Communications Commission warns - Westinghouse W32001 | User Manual - Page 4
instructions in a safe place for future reference. • To reduce the risk of fire or electric shock, do not expose this appliance to rain or moisture. Do not place your LCD servicing to qualified service personnel. Servicing is required when the apparatus has been damaged in any way, such as power-supply - Westinghouse W32001 | User Manual - Page 5
the Remote Control Battery 8 Adjusting the Viewing Angle 9 Setting up the Optional Wall Mount 9 Built-in Speakers 10 Connecting the AC Power Adapter 10 Turning On the LCD Display 10 Adjusting Settings Controlling the OSD 11 Setting the Main Display Mode 12 Setting the Picture-in-Picture - Westinghouse W32001 | User Manual - Page 6
19 Adjusting the VGA Display Manually 19 Adjusting Geometric Settings 20 Adjusting Volume 20 Miscellaneous Settings 21 Setting the OSD Timer 21 Setting the OSD Language 21 Changing the PIP Size 21 Setting the PIP Position 21 Setting the Sleep Timer 21 Troubleshooting Specifications Index iv - Westinghouse W32001 | User Manual - Page 7
(LCD panel and display base) • AC power cord and 100-240 VAC/60W power adapter • Remote control (3-volt lithium battery included) • Cables: • 15-pin D-sub VGA cable • RCA video cable • RCA stereo audio cable • 3.5 mm stereo audio cable • AC power cord • Warranty Card • Quick Installation Guide If - Westinghouse W32001 | User Manual - Page 8
to provide easy access to all controls and connections. The following figures identify the LCD display's components, controls, and ports. 2.1 Front View Note: Appearance varies according to model. LCD Panel Speaker Stand IR Remote Receiver Power LED Speaker 2.2 Side View Speaker 2 Stand - Westinghouse W32001 | User Manual - Page 9
ENGLISH 2.3 Rear View A Getting to Know Your LCD Display B Connectors 3 - Westinghouse W32001 | User Manual - Page 10
LCD Display 2.4 Cables and Connectors The LCD display is equipped with the following types of connectors that are used to connect to external devices including VCRs, DVD players, camcorders, and computers. No. Function Type 1 1 Cable TV 12 DC Power In 2-pin DC plug The LCD display comes - Westinghouse W32001 | User Manual - Page 11
ENGLISH Getting to Know Your LCD Display 2.5 Control Panel Keys The control panel keys located at the top of the LCD display can be used to adjust all available settings. The remote control keys (see "Remote Control" on page 6) have the same functionality. 1234567 POWER SOURCE MENU PRG VOL Key - Westinghouse W32001 | User Manual - Page 12
Getting to Know Your LCD Display 2.6 Remote Control MUTE POWER 1 MTS SLEEP 6 2 QUICK CH 7 123 CH 8 456 3 7 8 9 MEM. 9 100 0 R DEL. 10 11 SOURCE 12 CH 4 VOL PIP 13 CH VIDEO 14 SWAP 5 i MENU AUDIO 15 16 6 - Westinghouse W32001 | User Manual - Page 13
ENGLISH Getting to Know Your LCD Display 2.6.1 Remote Control Key Index Key 1 Mute 2 MTS Selector 3 Numeric Keys (0 to 9, and 100) OSD Navigation 4 Channel Up/Down Volume Increase/Decrease 5 Information 6 Power 7 Sleep 8 Quick Channel Memory Up/Down 9 Quick Channel Memory Set 10 - Westinghouse W32001 | User Manual - Page 14
which it can be used. • Aim the remote control at the IR receiver on the LCD display and ensure there are no object in the line of sight. 2.6.2 Replacing the Remote Control Battery Refer to the following illustration for instructions on replacing the remote control battery (CR2025 3V). 1 Slide the - Westinghouse W32001 | User Manual - Page 15
2 Turn the LCD display power off, disconnect it from the power adapter, and gently lay the display on its front. 3 Remove the four screws located at the rear of the LCD display as illustrated. Remove the LCD display stand. 4 Refer to and follow the instructions included with the wall mount kit that - Westinghouse W32001 | User Manual - Page 16
use any other AC power adapter except the adapter that was included with your LCD display. • Contact your dealer if you need a replacement adapter. 1 Connect the power cord to the AC adapter. 2 Plug the power cord into an electrical outlet. Contact your dealer or a qualified service technician if the - Westinghouse W32001 | User Manual - Page 17
The OSD Menus can be accessed using either the remote control or the display control panel located on the top of the LCD display. 3.1 Controlling the OSD Press the MENU button to turn the OSD on or off. LCD Control Panel MENU MENU VOL PRG Remote Control CH VOL CH i MENU CH VOL CH i MENU CH - Westinghouse W32001 | User Manual - Page 18
on the remote control • the SOURCE key on the LCD control panel The Main display mode rotates between: • TV • AV • S-Video • YPbPr • VGA 1 : TV 2 . 3.3 Setting the Picture-in-Picture Display Mode The LCD display is capable of displaying a second video input signal on the LCD screen at the same - Westinghouse W32001 | User Manual - Page 19
the PIP source by pressing the PIP key on the remote control. There is no equivalent key on the LCD control panel. Sub signal options vary according to the selected Main signal as shown in the following table. Main TV AV S-Video YPbPr VGA PIP (Picture-in-Picture) OFF TV AV S-Video YPbPr VGA - Westinghouse W32001 | User Manual - Page 20
indicates the display settings that are available for each Main display mode. Setting TV AV S-Video YPbPr VGA Contrast √ √ √ Brightness √ √ √ Color the difference between the lightest and darkest areas of the LCD display screen. Contrast should be adjusted in conjunction with the - Westinghouse W32001 | User Manual - Page 21
to a television antenna or CATV cable, the LCD display can automatically scan for available channels. Before scanning, make sure you have selected the correct TV signal source: air (broadcast) or CATV (cable TV). GRB TV CH-Scan C.CPT V-Chip TV-SYSTEM OFF AIR To scan for channels: 1 Press - Westinghouse W32001 | User Manual - Page 22
to the quick channels by using the normal PRG/CH / keys or by entering a channel number directly with the number keys on the remote control. MUTE MTS POWER SLEEP QUICK CH 123 CH 456 7 8 9 MEM. 100 0 R DEL. SOURCE CH VOL PIP CH VIDEO SWAP i MENU AUDIO Quick Channel Block 2 Press - Westinghouse W32001 | User Manual - Page 23
ENGLISH Adjusting Settings 3.5.3 Closed Captioning Closed captioning allows you to view subtitles on your LCD display display if your broadcast or cable TV provider supports this feature. 3.5.4 Using the V-Chip (North America only) The V-Chip function reads information encoded in rated programs - Westinghouse W32001 | User Manual - Page 24
on your LCD display. 1 Select the V-Chip option in the TV menu on the OSD and press VOL+. 2 You are prompted for the password. The default password is four zeros (0000). Enter the password using the numeric keys on the remote control, then press the Return key. G PG UU FV TV-Y7 U TV-PG TV-14 TV-MA - Westinghouse W32001 | User Manual - Page 25
control panel simultaneously. Enter your new password at the prompt and wait five seconds. The new password will be saved. 3.6 VGA (PC) Settings The LCD display supports 3.6.2 Adjusting the VGA Display Manually You can adjust the various VGA display settings manually to suit your personal preferences - Westinghouse W32001 | User Manual - Page 26
D GRB ing that can be adjusted when the GEOMETRIC LCD display is in VGA mode: Clock 123 clock, phase, " page of the OSD menu system when the LCD display is in VGA Recall display mode. Setting volume. 18 Press MUTE to turn the sound off completely. Any change in volume, 18 channel, - Westinghouse W32001 | User Manual - Page 27
been pressed. Available options are: 5, 10, 15, 20, 25 or 30 seconds. 3.8.2 Setting the OSD Language Setting the PIP Position The position of the picture-in-picture window on the screen can be adjusted the LCD display off after a preset period of time. Press the SLEEP button on the remote control to - Westinghouse W32001 | User Manual - Page 28
" on page 20. A3: Check the sound mode by press the MTS or Sound key on the remote control to switch between SAP, Mono and Stereo. Press the Display key to view the setting on the screen. Q: Why is the display blurred when I connect the LCD display to my computer? A1: The LCD display supports VGA - Westinghouse W32001 | User Manual - Page 29
Input/Output Ports TV Systems Plug and Play VESA Hole Lock Power Consumption Power Source Speakers Dimensions Wall Mount Area Net Weight Operating /p & 576i/p SDTV support PIP function De-interlace support 3D noise reduction filter NTSC: BTSC support (USA only) EIAJ support (Japan only) SAP/MTS - Westinghouse W32001 | User Manual - Page 30
On-screen display adjusting settings, 11 menus, 11 OSD, 11 using the control panel, 11 using the remote control, 11 P Power adapter connecting to LCD TV, 10 replacement adapter, 10 safety notes, 10 troubleshooting, 22 Q Quick channels assigning, 16 deleting, 16 R Ratings setting channel ratings, 17
-
 1
1 -
 2
2 -
 3
3 -
 4
4 -
 5
5 -
 6
6 -
 7
7 -
8
-
9
-
10
-
11
-
12
-
13
-
14
-
15
-
16
-
17
-
18
-
19
-
20
-
21
-
22
-
23
-
24
-
25
-
26
-
27
-
28
-
29
-
30
 |
 |

20.1" LCD Display