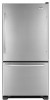
Whirlpool GB2FHDXWS Owners Manual
Whirlpool GB2FHDXWS Manual
 |
UPC - 883049181448
View all Whirlpool GB2FHDXWS manuals
Add to My Manuals
Save this manual to your list of manuals |
Whirlpool GB2FHDXWS manual content summary:
- Whirlpool GB2FHDXWS | Owners Manual - Page 1
need your model and serial number, located on the inside wall of the refrigerator compartment. Table of Contents / Índice / Table des matières REFRIGERATOR SAFETY 1 INSTALLATION INSTRUCTIONS 2 REFRIGERATOR USE 12 REFRIGERATOR CARE 14 TROUBLESHOOTING 15 WATER FILTER CERTIFICATIONS 17 PRODUCT - Whirlpool GB2FHDXWS | Owners Manual - Page 2
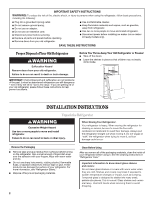
ice maker (on ice maker kit ready models only). SAVE THESE INSTRUCTIONS Proper Disposal of Your Old Refrigerator WARNING Suffocation Hazard Remove doors from your old refrigerator. Failure to do so can result in death or brain damage. IMPORTANT: Child entrapment and suffocation are not problems - Whirlpool GB2FHDXWS | Owners Manual - Page 3
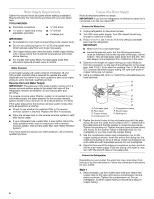
) space at the top and behind the refrigerator. If your refrigerator has an ice maker, allow extra space at the back for the water line connections. When installing your refrigerator next to a fixed wall, leave 2¹⁄₂" (6.3 cm) minimum on the hinge side (some models require more) to allow for the door - Whirlpool GB2FHDXWS | Owners Manual - Page 4
the water filter. See "Water Filtration System." If you have questions about your water pressure, call a licensed, qualified plumber. Connect the Water Supply Read all directions before you begin. IMPORTANT: If you turn the refrigerator on before the water line is connected, turn the ice maker OFF - Whirlpool GB2FHDXWS | Owners Manual - Page 5
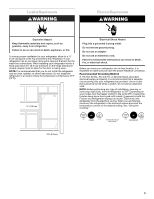
a flat-blade screwdriver. IMPORTANT: ■ Your refrigerator may have a standard reversible refrigerator door (Style 1) with either a freezer door or freezer drawer, or French doors (Style 2). Follow the instructions specific to the door style of your model. ■ All graphics referenced in the following - Whirlpool GB2FHDXWS | Owners Manual - Page 6
from the cabinet. 4. Remove the parts for the bottom hinge as shown in Bottom Hinge graphic. Freezer door models 1. Unplug refrigerator or disconnect power. 2. Keep the freezer door closed until you are ready to lift it free from the cabinet. NOTE: Provide additional support for the door while the - Whirlpool GB2FHDXWS | Owners Manual - Page 7
the door so that the bottom of the refrigerator door is aligned with the top of the freezer drawer. Tighten all screws. Freezer door models 1. Replace the parts for the bottom hinge as shown. Tighten screws. Replace the freezer door. NOTE: Provide additional support for the door while the hinges are - Whirlpool GB2FHDXWS | Owners Manual - Page 8
C D A. Hinge Pin Shim (on some models) B. Bottom Hinge C. ³⁄₈" Hex-Head Hinge Screws D. Bottom Hinge Cover Door Swing Reversal (optional) 2 1-2 A A. Cabinet Hinge Hole Plugs A 1-1 B C A A Hex-Head Hinge Screws 1 1 C A A. Handle Trim B. Refrigerator Door Handle C. Flat-Head Handle Screws - Whirlpool GB2FHDXWS | Owners Manual - Page 9
Standard Door - Freezer Drawer Door Removal & Replacement Top Hinge A B C D A. Hinge Cover Screw B. Top Hinge Plugs B 1-1 C A A A. Hinge Screws B A A. Handle Trim B. Flat-Head Handle Screws C. Refrigerator Door Handle Front View Side View 3 A. Door Stop Screws A B B. Door Stop 5 AB C B - Whirlpool GB2FHDXWS | Owners Manual - Page 10
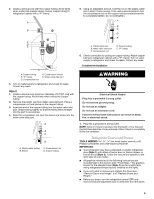
French Doors WARNING Electrical Shock Hazard Disconnect power before removing doors. Failure to do so can result in death or electrical shock. Top Hinges A B C D Door Removal & Replacement Metal Handle 1 A. Hinge Cover Screw B. Top Hinge Cover C. 5/16" Hex Head Hinge Screws D. Top Hinge Bottom - Whirlpool GB2FHDXWS | Owners Manual - Page 11
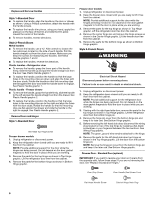
has two front adjustable rollers located at the base of the refrigerator. If your refrigerator seems unsteady or you want the door to close more easily, use the instructions below. Style1-Freezer Door Models 1. Remove the base grille. Grasp the grille firmly and pull it toward you. 5. Open - Whirlpool GB2FHDXWS | Owners Manual - Page 12
pad until a dash (-) appears in both the refrigerator and freezer displays. Neither compartment will cool. Style 2 Turn the freezer control to the word OFF. Neither compartment will cool when the freezer is set to OFF. Humidity Control (on some models) The humidity control turns on a heater to help - Whirlpool GB2FHDXWS | Owners Manual - Page 13
Water 1. Hold a container under the dispenser while pressing the button. 2. Release the button to stop dispensing. Ice Production Rate ■ The ice maker should produce a complete batch of ice approximately every 3 hours. ■ To increase ice production, lower the freezer and refrigerator temperature - Whirlpool GB2FHDXWS | Owners Manual - Page 14
, wrap or cover foods tightly. ■ For stainless steel models, stainless steel is corrosionresistant and not corrosion-proof. To help avoid corrosion of your stainless steel, keep your surfaces clean by using the following cleaning instructions. To Clean Your Refrigerator: NOTE: Do not use abrasive or - Whirlpool GB2FHDXWS | Owners Manual - Page 15
you may hear intermittent noises from your new refrigerator that you did not notice from your old model. Below are listed some normal sounds with explanations. ■ Buzzing - heard when the water valve opens to fill the ice maker ■ Pulsating - fans/compressor adjusting to optimize performance ■ Hissing - Whirlpool GB2FHDXWS | Owners Manual - Page 16
of low water pressure. ■ Water shutoff valve not fully open? Turn the water shutoff valve fully open. ■ Kink in the water source line? A kink in the line can reduce water flow. Straighten the water source line. ■ Water filter installed on the refrigerator? Remove filter and operate ice maker. If ice - Whirlpool GB2FHDXWS | Owners Manual - Page 17
WATER FILTER CERTIFICATIONS 17 - Whirlpool GB2FHDXWS | Owners Manual - Page 18
every 6 months. Use replacement filter model UKF8001AXX-750. 2008 suggested retail price of $44.99 U.S.A./$49.95 Canada. Prices are subject to change without notice. Application Guidelines/Water Supply Parameters Water Supply Water Pressure Water Temperature Service Flow Rate City or Well 35 - Whirlpool GB2FHDXWS | Owners Manual - Page 19
accordance with Whirlpool's published installation instructions. 11. Replacement parts or repair labor on major appliances with original model/serial numbers that have been removed, altered or cannot be easily determined. 12. Discoloration, rust, or oxidation of stainless steel surfaces. DISCLAIMER - Whirlpool GB2FHDXWS | Owners Manual - Page 20
al 1-800-253-1301. En Canadá, visite nuestro sitio de internet en www.whirlpool.ca o llámenos al 1-800-807-6777. Necesitará tener a mano su número de modelo y de serie ubicados en la pared interior del compartimiento del refrigerador. SEGURIDAD DEL REFRIGERADOR Su seguridad y la seguridad de los - Whirlpool GB2FHDXWS | Owners Manual - Page 21
vez que usted haya quitado todos los materiales de empaque, limpie el interior de su refrigerador antes de usarlo. Vea las instrucciones de limpieza en de su refrigerador, permita un espacio de ¹⁄₂" (1,25 cm) en la parte superior y detrás del refrigerador. Si su refrigerador tiene fábrica de hielo, - Whirlpool GB2FHDXWS | Owners Manual - Page 22
. Saque el filtro de agua. Vea "Sistema de filtración de agua". Si tiene preguntas acerca de la presión del agua, llame a un plomero competente autorizado. 22 - Whirlpool GB2FHDXWS | Owners Manual - Page 23
del refrigerador con una abrazadera en "P". A 4. Determine la longitud de la tubería de cobre que necesite. Mida desde la conexión de la parte trasera del refrigerador hasta la tubería de agua. Agregue 7 pies (2,1 m) para poder B mover el refrigerador para limpiarlo. Use tubería de cobre de - Whirlpool GB2FHDXWS | Owners Manual - Page 24
la pieza del adorno hacia el centro de la manija. ■ Para quitar las manijas, invierta las instrucciones. Estilo 2-Dos puertas con congelador en la parte inferior Manijas de metal ■ Para quitar la manija, use una llave Allen de 3/32" para aflojar los dos tornillos de ajuste ubicados al costado de - Whirlpool GB2FHDXWS | Owners Manual - Page 25
bisagra del lado de la manija y colóquelos del lado opuesto. Vea la ilustración 1-1. 2. Quite los tapones de los orificios de las bisagras de la parte superior de la carcasa y colóquelos en los orificios de la bisagra del lado opuesto, como se muestra en la ilustración 12. Puerta del refrigerador - Whirlpool GB2FHDXWS | Owners Manual - Page 26
el frente del cajón. Para volver a colocar el frente del cajón 1. Deslice las guías fuera del compartimiento del congelador. Inserte los tornillos en la parte superior del frente del cajón, dentro de las ranuras que están en los soportes del cajón. Vea la ilustración Cómo volver a colocar el frente - Whirlpool GB2FHDXWS | Owners Manual - Page 27
Puerta estándar-Congelador con puerta Cómo quitar y volver a poner la puerta en su lugar Bisagra superior A B C A. Cubierta de la bisagra superior B. Tornillos de cabeza hexagonal para bisagra de C. Bisagra superior Bisagra central A B C A. Cubierta del pasador de la bisagra B. Bisagra central C. - Whirlpool GB2FHDXWS | Owners Manual - Page 28
Puerta estándar-Congelador de cajón Cómo quitar y volver a poner la puerta en su lugar Bisagra superior A B C D A. Tornillo para la cubierta de la bisagra B. Cubierta de la bisagra superior C. Tornillos de cabeza hexagonal para bisagra de D. Bisagra superior Bisagra inferior A B C A. Cubierta del - Whirlpool GB2FHDXWS | Owners Manual - Page 29
Dos puertas con congelador en la parte inferior ADVERTENCIA Peligro de Choque Eléctrico Desconecte el suministro de energía antes de sacar las puertas. No seguir esta instrucción puede ocasionar la muerte o - Whirlpool GB2FHDXWS | Owners Manual - Page 30
los) tornillo(s) de ajuste del rodillo que está(n) a cada lado, para levantar o bajar ese lado del refrigerador. NOTA: Haga que alguien empuje la parte superior del refrigerador, lo cual quita el peso de los tornillos reguladores y los rodillos. Esto facilita el giro de los tornillos. Puede precisar - Whirlpool GB2FHDXWS | Owners Manual - Page 31
las puertas (Modelos de dos puertas con congelador en la parte inferior) El compartimiento del refrigerador tiene dos puertas. Las puertas de los controles Los controles de temperatura están ubicados en la parte frontal superior de los compartimientos del refrigerador o del congelador. Humidity - Whirlpool GB2FHDXWS | Owners Manual - Page 32
hermético para verduras. Dependiendo de su modelo, regule el control a cualquier ajuste entre FRUIT (Fruta) y VEGETABLES (Vegetales) o LOW (Bajo) y HIGH (Alto). FRUIT / LOW (Fruta / Bajo - posición abierta) para el mejor almacenamiento de frutas y verduras con cáscaras. VEGETABLES / HIGH (Vegetales - Whirlpool GB2FHDXWS | Owners Manual - Page 33
, blanqueadores o productos de limpieza que contengan productos derivados del petróleo en las superficies exteriores (puertas y carcasa), las partes de plástico, en el interior y en los revestimientos o juntas de la puerta. No use toallas de papel, estropajos para fregar u otros utensilios de - Whirlpool GB2FHDXWS | Owners Manual - Page 34
a colocar la pantalla de luz. Modelos con congelador de cajón ■ Parte superior del compartimiento del refrigerador inserte las lengüetas en la pantalla, de servicio técnico. En EE.UU., www.whirlpool.com En Canadá, www.whirlpool.ca Funcionamiento del refrigerador El refrigerador no funciona ■ - Whirlpool GB2FHDXWS | Owners Manual - Page 35
los controles a un ajuste más frío. Verifique la temperatura en 24 horas. Vea "Uso del(de los) control(es)". Hay acumulación de humedad en el interior NOTA: Es normal que se acumule un poco de humedad. ■ ¿Está húmeda la habitación? Esto contribuye a la acumulación de humedad. ■ ¿Se abre(n) o se - Whirlpool GB2FHDXWS | Owners Manual - Page 36
■ ¿Se ha conectado un sistema de filtración de agua de ósmosis inversa al suministro de agua fría? Esto puede hacer que disminuya la presión de agua. Vea "Requisitos del suministro de agua". ■ ¿Aún tiene preguntas acerca de la presión de agua? Llame a un plomero competente autorizado. El hielo tiene - Whirlpool GB2FHDXWS | Owners Manual - Page 37
Cloro, sabor/olor 50% reducción Clase de partículas I* 85% reducción Promedio influente 1,88 mg/L 5.700.00 #/mL Reducción de contaminantes Plomo: a Turbidez Lindano Requisitos de reducción de NSF 0,010 mg/L 0,010 mg/L 0,002 mg/L 0,002 mg/L 0,005 mg/L 0,075 mg/L 0,04 mg/L 0,003 mg/L 0,003 mg/L - Whirlpool GB2FHDXWS | Owners Manual - Page 38
ACERCA DE CUÁNTO de Whirlpool para determinar si corresponde otra garantía. 3/08 en la etiqueta ubicada en la pared interior del compartimiento del refrigerador. Si necesita ayuda Whirlpool con sus preguntas o dudas a la dirección que aparece a continuación: En los EE.UU.: Whirlpool Brand Home - Whirlpool GB2FHDXWS | Owners Manual - Page 39
® INSTRUCTIONS D'UTILISATION DU RÉFRIGÉRATEUR Nous vous REMERCIONS d'avoir acheté ce produit de haute qualité. Si vous rencontrez un problème non mentionné dans la section DÉPANNAGE, veuillez visiter notre site Web www.whirlpool.com pour des informations supplémentaires. Si vous avez toujours - Whirlpool GB2FHDXWS | Owners Manual - Page 40
frigérateur AVERTISSEMENT Risque du poids excessif Utiliser deux ou plus de personnes pour déplacer et installer le réfrigérateur. Le non-respect de cette instruction peut causer une blessure au dos ou d'autre blessure. Enlèvement des matériaux d'emballage ■ Enlever le ruban adhésif et la colle des - Whirlpool GB2FHDXWS | Owners Manual - Page 41
pas enlever la broche de liaison à la terre. Ne pas utiliser un adaptateur. Ne pas utiliser un câble de rallonge. Le non-respect de ces instructions peut causer un décès, un incendie ou un choc électrique. Avant de placer le réfrigérateur à son emplacement final, il est important de vous assurer - Whirlpool GB2FHDXWS | Owners Manual - Page 42
eau peut être configurée vers le haut ou vers le bas. Suivre les instructions de raccordement appropriées à votre modèle. 1. Débrancher le réfrigé é solidement en tirant sur le tube en cuivre. 2. Créer une boucle de service avec le tube de cuivre. Éviter les déformations en pliant le tube de cuivre - Whirlpool GB2FHDXWS | Owners Manual - Page 43
pas enlever la broche de liaison à la terre. Ne pas utiliser un adaptateur. Ne pas utiliser un câble de rallonge. Le non-respect de ces instructions peut causer un décès, un incendie ou un choc électrique. 1. Brancher le réfrigérateur sur une prise à 3 alvéoles reliée à la terre. REMARQUE : Prévoir - Whirlpool GB2FHDXWS | Owners Manual - Page 44
enlever les portes. Le non-respect de cette instruction peut causer un décès ou un choc é les soulever de la caisse. REMARQUE : Prévoir un support additionnel des portes pendant la réinstallation des charnières. La la porte à part jusqu'à ce que les charnières et le tiroir du compartiment - Whirlpool GB2FHDXWS | Owners Manual - Page 45
Serrer toutes les vis. Conserver la porte à part jusqu'à ce que la charnière inférieure du congélateur. REMARQUE : Prévoir un support additionnel de la porte pendant la réinstallation des un câble de rallonge. Le non-respect de ces instructions peut causer un décès, un incendie ou un choc électrique. - Whirlpool GB2FHDXWS | Owners Manual - Page 46
Porte standard - Porte du compartiment de congélation Dépose et réinstallation de la porte Charnière supérieure A B C A. Couvercle de charnière supérieure B. Vis de charnière à tête hexagonale de 5/16" C. Charnière supérieure Inversion du sens d'ouverture des portes (option) 2 A 1-2 A. - Whirlpool GB2FHDXWS | Owners Manual - Page 47
Porte standard - Porte du compartiment de congélation Dépose et réinstallation de la porte Charnière supérieure A B C D A. Vis du couvercle de la charnière B. Couvercle de la charnière supérieure C. Vis de charnière à tête hexagonale de 5/16" D. Charnière supérieure Charnière inférieure A B C - Whirlpool GB2FHDXWS | Owners Manual - Page 48
battants AVERTISSEMENT Risque de choc électrique Déconnecter la source de courant électrique avant d'enlever les portes. Le non-respect de cette instruction peut causer un décès ou un choc électrique. Charnières supérieures A B C D Dépose et réinstallation de la porte Poignée en métal 1 A. Vis - Whirlpool GB2FHDXWS | Owners Manual - Page 49
ou si vous désirez que les portes se ferment plus facilement, suivre les instructions ci-dessous. Style 1-Modèles de compartiments de congélation avec porte 1. de façon égale. 6. Réinstaller le couvercle du support. Placer le couvercle du support sur le bord extérieur, tourner le couvercle vers la - Whirlpool GB2FHDXWS | Owners Manual - Page 50
d'ajuster la température dans le compartiment de réfrigération ou de congélation, utiliser les réglages indiqués dans le tableau ci-dessous comme guide. Pour les réglages de commande (Style 1) appuyer sur les touches à flèche (haut ou bas) ou pour les réglages de commande (Style 2) tourner le - Whirlpool GB2FHDXWS | Owners Manual - Page 51
légumes étanche. Selon le modèle, on peut appliquer les réglages suivants : FRUIT (fruits) et VEGETABLES (légumes) ou LOW (faible) et HIGH (élevé). FRUIT (fruits) / LOW (bas) [ouvert] pour une meilleure conservation des fruits et légumes à peaux. VEGETABLES (légumes) / HIGH (élevé) [fermé] pour une - Whirlpool GB2FHDXWS | Owners Manual - Page 52
pour éviter les éventuelles taches laissées par l'eau. Risque d'explosion Utiliser un produit de nettoyage ininflammable. Le non-respect de cette instruction peut causer un décès, une explosion ou un incendie. Acier inoxydable : Laver les surfaces en acier inoxydable avec une éponge propre ou un - Whirlpool GB2FHDXWS | Owners Manual - Page 53
pour éviter le coût d'un appel de service. Aux É.-U., www.whirlpool.com Au Canada, www.whirlpool.ca Le réfrigérateur ne fonctionne pas adaptateur. Ne pas utiliser un câble de rallonge. Le non-respect de ces instructions peut causer un décès, un incendie ou un choc électrique. ■ Le cordon - Whirlpool GB2FHDXWS | Owners Manual - Page 54
position correcte. Les portes sont difficiles à ouvrir AVERTISSEMENT Risque d'explosion Utiliser un produit de nettoyage ininflammable. Le non-respect de cette instruction peut causer un décès, une explosion ou un incendie. ■ Les joints d'étanchéité sont-ils sales ou collants? Nettoyer les joints et - Whirlpool GB2FHDXWS | Owners Manual - Page 55
■ Un filtre à eau est-il installé sur le réfrigérateur? Enlever le filtre et faire fonctionner la machine à glaçons. Si la qualité des glaçons augmente, le filtre est probablement obstrué ou mal installé. Remplacer le filtre ou le réinstaller correctement. ■ Un système de filtration de l'eau à - Whirlpool GB2FHDXWS | Owners Manual - Page 56
010 mg/L 0,010 mg/L 0,002 mg/L 0,002 mg/L 0,005 mg/L 0,075 mg/L 0,04 particules/mL 0,06 mg/L 69 /L 0,225 mg/L ± 10 % < 0,0005 mg/L 0,08 mg/L ± 10 % < 0,001mg/L 0,015 ± 10 10 % < 0,0001mg/L Effluent moyen 0,05 mg/L 30,583 #/mL % de 22 95,71 % 99,76 % 98,74 % 92,97 % 76,99 % >99.99 % >99,99 97,09 - Whirlpool GB2FHDXWS | Owners Manual - Page 57
situé dans une région éloignée où un service d'entretien Whirlpool autorisé n'est pas disponible. 10. La dépose et la réinstallation de votre gros appareil si celui-ci est installé dans un endroit inaccessible ou n'est pas installé conformément aux instructions d'installation fournies. 11. Les gros - Whirlpool GB2FHDXWS | Owners Manual - Page 58
EN/FR PN W10208431A © 2008 Whirlpool Corporation. 8/08 All rights reserved. ® Registered Trademark/TM Trademark of Whirlpool, U.S.A., Whirlpool Canada LP Licensee in Canada Printed in U.S.A. Todos los derechos reservados. ® Marca registrada/TM Marca de comercio de Whirlpool, U.S.A., usada bajo - Whirlpool GB2FHDXWS | Owners Manual - Page 59
NOTICE: Flush four (4) gallons of water through water filter cartridge before use. AVIS : Vider quatre (4) gallons d'eau par la cartouche du filtre à eau avant utilisation. AVISO: Deje pasar cuatro (4) galones de agua a través del cartucho del filtro de agua antes de usarlo. W10297791
-
 1
1 -
 2
2 -
 3
3 -
 4
4 -
 5
5 -
 6
6 -
 7
7 -
8
-
9
-
10
-
11
-
12
-
13
-
14
-
15
-
16
-
17
-
18
-
19
-
20
-
21
-
22
-
23
-
24
-
25
-
26
-
27
-
28
-
29
-
30
-
31
-
32
-
33
-
34
-
35
-
36
-
37
-
38
-
39
-
40
-
41
-
42
-
43
-
44
-
45
-
46
-
47
-
48
-
49
-
50
-
51
-
52
-
53
-
54
-
55
-
56
-
57
-
58
-
59
 |
 |

THANK YOU for purchasing this high-quality product. If you should experience a problem not covered in TROUBLESHOOTING,
please visit our website at
www.whirlpool.com
for additional information. If you still need assistance, call us at 1-800-253-1301.
In Canada, visit our website at
www.whirlpool.ca
or call us at 1-800-807-6777.
You will need your model and serial number, located on the inside wall of the refrigerator compartment.
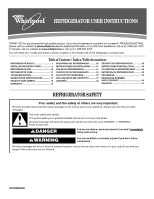
REFRIGERATOR SAFETY
Table of Contents
/
Índice / Table des matières
REFRIGERATOR SAFETY
...............................
1
INSTALLATION INSTRUCTIONS
...................
2
REFRIGERATOR USE
...................................
12
REFRIGERATOR CARE
.................................
14
TROUBLESHOOTING
....................................
15
WATER FILTER CERTIFICATIONS
..............
17
PRODUCT DATA SHEETS
............................
18
WARRANTY
....................................................
19
SEGURIDAD DEL REFRIGERADOR
............
20
INSTRUCCIONES DE INSTALACIÓN
..........
21
USO DE SU REFRIGERADOR
......................
31
CUIDADO DE SU REFRIGERADOR
.............
33
SOLUCIÓN DE PROBLEMAS
.......................
34
HOJA DE DATOS DEL PRODUCTO
............
37
GARANTÍA
......................................................
38
SÉCURITÉ DU RÉFRIGÉRATEUR
................
39
INSTRUCTIONS D’INSTALLATION
..............
40
UTILISATION DU RÉFRIGÉRATEUR
...........
50
ENTRETIEN DU RÉFRIGÉRATEUR
.............
52
DÉPANNAGE
..................................................
53
FEUILLES DE DONNÉES
SUR LE PRODUIT
..........................................
56
GARANTIE
......................................................
57
®
REFRIGERATOR USER INSTRUCTIONS
W10208432A
You can be killed or seriously injured if you don't immediately
You
can be killed or seriously injured if you don't follow
All safety messages will tell you what the potential hazard is, tell you how to reduce the chance of injury, and tell you what can
happen if the instructions are not followed.
Your safety and the safety of others are very important.
We have provided many important safety messages in this manual and on your appliance. Always read and obey all safety
messages.
This is the safety alert symbol.
This symbol alerts you to potential hazards that can kill or hurt you and others.
All safety messages will follow the safety alert symbol and either the word “DANGER” or “WARNING.”
These words mean:
follow instructions.
instructions.
DANGER
WARNING