Whirlpool GCI3061XB Installation Instructions
Whirlpool GCI3061XB Manual
 |
UPC - 883049204710
View all Whirlpool GCI3061XB manuals
Add to My Manuals
Save this manual to your list of manuals |
Whirlpool GCI3061XB manual content summary:
- Whirlpool GCI3061XB | Installation Instructions - Page 1
30" (76.2 CM) ELECTRIC INDUCTION COOKTOP INSTALLATION INSTRUCTIONS INSTRUCTIONS D'INSTALLATION DE LA TABLE DE CUISSON ÉLECTRIQUE À INDUCTION DE 30" (76,2 CM) Table of Contents/Table des matières COOKTOP SAFETY 1 INSTALLATION REQUIREMENTS 2 Tools and Parts 2 Location Requirements 2 Electrical - Whirlpool GCI3061XB | Installation Instructions - Page 2
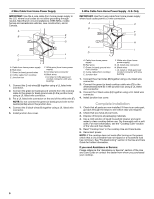
Instructions for approval for built-in undercounter use and proper cutout dimensions. ■ When installing cooktop over an undercounter built-in oven, do not fasten cooktop to countertop with clamps or seal cooktop to countertop. This will make the cooktop easier to remove if future servicing - Whirlpool GCI3061XB | Installation Instructions - Page 3
you make the countertop cutout, some installations may require notching down the base cabinet side walls to clear the cooktop base. To avoid this modification, use a base cabinet with sidewalls wider than the cutout. Electrical Shock Hazard Disconnect power before servicing. Use 8 gauge copper wire - Whirlpool GCI3061XB | Installation Instructions - Page 4
NOTE: Kit Part Number W10310006 is required for installing the cooktop into a solid surface or marble countertop. See the "Assistance or Service" section of the Use and Care Guide for information on ordering. To Install Brackets into Marble Countertop: 1. Clean the brackets and cooktop cutout of any - Whirlpool GCI3061XB | Installation Instructions - Page 5
power before servicing. Use 8 gauge copper wire. Electrically ground cooktop. Failure to follow these instructions can result in death, fire, or electrical shock. A. Clip 2. Push down on cooktop to snap the cooktop clips onto the brackets installed in the cutout. A This cooktop is manufactured - Whirlpool GCI3061XB | Installation Instructions - Page 6
power. NOTE: If the cooktop does not work after turning on the power, check that a circuit breaker has not tripped or a household fuse has not blown. See "Troubleshooting" section in the Use and Care Guide for further information. If you need Assistance or Service: Please reference the "Assistance - Whirlpool GCI3061XB | Installation Instructions - Page 7
instructions. IMPORTANT : Observer les dispositions de tous les codes et règlements en vigueur. Lors de l'installation de la table de cuisson, utiliser les dimensions . Emplacement de la plaque signalétique de la table de cuisson de 30" (76,2 cm) (modèles GCI3061, ICI500, KICU500) ■ C' - Whirlpool GCI3061XB | Installation Instructions - Page 8
. ■ Utiliser les dimensions d'ouverture du plan de travail qui sont indiquées dans ces Instructions d'installation. Les dimensions données sont les cm) depuis le côté droit du placard J. 29½" (75 cm) sur les modèles de 30" (76,2 cm) K. Distance de séparation minimale de 1" (2,5 cm) par rapport à la - Whirlpool GCI3061XB | Installation Instructions - Page 9
de travail en marbre. Voir la section "Assistance ou service" dans le Guide d'utilisation et d'entretien pour des renseignements sur le processus de commande. Installation des supports dans le plan de travail en marbre : 1. Nettoyer les supports et l'ouverture de la table de cuisson pour éliminer - Whirlpool GCI3061XB | Installation Instructions - Page 10
en affleurement avec le plan de travail. A. Support B. Vis Installation de la table de cuisson AVERTISSEMENT Risque du poids excessif Utiliser deux ou plus de personnes pour déplacer et installer la table de cuisson. Le non-respect de cette instruction peut causer une blessure au dos ou d'autre - Whirlpool GCI3061XB | Installation Instructions - Page 11
à la terre. Le non-respect de ces instructions peut causer un décès, un incendie ou un du conducteur neutre, en cas de nouvelle installation avec alimentation par un circuit secondaire (1996 hicules récréatifs, dans les nouvelles constructions, et au Canada. A B E F G Un conducteur vert (ou - Whirlpool GCI3061XB | Installation Instructions - Page 12
homologation UL). 4. Installer le couvercle du boîtier de connexion. Achever l'installation 1. Vérifier que toutes les pièces sont maintenant installées. S'il vous avez besoin d'assistance ou de service : Consulter la section "Assistance ou service" du Guide d'utilisation et d'entretien ou contacter
-
 1
1 -
 2
2 -
 3
3 -
 4
4 -
 5
5 -
 6
6 -
 7
7 -
8
-
9
-
10
-
11
-
12
 |
 |
30" (76.2 CM) ELECTRIC INDUCTION COOKTOP
INSTALLATION INSTRUCTIONS
INSTRUCTIONS D'INSTALLATION DE
LA TABLE DE CUISSON ÉLECTRIQUE À
INDUCTION DE 30" (76,2 CM)
COOKTOP SAFETY
501910200567E
Table of Contents/Table des matières
COOKTOP SAFETY
.................................................................................
1
INSTALLATION REQUIREMENTS
.........................................................
2
Tools and Parts
.....................................................................................
2
Location Requirements
.........................................................................
2
Electrical Requirements
.......................................................................
3
INSTALLATION INSTRUCTIONS
...........................................................
4
Prepare Location
...................................................................................
4
Install Brackets
......................................................................................
4
Install Cooktop
......................................................................................
5
Make Electrical Connection
..................................................................
5
Complete Installation
............................................................................
6
SÉCURITÉ DE LA TABLE DE CUISSON
.............................................
7
EXIGENCES D'INSTALLATION
............................................................
7
Outillage et pièces
..............................................................................
7
Exigences d’emplacement
.................................................................
7
Spécifications électriques
.................................................................
9
INSTRUCTIONS D'INSTALLATION
.....................................................
9
Préparation de l'emplacement
...........................................................
9
Installation des supports
....................................................................
9
Installation de la table de cuisson
....................................................
10
Raccordement électrique
.................................................................
11
Achever l'installation
.........................................................................
12
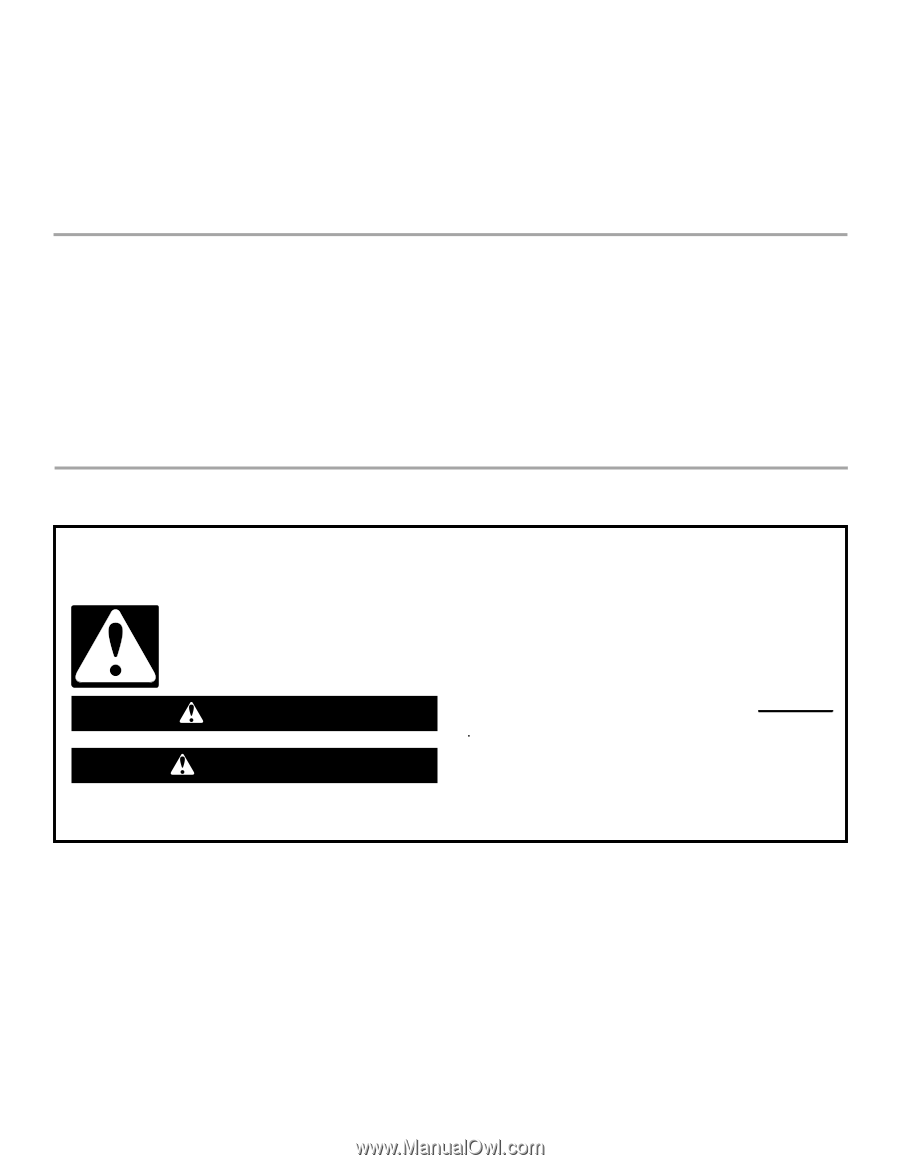
You can be killed or seriously injured if you don't immediately
You
can be killed or seriously injured if you don't follow
All safety messages will tell you what the potential hazard is, tell you how to reduce the chance of injury, and tell you what can
happen if the instructions are not followed.
Your safety and the safety of others are very important.
We have provided many important safety messages in this manual and on your appliance. Always read and obey all safety
messages.
This is the safety alert symbol.
This symbol alerts you to potential hazards that can kill or hurt you and others.
All safety messages will follow the safety alert symbol and either the word “DANGER” or “WARNING.”
These words mean:
follow instructions.
instructions.
DANGER
WARNING
IMPORTANT:
Save for local electrical inspector's use.
IMPORTANT :
À conserver pour consultation par l'inspecteur local des installations électriques.