Whirlpool GR478LXPS Use and Care Guide
Whirlpool GR478LXPS Manual
 |
View all Whirlpool GR478LXPS manuals
Add to My Manuals
Save this manual to your list of manuals |
Whirlpool GR478LXPS manual content summary:
- Whirlpool GR478LXPS | Use and Care Guide - Page 1
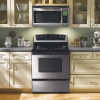
9761079 ® ELECTRIC RANGE Use & Care Guide For questions about features, operation/performance, parts, accessories or service, call: 1-800-253-1301 or visit our website at... www.whirlpool.com Table of Contents 2 To the installer: Please leave this instruction book with the unit. To the consumer: - Whirlpool GR478LXPS | Use and Care Guide - Page 2
17 Convection Baking and Roasting 17 Warm Hold Feature 18 Timed Cooking 19 Sequence Programming 20 Warming Drawer 21 RANGE CARE 21 Self-Cleaning Cycle 21 General Cleaning 23 Oven Light 24 Oven Door 25 Storage Drawer 25 Warming Drawer 26 TROUBLESHOOTING 26 ASSISTANCE OR SERVICE 27 - Whirlpool GR478LXPS | Use and Care Guide - Page 3
RANGE SAFETY Your safety and the safety of others are very important. We have provided many important safety messages in this manual and on your appliance can happen if the instructions are not followed. The Anti-Tip Bracket The range will not tip during normal use. However, the range can tip if - Whirlpool GR478LXPS | Use and Care Guide - Page 4
- Do not repair or replace any part of the range unless specifically recommended in the manual. All other servicing should be referred to a qualified technician. s Storage in or on the Range - Flammable materials should not be stored in an oven or near surface units. s Do Not Use Water on Grease - Whirlpool GR478LXPS | Use and Care Guide - Page 5
This manual covers several different models. The range you have purchased may have some or all of the parts and features listed. The location and appearance of the features shown here may not match those of your model. Control Panels A B C D E A. Surface cooking area locator B. Electronic oven - Whirlpool GR478LXPS | Use and Care Guide - Page 6
ceramic glass models) M. Automatic oven light switch N. Broil element (not shown) O. Gasket P. Bake element (hidden on some models) Q. Self-clean latch Parts and Features not shown Coil elements (on some models) Oven door window Oven light Broiler pan and grid Roasting rack (on some models) Storage - Whirlpool GR478LXPS | Use and Care Guide - Page 7
HI and LO. Push in and turn to setting. Use the following chart as a guide when setting heat levels. SETTING RECOMMENDED USE HI s Start food cooking. s Bring liquid to REMEMBER: When range is in use or (on some models) during the Self-Cleaning cycle, the entire cooktop area may become hot. 7 - Whirlpool GR478LXPS | Use and Care Guide - Page 8
to vertical (off) when finished. Warm Zone Element (on some models) WARNING Food Poisoning Hazard Do not let food sit for more than Use only cookware and dishes recommended for oven and cooktop use. s Cover all foods with a lid or aluminum foil. When warming baked goods, allow a small opening in - Whirlpool GR478LXPS | Use and Care Guide - Page 9
cooktop to cool down slightly. Then, while wearing oven mitts, remove the spills while the surface is still warm. If sugary spills are allowed to cool down, they can adhere to the cooktop part of the entire cooktop. s Do not use the cooktop NOTE: Before removing or replacing coil elements and burner - Whirlpool GR478LXPS | Use and Care Guide - Page 10
the "General Cleaning" section. To Lift: Lift the cooktop by both front corners until the supports lock into place. To Replace: 1. Lift the cooktop from both sides while pressing the support rods back to unlock them. 2. Slowly lower the cooktop into place. Home Canning When canning for long periods - Whirlpool GR478LXPS | Use and Care Guide - Page 11
Oven Control (on some models) Style 3 - Electronic Oven Control (on some models) AB C D E FG H A B CDE F BROIL CONVECT REVIEW CHOICE BAKE WARM PROGRAM STEP 1 2 3 4 SET TIMER DELAY broil K. Bake Display Style 1 - Electronic Oven Control When power is first supplied to the appliance, "12: - Whirlpool GR478LXPS | Use and Care Guide - Page 12
of cycle Style 1 - Electronic Oven Control Reminder Tones: Reminder tones may be turned off. On some models, press and hold BAKE for 5 seconds. REMINDER TONES preset at high, but can be changed to low. To Change: Press and hold DELAY START for 5 seconds. A tone will sound, and "Snd LO" will appear on - Whirlpool GR478LXPS | Use and Care Guide - Page 13
Press START. Styles 2 & 3 - Electronic Oven Controls 1. Press and hold BAKE for 5 seconds until the oven display shows the current calibration, for example oven bottom with any type of foil, liners or cookware because permanent damage will occur to the oven bottom finish. s Do not cover entire rack - Whirlpool GR478LXPS | Use and Care Guide - Page 14
the following chart as a guide. NUMBER OF PAN(S) POSITION ON RACK 1 Center of rack. 2 Side by side or slightly staggered. 3 or 4 Opposite corners on each rack. Make sure that no bakeware piece is directly over another. Split Oven Rack (on some models) Split-Rack with Removable Insert The - Whirlpool GR478LXPS | Use and Care Guide - Page 15
following chart as a guide. BAKEWARE/ RESULTS Baking and Roasting ACCUBAKE® Temperature Management System (on some models) The ACCUBAKE® system electronically regulates the oven heat levels during preheat and bake to maintain a precise temperature range for optimal cooking results. The bake - Whirlpool GR478LXPS | Use and Care Guide - Page 16
oven is suggested when baking foods with leavening ingredients, such as yeast, baking powder, baking soda and eggs. Choice Bake® Function (on some models) The CHOICE BAKE® function eliminates the top heat during oven cooking. It is ideal for baking with the range. It is Pull out oven rack to the - Whirlpool GR478LXPS | Use and Care Guide - Page 17
this oven for more information. To Convection Bake or Roast: Before convection baking or roasting, position the racks according to the "Positioning Racks and Bakeware" section. When using two racks, place them on rack positions 2 and 4. When roasting with CONVECT, use the roasting rack on top of - Whirlpool GR478LXPS | Use and Care Guide - Page 18
(82°C) Cornish Game Hens*, Rack Position 2 or 3 1-1.5 lbs 50-60 models) WARNING Food Poisoning Hazard Do not let food sit in oven Manual Warm Hold Feature: Style 1 - Electronic Oven range is 170°F-200°F (75°C-93°C). 3. Press START. 4. Press OFF/CANCEL when finished. Styles 2 - Electronic Oven - Whirlpool GR478LXPS | Use and Care Guide - Page 19
certain time of day, cook for a set length of time, and/or shut off automatically. Delay start should not be used for food such as breads and cakes because they may not bake properly. Style 1 - Electronic Oven Control To Set a Timed Cook: 1. Press the desired cook function. The indicator light will - Whirlpool GR478LXPS | Use and Care Guide - Page 20
models) Sequence Programming allows you to program at one time up to 4 cook functions, and is usable with other electronic oven control functions, such as the Timer and Warming Drawer. Sequence Programming takes precedence over any nonsequenced cook function. For example, if an untimed Bake REVIEW - Whirlpool GR478LXPS | Use and Care Guide - Page 21
Drawer operates at 170ºF (80ºC) only. RANGE CARE Self-Cleaning Cycle (on some models) WARNING Burn Hazard Do not touch the oven during the Self-Cleaning cycle. Keep children away from oven during Self-Cleaning cycle. Failure to follow these instructions can result in burns. IMPORTANT: The health - Whirlpool GR478LXPS | Use and Care Guide - Page 22
displayed. The door will automatically lock, and DOOR LOCKED or LOCKED and DELAY and the stop time will also appear on the display (on some models). The door will not unlock until the oven cools. When the start time is reached, the oven will automatically turn on. When the cycle is complete and the - Whirlpool GR478LXPS | Use and Care Guide - Page 23
cleanings become less noticeable. COOKTOP CONTROLS Do not use steel wool, abrasive cleansers or oven cleaner. Do not soak knobs. When replacing knobs, make sure knobs are in the OFF position. On some models, do not remove seals under knobs. s Soap and water or dishwasher: Pull knobs straight away - Whirlpool GR478LXPS | Use and Care Guide - Page 24
, then scrub with stainless steel wool pad. s Oven cleaner: Follow product label instructions. s Mildly abrasive cleanser: Scrub with wet scouring pad. Porcelain enamel only, not chrome s Dishwasher SURFACE UNDER COOKTOP (on some models) Do not remove the cooktop to avoid product damage. For more - Whirlpool GR478LXPS | Use and Care Guide - Page 25
and your thumbs on its inside surface. 2. Hold oven door so that the top edge of each hinge hanger is horizontal. Insert hinge hangers into the front frame hinge slots. 3. Tilt top of door toward range. Slide hinge hangers down onto front frame support pins. Make sure the hinge hangers are fully - Whirlpool GR478LXPS | Use and Care Guide - Page 26
"Cooktop Controls" section. s Is the appliance level? Level the appliance. See the Installation Instructions. Oven will not operate s Is the electronic oven control set correctly? See "Electronic Oven Control" section. s Has a delay start been set? See "Timed Cooking" section. s On some models, is - Whirlpool GR478LXPS | Use and Care Guide - Page 27
you the cost of a service call. If you still need help, follow the instructions below. When calling, please know the purchase date and the complete model and serial number of your appliance. This information will help us to better respond to your request. If you need replacement parts If you need to - Whirlpool GR478LXPS | Use and Care Guide - Page 28
WHIRLPOOL® COOKTOP, BUILT-IN OVEN AND RANGE WARRANTY ONE-YEAR FULL WARRANTY For one year from the date of purchase, when this appliance is operated and maintained according to instructions attached to or furnished with the product, Whirlpool Corporation will pay for FSP® replacement parts and
-
 1
1 -
 2
2 -
 3
3 -
 4
4 -
 5
5 -
 6
6 -
 7
7 -
8
-
9
-
10
-
11
-
12
-
13
-
14
-
15
-
16
-
17
-
18
-
19
-
20
-
21
-
22
-
23
-
24
-
25
-
26
-
27
-
28
 |
 |

ELECTRIC RANGE
Use & Care Guide
For questions about features, operation/performance,
parts, accessories or service, call:
1-800-253-1301
or visit our website at...
www.whirlpool.com
Table of Contents
.................................................
2
9761079
®
To the installer: Please leave this
instruction book with the unit.
To the consumer: Please read and
keep this book for future reference.