Whirlpool GSC309PVB Owners Manual
Whirlpool GSC309PVB - 30 Inch Microwave Combination Wall Oven Manual
 |
UPC - 883049143156
View all Whirlpool GSC309PVB manuals
Add to My Manuals
Save this manual to your list of manuals |
Whirlpool GSC309PVB manual content summary:
- Whirlpool GSC309PVB | Owners Manual - Page 1
W10192048A ® ELECTRIC COMBINATION LOWER OVEN Use & Care Guide For questions about features, operation/performance, parts, accessories or service, call: 1-800-253-1301. or visit our website at... www.whirlpool.com In Canada call 1-800-807-6777 or visit our website at www.whirlpoolappliances.ca FOURS - Whirlpool GSC309PVB | Owners Manual - Page 2
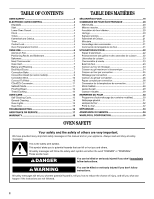
(sur certains modèles 30 Nettoyage général 31 Lampes du four 32 Porte du four 32 DÉPANNAGE 33 ASSISTANCE OU SERVICE 34 WHIRLPOOL CORPORATION 35 OVEN SAFETY Your safety and the safety of others are very important. We have provided many important safety messages in this manual and on your - Whirlpool GSC309PVB | Owners Manual - Page 3
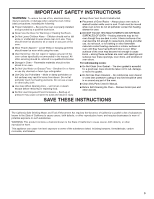
garments should never be worn while using the oven. ■ User Servicing - Do not repair or replace any part of the oven unless specifically recommended in the manual. All other servicing should be referred to a qualified technician. ■ Storage in Oven - Flammable materials should not be stored in an - Whirlpool GSC309PVB | Owners Manual - Page 4
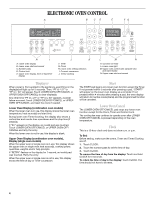
not in use, this display is blank. Upper Oven Display (combination oven models), Display (single oven models) When the upper oven or single oven is in use, this display shows the upper oven or single oven heat source(s), cooking power, quantities, weights and/or help prompts. If "RETRY" flashes on - Whirlpool GSC309PVB | Owners Manual - Page 5
low. To Change: Touch and hold the number pad "7" for 5 seconds. A tone will sound, and "Snd Lo" will appear on the lower oven end-ofcycle tones. On combination oven models, if "All Tones" have been means the oven will be warmer by the displayed amount. Use the following chart as a guide. ADJUSTMENT - Whirlpool GSC309PVB | Owners Manual - Page 6
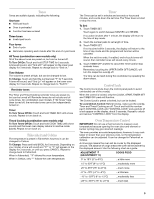
2" (5 cm) of space around bakeware and oven walls. Use the following chart as a guide. NUMBER POSITION ON RACK OF PAN(S) 1 Center oven. Insulated cookie sheets or baking pans ■ Place in the bottom third of oven. ■ May need to increase baking time. ■ Little or no bottom browning Stainless steel - Whirlpool GSC309PVB | Owners Manual - Page 7
a meat thermometer. Oven Vent A B C A. Upper oven B. Oven vent C. Lower oven The oven vent should not be Service" section to order. Ask for Part Number 4396923. ■ For proper draining, do not cover the grid with foil. The bottom of the pan may be lined with aluminum foil for easier cleaning. ■ Trim - Whirlpool GSC309PVB | Owners Manual - Page 8
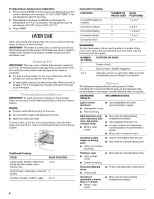
oven temperature will appear on the lower oven display until the oven is turned off. 3. Press LOWER OVEN OFF/CANCEL when finished cooking. BROILING CHART For best broiler grid. Convection Bake (on some models) A A. Convection element heat and fan guides 2 and 4. When using 3 racks, place on guides - Whirlpool GSC309PVB | Owners Manual - Page 9
Service" section to order. Ask for Part Number W10123240. 1. Press CONVECT ROAST. Press the number pads to enter a temperature other than 300°F (149°C). The convection roast range can be set between 170°F and 500°F (77°C and 260°C). 2. Press START. "Lo°" will appear on the oven done 25-30 30-35 - Whirlpool GSC309PVB | Owners Manual - Page 10
(on some models) Convect Full Meal lets you choose from 11 preset cooking cycles. A single pad includes an oven setting, an oven temperature, and a cook time or probe temperature. One pad is changeable to allow you to set your own cycle and save it for future use. Use the following chart as a guide - Whirlpool GSC309PVB | Owners Manual - Page 11
not be exact because foods are grouped in general categories. To ensure optimal cooking results, the oven will prompt a food check at the end of non-delayed Timed Cooking. Use the following chart as a guide. SETTING FOODS BAKED GOODS Biscuits, Breads: quick and yeast, Cakes: layer and angel food - Whirlpool GSC309PVB | Owners Manual - Page 12
Bread (on some models) Proofing bread prepares the dough for baking by activating the yeast. Follow the recipe directions as a guide. To Proof: until nearly doubled in size, checking after 20-25 minutes. Proofing time may vary depending on dough type and quantity. 3. Press LOWER OVEN OFF/CANCEL when - Whirlpool GSC309PVB | Owners Manual - Page 13
get rid of heat, odors, and smoke. Do not block the oven vent(s) during the Self-Cleaning cycle. Air must be able to move freely. Depending on your model, see "Oven Vent" or "Oven Vents" section. Do not clean, rub, damage or move the oven door gasket. The door gasket is essential for a good seal - Whirlpool GSC309PVB | Owners Manual - Page 14
controls are off and the microwave oven is cool. Always follow label instructions on cleaning products. Soap, water and a soft cloth or sponge are suggested first unless otherwise noted. STAINLESS STEEL (on some models) Cleaning Method: NOTE: To avoid damage to stainless steel surfaces, do not use - Whirlpool GSC309PVB | Owners Manual - Page 15
oil applied to the rack guides will help them slide. ■ Steel-wool pad TEMPERATURE PROBE (on some models) ■ Plastic scouring pad Oven Lights The oven lights are 12-volt, 5-watt maximum halogen bulbs. They will come on when the oven door is opened. On double oven models, both upper and lower lights - Whirlpool GSC309PVB | Owners Manual - Page 16
Timed Cooking" section. ■ On double oven models, is one oven self-cleaning? When one oven is self-cleaning, the other oven cannot be set to self-clean. Oven cooking results not what expected ■ Is the appliance level? Level the appliance. See the Installation Instructions. ■ Is the proper temperature - Whirlpool GSC309PVB | Owners Manual - Page 17
assistance with: ■ Features and specifications on our full line of appliances. ■ Use and maintenance procedures. ■ Accessory and repair parts sales. ■ Referrals to local dealers, repair parts distributors, and service companies. Whirlpool Canada LP designated service technicians are trained to - Whirlpool GSC309PVB | Owners Manual - Page 18
to correct the installation of your major appliance, to instruct you on how to use your major appliance, to replace or repair house fuses, or to correct house wiring or plumbing. 2. Service calls to repair or replace appliance light bulbs, air filters or water filters. Consumable parts are excluded - Whirlpool GSC309PVB | Owners Manual - Page 19
INSTRUCTIONS DE SÉCURITÉ AVERTISSEMENT : Pour réduire le risque d'incendie, de choc électrique, de blessures corporelles ou de dommages lors de l'utilisation du four, il convient d'observer certaines précautions élémentaires dont les suivantes : ■ Installation les ouvertures de l'évent du four et la - Whirlpool GSC309PVB | Owners Manual - Page 20
Lampe du four inférieur M. Commandes du four supérieur (voir le Guide d'utilisation et d'entretien séparé) N. Start (mise en marche) - Cancel = 27" ou "PF id = 30" apparaîtront. Appuyer sur LOWER OVEN OFF/CANCEL (arrêt/annulation du four inférieur), UPPER OVEN OFF/CANCEL (arrêt/annulation du four - Whirlpool GSC309PVB | Owners Manual - Page 21
tout moment pour annuler la minuterie et/ou pour arrêter les signaux de rappel. Rappel : si la touche UPPER OVEN OFF/CANCEL(arrêt/ annulation du four supérieur) est enfoncée, le(s) four(s) respectif(s) s'éteindront. La durée peut nombre de degrés affiché. Utiliser le tableau suivant comme guide. 21 - Whirlpool GSC309PVB | Owners Manual - Page 22
four est utilisé les premières fois, ou lorsqu'il est très sale. IMPORTANT : La santé de certains oiseaux est très sensible aux é ustensiles de cuisson et les parois du four. Se servir du tableau suivant comme guide. NOMBRE POSITION SUR LA GRILLE D'USTENSILES 1 Centre de la grille. 2 Cô - Whirlpool GSC309PVB | Owners Manual - Page 23
du tableau suivant comme guide. USTENSILES DE CUISSON/RÉSULTATS de cuisson ■ Croûtes croustillantes ■ Suivre les instructions du fabricant. Plats en verre, vitrocéramique ou autres articles qui pourraient fondre ou brûler à proximité de l'évent du four. Cuisson au four et rôtissage A B A. Éléments - Whirlpool GSC309PVB | Owners Manual - Page 24
inférieur jusqu'à ce que le four soit éteint. 3. Appuyer sur LOWER OVEN OFF/CANCEL (arrêt/annulation du four inférieur) lorsque la cuisson est terminée. une lèchefrite, vous pouvez la commander. Voir la section "Assistance ou service" pour placer une commande. Demander la pièce numéro 4396923. ■ - Whirlpool GSC309PVB | Owners Manual - Page 25
est atteinte, un signal sonore (si activé) sera entendu. 3. Appuyer sur LOWER OVEN OFF/CANCEL (arrêt/annulation du four inférieur) lorsque la cuisson est terminée. il est possible de les commander. Voir la section "Assistance ou service" pour placer une commande. Demander la pièce numéro W10123240. - Whirlpool GSC309PVB | Owners Manual - Page 26
point bien cuit Pain de viande 20-25 25-30 30-35 22-25 27-30 32-35 20-25 25-30 30-35 20-25 300°F (149°C) 140°F ( soit éteint. 3. Appuyer sur LOWER OVEN OFF/CANCEL (arrêt/annulation du four inf pour utilisation future. Utiliser le tableau suivant comme guide. ■ Tous les aliments doivent être à la - Whirlpool GSC309PVB | Owners Manual - Page 27
de terre au four et gâteau renversé aux ananas 1 h 30 min. Poitrine de dinde, farce, gâteau aux pêches 40 une minute. 4. Appuyer sur LOWER OVEN OFF/CANCEL (arrêt/annulation du four non différée. Utiliser le tableau suivant comme guide. RÉGLAGE TYPE D'ALIMENTS PRODUITS DE BOULANGERIE - Whirlpool GSC309PVB | Owners Manual - Page 28
cuisson. Le non-respect de cette instruction peut causer un empoisonnement alimentaire ou d'une minute. 7. Appuyer sur LOWER OVEN OFF/CANCEL (arrêt/annulation du four inf représentent diverses températures. Utiliser le tableau suivant comme guide. TOUCHE NUMÉRIQUE TEMPÉRATURE DU FOUR 1 170°F - Whirlpool GSC309PVB | Owners Manual - Page 29
levure. Suivre les directives de la recette comme guide. Pour faire lever le pain : Avant la pâte et de la quantité. 3. Appuyer sur LOWER OVEN OFF/CANCEL (arrêt/annulation du four inférieur) lorsque la la cuisson. Le non-respect de cette instruction peut causer un empoisonnement alimentaire ou une - Whirlpool GSC309PVB | Owners Manual - Page 30
Le non-respect de ces instructions peut causer des brûlures. du four avant qu'il ne devienne très sale. Les saletés intenses nécessitent un nettoyage le, voir la section "Évent du four" ou "Évents du four". Ne pas 30 minutes. La durée de nettoyage peut être réglée entre 2 h 30 minutes et 4 h 30 - Whirlpool GSC309PVB | Owners Manual - Page 31
30 minutes. La durée de nettoyage peut être réglée entre 2 h 30 minutes et 4 h 30 tout moment : Appuyer sur LOWER OVEN OFF/CANCEL. Si la température est froid. Toujours suivre les instructions sur l'étiquette des produits de Voir la section "Assistance ou service" pour placer une commande. TABLEAU - Whirlpool GSC309PVB | Owners Manual - Page 32
Sur les modèles de fours doubles, les lumières supérieure est fermée, appuyer sur OVEN LIGHT (lampe du four) est éteint et froid. Puis, suivre ces instructions. La porte du four est lourde. Dépose installer le couvercle de l'ampoule en l'emboîtant dans la paroi. 6. Rétablir le courant. Réinstallation - Whirlpool GSC309PVB | Owners Manual - Page 33
de service non nécessaire. Rien ne fonctionne ■ Un fusible est-il grillé ou le disjoncteur s'est-il déclenché? Remplacer le fusible ou réenclencher le disjoncteur. Si le problème persiste, appeler un électricien. ■ L'appareil est-il correctement raccordé? Voir les instructions d'installation. Le - Whirlpool GSC309PVB | Owners Manual - Page 34
Avant de faire un appel pour assistance ou service, consulter la section "Dépannage". Ce guide peut vous faire économiser le coût d'une visite de service. Si vous avez encore besoin d'aide, suivre les instructions ci-dessous. Lors d'un appel, veuillez connaître la date d'achat, le numéro de mod - Whirlpool GSC309PVB | Owners Manual - Page 35
soient signalés à Whirlpool dans les 30 jours suivant la date service d'entretien Whirlpool autorisé n'est pas disponible. 10. La dépose et la réinstallation de votre gros appareil si celui-ci est installé dans un endroit inaccessible ou n'est pas installé conformément aux instructions d'installation - Whirlpool GSC309PVB | Owners Manual - Page 36
. All rights reserved. ® Registered Trademark/TM Trademark of Whirlpool, U.S.A., Whirlpool Canada LP Licensee in Canada Tous droits réservés. ® Marque déposée/TM Marque de commerce de Whirlpool, U.S.A., emploi sous licence par Whirlpool Canada LP au Canada 4/08 Printed in U.S.A. Imprim
-
 1
1 -
 2
2 -
 3
3 -
 4
4 -
 5
5 -
 6
6 -
 7
7 -
8
-
9
-
10
-
11
-
12
-
13
-
14
-
15
-
16
-
17
-
18
-
19
-
20
-
21
-
22
-
23
-
24
-
25
-
26
-
27
-
28
-
29
-
30
-
31
-
32
-
33
-
34
-
35
-
36
 |
 |

ELECTRIC
COMBINATION
LOWER OVEN
Use & Care Guide
For questions about features, operation/performance,
parts, accessories or service, call:
1-800-253-1301
.
or visit our website at...
www.whirlpool.com
In Canada call
1-800-807-6777
or visit our website at
www.whirlpoolappliances.ca
FOURS ÉLECTRIQUES
COMBINÉS - FOUR
INFÉRIEUR
Guide d'utilisation et d'entretien
Pour des questions à propos des caractéristiques, du
fonctionnement/rendement, des pièces, des accessoires ou du
service, composez le :
1-800-807-6777
ou visitez notre site Web
www.whirlpool.ca
Table of Contents/Table des matières
.................
2
Models/Modèles GSC309
W10192048A
®