Whirlpool GW399LXUQ Owners Manual
Whirlpool GW399LXUQ - 30" Slide-In Gas Range Manual
 |
UPC - 883049127842
View all Whirlpool GW399LXUQ manuals
Add to My Manuals
Save this manual to your list of manuals |
Whirlpool GW399LXUQ manual content summary:
- Whirlpool GW399LXUQ | Owners Manual - Page 1
® GAS RANGE Use & Care Guide For questions about features, operation/performance, parts, accessories or service, call: 1-800-253-1301 or visit our website at...www.whirlpool.com In Canada, call for assistance, installation or service, call: 1-800-807-6777 or visit our website at... www.whirlpool.ca - Whirlpool GW399LXUQ | Owners Manual - Page 2
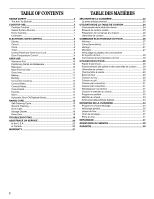
RANGE CARE 15 Self-Cleaning Cycle 15 General Cleaning 16 Oven Light 17 Storage Drawer 18 Oven Door 18 TROUBLESHOOTING 18 ASSISTANCE OR SERVICE 20 In the U.S.A 20 In Canada 29 Évent du four 29 Cuisson au four 30 Cuisson au gril 30 Cuisson par convection 31 Cuisson par convection 31 Rô - Whirlpool GW399LXUQ | Owners Manual - Page 3
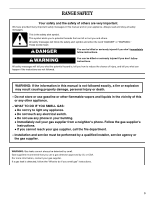
from a neighbor's phone. Follow the gas supplier's instructions. • If you cannot reach your gas supplier, call the fire department. - Installation and service must be performed by a qualified installer, service agency or the gas supplier. WARNING: Gas leaks cannot always be detected by smell - Whirlpool GW399LXUQ | Owners Manual - Page 4
-tip bracket, if the range is moved. See the installation instructions for details. Failure to follow these instructions can result in death or serious burns to children and adults. Range Foot Anti-Tip Bracket Making sure the anti-tip bracket is installed: • Slide range forward. • Look for the - Whirlpool GW399LXUQ | Owners Manual - Page 5
: TO REDUCE THE RISK OF TIPPING OF THE RANGE, THE RANGE MUST BE SECURED BY PROPERLY INSTALLED ANTI-TIP DEVICES. TO CHECK IF THE DEVICES ARE INSTALLED PROPERLY, SLIDE RANGE FORWARD, LOOK FOR ANTI-TIP BRACKET SECURELY ATTACHED TO FLOOR, AND SLIDE RANGE BACK SO REAR RANGE FOOT IS UNDER ANTI-TIP BRACKET - Whirlpool GW399LXUQ | Owners Manual - Page 6
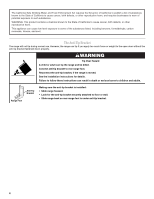
range is factory-set for use with Natural gas. If you wish to use LP gas, an LP Gas Conversion Kit is included with your new range. See the "Gas Conversions" section of the Installation Instructions models) ■ Precise simmer control REMEMBER: When range is in use or (on some models manually guide - Whirlpool GW399LXUQ | Owners Manual - Page 7
a trained repair specialist. 4. Replace the burner cap, making sure the alignment pins are properly aligned with the burner cap. A B A. Incorrect B. Correct 5. Turn on the burner. If the burner does not light, check cap alignment. If the burner still does not light, do not service the sealed burner - Whirlpool GW399LXUQ | Owners Manual - Page 8
power is supplied to the range or after a power interruption, the last clock time before power was interrupted will flash. Bake or Lock may flash rapidly in the display to alert you if there is an error or problem. Press CANCEL and reset clock if needed. When the oven is in use, the - Whirlpool GW399LXUQ | Owners Manual - Page 9
oven will be warmer by the displayed amount. Use the following chart as a guide oven temperature if there is a power failure or interruption. Temperature adjustments can be made to Bake, Convect Bake (on some models) and Convect Roast (on some models range will return to the existing setting after 30 - Whirlpool GW399LXUQ | Owners Manual - Page 10
) of space around bakeware and oven walls. Use the following chart as a guide. NUMBER OF POSITION ON RACK PAN(S) Power Failure Oven Burners Your range is equipped with pilotless ignition. With this type of ignition system, the gas automatically shuts off and the oven will not operate during a power - Whirlpool GW399LXUQ | Owners Manual - Page 11
Oven vent Baking The oven automatically regulates the heat levels and both the top and bottom burners cycle on and off accordingly during preheat and bake to maintain a precise temperature range grid (provided on some models). They are designed to or Service" section to order. Ask for Part Number - Whirlpool GW399LXUQ | Owners Manual - Page 12
Bacon well-done 4 6-10 Chicken bone-in pieces well-done 3 or 4 LO Broil 30-45 Fish Fillets flaky 4 Fish Steaks 1" (2.5 cm) thick flaky 4 8-12 10- wait for the oven to preheat, unless recommended in the recipe. A B A. Broiler grid B. Broiler pan Convect Bake (on some models) Use Convect - Whirlpool GW399LXUQ | Owners Manual - Page 13
3. While "HOLD" is still flashing press BAKE, CONVECT BAKE or CONVECT ROAST (on some models). 4. Press PRESETS 0 or the appropriate number pads to select the oven temperature. The selected function will flash. The oven temperature can be set from 170°F (75°C) to 550°F (290°C). 5. Press the selected - Whirlpool GW399LXUQ | Owners Manual - Page 14
display. Favorite WARNING Food Poisoning Hazard Do not let food sit in oven more than one hour before or after cooking. Doing so can will be displayed.) 2. Press BAKE, CONVECT BAKE (on some models) or CONVECT ROAST (on some models). The Favorite cycle will begin immediately. The selected cycle and - Whirlpool GW399LXUQ | Owners Manual - Page 15
The time of day will return to the display. RANGE CARE Self-Cleaning Cycle WARNING Prepare Cooktop and Storage models, the temperature probe from the oven. ■ Remove any foil from the oven because it may burn or melt, damaging the oven. ■ Remove oven racks to keep them shiny and easy to slide - Whirlpool GW399LXUQ | Owners Manual - Page 16
Part Number 31682 (not included): See "Assistance or Service" section to order. COOKTOP CONTROLS To avoid damage to the cooktop controls, do not use steel wool, abrasive cleansers or oven cleaner. Do not soak knobs. When replacing knobs, make sure knobs are in the Off position. On some models - Whirlpool GW399LXUQ | Owners Manual - Page 17
Appliance Cleaner Part Number 31682 (not included): See "Assistance or Service" section to order. Oven Light The oven light is a standard 40-watt appliance bulb. Before replacing, make sure the oven and cooktop are cool and the control knobs are in the off position. To Replace: 1. Unplug range or - Whirlpool GW399LXUQ | Owners Manual - Page 18
appear crooked. TROUBLESHOOTING Try the solutions suggested here first in order to avoid the cost of an unnecessary service call. Nothing will operate ■ Is the main or regulator gas shutoff valve in the off position? See Installation Instructions. WARNING ■ Is the range properly connected to - Whirlpool GW399LXUQ | Owners Manual - Page 19
the range. See the Installation Instructions. Oven will not operate ■ Is this the first time the oven has been used? Turn on any one of the surface burner knobs to release air from the gas lines. ■ Is the electronic oven control set correctly? See "Electronic Oven Control" section. ■ On some models - Whirlpool GW399LXUQ | Owners Manual - Page 20
® replacement parts in your area, call us or your nearest Whirlpool designated service center. In the U.S.A. Call the Whirlpool Customer eXperience Center toll free: 1-800-253-1301. Our consultants provide assistance with: ■ Features and specifications on our full line of appliances. ■ Installation - Whirlpool GW399LXUQ | Owners Manual - Page 21
PROVINCE. If outside the 50 United States and Canada, contact your authorized Whirlpool dealer to determine if another warranty applies. If you need service, first see the "Troubleshooting" section of the Use & Care Guide. After checking "Troubleshooting," you may find additional help by checking - Whirlpool GW399LXUQ | Owners Manual - Page 22
• Appeler immédiatement le fournisseur de gaz d'un téléphone voisin. Suivre ses instructions. • À défaut de joindre votre fournisseur de gaz, appeler les pompiers. - L'installation et l'entretien doivent être effectués par un installateur qualifié, une agence de service ou le fournisseur de gaz. 22 - Whirlpool GW399LXUQ | Owners Manual - Page 23
La bride antibasculement Dans des conditions de service normales, la cuisinière ne bascule pas. bride antibasculement si la cuisinière est déplacée. Voir détails dans les instructions d'installation. Le non-respect de ces instructions peut causer un décès ou des brûlures graves aux enfants et aux - Whirlpool GW399LXUQ | Owners Manual - Page 24
le bouton n'importe où entre HI et LO. Utiliser le tableau suivant comme guide lors du réglage des niveaux de chaleur. RÉGLAGE UTILISATION RECOMMANDÉE IMPORTANT la section "Conversions pour changement de gaz" des Instructions d'installation pour des détails sur la réalisation de cette conversion - Whirlpool GW399LXUQ | Owners Manual - Page 25
déformer les orifices. Ne pas utiliser un cure-dent en bois. Si le brûleur a besoin d'être ajusté, faire venir un technicien d'entretien qualifié. 4. Réinstaller le chapeau de brûleur et s'assurer que les tiges d'alignement sont bien alignées avec le chapeau de brûleur. A B A. Incorrect B. Correct - Whirlpool GW399LXUQ | Owners Manual - Page 26
■ Pour plus de renseignements, communiquez avec votre service local d'agriculture. Les compagnies qui fabriquent des gril. Utiliser le tableau suivant comme guide pour les caractéristiques du mat de façon uniforme. Terre cuite ■ Suivre les instructions du fabricant. ■ Utiliser des réglages de tempé - Whirlpool GW399LXUQ | Owners Manual - Page 27
A B C KJ I H G F E D A. Fonctions du four B. Afficheur du four C. Bloc numérique D. Cancel (annulation) E. Touche Presets (préréglages) F. Touche Delay (mise en marche différée) G. Lampe du four H. Minuterie I. Horloge J. Cook & Hold (cuisson et maintien au chaud) K. Autonettoyage Afficheur - Whirlpool GW399LXUQ | Owners Manual - Page 28
four sera plus chaud du nombre de degrés affiché. Utiliser le tableau suivant comme guide. AJUSTEMENT EN °F (AJUSTEMENT EN °C) CUIT LES ALIMENTS 5° à 10°F (3° faut de modification, la cuisinière revient au réglage existant après 30 secondes. 2. Appuyer sur la touche numérique PRESETS 0 pour - Whirlpool GW399LXUQ | Owners Manual - Page 29
pour la sortir du four. Se servir de l'illustration et du tableau suivants comme guide. 5 4 3 2 1 ALIMENTS POSITION(S) DE LA GRILLE Gros rôtis, dindes, en grès/Pierre de cuisson ■ Croûtes croustillantes ■ Suivre les instructions du fabricant. Plats en verre, vitrocéramique ou céramique allant - Whirlpool GW399LXUQ | Owners Manual - Page 30
les éclaboussures et la fumée. Il est possible de commander une lèchefrite. Voir la section "Assistance ou service" pour commander. Demander la pièce n° 12500100. ■ Pour un écoulement approprié, ne pas couvrir la 4 22-26 Tranche de jambon, précuite ¹ ₂" (1,25 cm) d'épaisseur 4 tiède 8-12 30 - Whirlpool GW399LXUQ | Owners Manual - Page 31
POSITION DE LA GRILLE DURÉE APPROXIMATIVE (minutes) Bacon bien cuit 4 6-10 Poulet morceaux avec os bien cuit 3 ou 4 LO Broil 30-45 Filets de poisson floconneux 4 Darnes de poisson 1" (2,5 cm) d'épaisseur floconneuses 4 8-12 10-15 *Placer jusqu'à 9 galettes, à distance égale, sur - Whirlpool GW399LXUQ | Owners Manual - Page 32
Risque d'empoisonnement alimentaire Ne pas laisser des aliments dans un four plus d'une heure avant ou après la cuisson. Le non-respect de cette instruction peut causer un empoisonnement alimentaire ou une maladie. Le programme Cook & Hold (cuisson et maintien au chaud) permet de faire cuire au four - Whirlpool GW399LXUQ | Owners Manual - Page 33
un four plus d'une heure avant ou après la cuisson. Le non-respect de cette instruction peut causer un empoisonnement alimentaire ou une maladie. IMPORTANT : Les aliments doivent être à la température de service avant d'être placés dans le four chaud. Les aliments peuvent être gardés au four jusqu - Whirlpool GW399LXUQ | Owners Manual - Page 34
toucher le four au cours du programme d'autonettoyage. Garder les enfants loin du four au cours du programme d'autonettoyage. Le non-respect de ces instructions peut causer des brûlures. ■ Essuyer toute saleté décollée afin de réduire la fumée et d'éviter les dommages. À des températures élevées - Whirlpool GW399LXUQ | Owners Manual - Page 35
Si la porte n'est pas fermée dans les 30 secondes, le programme d'autonettoyage est annulé et l' cuisson sont refroidis. Toujours suivre les instructions sur les étiquettes des produits nettoyants. non incluse) : Voir la section "Assistance ou service" pour passer une commande. ■ Détergent liquide - Whirlpool GW399LXUQ | Owners Manual - Page 36
de cuisson. Ne pas faire tremper les boutons. Lors de la réinstallation des boutons, s'assurer que chaque bouton est à la position d'arrêt ( cuisinière à gaz Pièce n° 31617B : Voir la section "Assistance ou service" pour placer une commande. BRÛLEURS DE SURFACE Voir la section "Brûleurs de - Whirlpool GW399LXUQ | Owners Manual - Page 37
enlever de la douille. 4. Remplacer l'ampoule et replacer le couvercle de l'ampoule en le tournant dans afin d'éviter le coût d'une visite de service non nécessaire. Rien ne fonctionne ■ Un fusible est-il à la position fermée? Voir les Instructions d'installation. ■ La cuisinière est-elle bien - Whirlpool GW399LXUQ | Owners Manual - Page 38
peut-être été mal convertie. Contacter un technicien de service ou voir la section "Assistance ou service". Le brûleur de surface fait des bruits re est-elle d'aplomb? Régler l'aplomb de la cuisinière. Voir les Instructions d'installation. Le four ne fonctionne pas ■ Est-ce la première fois que le - Whirlpool GW399LXUQ | Owners Manual - Page 39
conformément aux instructions jointes à ou fournies avec le produit, Whirlpool Corporation ou Whirlpool Canada LP (ci-après désignées "Whirlpool") paiera pour les limitée ne couvre pas : 1. Les visites de service pour rectifier l'installation du gros appareil ménager, montrer à l'utilisateur comment - Whirlpool GW399LXUQ | Owners Manual - Page 40
une région éloignée où un service d'entretien Whirlpool autorisé n'est pas disponible. 10. La dépose et la réinstallation de votre gros appareil si celui-ci est installé dans un endroit inaccessible ou n'est pas installé conformément aux instructions d'installation fournies. 11. Les gros appareils
-
 1
1 -
 2
2 -
 3
3 -
 4
4 -
 5
5 -
 6
6 -
 7
7 -
8
-
9
-
10
-
11
-
12
-
13
-
14
-
15
-
16
-
17
-
18
-
19
-
20
-
21
-
22
-
23
-
24
-
25
-
26
-
27
-
28
-
29
-
30
-
31
-
32
-
33
-
34
-
35
-
36
-
37
-
38
-
39
-
40
 |
 |
GAS RANGE
Use & Care Guide
For questions about features, operation/performance, parts,
accessories or service, call:
1-800-253-1301
or visit our website
at...
www.whirlpool.com
In Canada, call for assistance, installation or service, call:
1-800-807-6777
or visit our website at...
www.whirlpool.ca
CUISINIÈRE À GAZ
Guide d’utilisation
et d’entretien
Au Canada, pour assistance, installation ou service, composez le
1-800-807-6777
ou visitez notre site web à
www.whirlpool.ca
Table of Contents/Table des matières
..................
2
8113P679-60
®