Whirlpool LTE5243DQ Owners Manual
Whirlpool LTE5243DQ - Stack Washer Electric Dryer Manual
 |
UPC - 050946532578
View all Whirlpool LTE5243DQ manuals
Add to My Manuals
Save this manual to your list of manuals |
Whirlpool LTE5243DQ manual content summary:
- Whirlpool LTE5243DQ | Owners Manual - Page 1
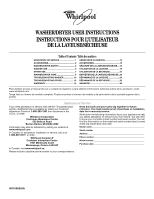
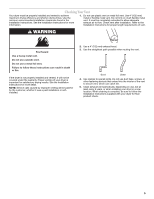
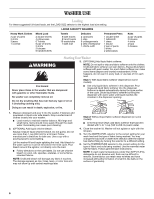
® WASHER/DRYER USER INSTRUCTIONS INSTRUCTIONS POUR L'UTILISATEUR DE LA LAVEUSE/SÉCHEUSE Table of Contents / Table des matières ASSISTANCE OR SERVICE 1 ACCESSORIES 2 WASHER/DRYER SAFETY 2 WASHER USE 6 DRYER USE 7 WASHER/DRYER CARE 8 TROUBLESHOOTING WASHER 10 TROUBLESHOOTING DRYER 12 - Whirlpool LTE5243DQ | Owners Manual - Page 2
90° elbow, hypro-blue steel couplings. (2-pack) 8212614 Dryer vent lint brush 8212545RP 5 ft (1.5 m) Inlet hose, Red and Blue EPDM. (2-pack) 3404351 Drying rack - fits 29" (737 mm) Super Capacity, 6.5 cu. ft (0.18 cu. m) side swing or hamper door 8212641RP 5 ft (1.5 m) Inlet hose, Black EPDM - Whirlpool LTE5243DQ | Owners Manual - Page 3
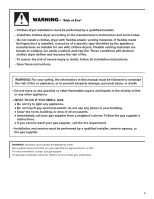
any electrical switch; do not use any phone in your building. • Clear the room, building, or area of all occupants. • Immediately call your gas supplier from a neighbor's phone. Follow the gas supplier's instructions. • If you cannot reach your gas supplier, call the fire department. - Installation - Whirlpool LTE5243DQ | Owners Manual - Page 4
As the gas is flammable, do not smoke or use an open flame during this time. ■ Do not repair or replace any part of the washer/dryer or attempt any servicing unless specifically recommended in this Use and Care Guide or in published user-repair instructions that you understand and have the skills to - Whirlpool LTE5243DQ | Owners Manual - Page 5
interior of the vent to secure vent, which can catch lint. 5. Clean exhaust vent periodically, depending on use, but at least every 2 years, or when installing your dryer in a new location. When cleaning is complete, be sure to follow the Installation Instructions supplied with your dryer for final - Whirlpool LTE5243DQ | Owners Manual - Page 6
1 cup (250 mL) for a full load. Follow manufacturer's directions for safe use. Use a cup with a pouring spout to avoid spilling. Let the washer fill and begin agitating the load. Add bleach to the wash cycle so it can be removed in the rinse cycle. Pour bleach around the agitator, not directly onto - Whirlpool LTE5243DQ | Owners Manual - Page 7
, or plastic must be dried on a clothesline or by using an Air Cycle. Failure to follow these instructions can result in death or fire. Before using your dryer, wipe the dryer drum with a damp cloth to remove dust from storing and shipping. 1. Clean lint screen before each load. See "Cleaning the - Whirlpool LTE5243DQ | Owners Manual - Page 8
of Factory Specified Parts. A list of factory specified hoses available for separate purchase are listed on the first page of this user instructions. These hoses are manufactured and tested to meet Whirlpool Corporation's specifications. Replace water inlet hoses after 5 years of use to reduce the - Whirlpool LTE5243DQ | Owners Manual - Page 9
the washer lid and dryer door. Reinstalling your washer/dryer 1. Follow the "Installation Instructions" to locate, level, and connect the washer/dryer. 2. Run the washer through a complete cycle with 1 scoop or capful of detergent to clean the washer and remove the antifreeze, if used. Electrical - Whirlpool LTE5243DQ | Owners Manual - Page 10
holes. ■ Did you completely remove the yellow shipping strap with cotter pins? See the Installation Instructions. ■ Are the gears engaging after the drain and before spin, or is the upper part of agitator clicking during wash? These are normal washer noises. ■ Is the washer gurgling or humming? When - Whirlpool LTE5243DQ | Owners Manual - Page 11
Installation Instructions. ■ Is the lid open? The lid must be closed during operation. Washer will not agitate or spin with the lid open. ■ Is there excessive sudsing? Always measure detergent. Follow manufacturer's directions. If you have very soft water, you might need to use less detergent. Wash - Whirlpool LTE5243DQ | Owners Manual - Page 12
■ Was a regular fuse used? Use a time-delay fuse. ■ Is the dryer door firmly closed? ■ Was the PUSH TO START dryer button firmly pressed? No heat ■ Has a household fuse blown, or has a circuit breaker tripped? The drum may be turning, but you may not have heat. Electric dryers use 2 fuses or circuit - Whirlpool LTE5243DQ | Owners Manual - Page 13
in the area where your dryer is located? If so, ventilate the area. When the odors or fumes are gone from the area, rewash and dry the clothing. ■ Is the electric dryer being used for the first time? The new electric heating element may have an odor. The odor will be gone after the first cycle. 13 - Whirlpool LTE5243DQ | Owners Manual - Page 14
servicer is not available. 9. The removal and reinstallation of your major appliance if it is installed in an inaccessible location or is not installed in accordance with Whirlpool's published installation instructions. 10. Replacement parts or repair labor on major appliances with original model - Whirlpool LTE5243DQ | Owners Manual - Page 15
être obtenues en visitant notre site web www.whirlpool.ca. Conservez ce manuel et votre reçu de vente ensemble pour référence ultérieure. Pour le service sous garantie, vous devez présenter un document prouvant la date d'achat ou d'installation. Inscrivez les renseignements suivants au sujet de - Whirlpool LTE5243DQ | Owners Manual - Page 16
: DANGER Risque possible de décès ou de blessure grave si vous ne suivez pas immédiatement les instructions. AVERTISSEMENT Risque possible de décès ou de blessure grave si vous ne suivez pas les instructions. Tous les messages de sécurité vous diront quel est le danger potentiel et vous disent - Whirlpool LTE5243DQ | Owners Manual - Page 17
gaz (homologation UL ou CSA). Pour d'autre information, contacter le fournisseur de gaz local. En cas de détection d'une fuite de gaz, exécuter les instructions "Que faire dans le cas d'une odeur de gaz". 17 - Whirlpool LTE5243DQ | Owners Manual - Page 18
lorsque le tambour, la cuve ou l'agitateur est en mouvement. ■ Ne pas installer ou remiser cette laveuse/sécheuse à un endroit où elle serait exposée aux intempé une opération de service, si ce n'est spécifiquement recommandé dans ce manuel ou dans un manuel d'instructions de réparations destiné - Whirlpool LTE5243DQ | Owners Manual - Page 19
la garantie. Pour obtenir les meilleurs résultats de séchage, l'évacuation de l'air doit être adéquate. Voir les Instructions d'installation pour plus de renseignements. REMARQUE : Les visites de service causées par une évacuation inadéquate seront aux frais du client peu importe s'il a fait faire - Whirlpool LTE5243DQ | Owners Manual - Page 20
é pour le type de tissu et le niveau de saleté de la charge. Utiliser l'eau la plus chaude sans danger pour le tissu. Suivre les instructions sur l'étiquette des vêtements. REMARQUE : Dans les températures d'eau de lavage inférieures à 60ºF (15,6ºC), les détergents ne se diluent pas bien. Les salet - Whirlpool LTE5243DQ | Owners Manual - Page 21
produit inflammable (même après un lavage). Le non-respect de ces instructions peut causer un décès, une explosion ou un incendie. Risque d'incendie sécheuse peut être munie d'un signal de fin de programme (END OF CYCLE SIGNAL). Le signal est utile lorsque vous faites sécher des articles qui doivent - Whirlpool LTE5243DQ | Owners Manual - Page 22
re page de ces instructions pour l'utilisateur. Ces tuyaux sont fabriqués et testés afin de répondre aux spécifications de Whirlpool Corporation. Remplacer les Lorsque vous remplacez vos tuyaux d'arrivée d'eau, noter la date de remplacement au marqueur indélébile sur l'étiquette. Nettoyage du filtre - Whirlpool LTE5243DQ | Owners Manual - Page 23
ruban adhésif de masquage pour fixer le couvercle de la laveuse et la porte de la sécheuse. Réinstallation de la laveuse/sécheuse 1. Suivre les "Instructions d'installation" pour choisir l'emplacement, régler l'aplomb de la laveuse/sécheuse et la raccorder. 2. Faire faire un programme complet à la - Whirlpool LTE5243DQ | Owners Manual - Page 24
éviter le coût d'un appel de service...www.whirlpool.ca La laveuse et ses composants Bruit, Instructions d'installation". ■ Le tuyau de vidange est-il correctement installé? Le tuyau de vidange doit être bien fixé au conduit d'évacuation ou à l'évier de buanderie. Voir "Instructions d'installation - Whirlpool LTE5243DQ | Owners Manual - Page 25
dessus du tuyau de vidange doit être au moins à 39" (990 mm) au-dessus du plancher. Voir les Instructions d'installation. ■ Le tuyau de vidange est-il trop serré dans le conduit d'évacuation, ou est-il fixé au conduit d'évacuation avec du ruban adhésif? Le tuyau de vidange doit être lâche mais bien - Whirlpool LTE5243DQ | Owners Manual - Page 26
(Foire aux questions) afin d'éviter le coût d'un appel de service... www.whirlpool.ca Fonctionnement de la sécheuse La sécheuse ne fonctionne pas ■ ? La sécheuse peut vibrer si elle n'est pas correctement installée. Voir les Instructions d'installation. ■ Les vêtements sont-ils emmêlés ou en boule? - Whirlpool LTE5243DQ | Owners Manual - Page 27
pas trop long ou ne comporte pas trop de changements de direction. Un long conduit augmentera les durées de séchage. Voir les Instructions d'installation. ■ Le diamètre du conduit d'évacuation a-t-il la taille correcte? Utiliser un composant de 4" (102 mm) de diamètre. AVERTISSEMENT ■ La sécheuse - Whirlpool LTE5243DQ | Owners Manual - Page 28
éloignée où un service d'entretien Whirlpool autorisé n'est pas disponible. 9. La dépose et la réinstallation de votre gros appareil ménager si celui-ci est installé dans un endroit inaccessible ou n'est pas installé conformément aux instructions d'installation fournies par Whirlpool. 10. Les pi
-
 1
1 -
 2
2 -
 3
3 -
 4
4 -
 5
5 -
 6
6 -
 7
7 -
8
-
9
-
10
-
11
-
12
-
13
-
14
-
15
-
16
-
17
-
18
-
19
-
20
-
21
-
22
-
23
-
24
-
25
-
26
-
27
-
28
 |
 |
W10196553A
®
WASHER/DRYER USER INSTRUCTIONS
INSTRUCTIONS POUR L’UTILISATEUR
DE LA LAVEUSE/SÉCHEUSE
Table of Contents / Table des matières
ASSISTANCE OR SERVICE
............................
1
ACCESSORIES
.................................................
2
WASHER/DRYER SAFETY
..............................
2
WASHER USE
..................................................
6
DRYER USE
......................................................
7
WASHER/DRYER CARE
.................................
8
TROUBLESHOOTING WASHER
...................
10
TROUBLESHOOTING DRYER
......................
12
WARRANTY
....................................................
14
ASSISTANCE OU SERVICE
...........................
15
ACCESSOIRES
...............................................
15
SÉCURITÉ DE LA LAVEUSE/SÉCHEUSE
....
16
UTILISATION DE LA LAVEUSE
.....................
19
UTILISATION DE LA SÉCHEUSE
..................
21
ENTRETIEN DE LA LAVEUSE/SÉCHEUSE..22
DÉPANNAGE DE LA LAVEUSE
.....................
24
DÉPANNAGE DE LA SÉCHEUSE
..................
26
GARANTIE
.......................................................
28
Para obtener acceso al manual de uso y cuidado en español, o para obtener información adicional acerca de su producto, visite:
www.whirlpool.com
Tenga listo su número de modelo completo. Puede encontrar el número de modelo y de serie dentro de la cavidad superior de la
puerta.
Assistance or Service
If you need assistance or service, first see the “Troubleshooting”
section. Additional help is available by calling our Customer
eXperience Center at
1-800-253-1301
from anywhere in the
U.S.A., or write:
Whirlpool Corporation
Customer eXperience Center
553 Benson Road
Benton Harbor, MI 49022-2692
Information may also be obtained by visiting our website at
www.whirlpool.com
.
In Canada, for assistance, installation or service, call us at
1-800-807-6777
, or write:
Whirlpool Canada LP
Customer Interaction Centre
1901 Minnesota Court
Mississauga, Ontario L5N 3A7
In Canada, visit
www.whirlpool.ca
.
Please include a daytime phone number in your correspondence.
Keep this book and your sales slip together for future
reference. You must provide proof of purchase or installation
date for in-warranty service.
Write down the following information about your appliance to help
you obtain assistance or service if you ever need it. You will need
to know your complete model number and serial number. You can
find this information on the model and serial number label, located
at the top inside dryer door well.
Dealer name____________________________________________________
Serial number
__________________________________________________
Address ________________________________________________________
Phone number__________________________________________________
Model number __________________________________________________
Purchase date __________________________________________________