Whirlpool MED6400T Use and Care Manual
Whirlpool MED6400T Manual
 |
View all Whirlpool MED6400T manuals
Add to My Manuals
Save this manual to your list of manuals |
Whirlpool MED6400T manual content summary:
- Whirlpool MED6400T | Use and Care Manual - Page 1
CARE GUIDE SÉCHEUSE ÉLECTRIQUE GUIDE D'UTILISATION ET D'ENTRETIEN FOR QUESTIONS ABOUT FEATURES, OPERATION/PERFORMANCE, PARTS, ACCESSORIES OR SERVICE CALL: , INSTALLATION OU SERVICE, COMPOSEZ LE : 1.800.807.6777 OU VISITEZ NOTRE SITE INTERNET WWW.MAYTAG.CA PARA OBTENER ACCESO AL MANUAL DE USO Y - Whirlpool MED6400T | Use and Care Manual - Page 2
Lint 26 Vacation and Moving Care 27 Changing the Drum Light 27 TROUBLESHOOTING...27 ASSISTANCE OR SERVICE...30 ACCESSORIES ...30 WARRANTY ...31 TABLE DES MATIÈRES SÉCURITÉ DE LA SÉCHEUSE 32 INSTRUCTIONS D'INSTALLATION 33 Outillage et pièces ...33 Exigences d'emplacement 34 Spécifications - Whirlpool MED6400T | Use and Care Manual - Page 3
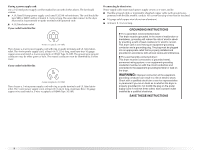
important. We have provided many important safety messages in this manual and on your appliance. Always read and obey all safety of the dryer or attempt any servicing unless specifically recommended in this Use and Care Guide or in published user-repair instructions that you understand and have the - Whirlpool MED6400T | Use and Care Manual - Page 4
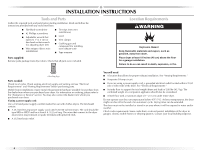
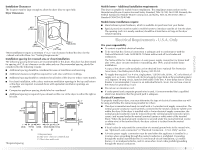
starting installation. Read and follow the instructions provided with any tools listed here ordering, please refer to the "Assistance or Service" section. You may also contact the dealer dryer. See "Electrical Requirements." ■ A sturdy floor to support the total weight (dryer and load) of 200 lbs - Whirlpool MED6400T | Use and Care Manual - Page 5
: ■ Additional spacing should be considered for ease of installation and servicing. ■ Additional clearances might be required for wall, door and floor the type of electrical connection you will be using and follow the instructions provided for it here. ■ This dryer is manufactured ready to install - Whirlpool MED6400T | Use and Care Manual - Page 6
(do not use aluminum). ■ At least 5 ft (1.52 m) long. GROUNDING INSTRUCTIONS ■ For a grounded, cord-connected dryer: This dryer must be grounded. In the in a risk of electric shock. Check with a qualified electrician or service representative or personnel if you are in doubt as to whether the dryer - Whirlpool MED6400T | Use and Care Manual - Page 7
. Be sure wall receptacle is within reach of dryer's final location. GROUNDING INSTRUCTIONS ■ For a grounded, cord-connected dryer: This dryer must be grounded. In a risk of electric shock. Check with a qualified electrician or service representative or personnel if you are in doubt as to whether - Whirlpool MED6400T | Use and Care Manual - Page 8
Power Supply Cord Electrical Connection - U.S.A. Only Direct Wire WARNING WARNING Fire Hazard Use a new UL listed 30 amp power supply cord. Use a UL listed strain relief. Disconnect power before making electrical connections. Connect neutral wire (white or center wire) to center terminal (silver - Whirlpool MED6400T | Use and Care Manual - Page 9
relief threads. A B C A. Removable conduit connector B. Hole below terminal block opening C. Strain relief threads 4. Now complete installation following instructions for your type of electrical connection: 4-wire (recommended) 3-wire (if 4-wire is not available) Electrical Connection Options If - Whirlpool MED6400T | Use and Care Manual - Page 10
4-wire connection: Power Supply Cord IMPORTANT: A 4-wire connection is required for mobile homes and where local codes do not permit the use of 3-wire connections. B F A 3. Connect ground wire (green or bare) of power supply cord to external ground conductor screw. Tighten screw. A B C CD - Whirlpool MED6400T | Use and Care Manual - Page 11
Strip 5" (12.7 cm) of outer covering from end of cable, leaving bare ground wire at 5" (12.7 cm). Cut 1¹⁄₂" (3.8 cm) from 3 remaining wires. Strip insulation back 1" (2.5 cm). Shape ends of wires into a hook shape. 1" (2.5 cm) 3. Connect ground wire (green or bare) of power supply cable to - Whirlpool MED6400T | Use and Care Manual - Page 12
3-wire connection: Power Supply Cord Use where local codes permit connecting cabinet-ground conductor to neutral wire: B D E A C GF A. 3-wire receptacle (NEMA type 10-30R) B. 3-wire plug C. Neutral prong D. Spade terminals with up turned ends E 1.9 cm) UL listed strain relief F. Ring - Whirlpool MED6400T | Use and Care Manual - Page 13
2. Place the hooked end of the neutral wire (white or center wire) of power supply cable under the center screw of terminal block (hook facing right). Squeeze hooked end together. Tighten screw. B C 2. Remove neutral ground wire from external ground conductor screw. Connect neutral ground wire - Whirlpool MED6400T | Use and Care Manual - Page 14
metal foil vent. Failure to follow these instructions can result in death or fire. WARNING: or flexible heavy metal vent. ■ Review Vent system chart. Modify existing vent Maytag Services. For more information, see the "Assistance or Service" be fully extended and supported when the dryer is in - Whirlpool MED6400T | Use and Care Manual - Page 15
latch. Improper venting can cause moisture and lint to collect indoors, which may result in: Moisture damage to woodwork, furniture, paint, wallpaper, carpets, etc. Housecleaning problems and health problems. 15 - Whirlpool MED6400T | Use and Care Manual - Page 16
. Two closeclearance installations are shown. Refer to the manufacturer's instructions. A B C A. Over-the-top installation (also available alternate installations are available for purchase. Please see the "Assistance or Service" section to order. ■ Over-the-Top Installation: Part Number - Whirlpool MED6400T | Use and Care Manual - Page 17
Install Leveling Legs WARNING Excessive Weight Hazard Use two or more people to move and install dryer. Failure to do so can result in back or other injury. 1. To protect the floor, use a large, flat piece of cardboard from the dryer carton. Place cardboard under the entire back edge of the dryer. - Whirlpool MED6400T | Use and Care Manual - Page 18
Reverse Door Swing You can change your door swing from a right-side opening to a left-side opening, if desired. 1. Place a towel or soft cloth on top of the dryer or work space to protect the surface. Remove the door assembly 1. Open the dryer door. 2. Remove the bottom screw from each of the 2 - Whirlpool MED6400T | Use and Care Manual - Page 19
runs an installation diagnostic routine at the start of its first cycle. If you receive an "L2" code, there may be a problem with your home power supply keeping the dryer's heater from turning on. See "Troubleshooting." If you receive an "AF" code, your dryer vent may be crushed or blocked. See - Whirlpool MED6400T | Use and Care Manual - Page 20
death or fire. WARNING: To reduce the risk of fire, electric shock, or injury to persons, read the IMPORTANT SAFETY INSTRUCTIONS before operating this appliance. This manual covers several different models. Your dryer may not have all of the cycles and features described. Follow these basic steps - Whirlpool MED6400T | Use and Care Manual - Page 21
■ Turn the knob to desired Sensor Dry Cycle. ■ Select DRYNESS to adjust how dry you want the load. As the cycle runs, the control senses the dryness of the load and adjusts the time automatically for the selected dryness level. The default dryness setting is Normal when a Sensor Dry Cycle is - Whirlpool MED6400T | Use and Care Manual - Page 22
available. ■ If desired, add a fabric softener sheet. Follow package instructions. ■ To reduce wrinkling, remove the load from the dryer as or Timed Preset Cycle Settings chart (in the "Cycles" section) for a guide to drying various loads. ■ Drying temperature and dryness level are preset when you - Whirlpool MED6400T | Use and Care Manual - Page 23
Sensor Dry Preset Cycle Settings Sensor Dry Cycles Load Type HEAVY DUTY Heavyweight mixed loads, cottons, jeans NORMAL Corduroys, work clothes, sheets WRINKLE CONTROL Business casual clothes, permanent press, synthetics DELICATE Lingerie, blouses, washable knit fabrics Temperature High Medium Low - Whirlpool MED6400T | Use and Care Manual - Page 24
When using Air Fluff ■ Check that coverings are securely stitched. ■ Shake and fluff pillows by hand periodically during the cycle. ■ Dry item completely. Foam rubber pillows are slow to dry. NOTE: Air Fluff is not available with Sensor Dry Cycles. Options You can customize your cycles by selecting - Whirlpool MED6400T | Use and Care Manual - Page 25
your model. To find out whether your model allows drying rack usage and for information on ordering, please refer to the front page of the manual or contact the dealer from whom you purchased your dryer. NOTE: The drying rack must be removed for normal tumbling. Do not use the automatic - Whirlpool MED6400T | Use and Care Manual - Page 26
This chart shows examples of items that can be rack dried and the suggested cycle, temperature setting and drying time. Actual drying time will depend on the amount of moisture items hold. Rack Dry Setting Temp. Time* Wool Sweaters Timed Dry Low 60 Block to shape and lay flat on the drying - Whirlpool MED6400T | Use and Care Manual - Page 27
4. Plug in dryer or reconnect power. TROUBLESHOOTING First try the solutions suggested here or visit Asked Questions) to possibly avoid the cost of a service call... In U.S.A. www.maytag.com/help - In fuse or reset the circuit breaker. If the problem continues, call an electrician. ■ Is the correct - Whirlpool MED6400T | Use and Care Manual - Page 28
side? The dryer may vibrate if not properly installed. See the Installation Instructions. ■ Is the clothing knotted or balled up? When balled up, etc.) service codes: Call for service. ■ "L2" Diagnostic Code (low or no line voltage condition): The drum will turn, but there may be a problem with your - Whirlpool MED6400T | Use and Care Manual - Page 29
of the dryer requires 5" (12.7 cm) of airspace, and the sides and front of the dryer require a minimum of 1" (2.5 cm). See the Installation Instructions. ■ Has the Air Fluff modifier been selected? Select the right temperature for the types of garments being dried. See "Modifiers." ■ Is the load too - Whirlpool MED6400T | Use and Care Manual - Page 30
or service, please check "Troubleshooting." It may save you the cost of a service call. If you still need help, follow the instructions below include a daytime phone number in your correspondence. In Canada Call the Whirlpool Canada LP Customer Interaction Centre toll free: 1-800-807-6777, or visti - Whirlpool MED6400T | Use and Care Manual - Page 31
or is not installed in accordance with published installation instructions. 11. Replacement parts or repair labor costs when service, first see the "Troubleshooting" section of the Use & Care Guide. After checking "Troubleshooting," additional help can be found by checking the "Assistance or Service - Whirlpool MED6400T | Use and Care Manual - Page 32
: DANGER Risque possible de décès ou de blessure grave si vous ne suivez pas immédiatement les instructions. AVERTISSEMENT Risque possible de décès ou de blessure grave si vous ne suivez pas les instructions. Tous les messages de sécurité vous diront quel est le danger potentiel et vous disent - Whirlpool MED6400T | Use and Care Manual - Page 33
la sécheuse est utilisée près d'eux. ■ Avant d'enlever la sécheuse du service ou la jeter, enlever la porte du compartiment de séchage. ■ Ne pas mettre d'une recommandation spécifique dans le guide d'utlilisation et d'entretien, ou publiée dans les instructions de réparation par l'utilisateur que - Whirlpool MED6400T | Use and Care Manual - Page 34
pour une installation dans un garage. Le non-respect de ces instructions peut causer un décès, une explosion ou un incendie. Il vous de la sécheuse. Voir "Spécifications électriques". ■ Un plancher robuste capable de supporter un poids total (sécheuse et charge) de 200 lb (90,7 kg). Le poids combin - Whirlpool MED6400T | Use and Care Manual - Page 35
d'alimentation de rechange numéro de pièce 3394208. Pour plus d'information, veuillez consulter les numéros de service qui se trouvent à la section "Assistance ou service". INSTRUCTIONS DE LIAISON À LA TERRE ■ Pour une sécheuse reliée à la terre et connectée par un cordon : Cette sécheuse doit - Whirlpool MED6400T | Use and Care Manual - Page 36
un conduit d'évacuation en feuille de métal. Le non-respect de ces instructions peut causer un décès ou un incendie. AVERTISSEMENT : Pour réduire le marchand ou en téléphonant à Maytag Services. Pour plus de renseignements, voir la section "Assistance ou service". Conduit métallique rigide ■ Pour un - Whirlpool MED6400T | Use and Care Manual - Page 37
Brides de serrage ■ Utiliser des brides pour sceller tous les joints. ■ Le conduit d'évacuation ne doit pas être connecté ou fixé avec des vis ou avec tout autre dispositif de serrage qui se prolonge à l'intérieur du conduit. Ne pas utiliser de ruban adhésif pour conduit. Bride de serrage Évacuation - Whirlpool MED6400T | Use and Care Manual - Page 38
. Deux installations à dégagement réduit sont illustrées. Voir les instructions du fabricant. A B C A. Installation au-dessus de la sécheuse où le dégagement est réduit. Veuillez consulter la section "Assistance ou service" pour commander. ■ Installation au-dessus de la sécheuse : Pièce - Whirlpool MED6400T | Use and Care Manual - Page 39
pieds de nivellement AVERTISSEMENT Risque du poids excessif Utiliser deux ou plus de personnes pour déplacer et installer la sécheuse. Le non-respect de cette instruction peut causer une blessure au dos ou d'autre blessure. 1. Pour protéger le plancher, utiliser une grande pièce de carton de la bo - Whirlpool MED6400T | Use and Care Manual - Page 40
Inversion du sens d'ouverture de la porte Le sens d'ouverture de la porte peut être changé du côté droit au côté gauche, si désiré. 1. Placer une serviette ou un linge doux sur le dessus de la sécheuse ou du plan de travail pour protéger la surface. 5. Retirer les quatre chevilles de plastique - Whirlpool MED6400T | Use and Care Manual - Page 41
Réinstallation de la porte 1. Retirer les quatre vis et les deux charnières de la porte de la sécheuse. 2. Replacer les quatre vis dans les mêmes trous. 3. Retirer les quatre vis du côté opposé de la porte. 5. Installer les vis dans les trous supérieurs de la porte destinés à la pose des charnières - Whirlpool MED6400T | Use and Care Manual - Page 42
Achever l'installation 1. Vérifier que toutes les pièces sont maintenant installées. S'il reste une pièce, passer en revue les différentes étapes pour découvrir laquelle aurait été oubliée. 2. Vérifier la présence de tous les outils. 3. Jeter ou recycler tous les matériaux d'emballage. 4. Vérifier - Whirlpool MED6400T | Use and Care Manual - Page 43
la sécheuse. Ne pas faire sécher un article qui a déjà été touché par un produit inflammable (même après un lavage). Le non-respect de ces instructions peut causer un décès, une explosion ou un incendie. Risque d'incendie Aucune laveuse ne peut complètement enlever l'huile. Ne pas faire sécher des - Whirlpool MED6400T | Use and Care Manual - Page 44
4. Tourner le bouton au programme sélectionné. Les préréglages pour les programmes automatiques ou minutés s'allument. La durée estimée (programme automatique) ou réelle (programme minuté) du programme apparaît (en minutes) sur l'afficheur. REMARQUE : Une durée par défaut est affichée lorsqu'un - Whirlpool MED6400T | Use and Care Manual - Page 45
désiré, ajouter une feuille d'assouplissant de tissu. Suivre les instructions figurant sur l'emballage. ■ Pour réduire le froissement, enlever préréglages des programmes automatiques ou minutés (à la section "Programmes") pour un guide de séchage de charges diverses. ■ La température de séchage et - Whirlpool MED6400T | Use and Care Manual - Page 46
la température recommandée. Un capteur détecte l'humidité de la charge et règle automatiquement la durée pour un séchage optimal. Heavy Duty (service intense) Utiliser ce programme pour le séchage à température élevée des charges mixtes lourdes, des articles en coton et des jeans. Normal Utiliser - Whirlpool MED6400T | Use and Care Manual - Page 47
Modificateurs Modificateurs des programmes de séchage par détection Utiliser le modificateur de degré de séchage pour sélectionner les degrés de séchage des programmes de séchage par détection. Appuyer sur Dryness jusqu'à ce que le réglage de degré de séchage désiré s'allume. Le réglage de séchage - Whirlpool MED6400T | Use and Care Manual - Page 48
■ Appuyer sur le réglage Wrinkle Prevent pour obtenir jusqu'à 120 minutes de culbutage périodique sans chaleur à la fin d'un programme. ■ Arrêter le réglage Wrinkle Prevent à tout moment en appuyant sur WRINKLE PREVENT ou en ouvrant la porte de la sécheuse. ■ Pour le programme Wrinkle Control ( - Whirlpool MED6400T | Use and Care Manual - Page 49
Option de grille de séchage Utiliser la grille de séchage pour faire sécher sans culbutage des articles tels que chandails et oreillers. Le tambour tourne, mais la grille de séchage ne bouge pas. REMARQUE : Ne pas laisser un article pendre par-dessus le bord de la grille de séchage. Si votre modè - Whirlpool MED6400T | Use and Care Manual - Page 50
. Placer la sécheuse au moins 46 cm (18 po) au-dessus du plancher pour une installation dans un garage. Le non-respect de ces instructions peut causer un décès, une explosion ou un incendie. Nettoyage du filtre à charpie Nettoyer le filtre à charpie avant chaque charge. Un filtre obstrué de charpie - Whirlpool MED6400T | Use and Care Manual - Page 51
Retrait de la charpie accumulée De l'intérieur de la caisse de la sécheuse Retirer la charpie tous les 2 ans, ou plus souvent, selon l'utilisation de la sécheuse. Le nettoyage doit être effectué par une personne qualifiée. Du conduit d'évacuation Retirer la charpie tous les 2 ans, ou plus souvent, - Whirlpool MED6400T | Use and Care Manual - Page 52
aux questions), pour éventuellement éviter le coût d'une visite de service...www.maytag.ca Fonctionnement de la sécheuse Le sécheuse ne fonctionne pas sécheuse peut vibrer si elle n'est pas correctement installée. Voir les Instructions d'installation. ■ Les vêtements sont-ils emmêlés ou en boule? - Whirlpool MED6400T | Use and Care Manual - Page 53
sécheuse. Placer la sécheuse au moins 46 cm (18 po) au-dessus du plancher pour une installation dans un garage. Le non-respect de ces instructions peut causer un décès, une explosion ou un incendie. ■ La sécheuse se trouve-t-elle dans une pièce où la température ambiante est inférieure à 45 - Whirlpool MED6400T | Use and Care Manual - Page 54
service, consulter la section "Dépannage". Ce guide peut vous faire économiser le coût d'une visite de service. Si vous avez encore besoin d'aide, suivre les instructions avec la clientèle de Whirlpool Canada LP au : 1-800-807-6777 ou visitez notre site Web www.whirlpool.ca. Nos consultants vous - Whirlpool MED6400T | Use and Care Manual - Page 55
est installé dans un endroit inaccessible ou n'est pas installé conformément aux instructions d'installation fournies. 11. Le coût des pièces de rechange et de garantie s'applique. Si vous avez besoin de service, voir d'abord la section "Dépannage" du Guide d'utilisation et d'entretien. Après avoir - Whirlpool MED6400T | Use and Care Manual - Page 56
W10150622A SP PN W10150623A © 2007 All rights reserved. Tous droits réservés. MAYTAG and the "M" Symbol are registered trademarks of Maytag Limited in Canada. MAYTAG et le symbole "M" sont des marques déposées de Maytag Limited au Canada. All other marks are trademarks of Maytag Corporation. Toutes
-
 1
1 -
 2
2 -
 3
3 -
 4
4 -
 5
5 -
 6
6 -
 7
7 -
8
-
9
-
10
-
11
-
12
-
13
-
14
-
15
-
16
-
17
-
18
-
19
-
20
-
21
-
22
-
23
-
24
-
25
-
26
-
27
-
28
-
29
-
30
-
31
-
32
-
33
-
34
-
35
-
36
-
37
-
38
-
39
-
40
-
41
-
42
-
43
-
44
-
45
-
46
-
47
-
48
-
49
-
50
-
51
-
52
-
53
-
54
-
55
-
56
 |
 |
ELECTRIC DRYER
USE & CARE GUIDE
SÉCHEUSE ÉLECTRIQUE
GUIDE D’UTILISATION ET D’ENTRETIEN
FOR QUESTIONS ABOUT FEATURES, OPERATION/PERFORMANCE, PARTS, ACCESSORIES OR SERVICE
CALL: 1.800.688.9900
IN CANADA, CALL: 1.800.807.6777
AU CANADA, POUR ASSISTANCE, INSTALLATION OU SERVICE, COMPOSEZ LE : 1.800.807.6777
VISIT OUR WEBSITE AT WWW.MAYTAG.COM
IN CANADA, WWW.MAYTAG.CA
OU VISITEZ NOTRE SITE INTERNET
WWW.MAYTAG.CA
PARA OBTENER ACCESO AL MANUAL DE USO Y CUIDADO EN ESPAÑOL, O PARA OBTENER INFORMACIÓN ADICIONAL ACERCA DE SU PRODUCTO, VISITE: WWW.MAYTAG.COM.
TENGA LISTO SU NÚMERO DE MODELO COMPLETO. PUEDE ENCONTRAR EL NÚMERO DE MODELO Y DE SERIE DENTRO DE LA CAVIDAD SUPERIOR DE LA PUERTA.
W10150622A