Whirlpool RF111PXSQ Owners Manual
Whirlpool RF111PXSQ Manual
 |
UPC - 883049013145
View all Whirlpool RF111PXSQ manuals
Add to My Manuals
Save this manual to your list of manuals |
Whirlpool RF111PXSQ manual content summary:
- Whirlpool RF111PXSQ | Owners Manual - Page 1
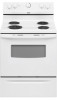
® ELECTRIC RANGE USER INSTRUCTIONS THANK YOU for purchasing this high-quality product. If you should experience a problem not covered in TROUBLESHOOTING, please visit our website at www.whirlpool.com for additional information. If you still need assistance, call us at 1-800-253-1301. You will - Whirlpool RF111PXSQ | Owners Manual - Page 2
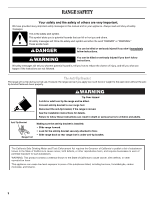
RANGE SAFETY Your safety and the safety of others are very important. We have provided many important safety messages in this manual and on what can happen if the instructions are not followed. The Anti-Tip Bracket The range will not tip during normal use. However, the range can tip if you apply - Whirlpool RF111PXSQ | Owners Manual - Page 3
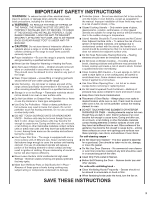
bowls or oven bottoms, except as suggested in the manual. Improper installation of these liners may result in a risk of electric shock, or fire. ■ Glazed Cooking Utensils - Only certain types of glass, glass/ceramic, ceramic, earthenware, or other glazed utensils are suitable for range-top service - Whirlpool RF111PXSQ | Owners Manual - Page 4
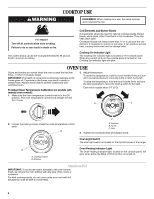
is uneven or too large, it can produce excess heat, causing the burner bowl to change color. Cooktop On Indicator Light The Cooktop On indicator light is Oven Temperature Calibration (on models with manual oven control): 1. Make sure the oven temperature control knob is in the Off position. Pull oven - Whirlpool RF111PXSQ | Owners Manual - Page 5
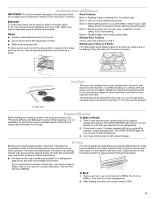
front edge, and then lift out. Use the following illustration and charts as a guide. Baking Layer Cakes on 2 Racks For best results when baking cakes on 2 to the cover for contact information. Ask for Part Number 4396923. To Broil: 1. Push in and turn oven control knob to BROIL HI or turn to BROIL - Whirlpool RF111PXSQ | Owners Manual - Page 6
RANGE CARE General Cleaning IMPORTANT: Before cleaning, make sure all controls are off and the oven and cooktop are cool. Always follow label instructions on cleaning products. For additional information, you can visit the Frequently Asked Questions (FAQs) section of our website at www.whirlpool. - Whirlpool RF111PXSQ | Owners Manual - Page 7
then bulb cover by turning clockwise. 5. Plug in range or reconnect power. TROUBLESHOOTING First try the solutions suggested here or visit our website and reference FAQs (Frequently Asked Questions) to possibly avoid the cost of a service call. www.whirlpool.com Nothing will operate ■ Is the power - Whirlpool RF111PXSQ | Owners Manual - Page 8
to instructions attached to or furnished with the product, Whirlpool Corporation or Whirlpool Canada LP (hereafter "Whirlpool") will pay for Factory Specified Parts and repair labor to correct defects in materials or workmanship. Service must be provided by a Whirlpool designated service company
-
 1
1 -
 2
2 -
 3
3 -
 4
4 -
 5
5 -
 6
6 -
 7
7 -
8
 |
 |

THANK YOU for purchasing this high-quality product. If you should experience a problem not covered in TROUBLESHOOTING,
please visit our website at
www.whirlpool.com
for additional information. If you still need assistance, call us at 1-800-253-1301.
You will need your model and serial number located on the oven frame behind the storage drawer panel.
Para obtener acceso a “Instrucciones para el usuario de la estufa eléctrica” en español, o para obtener información adicional acerca
de su producto, visite:
www.whirlpool.com
Tenga listo su número de modelo completo. Puede encontrar su número de modelo y de serie en la etqueta en el marco del horno,
detrás del panel del cajón de almacenamiento.
®
ELECTRIC RANGE
USER INSTRUCTIONS
Table of Contents
RANGE SAFETY
.......................................................................................
2
The Anti-Tip Bracket
.............................................................................
2
COOKTOP USE
........................................................................................
4
OVEN USE
................................................................................................
4
Aluminum Foil
........................................................................................
4
Positioning Racks and Bakeware
.........................................................
5
Oven Vent
..............................................................................................
5
Baking and Roasting
.............................................................................
5
Broiling
..................................................................................................
5
RANGE CARE
...........................................................................................
6
General Cleaning
...................................................................................
6
Oven Light
.............................................................................................
7
TROUBLESHOOTING
..............................................................................
7
ACCESSORIES
........................................................................................
7
WARRANTY
..............................................................................................
8
W10200359B