Whirlpool RF263LXTQ Owners Manual - Page 7
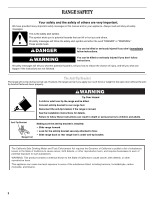
Warning - 3 parts
 |
View all Whirlpool RF263LXTQ manuals
Add to My Manuals
Save this manual to your list of manuals |
Page 7 highlights
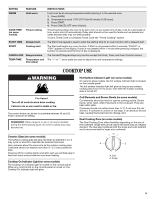
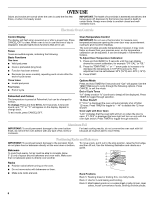
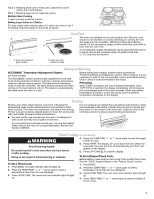
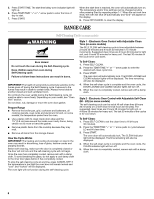
Rack 2: Roasting small cuts of meat, pies, casseroles, bundt cakes, and 2-rack baking. Rack 1: Roasting large cuts of meat and poultry. Multiple Rack Cooking 2-rack: Use rack positions 2 and 4. Baking Layer Cakes on 2 Racks For best results when baking cakes on 2 racks use racks 2 and 4 for baking. Place the cakes on the racks as shown. Oven Vent A A The oven vent releases hot air and moisture from the oven, and should not be blocked or covered. Blocking or covering the vent will cause poor air circulation, affecting cooking and cleaning results. Do not set plastics, paper or other items that could melt or burn near the oven vent. On coil element models, the element can be used when the oven is in use as long as the cookware does not extend more than ½" (1.3 cm) over the element. A. Oven vent (ceramic glass model) A. Oven vent (coil element model) Baking and Roasting ACCUBAKE® Temperature Management System (on some models) The ACCUBAKE® system electronically regulates the oven heat levels during preheat and bake to maintain a precise temperature range for optimal cooking results. The bake and broil elements cycle on and off in intervals. The bake element will glow red when cycling on; the broil element will not. This feature is automatically activated when the oven is in use. Before baking and roasting, position racks according to "Positioning Racks and Bakeware" section. When roasting, it is not necessary to wait for the oven preheat cycle to end before putting food in unless it is recommended in the recipe. Preheating When START is pressed, the oven will begin preheating. Once 170ºF (75ºC) is reached, the display temperature will increase as the actual temperature of the oven increases. When the preheat temperature is reached, a tone will sound, and the selected temperature will appear on the display. Broiling Broiling uses direct radiant heat to cook food. Changing the temperature when Custom Broiling allows more precise control when cooking. The lower the temperature, the slower the cooking. Thicker cuts and unevenly shaped pieces of meat, fish and poultry may cook better at lower broiling temperatures. It is not necessary to preheat the oven before putting food in unless recommended in the recipe. Position food on grid in a broiler pan, then place it in the center of the oven rack. Close the door to the broil stop position to ensure proper broiling temperature. ■ For best results, use a broiler pan and grid. It is designed to drain juices and help avoid spatter and smoke. If you would like to purchase a broiler pan, one may be ordered. Please refer to the cover for contact information. Ask for Part Number 4396923. Timed Cooking (on some models) WARNING Food Poisoning Hazard Do not let food sit in oven more than one hour before or after cooking. 4. Press the TEMP/TIME "+" or "-" arrow pads to enter the length of time to cook. 5. Press START. The display will count down the time. When the time ends, the oven will shut off automatically and "End" will appear on the display. 6. Press OFF/CANCEL to clear the display. Doing so can result in food poisoning or sickness. To Set a Timed Cook: 1. Press BAKE. The bake indicator light will light up. 2. Press the TEMP/TIME "+" or "-" arrow pads to enter a temperature other than the one displayed. 3. Press COOK TIME. The cook time oven indicator light will light up. To Set a Delayed Timed Cook: Before setting, make sure the clock is set to the correct time of day. See the "Clock" keypad feature in the "Feature Guide" section. 1. Press BAKE. 2. Press the TEMP/TIME "+" or "-" arrow pads to enter a temperature other than the one displayed. 3. Press COOK TIME. The cook time oven indicator light will light up. 4. Press TEMP/TIME "+" or "-" arrow pads to enter the length of time to cook. 7
-
 1
1 -
 2
2 -
 3
3 -
 4
4 -
 5
5 -
 6
6 -
 7
7 -
 8
8 -
 9
9 -
 10
10 -
 11
11 -
 12
12
 |
 |
