Whirlpool RF378LXPQ Installation Instructions
Whirlpool RF378LXPQ Manual
 |
View all Whirlpool RF378LXPQ manuals
Add to My Manuals
Save this manual to your list of manuals |
Whirlpool RF378LXPQ manual content summary:
- Whirlpool RF378LXPQ | Installation Instructions - Page 1
save these instructions for local electrical inspector's use. Write down the model and serial numbers before installing range. Both numbers are listed on the model/serial rating plate located on the oven frame behind the storage drawer panel. Model Serial www.whirlpool.com Part No. 97599213 - Whirlpool RF378LXPQ | Installation Instructions - Page 2
have provided many important safety messages in this manual and on your appliance. Always read and obey all safety messages. model/serial rating plate. The model/serial rating plate is located on the oven tools and parts before starting installation. Read and follow the instructions provided with - Whirlpool RF378LXPQ | Installation Instructions - Page 3
on the model/serial rating plate. (The model/serial rating plate is located on the oven frame behind the line so that it can be moved if servicing is ever necessary. A U.L.-listed conduit connector must ends to connect the power supply at the appliance end, terminating in a NEMA Type 14-50P - Whirlpool RF378LXPQ | Installation Instructions - Page 4
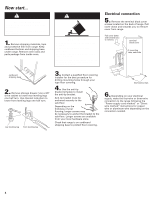
and parts package from inside oven. WARNING Tip Over Hazard A child or adult can tip the range and be killed. Connect anti-tip bracket to rear range foot. Reconnect the anti-tip bracket, if the range is moved. Failure to follow these instructions can result in death or serious burns to children - Whirlpool RF378LXPQ | Installation Instructions - Page 5
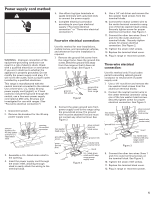
Power supply cord method: WARNING Electrical Shock Hazard Disconnect power before servicing. Use new 40 amp power supply cord. Plug into grounded outlet. Failure to follow these instructions can result in death, fire, or electrical shock. WARNING - Improper connection of the equipment-grounding - Whirlpool RF378LXPQ | Installation Instructions - Page 6
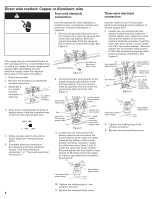
Aluminum wire WARNING Four-wire electrical connection: Electrical Shock Hazard Disconnect power before servicing. Use 8 gauge copper wire, or 6 gauge aluminum wire. Electrically ground range. Failure to follow these instructions can result in death, fire, or electrical shock. Use this method for - Whirlpool RF378LXPQ | Installation Instructions - Page 7
Check the operation of the oven: If your oven has one of the two types of electronic controls shown: 1. Press the "BAKE" pad. • Depending on model, the "BAKE" and Use & Care Guide. Keep Installation Instructions and Guide close to range for easy reference. The instructions will make installing the - Whirlpool RF378LXPQ | Installation Instructions - Page 8
in your Use and Care Guide. When you call, you will need: ࠜ The range model number. ࠜ The range serial number. Both numbers are listed on the model/serial rating plate located on the oven frame behind the storage drawer panel. Part No. 9759923 8© 2004 Whirlpool Corporation Benton Harbor, Michigan
-
 1
1 -
 2
2 -
 3
3 -
 4
4 -
 5
5 -
 6
6 -
 7
7 -
8
 |
 |
Installation Instructions
9759923
Quick Reference
Table of Contents:
Pages
2
2
3
4
5
-
8
9
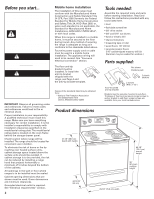
Before you start
Product dimensions
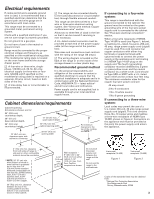
Cabinet dimensions/requirements
Electrical requirements
Installation steps
Check operation
If range does not operate
If you need assistance/service
Moving the range
Part No. 9759923
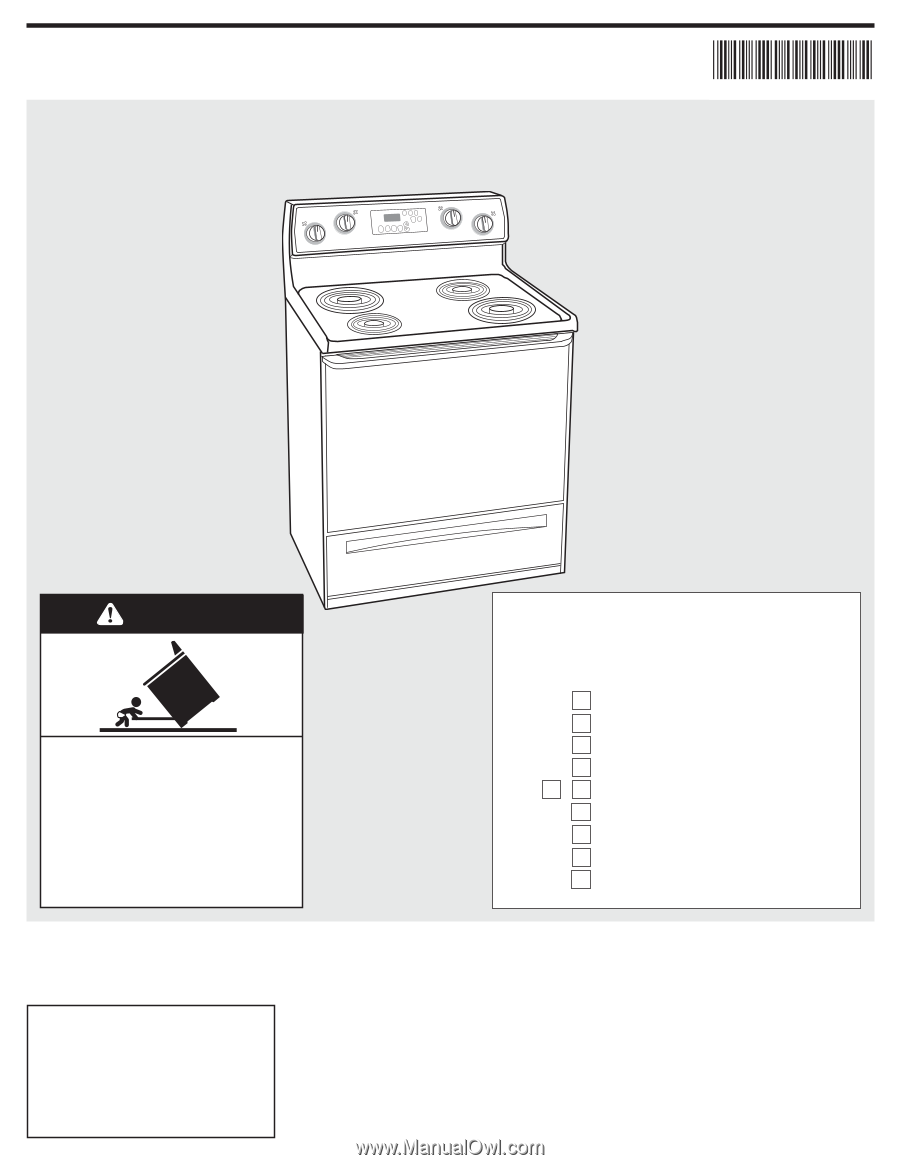
30" Electric Freestanding Range
with self-cleaning oven
WARNING
Tip Over Hazard
A child or adult can tip the range and
be killed.
Connect anti-tip bracket to rear
range foot.
Reconnect the anti-tip bracket, if the
range is moved.
Failure to follow these instructions can
result in death or serious burns to
children and adults.
10
10
10
www.whirlpool.com
IMPORTANT:
Installer:
Leave Installation
Instructions with the homeowner.
Homeowner:
Keep Installation
Instructions for future reference.
Read and save these instructions for
local electrical inspector’s use.
Write down the model and serial
numbers before installing range.
Both numbers are listed on the
model/serial rating plate located
on the oven frame behind the
storage drawer panel.
Model # _______________________________
Serial #
_______________________________
IMPORTANT:
Read and save these instructions.