Whirlpool SF111PXSQ Use and Care Guide
Whirlpool SF111PXSQ Manual
 |
View all Whirlpool SF111PXSQ manuals
Add to My Manuals
Save this manual to your list of manuals |
Whirlpool SF111PXSQ manual content summary:
- Whirlpool SF111PXSQ | Use and Care Guide - Page 1
98017488 ® STANDARD CLEANING GAS RANGE Use & Care Guide For questions about features, operation/performance parts, accessories or service, call: 1-800-253-1301 or visit our website at... www.whirlpool.com ESTUFA DE GAS DE LIMPIEZA ESTÁNDAR Manuel de Uso y Cuidado Para consultas respecto a caracterí - Whirlpool SF111PXSQ | Use and Care Guide - Page 2
8 Aluminum Foil 8 Positioning Racks and Bakeware 8 Bakeware 9 Oven Vent 9 Baking and Roasting 9 Broiling 9 RANGE CARE 10 Removing the Oven Bottom 10 General Cleaning 10 Oven Light 11 Oven Door 11 TROUBLESHOOTING 12 ASSISTANCE OR SERVICE 13 WARRANTY 14 ÍNDICE SEGURIDAD DE LA ESTUFA 15 - Whirlpool SF111PXSQ | Use and Care Guide - Page 3
from a neighbor's phone. Follow the gas supplier's instructions. • If you cannot reach your gas supplier, call the fire department. - Installation and service must be performed by a qualified installer, service agency or the gas supplier. The California Safe Drinking Water and Toxic Enforcement Act - Whirlpool SF111PXSQ | Use and Care Guide - Page 4
Tip Over Hazard A child or adult can tip the range and be killed. Connect anti-tip bracket to rear range foot. Reconnect the anti-tip bracket, if the range is moved. See the installation instructions for details. Failure to follow these instructions can result in death or serious burns to children - Whirlpool SF111PXSQ | Use and Care Guide - Page 5
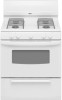
AND FEATURES This manual covers several different models. The range you have purchased may have some or all of the parts and features listed. The locations and appearances of the features shown here may not match those of your model. Control Panel A B C D EF A. Left rear burner - Whirlpool SF111PXSQ | Use and Care Guide - Page 6
Oven Temperature Controls WARNING Power failure In case of prolonged power failure, the surface burners can be lighted manually. Hold a lighted match near a burner and turn knob counterclockwise to LITE. After burner lights, turn knob to setting. REMEMBER: When range as a guide when setting heat - Whirlpool SF111PXSQ | Use and Care Guide - Page 7
flat-bottomed canners. s On coil element models, the installation of a Canning Unit Kit is recommended. If not installed, the life of the coil element will be shortened. See "Assistance or Service" for ordering instructions. s For more information, contact your local U.S. Government Agricultural - Whirlpool SF111PXSQ | Use and Care Guide - Page 8
B. Display C. Increase D. Clock E E. Decrease Display When power is first supplied to the range, "12:00" will appear on the display. If "12:00" appears at any other rack. Place the rack so the top of food will be centered in the oven. To move a rack, pull it out to the stop position, raise the - Whirlpool SF111PXSQ | Use and Care Guide - Page 9
bakeware and oven walls. Use the following chart as a guide. NUMBER OF instructions. Ovenproof glassware, ceramic glass or ceramic s Brown, crisp crusts s May need to reduce baking temperatures 25°F (15°C). Oven Vent A A. Oven Vent The oven and grid provided with the appliance. It is designed to - Whirlpool SF111PXSQ | Use and Care Guide - Page 10
into the lower part of the broiler pan. 3. instructions on cleaning products. Do not wipe down any of the inside surfaces until the oven has completely cooled down. Applying a cool damp cloth to the inner door glass before it has cooled completely could result in the glass breaking. Soap, water - Whirlpool SF111PXSQ | Use and Care Guide - Page 11
instructions. Porcelain enamel only, not chrome s Dishwasher OVEN DOOR GLASS (on some models) s Glass cleaner and paper towels or nonabrasive plastic scrubbing pad Oven Light (on some models) The oven light is a standard 40-watt appliance bulb. Press the manual oven replaced on the range. To Replace: - Whirlpool SF111PXSQ | Use and Care Guide - Page 12
service technician or see the Installation Instructions. Oven makes muffled ticking noise when in use s This is normal and occurs when the oven burner cycles on and off to hold the set oven temperature. Oven burner flames are uneven, yellow, or noisy s Is propane gas being used? The appliance - Whirlpool SF111PXSQ | Use and Care Guide - Page 13
of appliances. s Installation information. s Use and maintenance procedures. s Accessory and repair parts sales. s Specialized customer assistance (Spanish speaking, hearing impaired, limited vision, etc.). s Referrals to local dealers, repair parts distributors, and service companies. Whirlpool - Whirlpool SF111PXSQ | Use and Care Guide - Page 14
correct the installation of your major appliance, to instruct you how to use your major appliance, to replace or repair house fuses or to correct house wiring or plumbing. 2. Service calls to repair or replace appliance light bulbs, air filters or water filters. Those consumable parts are excluded - Whirlpool SF111PXSQ | Use and Care Guide - Page 15
es muy importante. Hemos incluido muchos mensajes importantes de seguridad en este manual y en su electrodoméstico. Lea y obedezca siempre todos los mensajes , una agencia de servicio o por el proveedor de gas. La California Safe Drinking Water and Toxic Enforcement Act (La ley de la protección - Whirlpool SF111PXSQ | Use and Care Guide - Page 16
de la llama del quemador superior debe ajustarse de manera que no se extienda más allá de los bordes del utensilio de estufa. Para estufas de gas de limpieza automática - s Antes de efectuar la limpieza automática del horno - quite la charola para asar y otros utensilios. Limpie con un trapo húmedo - Whirlpool SF111PXSQ | Use and Care Guide - Page 17
) C. Quemadores exteriores y parrillas D. Soporte antivuelco E. Placa del número de modelo y de serie (detrás del lado izquierdo de la puerta del asador) F. Puerta del asador G. Interruptor manual de luz del horno H. Reloj/Temporizador electrónico I. Tablero de control J. Junta de la puerta 17 - Whirlpool SF111PXSQ | Use and Care Guide - Page 18
USO DE LA SUPERFICIE DE COCCIÓN Controles de temperatura de la superficie de cocción y del horno ADVERTENCIA Para fijar la temperatura del horno: Presione y gire la perilla de control al ajuste de temperatura deseado. Cortes de corriente En el caso de un corte de corriente prolongado, se pueden - Whirlpool SF111PXSQ | Use and Care Guide - Page 19
encima del piloto del quemador del horno, ubicado en la parte posterior del quemador. Para facilitar el encendido del piloto, use un cerillo largo (del tipo que sirve para encender chimeneas). 3. Limpie la abertura del tubo de gas con un paño húmedo. 4. Limpie los orificios obstruidos del quemador - Whirlpool SF111PXSQ | Use and Care Guide - Page 20
El material de los utensilios de cocina es un factor que repercute en la rapidez y uniformidad en que se transmite el calor, lo cual afecta los resultados de cocción. Un acabado antiadherente tiene las mismas características de su material base. Por ejemplo, utensilios de aluminio con un acabado - Whirlpool SF111PXSQ | Use and Care Guide - Page 21
. Cerciórese de que las parrillas estén niveladas. Para un mejor resultado, hornee sobre una parrilla. Coloque la parrilla de tal manera que la parte más alta del alimento a hornear quede en el centro del horno. Para mover una parrilla, jálela hasta la posición de tope, levante el borde delantero - Whirlpool SF111PXSQ | Use and Care Guide - Page 22
UTENSILIO PARA HORNEAR/ RESULTADOS RECOMENDACIONES Utensilios de vidrio resistente al horno, cerámica vitrificada o cerámica s Cortezas doradas, crujientes s Puede necesitar reducir la temperatura para hornear 25°F (15°C). Ducto de escape del horno A A. Ducto de escape del horno El ducto de - Whirlpool SF111PXSQ | Use and Care Guide - Page 23
: Limpie tan pronto la superficie de cocción, las parrillas y las tapas se hayan enfriado. A A. Borde 3. Levante la parte posterior del panel hacia arriba y hacia atrás. El borde de la parte delantera del panel deberá liberarse del marco frontal de la cavidad del horno. 4. Levante el fondo hacia - Whirlpool SF111PXSQ | Use and Care Guide - Page 24
de 40 vatios. Presione el interruptor manual de la luz del horno (en algunos modelos) que está en la parte de atrás para encender y apagar mientras esté sacando la puerta de la estufa. 2. Sujete ambos lados de la parte delantera de la puerta con sus dedos y use sus pulgares en la superficie interior - Whirlpool SF111PXSQ | Use and Care Guide - Page 25
ésta la primera vez que usa el horno? Encienda cualquiera de las perillas del quemador exterior para liberar el aire proveniente de la tubería de gas. s ¿Se ha fijado corectamente la perilla de control de la temperatura del horno? Vea la sección "Controles de temperatura de la superficie de cocci - Whirlpool SF111PXSQ | Use and Care Guide - Page 26
aire/gas? Póngase en contacto con un técnico de servicio autorizado para verificar la mezcla de aire/gas, o distribuidores de partes para reparación. Los técnicos de servicio designados por Whirlpool están a Whirlpool Corporation con sus preguntas o dudas a: Whirlpool Brand Home Appliances Customer - Whirlpool SF111PXSQ | Use and Care Guide - Page 27
Estados Unidos y Canadá. Póngase en contacto con el distribuidor autorizado de Whirlpool para determinar si corresponde otra garantía. Si necesita servicio, consulte primero la sección "Solución de problemas" del Manual de uso y cuidado. Después de consultar la sección "Solución de problemas - Whirlpool SF111PXSQ | Use and Care Guide - Page 28
98017488 © 2005 Whirlpool Corporation. All rights reserved. Todos los derechos reservados. ® Registered Trademark/TM Trademark of Whirlpool, U.S.A. ® Marca registrada/TM Marca de comercio de Whirlpool, EE.UU. 9/05 Printed in Mexico Impreso en México
-
 1
1 -
 2
2 -
 3
3 -
 4
4 -
 5
5 -
 6
6 -
 7
7 -
8
-
9
-
10
-
11
-
12
-
13
-
14
-
15
-
16
-
17
-
18
-
19
-
20
-
21
-
22
-
23
-
24
-
25
-
26
-
27
-
28
 |
 |

STANDARD CLEANING
GAS RANGE
Use & Care Guide
For questions about features, operation/performance
parts, accessories or service, call:
1-800-253-1301
or visit our website at...
www.whirlpool.com
ESTUFA DE GAS DE
LIMPIEZA ESTÁNDAR
Manuel de Uso y Cuidado
Para consultas respecto a características, funcionamiento, rendimiento,
piezas, accesorios o servicio técnico, llame al:
1-800-253-1301
o visite nuestro sitio web en:
www.whirlpool.com
Table of Contents/
Í
ndice
......................................
2
98017488
®
To the installer: Please leave this
instruction book with the unit.
To the consumer: Please read and
keep this book for future reference.
Para el instalador: favor de dejar este
manual de instrucciones con la unidad.
Para el consumidor: favor de leer y guardar
este manual para futuras referencias.