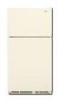
Whirlpool W1TXEMMWT User Guide
Whirlpool W1TXEMMWT - 21 cu. Ft. Refrigerator Manual
 |
UPC - 883049159546
View all Whirlpool W1TXEMMWT manuals
Add to My Manuals
Save this manual to your list of manuals |
Whirlpool W1TXEMMWT manual content summary:
- Whirlpool W1TXEMMWT | User Guide - Page 1
, visite: www.whirlpool.com. Necesitara su nQmero de modelo y de serie, ubicado en el interior del compartimiento del refrigerador. Tableof Contents/ Tabledes matibres REFRIGERATOR SAFETY 1 INSTALLATION INSTRUCTIONS 2 REFRIGERATOR USE 7 REFRIGERATOR CARE 8 TROUBLESHOOTING 9 ACCESSORIES 10 - Whirlpool W1TXEMMWT | User Guide - Page 2
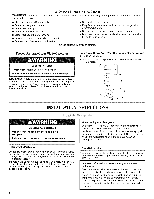
not problems of the past. Junked or abandoned refrigerators are still dangerous - even if they will sit for "just a few days." If you are getting rid of your old refrigerator, please follow these instructions to help prevent accidents. Before You Throw Away Your Old Refrigerator or Freezer: • Take - Whirlpool W1TXEMMWT | User Guide - Page 3
source and reset the control (Thermostat, Refrigerator or Freezer Control depending on the model) to the desired setting. See "Using the Controls." £ - ,,j Gather the required tools and parts before starting installation. Read and follow the instructions provided with any tools listed here. TOOLS - Whirlpool W1TXEMMWT | User Guide - Page 4
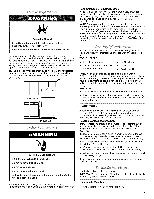
"Replace Doors and Hinges." • Depending on your model, you may have standard (Style 1) or contour (Style 2) doors. If you are going to reverse the door swing, follow the instructions for the appropriate door style. • Before you begin, turn the refrigerator control OFF, and remove food and adjustable - Whirlpool W1TXEMMWT | User Guide - Page 5
graphic. Do not tighten the screws completely. 4. Line up the doors so that the bottom of the freezer door aligns evenly with the top of the refrigerator door. Tighten all screws. Final Steps (all models) 1. Check all the holes to make sure that hole plugs and screws are in place. Reinstall the - Whirlpool W1TXEMMWT | User Guide - Page 6
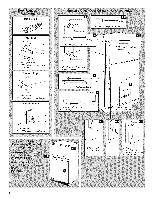
Hinge Cover B. _6" Hex-Head Hinge Screws C. Top Hinge Center Hinge A. Center Hinge B. _6" Hex-Head Hinge Screws Bottom Hinge A. Cabinet Hinge Hole Plugs A. Flat-Head Handle Screws B. Freezer Handle A. Door Handle Sealing Screws Front View Side View _J -v I A. Door Stop Screw B. Door Stop AB - Whirlpool W1TXEMMWT | User Guide - Page 7
below as a guide. On models with two controls, adjust the refrigerator temperature first. Wait at least 24 hours between adjustments and then recheck the temperatures. CONDITION/REASON: ADJUSTMENT: REFRIGERATOR too warm REFRIGERATOR or TEMPERATURE Control one setting higher FREEZER too warm/too - Whirlpool W1TXEMMWT | User Guide - Page 8
to 12 batches of ice in a 24-hour period. To increase ice production, lower the freezer and refrigerator temperature. See "Using the Control(s)." Wait 24 hours between adjustments. For maximum ice production (on some models), push the switch to ICE PLUS. The ice maker should produce 16 to 20 batches - Whirlpool W1TXEMMWT | User Guide - Page 9
the freezer (on some models). Replace it with an appliance bulb of the same wattage. 3= Plug in refrigerator or reconnect power. TROUBLESHOOTING First try the solutions suggested here or visit our website and reference FAQs (Frequently Asked Questions) to possibly avoid the cost of a service call - Whirlpool W1TXEMMWT | User Guide - Page 10
refrigerator to water supply and turn water shutoff valve fully open. • Kink in the water source line? A kink in the line can reduce water flow. Straighten the water source line. • Ice maker turned on? Make sure wire shutoff arm or switch (depending on model of low water pressure Whirlpool dealer - Whirlpool W1TXEMMWT | User Guide - Page 11
. This warranty gives you specific legal rights, and you service, you may contact Whirlpool at the number below. Have your complete model number ready. You can find your model number and serial number on the label, located on the inside wall of the refrigerator compartment. For assistance or service - Whirlpool W1TXEMMWT | User Guide - Page 12
whirlpool ce qui peut se produire en cas de non-respect des instructions. IIVIPORTANTES INSTRUCTIONS DE SECURITi_ AVERTISSEMENT : Pour r6duire les risques d'incendie, de de la machine & gla£:ons (seulement pour modeles pr6ts recevoir une machine a gla(_ons). CONSERVEZCESINSTRUCTIONS 12 - Whirlpool W1TXEMMWT | User Guide - Page 13
Enlever Jes portes de votre vieu× r_frJg_rateur. Le non=respect de cette instruction peut causer un d_c_s ou des I_sions c_r_brales. Avant de jeter votre : L'emprisonnement et I'etouffement des enfants ne sont pas un probleme du passe. Les refrigerateurs jetes ou abandonnes sont encore dangereux, - Whirlpool W1TXEMMWT | User Guide - Page 14
du thermostat du refrig6rateur ou du congelateur selon le modele) au reglage desir& Voir "Utilisation des commandes". Rassembler les outils et pieces necessaires avant de commencer I'installation. Lire et suivre les instructions fournies avec les outils indiqu_s ici. OUTILLAGE REQUlS : • Tournevis - Whirlpool W1TXEMMWT | User Guide - Page 15
une utilisation intense. Si vous avez des questions au sujet de la pression de votre eau, appeler un plombier qualifie agree. Lire toutes les instructions avant de commencer. IMPORTANT • Si on doit utiliser le refrigerateur avant qu'il soit raccorde & la canalisation d'eau, placer la commande de la - Whirlpool W1TXEMMWT | User Guide - Page 16
modele, votre refrigerateur peut comporter des portes standard (Style 1) ou incurvees (Style 2). Si vous souhaitez inverser le sens d'ouverture de la porte, suivre les instructions la caisse de I'appareil. REMARQUE : Prevoir un support additionnel des portes pendant la reinstallation des charnieres. - Whirlpool W1TXEMMWT | User Guide - Page 17
charnieres et de la porte du compartiment de refrigeration. Porte du r_frig_rateur 1. Enlever la garniture inferieure . REMARQUE : Prevoir un support additionnel des portes pendant la un c&ble de rallonge. Le non=respect de ces instructions peut causer un d_c_s, un incendie ou un choc _lectrique - Whirlpool W1TXEMMWT | User Guide - Page 18
B. Vis de charniere a t_te hexagonale de 5/18" A. Couvre-vis de la poignee de la porte S ...... C A. Vis de la poignee t_te plate B. Poignee du compartiment de refrigeration C. Vis de poignee 18 - Whirlpool W1TXEMMWT | User Guide - Page 19
les portes semble inegal, on peut faire le reglage en suivant les instructions ci-dessous : 1. Soulever et enlever le couvercle sur la charniere utiliser les reglages indiqu_s au tableau ci-dessous comme guide. Sur les modeles h deux commandes, ajuster d'abord la temperature du refrigerateur - Whirlpool W1TXEMMWT | User Guide - Page 20
etre ajustee & n'importe quel reglage entre LOW et HIGH. LOW/has (ouvert) pour une meilleure conservation production de gla£;ons maximale (sur certains modeles), tourner I'interrupteur a ICE PLUS. La instruction peut causer un d_c_s, une explosion ou un incendie. Les compartiments de refrigeration - Whirlpool W1TXEMMWT | User Guide - Page 21
service. Aux I_.-U., www.whirlpool.com Au Canada, www.whirlpool le probleme persiste, modele. Voici une liste des sons normaux accompagnes d'explications. • Pulsation - les ventilateurs/le compresseur se reglent afin d'optimiser la performance. SifflementJcliquetis - ecoulement de liquide refrigerant - Whirlpool W1TXEMMWT | User Guide - Page 22
supports. La porte est difficile a ouvrir Risque d'explosion Utiliser un produit de nettoyage ininflammable. Le non=respect de cette instruction interrupteur (selon le modele) est en position pression de I'eau. Voir "Specifications de I'alimentation en eau". marchand autorise Whirlpool. Au Canada - Whirlpool W1TXEMMWT | User Guide - Page 23
preuve de la date d'achat d'origine est exigee pour obtenir un service dans le cadre de la presente garantie limitee. I_LI_MENTS EXCLUS DE LA instructions d'installation fournies par Whirlpool. 11. Les pieces de rechange ou la main-d'ceuvre pour les gros appareils menagers dont les numeros de modele - Whirlpool W1TXEMMWT | User Guide - Page 24
un rendez-vous, vous pouvez contacter Whirlpool au numero ci-dessous. Ayez votre numero de modele a disposition. Vous pouvez trouver vos numeros de modele et de serie sur la plaque situee sur la paroi interne du compartiment de refrigeration. Pour assistance ou service aux le.-U., composez le 1-800
-
 1
1 -
 2
2 -
 3
3 -
 4
4 -
 5
5 -
 6
6 -
 7
7 -
8
-
9
-
10
-
11
-
12
-
13
-
14
-
15
-
16
-
17
-
18
-
19
-
20
-
21
-
22
-
23
-
24
 |
 |

THANK YOU for purchasing this high-quality product. If you should experience a problem not covered in TROUBLESHOOTING,
please visit our website at www.whirlpool.com
for additional information. If you still need assistance, call us at 1-800-253-1301.
In Canada, visit our website at www.whidpool.ca
or call us at 1-800-807-6777.
You will need your model and serial number, located on the inside wall of the refrigerator compartment.
Para obtener acceso a "lnstrucciones para el usuario del refrigerador" en espa_ol, o para obtener informaci6n adicional acerca de
su producto, visite: www.whirlpool.com.
Necesitara su nQmero de modelo y de serie, ubicado en el interior del compartimiento
del refrigerador.
Tableof Contents
/
Tabledes
matibres
REFRIGERATOR
SAFETY
.....................................................................
1
INSTALLATION
INSTRUCTIONS
.........................................................
2
REFRIGERATOR
USE
...........................................................................
7
REFRIGERATOR
CARE
.........................................................................
8
TROUBLESHOOTING
............................................................................
9
ACCESSORIES
....................................................................................
10
WARRANTY
..........................................................................................
11
SI_CURITI_
DU RI_FRIGI_RATEUR
.....................................................
12
INSTRUCTIONS
D'INSTALLATION
...................................................
13
UTILISATION
DU RC:FRIGC:RATEUR
.................................................
19
ENTRETIEN
DU RI_FRIGI_RATEUR
...................................................
20
DC:PANNAGE
........................................................................................
21
ACCESSOIRES
....................................................................................
22
GARANTIE
............................................................................................
23
REFRIGERATOR
SAFETY
Your
safety
and
the safety
of others
are very
important.
We have provided
many important
safety messages
in this manual and on your appliance.
Always read and obey all safety
messages.
This is the safety alert symbol.
This symbol
alerts you to potential
hazards that can kill or hurt you and others.
All safety
messages
will follow the safety alert symbol and either the word "DANGER"
or "WARNING."
These words mean:
You can be killed or seriously
injured if you don't immediately
follow
instructions.
You can be
killed
or seriously
injured
if you don't
follow
instructions.
All safety messages
will tell you what the potential
hazard is, tell you how to reduce the chance
of injury, and tell you what can
happen
if the instructions
are not followed.
W10249202A