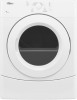
Whirlpool WED9051YW Installation Guide
Whirlpool WED9051YW Manual
 |
View all Whirlpool WED9051YW manuals
Add to My Manuals
Save this manual to your list of manuals |
Whirlpool WED9051YW manual content summary:
- Whirlpool WED9051YW | Installation Guide - Page 1
19 STACKING WASHER AND DRYER 19 TROUBLESHOOTING 19 INSTALLATION NOTES Date of purchase Date of installation Installer Model number Serial number Para obtener acceso al manual de uso y cuidado en español, o para obtener información adicional acerca de su producto, visite: www.whirlpool.com - Whirlpool WED9051YW | Installation Guide - Page 2
DRYER SAFETY 2 - Whirlpool WED9051YW | Installation Guide - Page 3
Equipment: (Not supplied with dryer) Refer to your "Use and Care Guide" for information about accessories available for your dryer. Parts needed: (Not supplied with dryer) Check local codes. Check existing electrical supply and venting. See "Electrical Requirements" and "Venting Requirements - Whirlpool WED9051YW | Installation Guide - Page 4
Venting Requirements." ■■ A separate 30 amp circuit. ■■ If using power supply cord, a grounded electrical outlet located within 2 ft. (610 mm) of either side of dryer. See "Electrical Requirements." ■■ Floor must support dryer weight of 200 lbs. (90.7 kg). Also consider weight of companion appliance - Whirlpool WED9051YW | Installation Guide - Page 5
same closet as the dryer. Closet installation (dryer only): 34" recommended (864 mm) 18" min. (457 mm) 3" (76 mm) 48 in.2 (310 cm2) Back view: Electric 61/4" (159 mm) spacing should be considered for ease of installation and servicing. ■■ Additional clearances might be required for wall, door - Whirlpool WED9051YW | Installation Guide - Page 6
information, see "Assistance or Service" section in your "Use and Care Guide." ■■ Special provisions must be made in mobile homes to introduce outside air into dryer. Openings (such as a nearby window) should be at least twice as large as dryer exhaust opening. ELECTRICAL REQUIREMENTS It is your - Whirlpool WED9051YW | Installation Guide - Page 7
solid copper wires and match a 4-wire receptacle of INSTRUCTIONS I For a grounded, cord-connected dryer: This dryer must be grounded. In the event of malfunction or breakdown, grounding will reduce the risk of electric shock by providing a path of least resistance for electric current. This dryer - Whirlpool WED9051YW | Installation Guide - Page 8
CONNECTION Power Supply Cord Direct Wire Electrical Connection Options 1. Choose electrical connection type Power supply cord 4-wire receptacle (NEMA Type 14-30R): Go to "Power Supply Cord Connection." 2. Remove terminal block cover Power supply cord 3-wire - Whirlpool WED9051YW | Installation Guide - Page 9
. Be sure that the wire insulation on the power supply cord is inside the strain relief. The strain relief should have a tight fit with the dryer cabinet and be in a horizontal position. Do not further tighten strain relief screws at this point. If your outlet looks like this: Power supply cord - Whirlpool WED9051YW | Installation Guide - Page 10
neutral wire B C Connect remaining wires to outer terminal block screws. Tighten screws. Finally, reinsert tab of terminal block cover into slot of dryer rear panel. Secure cover with hold-down screw. Now, go to "Venting Requirements." 3-WIRE POWER SUPPLY CORD CONNECTION Use where local codes - Whirlpool WED9051YW | Installation Guide - Page 11
strain relief Direct wire cable must have 5 ft. (1.52 m) of extra length so dryer may be moved if needed. Strip 5" (127 mm) of outer covering from end of relief. The strain relief should have a tight fit with the dryer cabinet and be in a horizontal position. Tighten strain relief screw against - Whirlpool WED9051YW | Installation Guide - Page 12
block (B). Squeeze hooked ends together and tighten screw. 5. Connect ground wire A F (893m½m" ) Direct wire cable must have 5 ft. (1.52 m) of extra length so dryer may be moved if needed. Strip 31/2" (89 mm) of outer covering from end of cable. Strip insulation back 1" (25 mm). If using 3-wire - Whirlpool WED9051YW | Installation Guide - Page 13
terminal block screws (hooks facing right). Squeeze hooked ends together and tighten screws. Finally, reinsert tab of terminal block cover into slot of dryer rear panel. Secure cover with hold-down screw. Now, go to "Venting Requirements." Place hooked ends of remaining wires under outer terminal - Whirlpool WED9051YW | Installation Guide - Page 14
dryer MUST BE EXHAUSTED OUTDOORS. IMPORTANT: Observe all governing codes and ordinances. Dryer exhaust must not be connected into any gas Must be fully extended and supported in final dryer location. ■■ Remove excess to rigid metal or flexible metal vents. Review "Vent System Charts" and if necessary - Whirlpool WED9051YW | Installation Guide - Page 15
are shown. Refer to the manufacturer's instructions. If you prefer, dryer may be converted to exhaust out right side, left side (all models except WED9051Y), or through bottom. You must contact your local dealer to have dryer converted. NOTE: On Model WED9051Y only, do not exhaust out the left - Whirlpool WED9051YW | Installation Guide - Page 16
115 ft. (35.1 m) 109 ft. (33.2 m) 3 Rigid metal 106 ft. (32.3 m) 100 ft. (30.5 m) 4 Rigid metal 98 ft. (29.9 m) 92 ft. (28.0 m) *For Model WED9051Y only. NOTE: Bottom exhaust installations have a 90º turn inside the dryer. To determine maximum exhaust length, add one 90º turn to the chart. 16 - Whirlpool WED9051YW | Installation Guide - Page 17
CONNECT INLET HOSES For non-steam models, skip to "Connect Vent" on page 18. The dryer must be connected to the cold water faucet using the new inlet hoses. Do not use old hoses. 1. Turn cold water off, remove and replace rubber washer 4. Attach long hose to "Y" connector and tighten couplings - Whirlpool WED9051YW | Installation Guide - Page 18
Check that the water faucets are turned on. 7. Check for leaks Move dryer to final location. Avoid crushing or kinking vent. After dryer is in place, remove cardboard from under dryer. LEVEL DRYER 1. Level Dryer Check for leaks around "Y" connector, faucets, and hoses. CONNECT VENT 1. Connect vent - Whirlpool WED9051YW | Installation Guide - Page 19
" section in your "Use and Care Guide." STACKING WASHER AND DRYER If you prefer to stack your washer and dryer: A stack kit, Part Number 8572546 is available to order. For further information, see "Assistance or Service" section in your "Use and Care Guide." TROUBLESHOOTING See your "Use and Care - Whirlpool WED9051YW | Installation Guide - Page 20
W10443041A W10443042A-SP © 2011 All rights reserved 20 11/11 Printed in U.S.A.
-
 1
1 -
 2
2 -
 3
3 -
 4
4 -
 5
5 -
 6
6 -
 7
7 -
8
-
9
-
10
-
11
-
12
-
13
-
14
-
15
-
16
-
17
-
18
-
19
-
20
 |
 |

W10443041A
W10443042A-SP
Table of Contents
DRYER SAFETY
.........................................................................
2
INSTALLATION REQUIREMENTS
.............................................
3
Tools and Parts
......................................................................
3
Location Requirements
.........................................................
4
Electrical Requirements
........................................................
6
Install Leveling Legs
..............................................................
7
Electrical Connection
............................................................
8
Venting Requirements
.........................................................
14
Plan Vent System
.................................................................
15
Install Vent System
..............................................................
16
Connect Inlet Hoses
............................................................
17
Connect Vent
........................................................................
18
Level Dryer
...........................................................................
18
COMPLETE INSTALLATION CHECKLIST
..............................
19
DOOR REVERSAL
....................................................................
19
STACKING WASHER AND DRYER
.........................................
19
TROUBLESHOOTING
..............................................................
19
INSTALLATION NOTES
Date of purchase:
_________________________________
Date of installation:
_______________________________
Installer:
________________________________________
Model number:
___________________________________
Serial number:
___________________________________
Electric Dryer Installation Instructions
Para obtener acceso al manual de uso y cuidado en español, o para obtener información adicional acerca de su
producto, visite:
www.whirlpool.com
Tenga listo su número de modelo completo. Puede encontrar el número de modelo y de serie dentro de la cavidad
superior de la puerta.