Whirlpool WET3300SQ User Instructions
Whirlpool WET3300SQ - 27" Stack Washer Manual
 |
UPC - 883049046570
View all Whirlpool WET3300SQ manuals
Add to My Manuals
Save this manual to your list of manuals |
Whirlpool WET3300SQ manual content summary:
- Whirlpool WET3300SQ | User Instructions - Page 1
/DRYER INSTALLATION INSTRUCTIONS INSTRUCCIONES DE INSTALACIÓN DE LA LAVADORA/ SECADORA ELÉCTRICA DE 27" (69 CM) INSTRUCTIONS D'INSTALLATION LAVEUSE/SÉCHEUSE ÉLECTRIQUE DE 27" (69 CM) Table of Contents / Índice / Table des matières WASHER/DRYER SAFETY 1 INSTALLATION INSTRUCTIONS 2 Tools and Parts - Whirlpool WET3300SQ | User Instructions - Page 2
" before purchasing parts. Mobile home installations require metal exhaust system hardware available for purchase from the dealer from whom you purchased your washer/dryer. For further information, please reference the "Assistance or Service" section of the Washer/Dryer User Instructions. 2 - Whirlpool WET3300SQ | User Instructions - Page 3
to support the washer/dryer weight (washer/ dryer, water and load) of 500 lbs (226.8 kg). ■ A level floor with a maximum slope of 1" (2.5 cm) under entire washer/dryer. Clothes may not tumble properly and automatic sensor cycles may not operate correctly if washer/dryer is not level. Installing on - Whirlpool WET3300SQ | User Instructions - Page 4
standpipe adapter kit is available. See "Alternate Parts." The top of the standpipe must be at least 39" install your washer/dryer, you must determine the type of electrical connection you will be using and follow the instructions provided for it here. ■ This dryer is manufactured ready to install - Whirlpool WET3300SQ | User Instructions - Page 5
electrician or service representative or personnel if you are in doubt as to whether the washer/dryer is properly grounded. Do not modify the plug provided with the washer/dryer: if it will not fit the outlet, have a proper outlet installed by a qualified electrician. SAVE THESE INSTRUCTIONS 5 - Whirlpool WET3300SQ | User Instructions - Page 6
D A. Center, silver-colored terminal block screw B. Hold-down screw C. Terminal block cover D. Neutral ground wire E. External ground conductor screw 3. Install strain relief. Style 1: Power supply cord strain relief ■ Remove the screws from a ³⁄₄" (1.9 cm) UL listed strain relief (UL marking on - Whirlpool WET3300SQ | User Instructions - Page 7
strain relief. The strain relief should have a tight fit with the dryer cabinet and be in a horizontal position. Do not further tighten strain ) UL listed strain relief G. Ring terminals 4. Now complete installation following instructions for your type of electrical connection: 4-wire (recommended) - Whirlpool WET3300SQ | User Instructions - Page 8
mobile homes and where local codes do not permit the use of 3-wire connections. Direct wire cable must have 5 ft (1.52 m) of extra length so washer/dryer can be moved if needed. Strip 5" (12.7 cm) of outer covering from end of cable, leaving bare ground wire at 5" (12.7 cm). Cut 1¹⁄₂" (3.8 cm) from - Whirlpool WET3300SQ | User Instructions - Page 9
Use where local codes permit connecting cabinet-ground conductor to neutral wire. Direct wire cable must have 5 ft (1.52 m) of extra length so washer/dryer can be moved if needed. Strip 3¹⁄₂" (8.9 cm) of outer covering from end of cable. Strip insulation back 1" (2.5 cm) If using 3-wire cable with - Whirlpool WET3300SQ | User Instructions - Page 10
the other wires to outer terminal block screws. Tighten screws. 4. Tighten strain relief screws. 5. Insert tab of terminal block cover into slot of dryer rear panel. Secure cover with hold-down screw. 6. Connect a separate copper ground wire from the external ground conductor screw to an adequate - Whirlpool WET3300SQ | User Instructions - Page 11
or flexible heavy metal vent. ■ Review Vent system chart. Modify existing vent system if necessary to achieve the best drying performance. If this is a calling Whirlpool Parts and Accessories. For more information, see the "Assistance or Service" section of the Washer/Dryer User Instructions. Good - Whirlpool WET3300SQ | User Instructions - Page 12
result in: Moisture damage to woodwork, furniture, paint, wallpaper, carpets, etc. Housecleaning problems and health problems. Remove Shipping Strap WARNING Excessive Weight Hazard Use two or more people to move and install washer/dryer. Failure to do so can result in back or other injury. To avoid - Whirlpool WET3300SQ | User Instructions - Page 13
until it is seated on the washer. 3. Using pliers, tighten the couplings with an additional twothirds turn. A In Canada B A. Cold water inlet valve hookup of water hoses. Replace access panel upon completion of washer/dryer installation. NOTE: Do not overtighten or use tape or sealants on - Whirlpool WET3300SQ | User Instructions - Page 14
are available for purchase. Please reference the "Assistance or Service" section of the Washer/Dryer User Instructions. ■ Over-the-Top Installation: Part Number 4396028 ■ Periscope Installation (For use with dryer vent to wall vent mismatch): Part Number 4396037 - 0" (0 cm) to 18" (45.72 cm - Whirlpool WET3300SQ | User Instructions - Page 15
. Determine vent length and elbows needed for best drying performance ■ Use the Vent system chart Install Leveling Legs" section. Repeat until the washer/dryer is level. NOTE: It may be necessary to level the washer/dryer again after it is moved into its final location. 4. After the washer/dryer - Whirlpool WET3300SQ | User Instructions - Page 16
that all parts are now installed. If there is an extra part, go back through the steps to see which step was skipped. 9. Remove the blue protective film on the console and any tape remaining on the washer/dryer. 2. Check that you have all of your tools. 10. Read the Washer/Dryer User Instructions - Whirlpool WET3300SQ | User Instructions - Page 17
INSTRUCCIONES DE INSTALACIÓN DE LA LAVADORA/ SECADORA ELÉCTRICA DE 27" (69 CM) SEGURIDAD DE LA LAVADORA/SECADORA Su seguridad y la seguridad de los demás es muy importante. Hemos incluido muchos mensajes importantes de seguridad en este manual y en su electrodoméstico. Lea y obedezca siempre todos - Whirlpool WET3300SQ | User Instructions - Page 18
de suministro de energía, un contacto con conexión a tierra ubicado a unos 2 pies (61 cm) de cualquiera de los lados de la lavadora/secadora. Vea "Requisitos eléctricos." *32" (81,3 cm) 27" (68,6 cm) *La mayoría de las instalaciones requieren un espacio libre mínimo de 5" (12,7 cm) detrás de la - Whirlpool WET3300SQ | User Instructions - Page 19
más de 96" (2,4 m) desde la base de la lavadora. 24 pulg.2 (155 cm2) 1" (2,5 cm) 27" (68,6 cm) A 1" 1"* 32" 5"** lavadora/secadora es apropiada para instalaciones en casas rodantes. La instalación debe ajustarse al Estándar de seguridad y construcción de casas fabricadas, Título 24 CFR, Parte - Whirlpool WET3300SQ | User Instructions - Page 20
secadora. Si la secadora secadora usado en secadoras de que conectan con la secadora deberán terminar en lavadora/secadora mediante cable eléctrico conectado a tierra: Esta lavadora/secadora Esta lavadora/secadora usa lavadora/secadora: Esta lavadora/secadora lavadora/ la secadora lavadora/la secadora - Whirlpool WET3300SQ | User Instructions - Page 21
plateado, del centro B. Tornillo de sujeción C. Tapa del bloque de terminal D. Hilo neutro de puesta a tierra E. Tornillo conductor de tierra externo 3. Instale el protector de cables. Estilo 1: Protector de cables del cable de suministro eléctrico ■ Quite los tornillos del protector de cables de - Whirlpool WET3300SQ | User Instructions - Page 22
su casa tiene: Y usted va a conectar con: Vaya a la sección Un contacto de 4 hilos (tipo NEMA 14-30R) Un cable de suministro eléctrico para secadora, que esté en la lista de UL, de 120/240 voltios mínimo y 30 amperios* Conexión de 4 hilos: Cable de suministro eléctrico Cable directo de - Whirlpool WET3300SQ | User Instructions - Page 23
no permitan el uso de conexiones de 3 hilos. El cable de conexión directa debe tener 5 pies (1,52 m) extra de largo para poder mover la lavadora/secadora si fuese necesario. Pele 5" (12,7 cm) de la cubierta exterior desde el extremo del cable, dejando el hilo de tierra desnudo a 5" (12,7 cm). Corte - Whirlpool WET3300SQ | User Instructions - Page 24
de tierra del gabinete al hilo neutro. El cable de conexión directa debe tener 5 pies (1,52 m) extra de largo para poder mover la lavadora/secadora si fuese necesario. Pele 3½" (8,9 cm) de la cubierta exterior desde el extremo del cable. Pele el aislamiento 1" (2,5 cm) hacia atrás. Si usa un - Whirlpool WET3300SQ | User Instructions - Page 25
tornillos del protector de cables. 5. Introduzca la lengüeta de la cubierta del bloque de terminal en la ranura del panel posterior de la secadora. Asegure la cubierta con el tornillo de sujeción. 6. Conecte un hilo de tierra de cobre separado desde el tornillo conductor de tierra externo a tierra - Whirlpool WET3300SQ | User Instructions - Page 26
Whirlpool Parts and Accessories (Piezas y accesorios de Whirlpool). Para obtener más información, vea la sección "Ayuda o servicio técnico" en las Instrucciones para el usuario de la lavadora/secadora aire y a un rendimiento insuficiente. ■ No instale el ducto de escape de metal flexible en paredes - Whirlpool WET3300SQ | User Instructions - Page 27
aquí) es aceptable. 4" (10,2 cm) Quite el fleje de embalaje ADVERTENCIA Peligro de Peso Excesivo Use dos o más personas para mover e instalar la lavadora/secadora. No seguir esta instrucción puede ocasionar una lesión en la espalda u otro tipo de lesiones. Para prevenir daños al piso, coloque la - Whirlpool WET3300SQ | User Instructions - Page 28
Instalación de las patas niveladoras Instale las patas niveladoras delanteras 1. Apuntale la parte frontal de la lavadora/secadora unas 4" (10,2 cm) con un bloque de madera o un objeto similar. El bloque tiene que soportar el peso de la lavadora/secadora. 2. Atornille la tuerca de seguridad dentro - Whirlpool WET3300SQ | User Instructions - Page 29
y un tope, ubicados en la parte superior del panel de acceso. Deje a un lado el panel, los tornillos y el tope. Complete la conexión de las mangueras de agua. Vuelva a colocar el panel de acceso una vez que haya completado la instalación de la lavadora/secadora. NOTA: No apriete demasiado ni use - Whirlpool WET3300SQ | User Instructions - Page 30
ón Seleccione su tipo de instalación de ventilación Instalaciones típicas de escape Las instalaciones típicas tienen la ventilación de la secadora en la parte posterior de la lavadora/secadora. Otras instalaciones son posibles. A B C A. Instalación estándar con desviación de la ventilación en la - Whirlpool WET3300SQ | User Instructions - Page 31
el usuario de la lavadora/secadora. ■ Instalación en la parte superior: Pieza número 27 pies (8,2 m) Metal flexible 21 pies (6,4 m) 16 pies (4,9 m) 2 Metal rígido 24 pies (7,3 m) 19 pies (5,8 m) Metal flexible 15 pies (4,6 m) 10 pies (3,0 m) Instalación del sistema de ventilación 1. Instale - Whirlpool WET3300SQ | User Instructions - Page 32
bloque de madera y ajuste las patas hacia arriba o hacia abajo, según sea necesario. Quite el bloque de madera. 3. Incline la lavadora/secadora hacia adelante hasta que la parte posterior de la misma esté por lo menos a 4" (10,2 cm) del piso. Tal vez escuche las patas traseras autorregulables cuando - Whirlpool WET3300SQ | User Instructions - Page 33
nécessaires. Les installations pour maison mobile nécessitent un système d'évacuation en métal qui peut être acheté chez le marchand chez qui vous avez acheté votre laveuse/sécheuse. Pour plus d'information, veuillez consulter la section "Assistance ou service" des Instructions pour l'utilisateur - Whirlpool WET3300SQ | User Instructions - Page 34
installation peut nécessiter des pièces supplémentaires. Pour commander, veuillez consulter les numéros sans frais d'interurbain sur la première page des Instructions . Voir "Spécifications électriques." ■ Un plancher robuste pour supporter le poids de la laveuse/ sécheuse (laveuse/sécheuse, eau - Whirlpool WET3300SQ | User Instructions - Page 35
être assez grand pour permettre d'ouvrir complètement la porte de la sécheuse. Dimensions de la laveuse/sécheuse 71⁵⁄₈" (181,9 cm) 23³⁄₄" (60,3 cm) 32¹⁄₄" (81,9 cm) *32" (81,3 cm) 27" (68,6 cm) *La plupart des installations requièrent un espace minimum de 5" (12,7 cm) derrière la sécheuse pour - Whirlpool WET3300SQ | User Instructions - Page 36
les numéros de service qui se trouvent dans les Instructions pour l'utilisateur de la ée sur une prise appropriée qui est bien installée et reliée à la terre conformément normalisation, 178 Rexdale Blvd., Toronto, ON M9W 1R3 CANADA. ■ Alimenter l'appareil uniquement par un circuit monophasé - Whirlpool WET3300SQ | User Instructions - Page 37
appelant le service Pièces et accessoires de Whirlpool. Pour plus d'information, voir la section "Assistance ou service" des Instructions pour l' de réduire la capacité d'évacuation et le rendement. ■ Ne pas installer le conduit métallique flexible dans les cavités fermées des murs, plafonds - Whirlpool WET3300SQ | User Instructions - Page 38
Enlever la sangle d'expédition AVERTISSEMENT Risque du poids excessif Utiliser deux ou plus de personnes pour déplacer et installer la laveuse/sécheuse. Le non-respect de cette instruction peut causer une blessure au dos ou d'autre blessure. Pour éviter des dommages au plancher, placer la laveuse - Whirlpool WET3300SQ | User Instructions - Page 39
Installation des pieds de nivellement avant 1. Relever l'avant de la laveuse/sécheuse d'environ 4" (10,2 cm) à l'aide d'un bloc de bois ou autre objet similaire. Le bloc doit pouvoir supporter fuie, l'installer en suivant les instructions ci-dessous. IMPORTANT : Pour une installation correcte, suivre - Whirlpool WET3300SQ | User Instructions - Page 40
ou du calfeutrant sur la valve. Les valves risquent d'être endommagées. Au Canada Vérifier s'il y a des fuites ■ Ouvrir les robinets d'eau et vérifier duire le risque de défaillance intempestive. Prendre note de la date d'installation ou de remplacement des tuyaux d'arrivée d'eau, pour référence ult - Whirlpool WET3300SQ | User Instructions - Page 41
où le dégagement est réduit. Consulter la section "Assistance ou service" des Instructions pour l'utilisateur de la laveuse/sécheuse. ■ Installation sur le dessus : Pièce numéro 4396028 ■ Installation avec périscope (Pour utilisation en cas de non-concordance de la bouche de décharge de - Whirlpool WET3300SQ | User Instructions - Page 42
20 pi (6,1 m) 1 Métallique 32 pi (9,7 m) 27 pi (8,2 m) rigide Métallique souple 21 pi (6,4 m) 16 pi (4,9 m) 2 Métallique 24 pi (7,3 m) 19 pi (5,8 m) rigide Métallique souple 15 pi (4,6 m) 10 pi (3,0 m) Installation du système d'évacuation 1. Installer le clapet d'évacuation. Calfeutrer - Whirlpool WET3300SQ | User Instructions - Page 43
de niveau. Achever l'installation 1. Vérifier que toutes les pièces sont maintenant installées. S'il sur la laveuse/ sécheuse. 10. Lire les Instructions pour l'utilisateur de la laveuse/sécheuse. 11. . Rabattre le couvercle. Sélectionner HEAVY DUTY (service intense) et tirer sur le bouton de commande - Whirlpool WET3300SQ | User Instructions - Page 44
rights reserved. TM DURASAFE is a trademark of Whirlpool, U.S.A., Whirlpool Canada LP licensee in Canada Printed in U.S.A. Todos los derechos reservados. TM DURASAFE es una marca de comercio de Whirlpool, U.S.A., usada en Canadá bajo licencia de Whirlpool Canada LP Impreso en EE. UU. Tous droits
-
 1
1 -
 2
2 -
 3
3 -
 4
4 -
 5
5 -
 6
6 -
 7
7 -
8
-
9
-
10
-
11
-
12
-
13
-
14
-
15
-
16
-
17
-
18
-
19
-
20
-
21
-
22
-
23
-
24
-
25
-
26
-
27
-
28
-
29
-
30
-
31
-
32
-
33
-
34
-
35
-
36
-
37
-
38
-
39
-
40
-
41
-
42
-
43
-
44
 |
 |

27" (69 CM) ELECTRIC WASHER/DRYER
INSTALLATION INSTRUCTIONS
INSTRUCCIONES DE INSTALACIÓN DE LA LAVADORA/
SECADORA ELÉCTRICA DE 27" (69 CM)
INSTRUCTIONS D'INSTALLATION
LAVEUSE/SÉCHEUSE ÉLECTRIQUE DE 27" (69 CM)
WASHER/DRYER SAFETY
Table of Contents / Índice / Table des matières
WASHER/DRYER SAFETY
.............................
1
INSTALLATION INSTRUCTIONS
...................
2
Tools and Parts
.............................................
2
Alternate Parts
...............................................
2
Location Requirements
.................................
3
Drain System
.................................................
4
Electrical Requirements - U.S.A
. ..................
4
Electrical Requirements - Canada
................
5
Electrical Connection - U.S.A. Only
.............
6
Venting Requirements
.................................
11
Remove Shipping Strap
..............................
12
Install Leveling Legs
....................................
12
Connect the Drain Hose
..............................
12
Connect the Inlet Hoses
.............................
13
Secure the Drain Hose
................................
14
Plan Vent System
........................................
14
Install Vent System
......................................
15
Level Washer/Dryer
.....................................
15
Connect Vent
..............................................
15
Complete Installation
..................................
16
SEGURIDAD DE LA
LAVADORA/SECADORA
...............................
17
INSTRUCCIONES DE INSTALACIÓN
..........
17
Herramientas y piezas
.................................
17
Piezas alternativas
......................................
18
Requisitos de ubicación
.............................
18
Sistema de desagüe
..................................
19
Requisitos eléctricos - EE.UU
.....................
19
Conexión eléctrica - Sólo en EE. UU
..........
21
Requisitos de ventilación
............................
26
Quite el fleje de embalaje
............................
27
Instalación de las patas niveladoras
...........
28
Conecte la manguera de desagüe
..............
28
Conecte las mangueras de entrada
...........
29
Fijación de la manguera de desagüe
..........
30
Planificación del sistema de ventilación
.....
30
Instalación del sistema de ventilación
........
31
Cómo nivelar la lavadora/secadora
............
31
Conexión del ducto de escape
...................
32
Complete la instalación
...............................
32
SÉCURITÉ DE LA LAVEUSE/SÉCHEUSE ... 33
INSTRUCTIONS D'INSTALLATION
..............
33
Outillage et pièces
.......................................
33
Autres pièces
..............................................
34
Exigences d'emplacement
........................
34
Système de vidange
...................................
35
Spécifications électriques - Canada
...........
36
Exigences concernant l'évacuation
............
37
Enlever la sangle d'expédition
....................
38
Installation des pieds de nivellement
..........
39
Raccordement du tuyau de vidange
..........
39
Raccordement des tuyaux d’alimentation.. 39
Immobilisation du tuyau de vidange
...........
40
Planification du système d’évacuation
.......
41
Installation du système d'évacuation
.........
42
Nivellement de la laveuse/sécheuse
...........
42
Raccordement du conduit d'évacuation
....
43
Achever l'installation
...................................
43
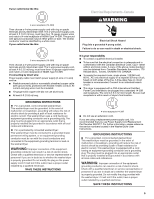
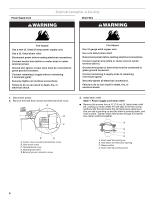
You can be killed or seriously injured if you don't immediately
You
can be killed or seriously injured if you don't follow
All safety messages will tell you what the potential hazard is, tell you how to reduce the chance of injury, and tell you what can
happen if the instructions are not followed.
Your safety and the safety of others are very important.
We have provided many important safety messages in this manual and on your appliance. Always read and obey all safety
messages.
This is the safety alert symbol.
This symbol alerts you to potential hazards that can kill or hurt you and others.
All safety messages will follow the safety alert symbol and either the word “DANGER” or “WARNING.”
These words mean:
follow instructions.
instructions.
DANGER
WARNING
W10118289A