Whirlpool WFG110AVQ Installation Instructions
Whirlpool WFG110AVQ - 30" Standard Clean Gas Range Manual
 |
UPC - 883049146980
View all Whirlpool WFG110AVQ manuals
Add to My Manuals
Save this manual to your list of manuals |
Whirlpool WFG110AVQ manual content summary:
- Whirlpool WFG110AVQ | Installation Instructions - Page 1
INSTALLATION INSTRUCTIONS 30" (76.2 CM) FREESTANDING GAS RANGES with standard clean oven Table of Contents RANGE SAFETY...2 INSTALLATION REQUIREMENTS 3 Tools and Parts...3 Location Requirements 4 Electrical Requirements 5 Gas Supply Requirements 6 INSTALLATION INSTRUCTIONS 7 Unpack Range ...7 - Whirlpool WFG110AVQ | Installation Instructions - Page 2
from a neighbor's phone. Follow the gas supplier's instructions. • If you cannot reach your gas supplier, call the fire department. - Installation and service must be performed by a qualified installer, service agency or the gas supplier. WARNING: Gas leaks cannot always be detected by smell - Whirlpool WFG110AVQ | Installation Instructions - Page 3
range foot. Reconnect the anti-tip bracket, if the range is moved. Failure to follow these instructions can result in death or serious burns to children and adults. INSTALLATION REQUIREMENTS Tools and Parts Gather the required tools and parts compound resistant to LP gas ■ Noncorrosive leak- - Whirlpool WFG110AVQ | Installation Instructions - Page 4
model/serial rating plate. The model/serial rating plate is located on the oven frame behind the left side of the broiler door. A A. Model/serial rating plate location ■ The range " section. E D ■ Proper gas supply connection must be available. See "Gas Supply Requirements" section. ■ Contact - Whirlpool WFG110AVQ | Installation Instructions - Page 5
, follow the range hood or microwave hood combination installation instructions for dimensional clearances above the cooktop surface. B D C A H E G J I F K M L NL A. 18" (45.7 cm) min. clearance upper side cabinet to countertop B. 13" (33.0 cm) max. upper cabinet depth C. 30" (76.2 cm - Whirlpool WFG110AVQ | Installation Instructions - Page 6
be done by a qualified service technician. No attempt shall be made to convert the appliance from the gas specified on the model/serial rating plate for use with a different gas without consulting the serving gas supplier. See "Gas Conversions" section. Gas Supply Line ■ Provide a gas supply line of - Whirlpool WFG110AVQ | Installation Instructions - Page 7
must be isolated from the gas supply piping system by closing its individual manual shutoff valve during any pressure testing of the gas supply piping system at test pressures equal to or less than ½ psi (3.5 kPa). INSTALLATION INSTRUCTIONS Unpack Range Install Anti-Tip Bracket WARNING Excessive - Whirlpool WFG110AVQ | Installation Instructions - Page 8
so range will be 7. Move range close enough to the or hardboard from under range. 8. Open the broiler engage the anti-tip bracket. 10. Move range into its final location making sure rear leveling range in a mobile home, you must secure the range to the floor. Any method of securing the range - Whirlpool WFG110AVQ | Installation Instructions - Page 9
in the "on" position. G A. Pressure regulator connection fitting B. 90° elbow C. Black iron pipe D. Union E. Nipple F. Manual shutoff valve G. ½" or ¾" gas pipe Typical flexible connection 1. Apply pipe-joint compound made for use with LP gas to the smaller thread ends of the flexible connector - Whirlpool WFG110AVQ | Installation Instructions - Page 10
for the anti-tip bracket securely attached to the floor. ■ Slide the range back so the rear range foot is under the anti- tip bracket. Electronic Ignition System Initial lighting and gas flame adjustments Cooktop and oven burners use electronic igniters in place of standing pilots. When the cooktop - Whirlpool WFG110AVQ | Installation Instructions - Page 11
a soft cloth. For more information, see the "Range Care" section of the Use and Care Guide. 6. Read the Use and Care Guide. 7. Turn on surface burners and oven. See the Use and Care Guide for specific instruction on range operation. If range does not operate, check the following: ■ Household fuse - Whirlpool WFG110AVQ | Installation Instructions - Page 12
is moved. Failure to follow these instructions can result in death or serious burns to children and adults. To Convert Gas Pressure Regulator 1. Turn manual shutoff valve to the "closed" position. B A C A. To range B. Manual shutoff valve "closed" position C. Gas supply line 12 6. Reinstall the cap - Whirlpool WFG110AVQ | Installation Instructions - Page 13
To Convert Surface Burners 1. Remove burner grate, burner caps and burners. A B For models with 3 standard burners and 1 super™ burner: Std burner 88 Super burner 96 Std burner 88 Std burner 88 A. Burner cap B. Burner 2. Locate LP gas orifice spuds for top burners in the literature bag included - Whirlpool WFG110AVQ | Installation Instructions - Page 14
to follow these instructions can result in death or serious burns to children and adults. To Convert Gas Pressure Regulator 1. Turn manual shutoff valve to the "closed" position. B A C A. To range B. Manual shutoff valve "closed" position C. Gas supply line 2. Unplug range or disconnect power - Whirlpool WFG110AVQ | Installation Instructions - Page 15
To Convert Surface Burners 1. Remove burner grate, burner caps and burners. A B For models with 4 standard burners: Std Burner 149 Std Burner 149 Std Burner 149 Std Burner 149 For models with 3 standard burners and 1 super burner: A. Burner cap B. Burner 2. Locate the Natural gas orifice spuds - Whirlpool WFG110AVQ | Installation Instructions - Page 16
the range. 4. Use a ³⁄₈" combination wrench and remove the LP gas orifice spud. 5. Install the number "47" LP gas spud. A A. Natural gas oven orifice spud stamped with "47" IMPORTANT: Do not overtighten. 6. Place LP gas oven burner spud in plastic parts bag along with LP gas cooktop burner spuds
-
 1
1 -
 2
2 -
 3
3 -
 4
4 -
 5
5 -
 6
6 -
 7
7 -
8
-
9
-
10
-
11
-
12
-
13
-
14
-
15
-
16
 |
 |

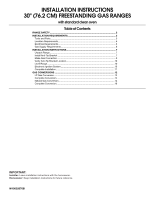
INSTALLATION INSTRUCTIONS
30" (76.2 CM) FREESTANDING GAS RANGES
with standard clean oven
Table of Contents
RANGE SAFETY
............................................................................................................
2
INSTALLATION REQUIREMENTS
...............................................................................
3
Tools and Parts
...........................................................................................................
3
Location Requirements
...............................................................................................
4
Electrical Requirements
..............................................................................................
5
Gas Supply Requirements
..........................................................................................
6
INSTALLATION INSTRUCTIONS
.................................................................................
7
Unpack Range
............................................................................................................
7
Install Anti-Tip Bracket
...............................................................................................
7
Make Gas Connection
................................................................................................
9
Verify Anti-Tip Bracket Location
...............................................................................
10
Level Range
..............................................................................................................
10
Electronic Ignition System
........................................................................................
10
Complete Installation
................................................................................................
11
GAS CONVERSIONS
..................................................................................................
12
LP Gas Conversion
...................................................................................................
12
Complete Conversion
...............................................................................................
14
Natural Gas Conversion
............................................................................................
14
Complete Conversion
...............................................................................................
16
IMPORTANT:
Installer:
Leave installation instructions with the homeowner.
Homeowner:
Keep installation instructions for future reference.
W10032070B