Whirlpool WFG361LVS Owners Manual
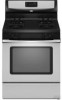
Whirlpool WFG361LVS - 5.0 Cubic Foot Gas Range Manual
 |
UPC - 883049139159
View all Whirlpool WFG361LVS manuals
Add to My Manuals
Save this manual to your list of manuals |
Whirlpool WFG361LVS manual content summary:
- Whirlpool WFG361LVS | Owners Manual - Page 1
6 Electronic Oven Controls 6 Aluminum Foil 7 Positioning Racks and Bakeware 7 Oven Vent 7 Baking and Roasting 7 Broiling 7 Timed Cooking (on some models 8 RANGE CARE 8 Self-Cleaning Cycle (on some models 8 General Cleaning 9 Oven Light 9 TROUBLESHOOTING 10 ACCESSORIES 11 WARRANTY 12 - Whirlpool WFG361LVS | Owners Manual - Page 2
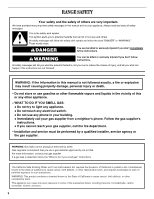
. Follow the gas supplier's instructions. • If you cannot reach your gas supplier, call the fire department. - Installation and service must be performed by a qualified installer, service agency or the gas supplier. WARNING: Gas leaks cannot always be detected by smell. Gas suppliers recommend that - Whirlpool WFG361LVS | Owners Manual - Page 3
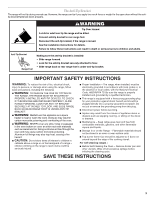
Be sure the range is properly installed and grounded by a qualified technician. ■ This range is equipped with self-cleaning ranges - ■ Before Self-Cleaning the Oven - Remove broiler pan and other utensils. Wipe off all excessive spillage before initiating the cleaning cycle. SAVE THESE INSTRUCTIONS - Whirlpool WFG361LVS | Owners Manual - Page 4
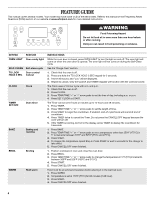
.whirlpool.com for more detailed instructions. WARNING Food Poisoning Hazard Do not let food sit in oven more than one hour before or after cooking. Doing so can result in food poisoning or sickness. KEYPAD FEATURE OVEN LIGHT Oven cavity light SELF-CLEAN Self-clean cycle TO LOCK Oven control - Whirlpool WFG361LVS | Owners Manual - Page 5
. All 4 surface burners will click. Only the burner with the control knob turned to IGNITE will produce a flame. 2. Turn knob to anywhere between HIGH and LOW. REMEMBER: When range is in use or (on some models) during the Self-Cleaning cycle, the entire cooktop area may become hot. Power Failure In - Whirlpool WFG361LVS | Owners Manual - Page 6
To Clean: IMPORTANT: Before cleaning, make sure all controls are off and the oven and cooktop are cool. Do not use oven cleaners, bleach or rust removers. 1. Remove the burner cap from the burner base and clean according to "General Cleaning" section. 2. Clean the gas tube opening with a damp cloth. - Whirlpool WFG361LVS | Owners Manual - Page 7
some models) The ACCUBAKE® system electronically regulates the oven heat levels during preheat and bake to maintain a precise temperature range for optimal cooking results. The bake and broil elements or burners cycle on and off in intervals. This feature is automatically activated when the oven is - Whirlpool WFG361LVS | Owners Manual - Page 8
Oven Control with Adjustable Clean Time (on some models) The SELF CLEAN self-cleaning cycle is time adjustable between 2 hours 30 minutes and 4 hours 30 minutes in 15-minute increments. Suggested clean times are 2 hours 30 minutes for light soil, and 4 hours 30 minutes for heavy soil. The last 30 - Whirlpool WFG361LVS | Owners Manual - Page 9
clean around the model and serial number plate because scrubbing may remove numbers. ■ All-Purpose Appliance Cleaner Part Number 31682 (not included): See cover for contact information. COOKTOP CONTROLS To avoid damage to the cooktop controls, do not use steel wool, abrasive cleansers or oven - Whirlpool WFG361LVS | Owners Manual - Page 10
? See Installation Instructions. ■ Is the range properly connected to the gas supply? Contact a trained repair specialist or see Installation Instructions. Surface burners will not operate ■ Is the oven in self-clean? Surface burners will not operate during self-clean cycle. ■ Is the control knob - Whirlpool WFG361LVS | Owners Manual - Page 11
position in the oven. ■ Are pie crust edges browning early? Use aluminum foil to cover the edge of the crust and/or reduce baking temperature. Stainless Steel Cleaner and Polish (stainless steel models) Order Part Number 31462 All-Purpose Appliance Cleaner Order Part Number 31682 Gas Grate and Drip - Whirlpool WFG361LVS | Owners Manual - Page 12
service by an authorized Whirlpool servicer is not available. 10. The removal and reinstallation of your major appliance if it is installed in an inaccessible location or is not installed in accordance with published installation instructions. 11. Major appliances with original model/serial numbers
-
 1
1 -
 2
2 -
 3
3 -
 4
4 -
 5
5 -
 6
6 -
 7
7 -
8
-
9
-
10
-
11
-
12
 |
 |
THANK YOU for purchasing this high-quality product. If you should experience a problem not covered in TROUBLESHOOTING,
please visit our website at
www.whirlpool.com
for additional information. If you still need assistance, call us at 1-800-253-1301.
You will need your model and serial number located on the oven frame behind the storage drawer panel.
Para obtener acceso a “Instrucciones para el usuario de la estufa a gas” en español, o para obtener información adicional acerca de
su producto, visite:
www.whirlpool.com
Tenga listo su número de modelo completo. Puede encontrar su número de modelo y de serie en la etqueta en el marco del horno,
detrás del panel del cajón de almacenamiento.
®
GAS RANGE
USER INSTRUCTIONS
Table of Contents
RANGE SAFETY
.......................................................................................
2
The Anti-Tip Bracket
.............................................................................
3
FEATURE GUIDE
.....................................................................................
4
COOKTOP USE
........................................................................................
5
Sealed Surface Burners
........................................................................
5
OVEN USE
................................................................................................
6
Electronic Oven Controls
......................................................................
6
Aluminum Foil
........................................................................................
7
Positioning Racks and Bakeware
.........................................................
7
Oven Vent
..............................................................................................
7
Baking and Roasting
.............................................................................
7
Broiling
..................................................................................................
7
Timed Cooking (on some models)
........................................................
8
RANGE CARE
...........................................................................................
8
Self-Cleaning Cycle (on some models)
................................................
8
General Cleaning
...................................................................................
9
Oven Light
.............................................................................................
9
TROUBLESHOOTING
............................................................................
10
ACCESSORIES
......................................................................................
11
WARRANTY
............................................................................................
12
W10196153B