Whirlpool WOC54EC0AB Installation Guide
Whirlpool WOC54EC0AB Manual
 |
View all Whirlpool WOC54EC0AB manuals
Add to My Manuals
Save this manual to your list of manuals |
Whirlpool WOC54EC0AB manual content summary:
- Whirlpool WOC54EC0AB | Installation Guide - Page 1
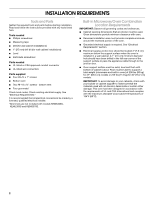
DE 27" (68,6 CM) ET 30" (76,2 CM) Table of Contents/Table des matières BUILT-IN MICROWAVE/OVEN COMBINATION SAFETY 1 INSTALLATION REQUIREMENTS 2 Tools and Parts 2 Built-In Microwave/Oven Combination Location Requirements 2 Electrical Requirements 4 INSTALLATION INSTRUCTIONS 5 Prepare Built-In - Whirlpool WOC54EC0AB | Installation Guide - Page 2
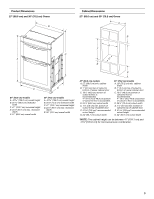
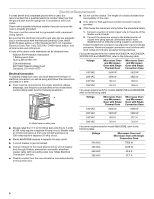
supply is required. See "Electrical Requirements" section. ■ Electrical supply junction box should be located 3" (7.6 cm) maximum below the support surface when the oven is installed in a wall cabinet. A 1" (2.5 cm) minimum diameter hole should have been drilled in the left rear corner of the - Whirlpool WOC54EC0AB | Installation Guide - Page 3
27" (68.6 cm) and 30" (76.2 cm) Ovens B Cabinet Dimensions 27" (68.6 cm) and 30" (76.2 cm) Ovens A B D F C A G E C E D 27" (68.6 cm) models A. 42 108.0 cm) overall height B. 25 64.6 cm) recessed width C. 41" (104.1 cm) recessed height D. 23¹⁄₄" (59.1 cm) max. recessed depth E. 27 - Whirlpool WOC54EC0AB | Installation Guide - Page 4
for serviceability of the oven. install your oven, you must determine the type of electrical connection you will be using and follow the instructions provided for it here. ■ Oven must be connected to the proper electrical voltage, amperage, and frequency as specified on the model/serial number rating - Whirlpool WOC54EC0AB | Installation Guide - Page 5
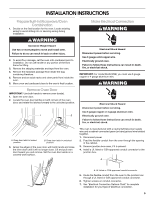
Electrical Connection WARNING Electrical Shock Hazard Disconnect power before servicing. Use 8 gauge solid copper wire. Electrically ground oven. Failure to follow these instructions can result in death, fire, or electrical shock. IMPORTANT: For model KEHU309B, you must use 6 gauge copper or 4 gauge - Whirlpool WOC54EC0AB | Installation Guide - Page 6
through neutral, New Branch circuit installations (1996 NEC), mobile homes and recreational vehicles, new construction and in Canada. A B E F G White wires E. Green (or bare) ground wire (from oven) F. 4-wire flexible conduit from oven G. Red wires H. UL listed wire connectors I. UL listed - Whirlpool WOC54EC0AB | Installation Guide - Page 7
models, the oven vent is taped to the side of the oven. See the following instructions to install. ■ Insert the vent tabs (B) into slots (A) in the oven reference the "Assistance or Service" section of the Use and Care Guide or contact the dealer from whom you purchased your oven. B C A. - Whirlpool WOC54EC0AB | Installation Guide - Page 8
1. Check that all parts are now installed. If there is an extra part, go back through the steps to see which step was skipped. 2. Check that you have all of your tools. 3. Dispose of/recycle all packaging materials. 4. For oven use and cleaning, read the Use and Care Guide. Check Operation of - Whirlpool WOC54EC0AB | Installation Guide - Page 9
: DANGER Risque possible de décès ou de blessure grave si vous ne suivez pas immédiatement les instructions. AVERTISSEMENT Risque possible de décès ou de blessure grave si vous ne suivez pas les instructions. Tous les messages de sécurité vous diront quel est le danger potentiel et vous disent - Whirlpool WOC54EC0AB | Installation Guide - Page 10
dimensions indiquées pour la cavité d'installation entre les placards. Ces dimensions prennent en compte les dégagements de séparation nécessaires. ■ L'espace d'installation de la surface de support lorsque le four est installé dans un placard mural pour les modèles de 30" (76,2 cm). IMPORTANT - Whirlpool WOC54EC0AB | Installation Guide - Page 11
du produit Fours de 27" (68,6 cm) et 30" (76,2 cm) B Dimensions du placard Fours de 27" (68,6 cm) et 30" (76,2 cm) A C A E D Modèles de 27" (68,6 cm) A. Hauteur hors-tout 42 108 cm) B. Largeur d'encastrement 25 64,6 cm) C. Hauteur d'encastrement 41" (104,1 cm) D. Profondeur d' - Whirlpool WOC54EC0AB | Installation Guide - Page 12
installer le four correctement, il faut établir le type de raccords électriques que l'on utilisera et suivre les instructions modèles WOC54EC7A, WOC54EC0A,WOC95EC0A et MMW9730A consulter le 5490 W 5520 W 208 VCA 4590 W 4620 W 240 VCA 30,4 A 30,5 A 208 VCA 28,4 A 28,6 A A A. Plaque signal - Whirlpool WOC54EC0AB | Installation Guide - Page 13
installation. AVERTISSEMENT Risque du poids excessif Utiliser deux ou plus de personnes pour déplacer et installer le four. Le non-respect de cette instruction four vers soi et enlever la porte. Conserver la porte du four à part sur une surface de travail couverte. Le câblage d'alimentation de ce - Whirlpool WOC54EC0AB | Installation Guide - Page 14
la terre par l'intermédiaire du conducteur neutre, en cas de nouvelle installation avec alimentation par un circuit secondaire (1996 NEC), dans les résidences mobiles et les véhicules récréatifs, dans les nouvelles constructions, et au Canada. A B E F G C H D I A. Câble depuis le point - Whirlpool WOC54EC0AB | Installation Guide - Page 15
avec du ruban adhésif sur le côté du four. Pour l'installation, procéder selon les instructions suivantes. ■ Insérer les onglets de l'évent (B) dans les d'affichage ne s'allume pas, consulter la section "Assistance ou service" du Guide d'utilisation et d'entretien ou contacter le marchand qui vous a - Whirlpool WOC54EC0AB | Installation Guide - Page 16
2. Régler le four à micro-ondes pour une durée de cuisson de "2:00" minutes. 3. Appuyer sur START (mise en marche). La lumière inté service" du Guide d'utilisation et d'entretien ou contacter le marchand chez qui le four encastré et le four à micro-ondes ont été achetés. 7. Appuyer sur CANCEL OVEN
-
 1
1 -
 2
2 -
 3
3 -
 4
4 -
 5
5 -
 6
6 -
 7
7 -
8
-
9
-
10
-
11
-
12
-
13
-
14
-
15
-
16
 |
 |
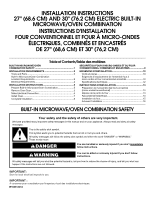
INSTALLATION INSTRUCTIONS
27" (68.6 CM) AND 30" (76.2 CM) ELECTRIC BUILT-IN
MICROWAVE/OVEN COMBINATION
INSTRUCTIONS D'INSTALLATION
FOUR CONVENTIONNEL ET FOUR À MICRO-ONDES
ÉLECTRIQUES, COMBINÉS ET ENCASTRÉS
DE 27" (68,6 CM) ET 30" (76,2 CM)
BUILT-IN MICROWAVE/OVEN COMBINATION SAFETY
W10351241A
Table of Contents/Table des matières
BUILT-IN MICROWAVE/OVEN
COMBINATION SAFETY
................................................................
1
INSTALLATION REQUIREMENTS
................................................
2
Tools and Parts
............................................................................
2
Built-In Microwave/Oven Combination
Location Requirements
................................................................
2
Electrical Requirements
...............................................................
4
INSTALLATION INSTRUCTIONS
..................................................
5
Prepare Built-In Microwave/Oven Combination
..........................
5
Remove Oven Door
......................................................................
5
Make Electrical Connection
.........................................................
5
Install Oven
...................................................................................
7
Complete Installation
...................................................................
8
SÉCURITÉ DU FOUR À MICRO-ONDES ET DU FOUR
CONVENTIONNEL COMBINÉS ET ENCASTRÉS
........................
9
EXIGENCES D'INSTALLATION
...................................................
10
Outils et pièces
...........................................................................
10
Exigences d'emplacement de l'ensemble four à
micro-ondes et four conventionnel encastrés
...........................
10
Spécifications électriques
..........................................................
12
INSTRUCTIONS D'INSTALLATION
.............................................
13
Préparation de l'ensemble des fours encastrés
(micro-ondes/conventionnel)
.....................................................
13
Dépose de la porte du four
........................................................
13
Raccordement électrique
...........................................................
13
Installation du four
......................................................................
15
Achever l'installation
..................................................................
16
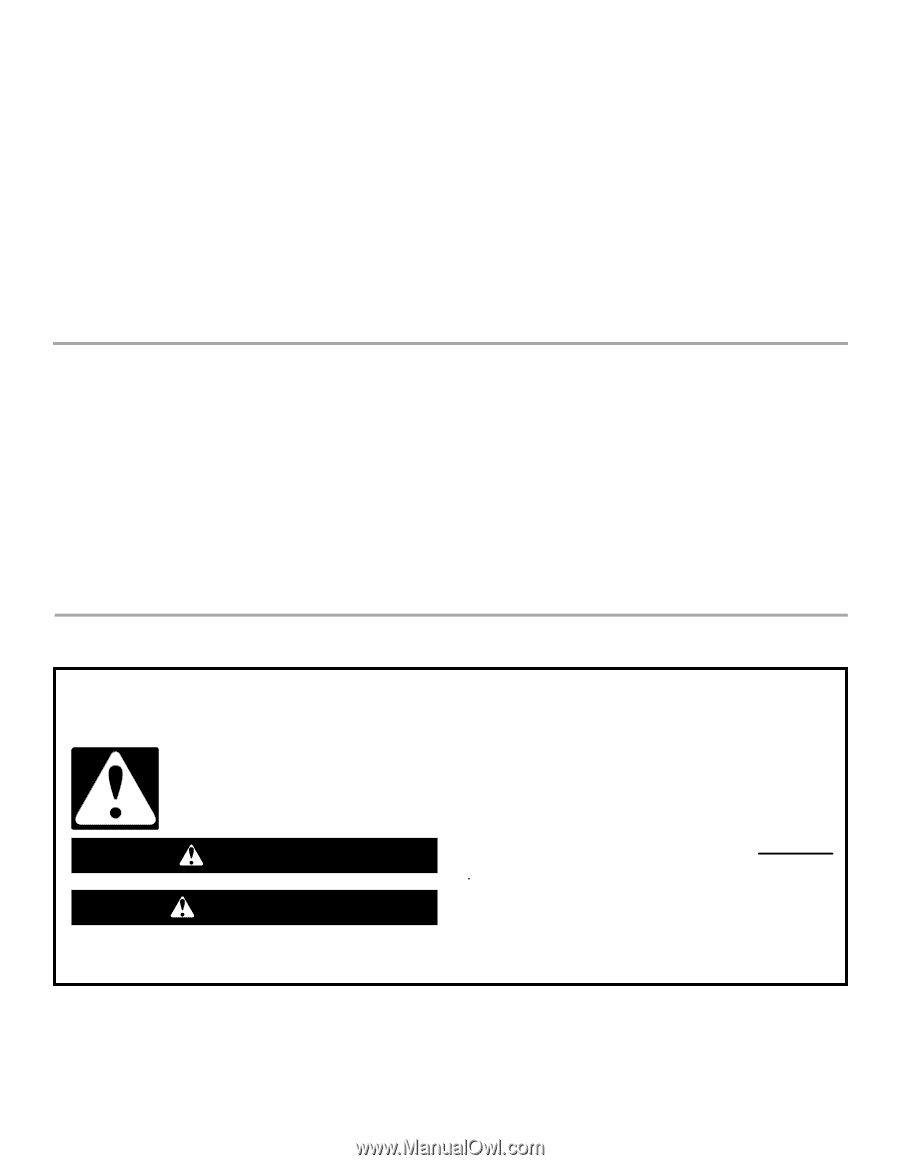
You can be killed or seriously injured if you don't immediately
You
can be killed or seriously injured if you don't follow
All safety messages will tell you what the potential hazard is, tell you how to reduce the chance of injury, and tell you what can
happen if the instructions are not followed.
Your safety and the safety of others are very important.
We have provided many important safety messages in this manual and on your appliance. Always read and obey all safety
messages.
This is the safety alert symbol.
This symbol alerts you to potential hazards that can kill or hurt you and others.
All safety messages will follow the safety alert symbol and either the word “DANGER” or “WARNING.”
These words mean:
follow instructions.
instructions.
DANGER
WARNING
IMPORTANT:
Save for local electrical inspector's use.
IMPORTANT :
À conserver pour consultation par l'inspecteur local des installations électriques.