Whirlpool WOD93EC0A Instruction Sheet
Whirlpool WOD93EC0A Manual
 |
View all Whirlpool WOD93EC0A manuals
Add to My Manuals
Save this manual to your list of manuals |
Whirlpool WOD93EC0A manual content summary:
- Whirlpool WOD93EC0A | Instruction Sheet - Page 1
nothing is blocking the exhaust or there are any problems with the blower(s) not moving enough air. Look WARNING Electrical Shock Hazard Disconnect power before servicing. Replace all parts and panels before Whirlpool Corporation 2014 (All Rights Reserved) Instruction Sheet W10719219 Rev A 6/14 - Whirlpool WOD93EC0A | Instruction Sheet - Page 2
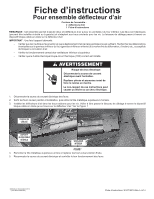
et panneaux avant de faire la remise en marche. Le non-respect de ces instructions peut causer un décès ou un choc électrique. 1. Déconnecter la source de courant ôler le bon fonctionnement des fours. © Whirlpool Corporation 2014 (Tous droits réservés) Fiche d'instructions W10719219 Rév A 6/14
-
 1
1 -
 2
2
 |
 |
Instruction Sheet W10719219 Rev A
6/14
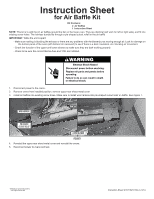
Instruction Sheet
for Air Baffle Kit
Kit Contains:
NOTE
: This kit is to add the (2) air baffles around the fan on the lower oven. They are identical (will work for left or right side), and fit into
existing screw holes. The harness bundle fits through a pie-shaped cutout relief on the air baffle.
IMPORTANT
: While the unit is apart;
- Make sure nothing is blocking the exhaust or there are any problems with the blower(s) not moving enough air. Look for damage on
the bottom panel of the oven (with bottom trim removed) to see if there is a dent, insulation, etc. blocking air movement.
- Check the function of the upper and lower blowers to make sure they are both working properly.
- Check to be sure the correct thermo-fuse and TOD are installed.
2
Air Baffles
1
Instruction Sheet
© Whirlpool Corporation 2014
(All Rights Reserved)
WARNING
Electrical Shock Hazard
Disconnect power before servicing.
Failure to do so can result in death
or electrical shock.
Replace all parts and panels before
operating.
1.
Disconnect power to the ovens.
2.
Remove ovens from installed position, remove upper rear sheet metal cover.
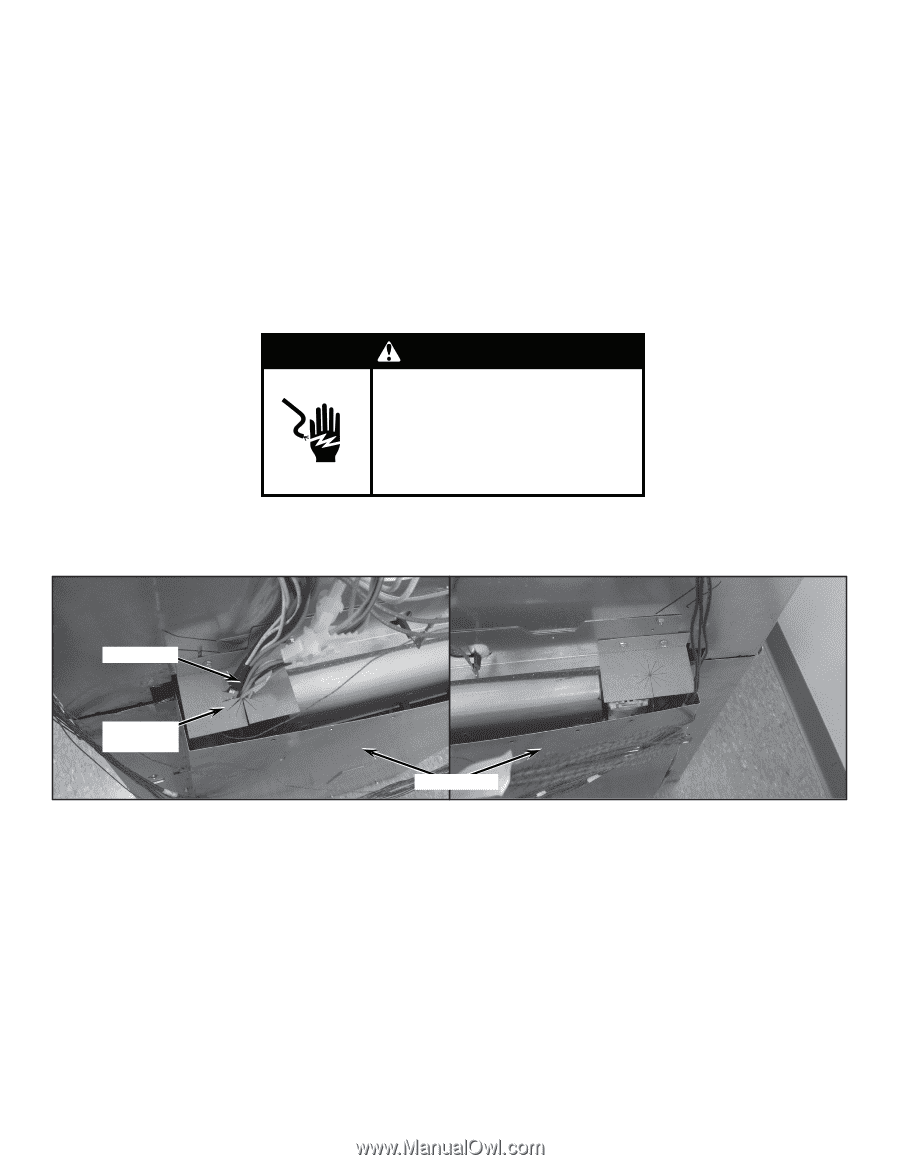
3.
Install air baffles into existing screw holes. Make sure to install wire harness into pie-shaped cutout relief on baffle. See
Figure 1.
FIGURE 1
WIRE HARNESS
PIE-SHAPED
CuTOuT RElIEF
4.
Reinstall the upper rear sheet metal cover and reinstall the ovens.
5.
Reconnect power to ovens and test.
lOwER BlOwER