Xerox 097N01674 Systems Administrator Guide
Xerox 097N01674 Manual
 |
View all Xerox 097N01674 manuals
Add to My Manuals
Save this manual to your list of manuals |
Xerox 097N01674 manual content summary:
- Xerox 097N01674 | Systems Administrator Guide - Page 1
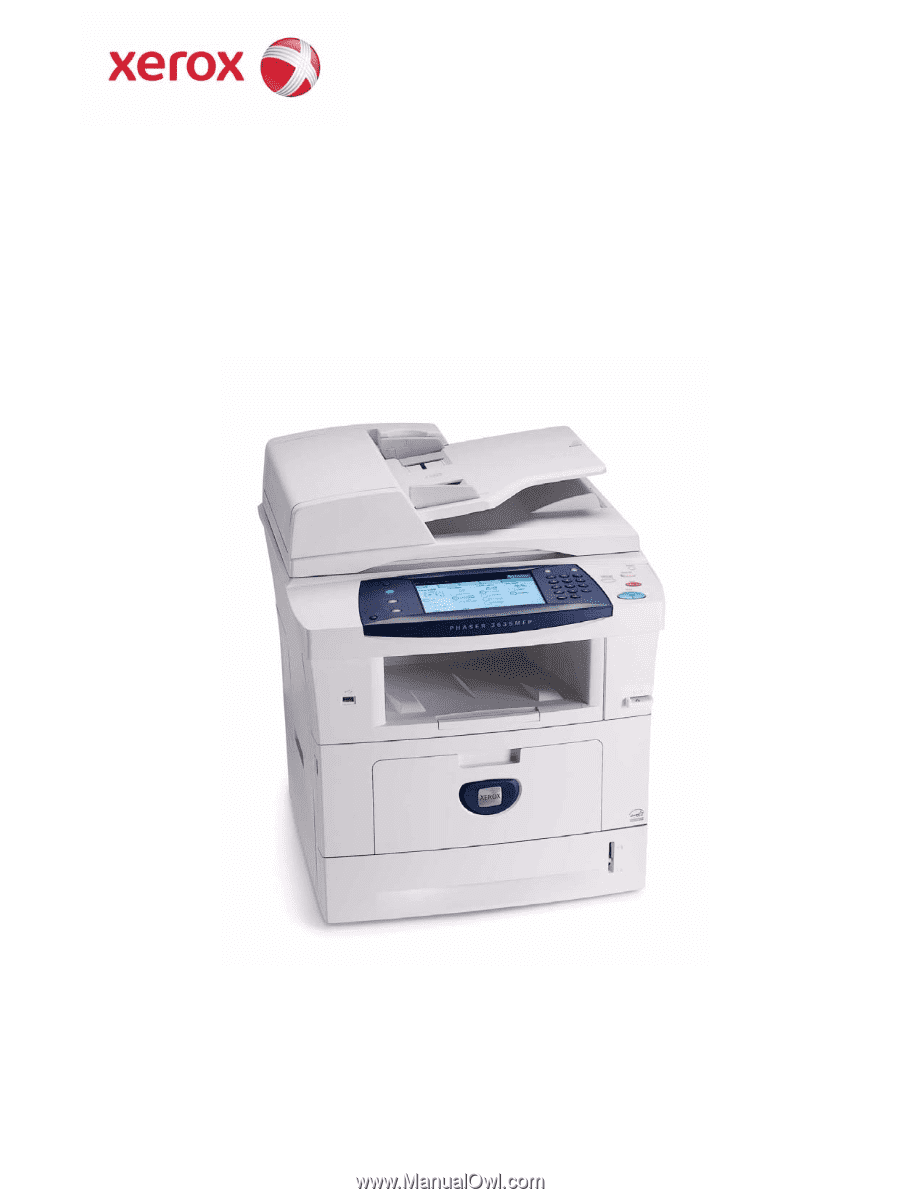
System Administration Guide Xerox Phaser 3635 Xerox WorkCentre 4260 Series System Administration Guide i - Xerox 097N01674 | Systems Administrator Guide - Page 2
GKLS Europe Operations Bessemer Road Welwyn Garden City Hertfordshire AL7 1BU United Kingdom © 2008 Xerox Corporation. Xerox® and the sphere of connectivity design are trademarks of Xerox Corporation in the United States and/or other countries. The information in this document is correct at the - Xerox 097N01674 | Systems Administrator Guide - Page 3
Introduction ...1 Who should use this Guide 1 Machine Models 1 Xerox Phaser 3635 2 Control Panel Overview 3 2 Machine Connection ...5 Connection Ports 5 machine 8 Printing a Configuration Report 9 CentreWare Internet Services 9 System Configuration 9 Access CentreWare Internet Services - Xerox 097N01674 | Systems Administrator Guide - Page 4
46 Information Checklist 46 Procedure 46 Configure the Windows Printer Driver 48 Bi-Directional Communication 48 Manual Print Driver Configuration 50 Apple Mac 50 TCP/IP Printing (OSX 50 Information Checklist 50 Install the Print Driver 50 iv Xerox Phaser 3635 System Administration Guide - Xerox 097N01674 | Systems Administrator Guide - Page 5
Mac Print Driver 52 Information Checklist 52 Procedure 52 UNIX 53 Print Driver Options: Enable/Disable the Banner Sheet 54 From the Print Driver 54 From the Machine 54 5 Network ...71 Overview 71 Information Checklist 71 Use the Feature 71 Xerox Phaser 3635 System Administration Guide v - Xerox 097N01674 | Systems Administrator Guide - Page 6
CONTENTS Copy Jobs to the machine 72 Print Jobs to the Machine 72 Store to USB 72 Print Files 73 Print file from the machine (stored on the Internal drive 73 Print file from the machine (stored ...89 Overview 89 Server Fax and Embedded Fax 89 vi Xerox Phaser 3635 System Administration Guide - Xerox 097N01674 | Systems Administrator Guide - Page 7
the Printer Driver - Manually 102 Use the Feature 102 Windows 102 Mac OS Users 103 Add Fax Recipient 103 Add Recipient from Phonebook 103 Setting up a Cover Sheet 104 Setup Fax Options 104 Setup Phonebook Preferences 105 User Preferences 105 Xerox Phaser 3635 System Administration Guide - Xerox 097N01674 | Systems Administrator Guide - Page 8
Standard Accounting 113 Overview 113 Information Checklist 114 Enable Xerox Standard Accounting in CentreWare Internet Services 114 Enable Xerox Standard Accounting from the Machine 115 Enable Xerox Standard Accounting in your Print Driver 115 Windows 115 Mac OS 116 Create a Group Account - Xerox 097N01674 | Systems Administrator Guide - Page 9
135 Verify that Local Authentication is enabled at the machine 136 802.1X Authentication 136 Overview 136 Information 802.1X 137 Enable 802.1X using the CentreWare Internet Service 137 Image Overwrite Security 138 Overview 138 On Demand 143 Xerox Phaser 3635 System Administration Guide ix - Xerox 097N01674 | Systems Administrator Guide - Page 10
Rebooting the machine 161 Alerts 161 Trays 162 Consumables 162 Billing and Counters 163 Billing Information 163 Billing Meter 163 Usage Counters 163 Active Jobs 164 Print 164 Image Settings 165 Portable Document Format (PDF) Settings 166 Job Management 166 x Xerox Phaser 3635 System - Xerox 097N01674 | Systems Administrator Guide - Page 11
Manual upgrade using CentreWare Internet Services 170 Information Checklist 170 Procedure 170 Manual upgrade using a USB flash drive 171 Information Checklist 171 Procedure 171 19 Troubleshooting ...173 Problem Values 188 At the machine 188 Xerox Phaser 3635 System Administration Guide xi - Xerox 097N01674 | Systems Administrator Guide - Page 12
TABLE OF CONTENTS xii Xerox Phaser 3635 System Administration Guide - Xerox 097N01674 | Systems Administrator Guide - Page 13
Xerox WorkCentre products. Who should use this Guide? This Guide is intended for System Administrators who need to install, setup and manage printers and other services on their network. To use the procedures in this Guide network User accounts. Machine Models The Xerox Phaser 3635 is capable of - Xerox 097N01674 | Systems Administrator Guide - Page 14
Stand Foreign Interface Phaser 3635MFP/S Standard Standard Standard Standard Standard Standard Standard Option Option Option Option Phaser 3635MFP/X Standard Standard Standard Standard Standard Standard Standard Standard Option Option Option Option 2 Xerox Phaser 3635 System Administration Guide - Xerox 097N01674 | Systems Administrator Guide - Page 15
Control Panel Overview Control Panel Overview Job Status Services Services Home Display and Touch Screen Log In/Out Interrupt Help Printing Power Clear All Stop Start Language Machine Status Dial Pause Cancel Entry Numeric Keypad Xerox Phaser 3635 System Administration Guide 3 - Xerox 097N01674 | Systems Administrator Guide - Page 16
1 Introduction 4 Xerox Phaser 3635 System Administration Guide - Xerox 097N01674 | Systems Administrator Guide - Page 17
2 Machine Connection This chapter shows you how to connect your machine to a network and configure Ethernet settings. Connection Ports Front View USB Port Xerox Phaser 3635 System Administration Guide 5 - Xerox 097N01674 | Systems Administrator Guide - Page 18
2 Machine Connection Rear View Power Switch Power Connection Foreign Device Interface Port Card Reader Slot for for connection to a USB flash drive and is used as an input port for printing jobs, storing jobs and performing a software upgrade. 6 Xerox Phaser 3635 System Administration Guide - Xerox 097N01674 | Systems Administrator Guide - Page 19
your network port. 3. Power on the machine The Power On button is located at the rear of the machine. 4. Complete the Steps shown by the Installation Wizard If this is the first time the machine has been powered on, the Installation Wizard will run. Xerox Phaser 3635 System Administration Guide 7 - Xerox 097N01674 | Systems Administrator Guide - Page 20
will automatically detect the speed of your network. The machine supports hub/switch speeds of: • Auto • 10 Mbps Machine Status> button. 5. Touch [Tools]. 6. Touch [Connectivity and Network Setup]. 7. Touch [Advanced]. 8. Touch [Network Setting]. 8 Xerox Phaser 3635 System Administration Guide - Xerox 097N01674 | Systems Administrator Guide - Page 21
. Access CentreWare Internet Services To view the [Internet Services Welcome] screen: 1. At your Workstation, open the Web browser, enter the TCP/IP Address of the machine in the Address bar. 2. Press [Enter] or click on the [Go] button. For example: Xerox Phaser 3635 System Administration Guide 9 - Xerox 097N01674 | Systems Administrator Guide - Page 22
simultaneous connections that can occur at any given moment to Internet Services. Enter a number from 8 - 32 to indicate the maximum machine in the Address bar. 2. Press [Enter]. 3. Click on the [Properties] tab. 4. Click on the [Maintenance] link. 10 Xerox Phaser 3635 System Administration Guide - Xerox 097N01674 | Systems Administrator Guide - Page 23
in the [New Admin Password] area. IMPORTANT: Do not forget the password or you could be completely locked out of the system, requiring a Service call. 7. Click on [Apply]. 8. Click on the [OK] button when the confirmation message box appears. Xerox Phaser 3635 System Administration Guide 11 - Xerox 097N01674 | Systems Administrator Guide - Page 24
2 Machine Connection 12 Xerox Phaser 3635 System Administration Guide - Xerox 097N01674 | Systems Administrator Guide - Page 25
network utilising the TCP/IP protocol. 2. Ensure that the machine is connected to the network. 3. Static IP Address for the machine. 4. Subnet Mask Address for the machine. 5. Gateway Address for the machine. 6. Host Name for the machine. Xerox Phaser 3635 System Administration Guide 13 - Xerox 097N01674 | Systems Administrator Guide - Page 26
which your machine will accept LPR print jobs through, it is recommended that you do this with extreme caution as most LPR spoolers are set to send print jobs to the default port of 515. 26. Touch [Save]. 27. Touch [HTTP] and ensure it says Enabled. If not, touch [Enable]. 14 Xerox Phaser 3635 - Xerox 097N01674 | Systems Administrator Guide - Page 27
and/or the tasks have been performed: 1. Existing operational network utilising the TCP/IP protocol. 2. DHCP or BOOTP Server should be available on the network. 3. Machine should be connected to the network via Ethernet Cable. Xerox Phaser 3635 System Administration Guide 15 - Xerox 097N01674 | Systems Administrator Guide - Page 28
your machine will accept LPR print jobs, it is recommended that you do this ONLY with extreme caution as most LPR spoolers are set to send print jobs to the default port, 515. 19. Touch [Save]. 20. Touch [HTTP]. 21. Touch [Enable]. 22. Touch [Save]. 16 Xerox Phaser 3635 System Administration Guide - Xerox 097N01674 | Systems Administrator Guide - Page 29
Dynamic DNS Registration]. NOTE: If your DNS Server does not support dynamic updates there is no need to enable DDNS. Zero- [Self Assigned Address] enabled box to allow the machine to assign itself an IP address of 169.254 services of the device. Xerox Phaser 3635 System Administration Guide 17 - Xerox 097N01674 | Systems Administrator Guide - Page 30
your Workstation, open the Web browser and enter the TCP/IP Address of the machine in the Address bar. 2. Press [Enter]. 3. Click on the [Properties manual entry address. 13. Enter the manual IPv6 address (interfaceID) to append to the Router prefix. 18 Xerox Phaser 3635 System Administration Guide - Xerox 097N01674 | Systems Administrator Guide - Page 31
Services is encrypted, enter "https://" followed by the Internet address, instead of "http://". DHCP/DDNS: • Release Registration - Allows DHCP resources to be released when the machine is powering down. This is a display-only item and shows "Enabled". Xerox Phaser 3635 System Administration Guide - Xerox 097N01674 | Systems Administrator Guide - Page 32
]. 10. Touch [AppleTalk]. 11. Touch [Protocol]. 12. Touch [Enable]. 13. Touch [Save]. 14. Touch [Name and Area]. 15. Touch [Printer Name]. 16. Enter the name using the on screen keyboard. When you are finished, touch [Save]. 17. Touch [Area Name]. 20 Xerox Phaser 3635 System Administration Guide - Xerox 097N01674 | Systems Administrator Guide - Page 33
your printer services queues on machine to enter the Tools Pathway. 2. Enter the Administrator's Password. The default is 1111. 3. Touch [Enter]. 4. Press the button. 5. Touch the [Tools] tab. 6. Touch [Connectivity and Network Setup]. Xerox Phaser 3635 System Administration Guide - Xerox 097N01674 | Systems Administrator Guide - Page 34
Save]. 21. Touch [Directory Service Tree]. 22. Enter a directory tree and context for the machine in the NDS Tree Name and wish to change the desired SAP rate or Poll Interval for your printer or set the Primary File Server, touch [Rates]. • Select the 22 Xerox Phaser 3635 System Administration Guide - Xerox 097N01674 | Systems Administrator Guide - Page 35
(SAM). 4. Click on the [Printers and Plotters] icon. 5. Click on [lp] spooler. 6. Click on [Printers and Plotters]. 7. Click on [Actions: Add Remote Printer/Plotter...]. 8. Enter the following information into the [Add Remote Printer/Plotter] form: Xerox Phaser 3635 System Administration Guide 23 - Xerox 097N01674 | Systems Administrator Guide - Page 36
: lp -d queuename /etc/hosts. 11. Verify that the job prints at the machine. Solaris 2.x Information Checklist Before starting the installation procedure, please ensure that the following items are available and/or the tasks have been performed: 24 Xerox Phaser 3635 System Administration Guide - Xerox 097N01674 | Systems Administrator Guide - Page 37
to this page. Configure the Client 1. Add the machine printer Host Name to the etc/hosts file. 2. Ensure that you can ping the machine. 3. Use either the GUI method or the tty -d queuename /etc/hosts. 12. Verify that the job prints at the machine. Xerox Phaser 3635 System Administration Guide 25 - Xerox 097N01674 | Systems Administrator Guide - Page 38
Add the machine printer hostname to the etc/hosts file on the SCO workstation. 2. Ensure that you can Ping the machine from the SCO workstation. Perform the following steps to create a machine print queue on a SCO UNIX workstation using either the GUI or the TTY method. 26 Xerox Phaser 3635 System - Xerox 097N01674 | Systems Administrator Guide - Page 39
, enter y 4. Click on [Enter] to accept the default for a non-SCO remote printer. 5. Click on [Enter] to accept the default for non-default printer. 6. Click on [Enter] to start the process for adding a queue. 7. Enter q to quit the rlconf program. Xerox Phaser 3635 System Administration Guide 27 - Xerox 097N01674 | Systems Administrator Guide - Page 40
hostname is the hostname of the Xerox machine and printername is the printer name of the Xerox machine. 14. Click on [Continue]. 15. Click on [Xerox] in the [Make] menu. 16. Click on [Continue]. 17. Select the correct driver in the [Driver] menu. 28 Xerox Phaser 3635 System Administration Guide - Xerox 097N01674 | Systems Administrator Guide - Page 41
supports PrintTool. NOTE: Not all distros of Linux support PrintTool. Procedure 1. Follow the steps in Chapter 3, Configure Static IPv4 Addressing using the Machine will launch. 5. Click on the [Add]. 6. The [Add a Printer Entry] window will appear. Xerox Phaser 3635 System Administration Guide 29 - Xerox 097N01674 | Systems Administrator Guide - Page 42
jobs are 18. The printer should now be Machine User Interface, Procedure on page 16 until step 38, then return to this page. IMPORTANT: Click on [BOOTP] in step 9. Create the Print Queue 2. Follow the steps above in Create the Print Queue on page 29. 30 Xerox Phaser 3635 System Administration Guide - Xerox 097N01674 | Systems Administrator Guide - Page 43
directory is the directory where print jobs are stored and is a subdirectory of [/var/spool/lpd]. Add the name of the print queue to the end of the subdirectory path. 5. In the [Hostname/IP of Printer] area, enter the hostname or IP Address of the Xerox machine. 6. Click on [OK]. 7. Click on [Exit - Xerox 097N01674 | Systems Administrator Guide - Page 44
version. NOTE: Do not close the web browser. Clone a Machine 1. Within the [General Setup] area of CentreWare Internet Services, click on [Cloning]. 2. You have one of the following cloning options: a) All features - DO NOT deselect any checkboxes. 32 Xerox Phaser 3635 System Administration Guide - Xerox 097N01674 | Systems Administrator Guide - Page 45
1. At your Workstation, open the web browser, enter the TCP/IP Address of the machine in the Address bar. 2. Press [Enter]. 3. Click on the [Properties] tab. file to the machine. The machine will not be available over the network for several minutes. Xerox Phaser 3635 System Administration Guide 33 - Xerox 097N01674 | Systems Administrator Guide - Page 46
3 Network Installation 34 Xerox Phaser 3635 System Administration Guide - Xerox 097N01674 | Systems Administrator Guide - Page 47
If the CD autoruns, click on [Exit]. 2. Verify that Print Services for Unix is loaded 3. Click on [Start]. 4. Click on [Control Panel]. 5. Double-click on [Add or Remove Programs]. 6. Click on [Add/Remove Windows Components] in the left hand column. Xerox Phaser 3635 System Administration Guide 35 - Xerox 097N01674 | Systems Administrator Guide - Page 48
is not installed, refer to instructions from Microsoft to install this service. When you are finished, return to this page. 12. Click on the [Finish] button. 13. Close the [Add/Remove Programs] window. 14. Follow the steps in Chapter 4, LPR Printing, Install Printer Driver on page 37. Windows 2000 - Xerox 097N01674 | Systems Administrator Guide - Page 49
on [Have Disk]. 12. Click on the [Browse] button. 13. Locate the Drivers folder on the CD and select the required Printer Driver file [.inf]. 14. Click on the [Open] button. 15. Click on the [OK] button. 16. Click on the Printer Model from the list. Xerox Phaser 3635 System Administration Guide 37 - Xerox 097N01674 | Systems Administrator Guide - Page 50
on the [Finish] button. The printer driver will install. 29. Verify that the test page is printed at the machine. Internet Printing Protocol (IPP) Printer URL will show the http:// IP address of the device and the ipp:// IP address of the device. 38 Xerox Phaser 3635 System Administration Guide - Xerox 097N01674 | Systems Administrator Guide - Page 51
or IP Address] in the URL field. The Printer Name can be either the Host Name or the SMB Host Name as shown on the machine Configuration Report, depending on the name resolution used by your network (WINS or DNS). 12. Click on the [Next] button. Xerox Phaser 3635 System Administration Guide 39 - Xerox 097N01674 | Systems Administrator Guide - Page 52
the machine. 10. Click on the [Status] tab. 11. Click on the [Reboot Machine] button and click on [OK] to reboot machine. The network controller takes approximately 60 seconds to reboot and network connectivity will be unavailable during this time. 40 Xerox Phaser 3635 System Administration Guide - Xerox 097N01674 | Systems Administrator Guide - Page 53
Printer Driver 1. At your Workstation, from the [Start] menu, select the appropriate option from the following: • For Windows 2000/2003, click on [Settings] then [Printers]. • For Windows XP, click on [Printers Number and click on the [OK] button. Xerox Phaser 3635 System Administration Guide 41 - Xerox 097N01674 | Systems Administrator Guide - Page 54
The Internet Services AppleTalk® page allows you to configure the machine to support AppleTalk®. Information Checklist 1. The AppleTalk settings must be correctly configured on the machine. 2. Locate the CentreWare Print and Fax Drivers CD delivered with your machine. 42 Xerox Phaser 3635 System - Xerox 097N01674 | Systems Administrator Guide - Page 55
Machine] button and click [OK] to reboot the machine. The network controller takes approximately 5 minutes to reboot and network connectivity will be unavailable during this time. Install the Printer Driver [Start]. b) Click on [Network Connections] Xerox Phaser 3635 System Administration Guide 43 - Xerox 097N01674 | Systems Administrator Guide - Page 56
). 20. Click on the [Next] button. 21. If you want this to be your default printer, click on [Yes]. 22. Click on the [Next] button. 23. The [Printer Sharing] screen appears. If you will be sharing this printer with other clients, then: a) Select: 44 Xerox Phaser 3635 System Administration Guide - Xerox 097N01674 | Systems Administrator Guide - Page 57
Print and Fax Drivers CD into your CD drive. 10. Select the required USB printer driver. 11. Select the correct printer model from the list. 12. Click on the [Next] button. The printer driver will install. 13. Click on the [Finish] button. Xerox Phaser 3635 System Administration Guide 45 - Xerox 097N01674 | Systems Administrator Guide - Page 58
such as Xerox Standard Accounting or Network Accounting installed, you can enable Accounting in the driver. For further information, see Chapter 12, Network Accounting on page 107. 1. Click on the [OK] button to close your print driver Properties. 46 Xerox Phaser 3635 System Administration Guide - Xerox 097N01674 | Systems Administrator Guide - Page 59
Within your Printers folder, right-click on the appropriate print driver and select [Printing Preferences]. NOTE: Click on the [Help] button in the driver to view information about each feature. Paper/Output 2. Click on the [Paper/Output] tab. 3. In [Job Type], select one of the following job types - Xerox 097N01674 | Systems Administrator Guide - Page 60
specific to the driver, such as Postscript printer in the Printers list and select [Properties]. Windows 2000/2003 a) From the [Start] menu, click on [Settings] then [Printers]. b) Right-click on the printer icon and select [Properties]. Windows XP 48 Xerox Phaser 3635 System Administration Guide - Xerox 097N01674 | Systems Administrator Guide - Page 61
's Printing Preferences will report information about the printer's operational status, active jobs, completed jobs and paper status. 5. Click on [Automatic] to have the driver automatically configure the IP Address of the machine or click on [Manual] and enter the IP Address or Host Name of the - Xerox 097N01674 | Systems Administrator Guide - Page 62
the machine. 2. Locate the CentreWare Print and Fax Drivers CD delivered with your machine. Install the Print Driver 1. Load the CentreWare Print and Fax Drivers CD into your CD drive. 2. Open the CD and select the required language, if necessary. 50 Xerox Phaser 3635 System Administration Guide - Xerox 097N01674 | Systems Administrator Guide - Page 63
] button. 14. Click on the [Printer Setup Utility] on the Dock. 15. Double-click on the Hard Drive icon on the Desktop. 16. Double-click to open [Applications]. 17. Double-click to open [Utilities]. 18. Double-click to open [Printer Setup Utility]. Xerox Phaser 3635 System Administration Guide 51 - Xerox 097N01674 | Systems Administrator Guide - Page 64
machine. NOTE: If you want to use the Save Job for Reprint feature, then make sure that Job Storage is set to [Installed]. 30. Click on [Apply Changes]. 31. Close the [Printer Info] box. 32. Print a document to verify that the printer is installed correctly. Configure your Apple Mac Print Driver - Xerox 097N01674 | Systems Administrator Guide - Page 65
job Drivers Guide for Macintosh located on the CentreWare Print and Fax Drivers CD delivered with your device. Unix printer drivers are located on the CentreWare Print and Fax Drivers CD delivered with your device. Refer to the documentation contained on the CD for further instructions. Xerox Phaser - Xerox 097N01674 | Systems Administrator Guide - Page 66
]. 4. Press the button. 5. Touch [Tools]. 6. Touch [User Interface]. 7. Touch [Job Sheets]. 8. Touch [Banner Sheets]. 9. Touch [Enabled] or [Disabled]. 10. Touch [Save]. 11. Press the button. 12. Touch [Confirm] to exit the Tools Pathway. 54 Xerox Phaser 3635 System - Xerox 097N01674 | Systems Administrator Guide - Page 67
the following items are available and/or the tasks have been performed: 1. Ensure that the machine is fully functioning on the network. 2. TCP/IP and HTTP protocols must be enabled on the machine so that the machine's web browser can be accessed. Xerox Phaser 3635 System Administration Guide 55 - Xerox 097N01674 | Systems Administrator Guide - Page 68
with FTP services. 2. SMB (Server Message Block) - see Server Message Block (SMB) on page 58. This is used to scan to a computer that supports the services are running on the Server or Workstation where images scanned by the machine will be stored. 56 Xerox Phaser 3635 System Administration Guide - Xerox 097N01674 | Systems Administrator Guide - Page 69
web browser, enter the TCP/IP Address of the machine in the Address bar. 2. Press [Enter]. 3. Click on the [Properties] tab. 4. Click on the [Services] link. 5. Click on the [Network Scanning] link Select the [Select to save new password] checkbox. Xerox Phaser 3635 System Administration Guide 57 - Xerox 097N01674 | Systems Administrator Guide - Page 70
the web browser, enter the TCP/IP Address of the machine in the Address bar. 2. Press [Enter]. 3. Click on the [Properties] tab. 4. Click on the [Services] link. 5. Click on the [Network Scanning] link. the Port Number, if required (Default is 139). 58 Xerox Phaser 3635 System Administration Guide - Xerox 097N01674 | Systems Administrator Guide - Page 71
the web browser, enter the TCP/IP Address of the machine in the Address bar. b) Press [Enter]. c) Click on the [Properties] tab. d) Click on the [Services] link. e) Click on the [Network Scanning] link. f) Click on the [File Repository Setup] link. Xerox Phaser 3635 System Administration Guide 59 - Xerox 097N01674 | Systems Administrator Guide - Page 72
Perl language: j) Select an appropriate Script Language file which is supported by your HTTP Scan Repository server. k) Right click on machine in the Address bar. 2. Press [Enter]. 3. Click on the [Properties] tab. 4. Click on the [Services] link. 60 Xerox Phaser 3635 System Administration Guide - Xerox 097N01674 | Systems Administrator Guide - Page 73
add alternate Network Scanning locations, which can then be selected when a template is created from the machine's web pages. • If you have only setup 1 filing destination, go to the next section Filing Destination in the [Friendly Name] entry box. Xerox Phaser 3635 System Administration Guide 61 - Xerox 097N01674 | Systems Administrator Guide - Page 74
Internet Services. If the [Name] field is empty, then the value set in the Default Template will be used as the default document name. Advanced Using this option, you can enter more specific data formats and types, such as: • Date • Day of Month • Month • Year • Time (24 hour) 62 Xerox Phaser - Xerox 097N01674 | Systems Administrator Guide - Page 75
Scanning job. 7. Select one of the following options from the [Confirmation Sheet] drop-down menu: a) On - Prints a Confirmation Sheet after every Network Scanning job. b) Errors only - Prints a Confirmation Sheet only when the job is unsuccessful. Xerox Phaser 3635 System Administration Guide 63 - Xerox 097N01674 | Systems Administrator Guide - Page 76
Job Log when Users log in to the machine Services] link. 5. Click on the [Network Scanning] link. 6. Click on the [Default Template] link. Destination Services 7. If you have the Server Fax feature installed, then you will see 2 options: • File • Fax 64 Xerox Phaser 3635 System Administration Guide - Xerox 097N01674 | Systems Administrator Guide - Page 77
machine, you will be able to scan a document and automatically have it sent to a fax number. You will see [Fax] as a filing destination service. These instructions Job Log. Third party applications can be used to search, file and distribute jobs based on their Job field at the machine. Choose one of - Xerox 097N01674 | Systems Administrator Guide - Page 78
machine to verify the data, select the [Validate Data Before Scanning] checkbox. See Validation Servers on page 67 for more information. 3. Click on the [Apply] button to accept the changes. Scan Options You can configure a variety of settings for your scanned images, including: 66 Xerox Phaser - Xerox 097N01674 | Systems Administrator Guide - Page 79
• Confirmation Report. • Job Log. To change the Services, click on the [Scan] tab. 2. Enter a Template Name in the New Distribution Template: General Information area. 3. Enter a Description their documents at the machine, for example Invoice number Xerox Phaser 3635 System Administration Guide 67 - Xerox 097N01674 | Systems Administrator Guide - Page 80
entered at the local UI is invalid, then the job will be cancelled and will not be transferred to /IP Address of the machine in the Address bar. 2. Press [Enter]. 3. Click on the [Properties] tab. 4. Click on the [Services] button. 5. Click on Login]. 68 Xerox Phaser 3635 System Administration Guide - Xerox 097N01674 | Systems Administrator Guide - Page 81
creation or management application to add, delete or modify templates stored locally on the Xerox machine, via their template management application. Any templates created by the Template Management application are stored on the Xerox machine. Xerox Phaser 3635 System Administration Guide 69 - Xerox 097N01674 | Systems Administrator Guide - Page 82
is designed to be used by Xerox Partners. For further information on Xerox Partners, refer to www.xerox.com. NOTE: The Template Management Application Program Interface (API) must be enabled in order for the WIA and TWAIN Scan drivers to be used. 70 Xerox Phaser 3635 System Administration Guide - Xerox 097N01674 | Systems Administrator Guide - Page 83
driver, the machine must be configured over the network and the appropriate printer driver must be installed on your Workstation. Use the Feature You can either save a job at the machine or from your print driver. You can print jobs at the machine. Xerox Phaser 3635 System Administration Guide - Xerox 097N01674 | Systems Administrator Guide - Page 84
job to the machine. • Save a job to the machine. • Copy and save a job to the machine. Refer to 'Store File' chapter 7 of the User Guide for instructions. Print Jobs to the Machine 1. From your Workstation, open a document. 2. Select [File] and then [Print]. 3. Select the printer icon for your Xerox - Xerox 097N01674 | Systems Administrator Guide - Page 85
Guide for instructions on how to retrieve and print files from the USB flash drive. Print Files Print file from the machine (stored on the Internal drive) This service allows the user to print a job stored on the machine. 1. Press the - Xerox 097N01674 | Systems Administrator Guide - Page 86
data from the jobs are left on the machine image disk. The On Demand Image Overwrite feature can be used to remove residual image data from the machine and protect against unauthorized retrieval of this information. See Chapter 15, Image Overwrite Security on page 138. 74 Xerox Phaser 3635 System - Xerox 097N01674 | Systems Administrator Guide - Page 87
Authentication (Service Access Control) can be enabled on the machine to below: 1. Enter a recipient address manually at the email keyboard screen. LDAP provides access to the global, or corporate address book. See LDAP Configuration and Address Xerox Phaser 3635 System Administration Guide 75 - Xerox 097N01674 | Systems Administrator Guide - Page 88
. Configure SMTP 1. At your workstation, open the web browser, enter the TCP/IP Address of the machine in the Address bar. 2. Press [Enter]. 3. Click on the [Properties] tab. 4. Click on the [Connectivity] link. 5. Click on the [Protocols] link. 76 Xerox Phaser 3635 System Administration Guide - Xerox 097N01674 | Systems Administrator Guide - Page 89
server requires the machine to log in. 9. Enter the [Login Name] and [Password] required for the machine to authenticate at the menu, scroll down until you can see Services. Click on the [Services] link. 2. Click on [E-mail Settings]. a From Name. Xerox Phaser 3635 System Administration Guide 77 - Xerox 097N01674 | Systems Administrator Guide - Page 90
Users can edit the 'From' field when authentication is not enabled on the machine. 7. Select [Enable] if you want to [Allow user to edit Reply that will provide error information and indication that the job has reached the recipient(s). • [On Errors Only] Xerox Phaser 3635 System Administration Guide - Xerox 097N01674 | Systems Administrator Guide - Page 91
you to choose either [Auto Detect] which allows the machine to automatically detect the original size of the document, or [Manual Input Size] which requires user to input the size of specify the default e-mail file format. There are two options: Xerox Phaser 3635 System Administration Guide 79 - Xerox 097N01674 | Systems Administrator Guide - Page 92
or grayscale images. NOTE: Searchable options are only available when the Searchable File Formats service is enabled. 1. Select the [Optimized for Fast Web Viewing] option. 2. Select the in Chapter 8, LDAP Configuration and Address Books on page 81. 80 Xerox Phaser 3635 System Administration Guide - Xerox 097N01674 | Systems Administrator Guide - Page 93
Checklist 1. Ensure your network supports LDAP services. 2. Obtain the IP Address or Host Name of your LDAP Server. The machine may also need a login name and password if the LDAP server is not configured to allow NULL names and passwords. Xerox Phaser 3635 System Administration Guide 81 - Xerox 097N01674 | Systems Administrator Guide - Page 94
validate your settings before inputting them into the Internet Services menus. LDAP clients include Microsoft Outlook Express, Microsoft , open the web browser, enter the TCP/IP Address of the machine in the Address bar. 2. Press [Enter]. 3. Click on the Xerox Phaser 3635 System Administration Guide - Xerox 097N01674 | Systems Administrator Guide - Page 95
]. Verify the LDAP Settings 1. Touch the [E-mail] button on Services Home screen. NOTE: It may be necessary to press the button first. 2. Touch the [New Recipients:] button. receives the scanned document in their e-mail inbox. Xerox Phaser 3635 System Administration Guide 83 - Xerox 097N01674 | Systems Administrator Guide - Page 96
available on the web. The E-mail service must be enabled at the machine to access the Local Address Book. Procedure 1. Open an application that supports .CSV files, for example, Microsoft Excel and click on [Open] in the [Choose File] window. 84 Xerox Phaser 3635 System Administration Guide - Xerox 097N01674 | Systems Administrator Guide - Page 97
copied to your computer. Test the Local Address Book 1. At the Machine, touch [E-mail]. You may need to press the button first. 2. Touch the [Address Book...] button. 3. recipient receives the scanned document in their e-mail inbox. Xerox Phaser 3635 System Administration Guide 85 - Xerox 097N01674 | Systems Administrator Guide - Page 98
list. Test the Group Address Book 1. At the Machine, touch [E-mail]. You may need to press the button first. 2. Touch the [Address Book 7. The machine will return matches. 8. Touch the persons name in the list and select [Add (To:)]. 86 Xerox Phaser 3635 System Administration Guide - Xerox 097N01674 | Systems Administrator Guide - Page 99
. Place a document in the document handler and press the green button. 13. Verify that the recipient receives the scanned document in their e-mail inbox. Xerox Phaser 3635 System Administration Guide 87 - Xerox 097N01674 | Systems Administrator Guide - Page 100
8 LDAP Configuration and Address Books 88 Xerox Phaser 3635 System Administration Guide - Xerox 097N01674 | Systems Administrator Guide - Page 101
. Information Checklist Before starting the Installation procedure, please ensure that the following items are available and/or the tasks have been performed: 1. Ensure that the machine is fully functioning on the network. Xerox Phaser 3635 System Administration Guide 89 - Xerox 097N01674 | Systems Administrator Guide - Page 102
a document from the machine the document is stored in a directory, known as the Fax Repository. The Fax Server monitors the Fax Repository for documents to be faxed. The machine can use 4 different ways to transfer a scanned fax to the repository: 90 Xerox Phaser 3635 System Administration Guide - Xerox 097N01674 | Systems Administrator Guide - Page 103
open the web browser, enter the IP Address of the machine in the Address bar. 2. Press [Enter]. 3. Click on the [Properties] tab. 4. Click on the [Services] link. 5. Click on the [Fax] link. 6. the location of the Fax folder in [Document Path]. Xerox Phaser 3635 System Administration Guide 91 - Xerox 097N01674 | Systems Administrator Guide - Page 104
supports machine in the Address bar. 2. Press [Enter]. 3. Click on the [Properties] tab. 4. Click on the [Services] link. 5. Click on the [Fax] link. 6. Click on the [Fax Repository Setup] link. 7. Select [SMB] from the [Protocol] drop-down menu. 92 Xerox Phaser 3635 System Administration Guide - Xerox 097N01674 | Systems Administrator Guide - Page 105
the machine in the Address bar. b) Press [Enter]. c) Click on the [Properties] tab. d) Click on the [Services] link. e) Click on the [Fax] link. f) Click on the [Fax Repository Setup] link. g) Select [HTTP] or [HTTPS] from the Protocol drop-down menu. Xerox Phaser 3635 System Administration Guide - Xerox 097N01674 | Systems Administrator Guide - Page 106
is supported by your to the machine's directory on Services] link. 5. Click on the [Fax] link. 6. Click on the [Fax Repository Setup] link. 7. Click on [IP Address] or [Host Name] and enter either the IP Address or the Host Name of the Web Server. 94 Xerox Phaser 3635 System Administration Guide - Xerox 097N01674 | Systems Administrator Guide - Page 107
[Tree] checkboxes if you want these to appear on the Job Log when Users log in to the machine with Network Authentication. The Job Log is filed with each document transferred to the Fax Repository. [admin] and Password [1111], and click on [Login]. Xerox Phaser 3635 System Administration Guide 95 - Xerox 097N01674 | Systems Administrator Guide - Page 108
1. Press the button on the Control Panel. 2. Touch [Fax]. 3. Enter a valid fax number. 4. Load a document in the document handler and press the green button. 5. Verify that your fax is received at the specified fax machine. 96 Xerox Phaser 3635 System Administration Guide - Xerox 097N01674 | Systems Administrator Guide - Page 109
access to a telephone connection. 3. Obtain the telephone number that you will configure as the machine's fax number. 4. Verify the Embedded Fax feature installed on your machine. 5. Connect your telephone cable(s) to the fax port(s) on the machine. Xerox Phaser 3635 System Administration Guide 97 - Xerox 097N01674 | Systems Administrator Guide - Page 110
Pathway. Test the Embedded Fax 1. At the Machine, press . 2. Touch [Fax]. 3. Enter the number of a nearby fax machine using the keypad. 4. Place your documents in the TCP/IP Address of the machine in the Address bar. 2. Press [Enter]. 98 Xerox Phaser 3635 System Administration Guide - Xerox 097N01674 | Systems Administrator Guide - Page 111
Additional Features 3. Click on the [Properties] tab. 4. Click on the [Services] link. 5. Click on the [Fax] link. 6. Click on the , enter the TCP/IP Address of the machine in the Address bar. 2. Press [Enter]. 3. Click on the [Properties] tab. Xerox Phaser 3635 System Administration Guide 99 - Xerox 097N01674 | Systems Administrator Guide - Page 112
10 Embedded Fax 4. Click on the [Services] link. 5. Click on the [Fax] link. Print local copy] option. NOTE: This feature allows the forwarded fax to be printed at the machine as a local copy. 13. For [Format Type], select either: • PDF • TIFF 14 . 100 Xerox Phaser 3635 System Administration Guide - Xerox 097N01674 | Systems Administrator Guide - Page 113
35. Enable LAN Fax (Windows Printer Drivers) LAN Fax must be enabled in your printer driver to support the LAN fax feature. LAN fax can be enabled automatically, with Bi-directional communication or manually. Both instructions are detailed below. Xerox Phaser 3635 System Administration Guide 101 - Xerox 097N01674 | Systems Administrator Guide - Page 114
the Printer Driver - Manually To configure the printer driver without using printer. 4. If you have a [Properties] or [Preferences], click on it. 5. Check that you are on the [Paper/Output] tab. 6. Click on the [Job Type] menu. 7. Click on [Fax]. 102 Xerox Phaser 3635 System Administration Guide - Xerox 097N01674 | Systems Administrator Guide - Page 115
Click on the appropriate Xerox WorkCentre printer. 3. Click on [Xerox Features] from the [Copies and Pages] menu. 4. Ensure you are in the [Paper/Output] area and click on the [Job Type] menu. 5. for a recipient, click the [Properties] button. Xerox Phaser 3635 System Administration Guide 103 - Xerox 097N01674 | Systems Administrator Guide - Page 116
the phonebook and click [OK]. Setting up a Cover Sheet Follow these instruction if you want to add a cover sheet to your fax. 19. rate based on the maximum capabilities of the receiving fax machine. Initial transmission speed will be 14,400 Bits Per Second Xerox Phaser 3635 System Administration Guide - Xerox 097N01674 | Systems Administrator Guide - Page 117
click on the [Send At:] and enter the time in the next 24 hours that you want the machine to send your fax. 35. If your telephone system requires Fax Users to enter a prefix in front of your selections. 44. Click on [OK] to close the [Fax] window. Xerox Phaser 3635 System Administration Guide 105 - Xerox 097N01674 | Systems Administrator Guide - Page 118
11 LAN Fax 45. Click on [OK] on the [Paper/Output] tab to send your fax. The document will fax with the specified settings. 46. Check that the recipient received the fax. 106 Xerox Phaser 3635 System Administration Guide - Xerox 097N01674 | Systems Administrator Guide - Page 119
software solution. Refer to your Xerox Sales Representative for further information. CentreWare Print and Fax Drivers are required to be installed on workstations. The User is prompted for User and Account ID information when submitting jobs to the machine. The job log information can be compiled - Xerox 097N01674 | Systems Administrator Guide - Page 120
Xerox-certified Network Accounting Solution Package on your network. Refer to the manufacturer's instructions with the network accounting package to complete this task. 5. Test communication between the accounting server and the machine Pathway. 108 Xerox Phaser 3635 System Administration Guide - Xerox 097N01674 | Systems Administrator Guide - Page 121
valid an Account ID for any job. The Account ID are alphanumeric machine User Interface. • [Mask User ID Details] and [Mask Account ID Details] - If you want user details to be replaced by asterisks (***) on the machine User Interface. 21. Touch [Save]. Xerox Phaser 3635 System Administration Guide - Xerox 097N01674 | Systems Administrator Guide - Page 122
the printer driver, any print or LAN fax jobs sent to the machine will be deleted. Win 2000 1. From the [Start] menu, click on [Settings] and [Printers]. 2. Right-click on the machine printer icon. 3. Click on [Properties]. 4. Click on [Configuration]. 5. Click on [Accounting]. 6. Click on [Xerox - Xerox 097N01674 | Systems Administrator Guide - Page 123
3. Click on [Xerox Network Accounting] from the Accounting System menu. 4. Click on [Prompt for Every Job] if you want Users document on your workstation, select the appropriate printer driver and print your document. You should see driver is used. Xerox Phaser 3635 System Administration Guide 111 - Xerox 097N01674 | Systems Administrator Guide - Page 124
already selected (if possible). 6. If the printer drivers are distributed without the option enabled, workstation Users will need to configure the drivers. 7. If the drivers are not properly configured, jobs sent to the machine will be deleted. 112 Xerox Phaser 3635 System Administration Guide - Xerox 097N01674 | Systems Administrator Guide - Page 125
only against that account and not against the User's individual account. When XSA is set up, users must enter their account details at the machine to use the machine. When they have finished their job, their XSA allocation is reduced by the number Xerox Phaser 3635 System Administration Guide 113 - Xerox 097N01674 | Systems Administrator Guide - Page 126
from any other accounting feature. If XSA is enabled at the machine, you cannot enable Foreign Device Interface or Network Accounting. Xerox Standard Accounting can be enabled via the CentreWare Internet Service. Each machine supports a maximum of: • 500 unique XSA User IDs • 250 General Accounts - Xerox 097N01674 | Systems Administrator Guide - Page 127
options: a) Prompt for Every Job - Users will be prompted to enter their details every time they submit a job. Options under this setting include: 1) [Save Accounting Codes] allows the inputted codes to be saved as the default Accounting Codes. Xerox Phaser 3635 System Administration Guide 115 - Xerox 097N01674 | Systems Administrator Guide - Page 128
When you use the printer driver to print a document Xerox printer. 3. From the [Copies and Pages] menu, click on [Accounting]. 4. Click on [Xerox Standard Accounting] from the Accounting System menu. 5. Click on [Prompt for Every Job link in the Xerox Standard Accounting menu to Xerox group. NOTE: - Xerox 097N01674 | Systems Administrator Guide - Page 129
checkbox. Add Users to a Group Account 1. Click on the [General Setup] link. 2. Click on the [Xerox Standard Accounting] link. 3. Click on the [Group Accounts] link. 4. Click on the [Manage] link next ,000. Usage limits can be specified as follows: Xerox Phaser 3635 System Administration Guide 117 - Xerox 097N01674 | Systems Administrator Guide - Page 130
13 Xerox Standard Accounting • Black Printed Impressions The maximum number of documents that can be printed by a User, from their Workstation via the printer driver. • Black Copied Impressions The maximum number of copies that can be produced by a User via the Copy feature on the machine. • Network - Xerox 097N01674 | Systems Administrator Guide - Page 131
error report will print at the machine to notify the User that their limit has been reached. The job will be deleted from the print queue. The job may run over due to sheets committed to the paper path. User limits can be reset on the Internet Services Xerox Standard Accounting and Report and Reset - Xerox 097N01674 | Systems Administrator Guide - Page 132
to each account. Jane can now record any impressions that she makes at the machine to a particular account. At the machine, Jane enters her Account ID and selects Project A. The number of impressions to add. 12. Click on the [Save Changes] button. 120 Xerox Phaser 3635 System Administration Guide - Xerox 097N01674 | Systems Administrator Guide - Page 133
At your Workstation, open the web browser, enter the TCP/IP Address of the machine in the Address bar. 2. Press [Enter]. 3. Click on the [Properties] tab. 4. Click on the report in an application that supports .CSV (comma separated values) files. Xerox Phaser 3635 System Administration Guide 121 - Xerox 097N01674 | Systems Administrator Guide - Page 134
this file to restore the data and settings on the machine or to copy the information to other Xerox machines. All the machines involved in the cloning procedure must have the same system cloning.dlm file that you saved when you cloned the machine. 122 Xerox Phaser 3635 System Administration Guide - Xerox 097N01674 | Systems Administrator Guide - Page 135
minutes. 11. The XSA settings and data will be restored as they were when the back-up file was created. If you are cloning another machine you may want to change, delete or reset the XSA accounts as appropriate for the new machine. Xerox Phaser 3635 System Administration Guide 123 - Xerox 097N01674 | Systems Administrator Guide - Page 136
13 Xerox Standard Accounting 124 Xerox Phaser 3635 System Administration Guide - Xerox 097N01674 | Systems Administrator Guide - Page 137
description of SMart eSolutions and to download the applications (SMart eSolutions Windows Client or CentreWare Web), refer to www.xerox.com/smartesolutions. Information Checklist Before registering machines Web, visit www.xerox.com/smartesolutions. Xerox Phaser 3635 System Administration Guide 125 - Xerox 097N01674 | Systems Administrator Guide - Page 138
Machine Serial Number displays the serial number of the printer. 7. In the Communications Setup area, [Daily Transmission Time] lets you specify the start time (hour and minute) when SMart eSolutions communication occurs with Xerox . Manual settings Xerox Phaser 3635 System Administration Guide - Xerox 097N01674 | Systems Administrator Guide - Page 139
reads will ensure quality and reliability of the data we use to manage your service agreements. To set up Meter Assistant, go to www.xerox.com/smartesolutions Supplies Assistant To set up Supplies Assistant, go to www.xerox.com/smartesolutions Xerox Phaser 3635 System Administration Guide 127 - Xerox 097N01674 | Systems Administrator Guide - Page 140
14 SMart eSolutions 128 Xerox Phaser 3635 System Administration Guide - Xerox 097N01674 | Systems Administrator Guide - Page 141
the default configuration for the machine. Network Authentication Authentication is used to verify that a User accessing the machine is a valid User. The User's authentication details are verified either remotely by a network authentication server, Xerox Phaser 3635 System Administration Guide 129 - Xerox 097N01674 | Systems Administrator Guide - Page 142
: • Require Network Authentication. • Require Local Authentication. Information Checklist 1. Ensure that the Xerox machine is fully functional on the network. TCP/IP and HTTP protocols must be configured so that Internet Services can be accessed. 130 Xerox Phaser 3635 System Administration Guide - Xerox 097N01674 | Systems Administrator Guide - Page 143
logoff after each Scan job], in the Logoff Reminder area, if you want to enable this service. 15. Click on the [Apply] button to accept the changes. If prompted, enter the Administrator's User ID [admin] and Password [1111], and click on [Login]. Xerox Phaser 3635 System Administration Guide 131 - Xerox 097N01674 | Systems Administrator Guide - Page 144
, open the web browser, enter the TCP/IP Address of the machine in the Address bar. 2. Press [Enter]. 3. Click on the [Properties] tab. 4. Click on the [Security] link. 5. Click on the [Authentication] link. 6. Click on the [Authentication] link. 132 Xerox Phaser 3635 System Administration Guide - Xerox 097N01674 | Systems Administrator Guide - Page 145
be authenticated resides on a different subnet from the machine, select the Optional Information checkbox and enter the IP . 13. Select the [Always prompt for logoff after each Scan job] option, in the Logoff Reminder area, if you want to enable Xerox Phaser 3635 System Administration Guide 133 - Xerox 097N01674 | Systems Administrator Guide - Page 146
enable this service. 11. Click on the [Apply] button to accept the changes. If prompted, enter the Administrator's User ID [admin] and Password [1111], and click on [Login]. 12. Click on [OK]. 13. Follow the steps below to check that you have setup authentication correctly. 134 Xerox Phaser 3635 - Xerox 097N01674 | Systems Administrator Guide - Page 147
machine and fully functional. This is required to access CentreWare Internet Services to configure Network Authentication. The Internet Services logoff after each scan job], in the Logoff Reminder area, if you want to enable this service. 9. Click on Xerox Phaser 3635 System Administration Guide 135 - Xerox 097N01674 | Systems Administrator Guide - Page 148
machine supports IEEE 802.1X Authentication via Extensible Authentication Protocol (EAP). IEEE 802.1X ensures all machines on the network are authenticated and authorized to use the network. 802.1X can be enabled for machines connected through wired Ethernet networks. 136 Xerox Phaser 3635 System - Xerox 097N01674 | Systems Administrator Guide - Page 149
Checklist 1. 802.1X authentication must be supported on the network where Xerox machines are connected. 2. Ensure that your 802 Service 1. At your Workstation, open the web browser, enter the TCP/IP Address of the machine into the Address bar. Xerox Phaser 3635 System Administration Guide - Xerox 097N01674 | Systems Administrator Guide - Page 150
used by the machine to spool and temporarily store image data. NOTE: When ODIO is initiated, the machine is taken offline until the overwrite is completed and any existing jobs in the queue are terminated, including print, fax and LAN fax jobs. 138 Xerox Phaser 3635 System Administration Guide - Xerox 097N01674 | Systems Administrator Guide - Page 151
will overwrite all jobs stored in machine should not be in Diagnostics mode when the overwrite is started. (The touch screen indicates a status of 'Diagnostics Mode'- this mode is used by the Customer Service Representative when servicing the machine.) Xerox Phaser 3635 System Administration Guide - Xerox 097N01674 | Systems Administrator Guide - Page 152
in Save Job for Reprint machine should not be in Diagnostics mode when the overwrite is started. (The touch screen indicates a status of 'Diagnostics Mode'- this mode is used by the Customer Service Representative when servicing the machine.) 140 Xerox Phaser 3635 System Administration Guide - Xerox 097N01674 | Systems Administrator Guide - Page 153
for several minutes. 14. Once the machine has rebooted, verify that the overwrite operation has completed: • View the Confirmation Report, under Confirmation Details. The [Job Information: Status ESS Disk] parameter should read 'SUCCESS'. Xerox Phaser 3635 System Administration Guide 141 - Xerox 097N01674 | Systems Administrator Guide - Page 154
a job by job basis, immediately after each job has been processed. For machines with network connectivity, all jobs that pass through the machine are immediately overwritten. For machines without item or task is available or has been performed: 142 Xerox Phaser 3635 System Administration Guide - Xerox 097N01674 | Systems Administrator Guide - Page 155
send a print job to the machine. 2. Press . 3. Touch a job in the queue. 4. View the Job Overwrite Status. The Job Overwrite Status will machine. View the instructions in the On Demand Image Overwrite (ODIO) on page 138 to complete this task. Xerox Phaser 3635 System Administration Guide - Xerox 097N01674 | Systems Administrator Guide - Page 156
feature that allows you to control access to Internet Services. IP Filtering allows you to prevent unauthorized access by security to the machine, by allowing you to register the IP addresses permitted to communicate with the machine. Enable IP Filtering Xerox Phaser 3635 System Administration Guide - Xerox 097N01674 | Systems Administrator Guide - Page 157
data over the TCP/IP network to the printer. Providing additional security in the negotiating process, is enabled on the machine. 1. At your Workstation, open your Web browser and enter the TCP/IP Address of the machine in the Address bar settings. Xerox Phaser 3635 System Administration Guide 145 - Xerox 097N01674 | Systems Administrator Guide - Page 158
to each type of activity displayed in the Audit Log: 1 = System startup 2 = System shutdown 3 = On Demand Image Overwrite started 4 = On Demand Image Overwrite complete 5 = Print job 146 Xerox Phaser 3635 System Administration Guide - Xerox 097N01674 | Systems Administrator Guide - Page 159
for each job. E-mail jobs - one audit log entry is recorded for each SMTP recipient within the job. Completion Status The Completion Status column shows the status of jobs and has the following values: • comp-normal - the job completed correctly. Xerox Phaser 3635 System Administration Guide 147 - Xerox 097N01674 | Systems Administrator Guide - Page 160
Socket Layer) protocol via Digital Certificates. SSL enables secure access to the machine. SSL requests include: • Administration of the machine via Internet Services. • Printing via Internet Services. • Use of Scan Template Management services. 148 Xerox Phaser 3635 System Administration Guide - Xerox 097N01674 | Systems Administrator Guide - Page 161
], [Locality Name], [Organization Name] and [Organization Unit]. Information entered for these options should describe the machine as per the X500 directory scheme but can be any value which is meaningful to the customer to identify the machine. Xerox Phaser 3635 System Administration Guide 149 - Xerox 097N01674 | Systems Administrator Guide - Page 162
Enter the [E-mail Address] of the Administrator who is responsible for the secure management of the machine. 11. In the [Days of Validity] box, enter the number of days that the certificate Authority, upload the certificate to the machine: 150 Xerox Phaser 3635 System Administration Guide - Xerox 097N01674 | Systems Administrator Guide - Page 163
, enter the TCP/IP Address of the machine in the Address bar. 2. Press [Enter]. 3. Click on the [Properties] tab. 4. Click on the [Connectivity] link. 5. Click on the [Protocols] link. 6. Click on the [SNMP] link. 7. Click on the [Enable] checkbox. Xerox Phaser 3635 System Administration Guide 151 - Xerox 097N01674 | Systems Administrator Guide - Page 164
The Traps are: • Printer Traps. • Cold Start machine which contains an invalid community name. 17. Click on the [Apply] button to accept the changes. If prompted, enter the Administrator's User ID [admin] and Password [1111], and click on [Login]. 152 Xerox Phaser 3635 System Administration Guide - Xerox 097N01674 | Systems Administrator Guide - Page 165
be enabled to create an encrypted channel for secure machine management. 1. At your Workstation, open the web browser, enter the TCP/IP Address of the machine in the Address bar. 2. Press [Enter]. [admin] and Password [1111], and click on [Login]. Xerox Phaser 3635 System Administration Guide 153 - Xerox 097N01674 | Systems Administrator Guide - Page 166
15 Security 154 Xerox Phaser 3635 System Administration Guide - Xerox 097N01674 | Systems Administrator Guide - Page 167
access specific services or areas. Xerox Secure Access Xerox Secure Access and Accounting Secure Access can be enabled with the Network Accounting, Xerox Standard Accounting and Foreign Device Interface features to provide accounting functionality. Xerox Phaser 3635 System Administration Guide - Xerox 097N01674 | Systems Administrator Guide - Page 168
Xerox device. For further instructions, see Machine Digital Certificate Management & Trusted Certificate Authorities on page 148. Configure Xerox Secure Access on the Device To configure Xerox described in Configure Xerox Secure Access on page 157. 156 Xerox Phaser 3635 System Administration Guide - Xerox 097N01674 | Systems Administrator Guide - Page 169
at the device. NOTE: If the Title and Prompt have been configured in the Xerox Secure Access Server, then this information will overwrite the [Default Title] and [Default Prompt] text entered within Internet Services. 8. Click [Apply]. Xerox Phaser 3635 System Administration Guide 157 - Xerox 097N01674 | Systems Administrator Guide - Page 170
with the address of the Xerox Secure Access Server. If and enter the address of the Xerox Secure Access Server. NOTE: Enter Secure Access At the Xerox Device: 1. Select a service that you have locked. set on the Xerox Secure Access Server. The on the device. The Xerox device will confirm successful - Xerox 097N01674 | Systems Administrator Guide - Page 171
The CentreWare Internet Services Support page provides easy access to the Xerox web site. The page can also be set up to show Xerox support telephone numbers and the contact details for the system Administrator. on page 167 Overview CWIS uses the embedded HTTP Server on the machine. This allows you - Xerox 097N01674 | Systems Administrator Guide - Page 172
been performed before accessing CentreWare Internet Services (CWIS): 1. The machine should be physically connected to the instructions to access CWIS; the embedded web pages resident in the machine. 1. Open the web browser from your Workstation. 160 Xerox Phaser 3635 System Administration Guide - Xerox 097N01674 | Systems Administrator Guide - Page 173
Overwrite of any incomplete print or network scan jobs being processed when the Network Controller is problem is and a solution to the problem. 1. At your Workstation, open the web browser, enter the TCP/IP Address of the machine in the Address bar. Xerox Phaser 3635 System Administration Guide - Xerox 097N01674 | Systems Administrator Guide - Page 174
- System Administrator needed to fix this problem. • Untrained - Normal User can fix this problem. • Field Service - Xerox Support needed to fix this problem. • Management - Network Administrator needed to fix this problem. • No intervention required - A normal machine status. Trays The Trays page - Xerox 097N01674 | Systems Administrator Guide - Page 175
the machine in the Address bar. 2. Press [Enter]. 3. Click on [Properties] tab. 4. Click on the [General Setup] link. 5. Click on the [Billing & Counters] link. 6. Click on the [Usage Counters] link. 7. Click on the [Refresh] button to view the current usage in the Usage Counters area. Xerox Phaser - Xerox 097N01674 | Systems Administrator Guide - Page 176
jobs need adequate space on your hard drive when printing through CentreWare Internet Services. 1. At your Workstation, open the web browser, enter the TCP/IP Address of the machine in the Address bar. 2. Press [Enter]. 3. Click on the [Print] tab. 164 Xerox Phaser 3635 System Administration Guide - Xerox 097N01674 | Systems Administrator Guide - Page 177
printer. Wait for the Job Submission confirmation window to appear before exiting or navigating to a different screen: this prevents your print job being deleted. 9. Retrieve the printed document(s) from the machine Supplement 2 (New JPEG). Xerox Phaser 3635 System Administration Guide 165 - Xerox 097N01674 | Systems Administrator Guide - Page 178
jobs. 7. Click on the: a) [Apply] button to accept the changes. Click on [OK]. If prompted, enter the Administrator's User ID [admin] and Password [1111], and click on [Login]. b) [Undo] button to return the settings to their previous values. 166 Xerox Phaser 3635 System Administration Guide - Xerox 097N01674 | Systems Administrator Guide - Page 179
to be notified of any machine problems. NOTE: This is normally Services Support page provides easy access to the Xerox web site. The page can also be set up to show Xerox support telephone numbers and the contact details for the system Administrator. Xerox Phaser 3635 System Administration Guide - Xerox 097N01674 | Systems Administrator Guide - Page 180
Services (CWIS) To Edit Xerox or Administrator Support Contact Details 1. At your Workstation, open the web browser, enter the TCP/IP Address of the machine in the Address bar. 2. Press [Enter]. 3. Click on the [Support [1111], and click on [Login]. 168 Xerox Phaser 3635 System Administration Guide - Xerox 097N01674 | Systems Administrator Guide - Page 181
connection 1. Press the button on the Control Panel. 2. Touch [Information Pages]. 3. Touch [System Configuration]. 4. Touch [Print]. For more instruction refer to Manual upgrade using CentreWare Internet Services on page 170. Xerox Phaser 3635 System Administration Guide 169 - Xerox 097N01674 | Systems Administrator Guide - Page 182
supported by the machine support Print File Submission upgrades. Manual upgrade using CentreWare Internet Services NOTE: This procedure will delete any current jobs in the machine print queue and prevent further jobs file [.hd] obtained earlier. 170 Xerox Phaser 3635 System Administration Guide - Xerox 097N01674 | Systems Administrator Guide - Page 183
Manual upgrade using a USB flash drive This section provides instructions to upgrade machine software via a Software Upgrade file stored on a USB flash drive. NOTE: The print queue will be used for this procedure, so further jobs . 6. Select [Done]. Xerox Phaser 3635 System Administration Guide 171 - Xerox 097N01674 | Systems Administrator Guide - Page 184
the upgrade process. 9. The User Interface will indicate the status of the upgrade and the machine will reboot once it is complete. If you have chosen to print the Confirmation Report, it will be printed after the machine has rebooted successfully. 172 Xerox Phaser 3635 System Administration Guide - Xerox 097N01674 | Systems Administrator Guide - Page 185
. 7. If printing and faxing documents are not available from a workstation, re-install a print driver on the workstation. 8. Call the local Xerox Welcome Center, where a representative will assist in the diagnosis and solution of the problem. Xerox Phaser 3635 System Administration Guide 173 - Xerox 097N01674 | Systems Administrator Guide - Page 186
19 Troubleshooting Network Scanning Problem I cannot scan on the machine. Action 1. If a Scan to File Confirmation Report is produced check the into the location. If you cannot do this, the Xerox machine will not be able to scan to this location. 174 Xerox Phaser 3635 System Administration Guide - Xerox 097N01674 | Systems Administrator Guide - Page 187
Network Scanning Problem I cannot scan to an FTP site. Action If you are using FTP to file scanned images, follow these instructions to check that the service is configured correctly: 1. Open a command prompt window from your Workstation: a) Click on [Start]. b) Click on [Run]. c) Enter cmd. d) - Xerox 097N01674 | Systems Administrator Guide - Page 188
Troubleshooting Problem I cannot scan to an HTTP or HTTPS site. Action 1. If the machine variable and make its value larger. • Restart the IIS service. 4. If jobs greater than 2MB are failing using the PHP script, the server , etc. 176 Xerox Phaser 3635 System Administration Guide - Xerox 097N01674 | Systems Administrator Guide - Page 189
allow. For example, if the LDAP server limit is 75, set the search results to 74 or less. This setting is located within the Internet Services LDAP screen. Xerox Phaser 3635 System Administration Guide 177 - Xerox 097N01674 | Systems Administrator Guide - Page 190
Troubleshooting Problem No LDAP entries fit the search criteria entered by the User. Action Verify the Search Name Order is set to match the name syntax used in your environment. This setting is located within the Internet Services LDAP screen. 178 Xerox Phaser 3635 System Administration Guide - Xerox 097N01674 | Systems Administrator Guide - Page 191
problem lies with the third party fax server. Ensure that the server is configured correctly and the path to the fax filing repository is set. Refer to the manufacturer's instructions contained with the fax server software to complete this task. Xerox Phaser 3635 System Administration Guide 179 - Xerox 097N01674 | Systems Administrator Guide - Page 192
screens can be found in the User Guide delivered with your machine. 1. Touch the [Tools] tab. 2. Touch [User Interface]. 3. Touch [Fax Service Settings]. 4. Check that [Country], [Line Configuration] and [Transmission Fax Defaults] are setup correctly. 180 Xerox Phaser 3635 System Administration - Xerox 097N01674 | Systems Administrator Guide - Page 193
by pinging the IP Address of the machine from your Network Accounting server. 3. Verify that your Network Accounting server is configured correctly. Consult the manufacturer's documentation with your Network Accounting server to perform this task. Xerox Phaser 3635 System Administration Guide 181 - Xerox 097N01674 | Systems Administrator Guide - Page 194
is requesting me to log in. 2. 3. My jobs are not printing on the 1. correct paper. 2. 3. 4. Action Ensure that there are no network connectivity problems with the Xerox machine. Print a Test Page from the Xerox print driver to the machine to verify connectivity. Ensure that the print server is - Xerox 097N01674 | Systems Administrator Guide - Page 195
set on your hub or switch. 5. Ensure that the Ethernet cable is correctly patched in at the hub/switch. 6. Try a different Ethernet cable at the machine. 7. Check that other machines/computers can communicate over the network. Xerox Phaser 3635 System Administration Guide 183 - Xerox 097N01674 | Systems Administrator Guide - Page 196
19 Troubleshooting Problem I cannot access CentreWare Internet Services. Action Incorrect TCP/IP Address In certain situations you may find the machine is configured with an incorrect IP Address or displays a network error. There are several possible causes of this: 1. When the machine boots up it - Xerox 097N01674 | Systems Administrator Guide - Page 197
Store Files Problem I cannot store jobs Action 1. Memory is full. 2. Delete files from Store Files folders. Store Files Xerox Phaser 3635 System Administration Guide 185 - Xerox 097N01674 | Systems Administrator Guide - Page 198
19 Troubleshooting 186 Xerox Phaser 3635 System Administration Guide - Xerox 097N01674 | Systems Administrator Guide - Page 199
. Refer to the manufacturer's documentation for instructions on how to configure and connect the wireless adapter. Once the wireless adapter is connected to the Xerox machine. Follow the steps in Chapter 3, Network Installation on page 13., and Chapter 4, Print Drivers on page 35 to configure the - Xerox 097N01674 | Systems Administrator Guide - Page 200
arrow. 15. Touch [Save] to return to the Timers menu. To enable Held Job Time Out 16. Touch [Held Job Time Out]. 17. Touch [Enable], to set the timer to indicate how long the System will hold incomplete jobs before automatically deleting them. 188 Xerox Phaser 3635 System Administration Guide - Xerox 097N01674 | Systems Administrator Guide - Page 201
arrow. 19. Touch [Save] to return to the Timers menu. 20. Press the button. 21. Touch [Confirm] to exit the Tools Pathway. Xerox Phaser 3635 System Administration Guide 189 - Xerox 097N01674 | Systems Administrator Guide - Page 202
190 Xerox Phaser 3635 System Administration Guide - Xerox 097N01674 | Systems Administrator Guide - Page 203
driver 50 TCP/IP (OSX ) 50 AppleTalk 7, 20 Audit Log 146 download 146 enable 146 file 146 Xerox Phaser 3635 System Administration Guide Index Audit Log File completion status 147 entry data 148 event description CentreWare Internet Services 9, 159 access CWIS 160 Accessing 9 active jobs 164 alert - Xerox 097N01674 | Systems Administrator Guide - Page 204
machine 32 procedure 32 Cloning 32 Completion Status 147 Configuration 52 Configuration Report 9, 169 Configure 802.1X 138 Apple Mac print driver 9, 159 D DDNS 7 Default Template 64 Destination Services 64 DHCP 7, 16 DHCP/Autonet 16 Distribution Templates Xerox Phaser 3635 System Administration Guide - Xerox 097N01674 | Systems Administrator Guide - Page 205
settings 8 Ethernet Cable 7 Ethernet Settings 8 Event Description 147 Event ID 146 Export local address book 85 Further Information 67, 74 G G3 104 Xerox Phaser 3635 System Administration Guide General 77, 95, 161 General Account 138 overview 138 use at the machine 139 use over the network 140 Image - Xerox 097N01674 | Systems Administrator Guide - Page 206
CWIS screen 149 create self signed certificate 149 overview 148 Machine Models 1 Management Information Base 187 Meter Assistant 125, 127 MIB 187 N NDPS/NEPS 21 NetWare 7 Netware 21 Network Accounting 107 enable 108 test 111 Network accounting 194 Xerox Phaser 3635 System Administration Guide - Xerox 097N01674 | Systems Administrator Guide - Page 207
73 from machine on internal drive 73 on USB flash drive 73 Print Queue Linux CUPS dynamic addressing 29 static addressing 28 Linux LPR via PrintTool static addressing 29 Print Services for Unix 35 Printer Drivers install for LPR port (Windows) 37 Xerox Phaser 3635 System Administration Guide 195 - Xerox 097N01674 | Systems Administrator Guide - Page 208
print driver 72 to USB flash drive directly 72 Store Jobs 72 Super G3 104 Supplies Assistant 127 Support 167 System Time Out 188 System Timer Values 188 T TCP/IP 7 TCP/IP (Windows) 13 Template 67 Template Pool Location 69 Test local address book 85 196 Xerox Phaser 3635 System Administration Guide - Xerox 097N01674 | Systems Administrator Guide - Page 209
119 group account 116 user account 117 enable 115 enable in CWIS 114 enable in print driver 115 general account account example 120 add users 120 procedure 120 general accounts overview 119 group account add users 117 overview 113 use feature 119 Xerox Phaser 3635 System Administration Guide 197 - Xerox 097N01674 | Systems Administrator Guide - Page 210
Index 198 Xerox Phaser 3635 System Administration Guide - Xerox 097N01674 | Systems Administrator Guide - Page 211
- Xerox 097N01674 | Systems Administrator Guide - Page 212
V5.0 15.07.09
-
 1
1 -
 2
2 -
 3
3 -
 4
4 -
 5
5 -
 6
6 -
 7
7 -
8
-
9
-
10
-
11
-
12
-
13
-
14
-
15
-
16
-
17
-
18
-
19
-
20
-
21
-
22
-
23
-
24
-
25
-
26
-
27
-
28
-
29
-
30
-
31
-
32
-
33
-
34
-
35
-
36
-
37
-
38
-
39
-
40
-
41
-
42
-
43
-
44
-
45
-
46
-
47
-
48
-
49
-
50
-
51
-
52
-
53
-
54
-
55
-
56
-
57
-
58
-
59
-
60
-
61
-
62
-
63
-
64
-
65
-
66
-
67
-
68
-
69
-
70
-
71
-
72
-
73
-
74
-
75
-
76
-
77
-
78
-
79
-
80
-
81
-
82
-
83
-
84
-
85
-
86
-
87
-
88
-
89
-
90
-
91
-
92
-
93
-
94
-
95
-
96
-
97
-
98
-
99
-
100
-
101
-
102
-
103
-
104
-
105
-
106
-
107
-
108
-
109
-
110
-
111
-
112
-
113
-
114
-
115
-
116
-
117
-
118
-
119
-
120
-
121
-
122
-
123
-
124
-
125
-
126
-
127
-
128
-
129
-
130
-
131
-
132
-
133
-
134
-
135
-
136
-
137
-
138
-
139
-
140
-
141
-
142
-
143
-
144
-
145
-
146
-
147
-
148
-
149
-
150
-
151
-
152
-
153
-
154
-
155
-
156
-
157
-
158
-
159
-
160
-
161
-
162
-
163
-
164
-
165
-
166
-
167
-
168
-
169
-
170
-
171
-
172
-
173
-
174
-
175
-
176
-
177
-
178
-
179
-
180
-
181
-
182
-
183
-
184
-
185
-
186
-
187
-
188
-
189
-
190
-
191
-
192
-
193
-
194
-
195
-
196
-
197
-
198
-
199
-
200
-
201
-
202
-
203
-
204
-
205
-
206
-
207
-
208
-
209
-
210
-
211
-
212
 |
 |
System Administration Guide
Xerox Phaser 3635