Xerox 1235/DX User Guide
Xerox 1235/DX - Phaser Color Laser Printer Manual
 |
UPC - 042215474542
View all Xerox 1235/DX manuals
Add to My Manuals
Save this manual to your list of manuals |
Xerox 1235/DX manual content summary:
- Xerox 1235/DX | User Guide - Page 1
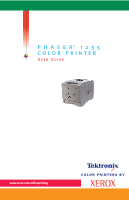
P H A S E R® 1 2 3 5 COLOR PRINTER User Guide - Xerox 1235/DX | User Guide - Page 2
- Xerox 1235/DX | User Guide - Page 3
Phaser® 1235 Color Printer User Guide 071-0730-00 June 2000 - Xerox 1235/DX | User Guide - Page 4
Xerox Corporation. TekColor CareSM and RealSUPPORTSM are service marks of Xerox trademark of FTP Software, Incorporated. PCL® and HP-GL® are registered trademarks of Hewlett-Packard Corporation and TrueType is a registered trademark of Apple Computer, Inc. Albertus™, Arial™, Gill Sans™, Joanna - Xerox 1235/DX | User Guide - Page 5
PANTONE® Colors generated by the Phaser 1235 Color Printer are four- and/or three-color process simulations and may not match PANTONE-identified solid color standards. Use current PANTONE Color Reference Manuals for accurate colors. PANTONE Color simulations are only obtainable on this product when - Xerox 1235/DX | User Guide - Page 6
Xerox, at its option, will: (1) repair the product by means of telephone support or on-site service at no charge for parts or labor, (2) replace the product with a comparable enable Xerox or its authorized service representative to diagnose and repair problems with the product remotely, Xerox may - Xerox 1235/DX | User Guide - Page 7
representatives to install, repair or service the product unless directed by a Xerox representative; b) to repair damage, malfunction, or degradation of performance resulting from improper use or connection to incompatible equipment or memory; c) to repair damage, malfunction, or degradation of - Xerox 1235/DX | User Guide - Page 8
loss suffered by the customer) is limited, except as otherwise stated herein, to (at Fuji Xerox' option) replacing or repairing the goods, or resupplying, or paying the cost of the resupply of, the services, in respect of which the breach occurred. Subject to the above, all conditions and warranties - Xerox 1235/DX | User Guide - Page 9
electrical shock. s If you notice unusual noises or odors, switch off the printer power immediately. Disconnect the power cord from the electrical outlet. Call an authorized service representative to correct the problem. s The power cord is attached to the printer as a plug-in device at the back of - Xerox 1235/DX | User Guide - Page 10
you are installing optional equipment and are specifically instructed to do so. Power should be OFF when performing these installations. Except printer in an area where there is adequate space for ventilation, operation and servicing. The recommended minimal spacing is 90 cm (36 in.) in front of and - Xerox 1235/DX | User Guide - Page 11
when moving the printer from one location to another. Refer to the Phaser 1235 Setup Instructions. s Do not place any liquids on the printer. Warning Be careful when source tray that you have selected in the driver or front panel s any trays above the currently selected media source tray. 0730-02 - Xerox 1235/DX | User Guide - Page 12
s Do not open the covers while printing. 0730-03 s Do not switch off the printer power while printing. s Do not move the printer while printing. 0730-04 - Xerox 1235/DX | User Guide - Page 13
-06 Hot surface on or in the printer. Use caution to avoid personal injury: 0730-07 0730-08 0730-09 Use caution. Refer to the manual(s) for information: 0730-10 Warning If the product loses the ground connection, usage of knobs and controls (and other conductive parts) can cause an electrical - Xerox 1235/DX | User Guide - Page 14
- Xerox 1235/DX | User Guide - Page 15
Contents Xerox Supplies and Accessories 1 Front Panel Usage 9 Basic Menu Navigation 10 Feeder (MBF 30 Automatic 2-Sided Printing From the Paper Tray 36 Manual 2-Sided Printing 38 Troubleshooting Print Quality Problems 43 Clearing Paper/Media Jams 47 Getting Help 55 Specifications 58 Index - Xerox 1235/DX | User Guide - Page 16
xiv Phaser 1235 User Guide - Xerox 1235/DX | User Guide - Page 17
Supplies Xerox Supplies and Accessories Toner cartridges (4) Fuser Imaging drums (4) Transfer belt 0730-11 Note Inside the have replacements on hand. To order supplies and accessories, contact your local dealer or visit the Xerox web site: www.xerox.com/officeprinting/supplies/ User Guide 1 - Xerox 1235/DX | User Guide - Page 18
Supplies Customer-Replaceable Consumables (CRCs) 1235-12 High-Capacity Toner Cartridges* Item Cyan Magenta Yellow Black Part Number 006R90304 006R90305 006R90306 006R90303 * This is an example of 5 percent coverage per color (20 percent coverage per page). 0730-13 2 Phaser 1235 Color Printer - Xerox 1235/DX | User Guide - Page 19
usage. Imaging Drum Rainbow Pack Item Imaging Drum Rainbow Pack (each pack contains a Cyan, Magenta, and Yellow imaging drum) Part Number 016-1934-00 User Guide 3 - Xerox 1235/DX | User Guide - Page 20
5 pages, opening and closing the top cover, turning the printer off and on, printing on transparencies or specialty papers, and automatic two-sided printing. 4 Phaser 1235 Color Printer - Xerox 1235/DX | User Guide - Page 21
016-1823-00 Phaser Premium Cover A4 (Metric Letter) 100 sheets 016-1824-00 Paper (160 g/m2) 210 x 297 mm Xerox Phaser 35 Series Transparency Film Item Premium Premium Standard Standard Size A/Letter (U. S.) 8.5 x 11 in. A4 (Metric Letter) sheets 016-1894-00 50 sheets 016-1895-00 User Guide 5 - Xerox 1235/DX | User Guide - Page 22
s 016-1130-00 s 016-1131-00 016-1194-00 Xerox Phaser Color Laser Labels Size A/Letter (U. S.) 8.5 x per sheet 016-1689-00 67.7 x 99.1 mm labels Xerox Phaser Premium Business Cards Item Description A/Letter (U.S.) 25 sheets instructions and five alcohol wipes Part Number 016-1845-00 6 Phaser - Xerox 1235/DX | User Guide - Page 23
Capacity 1235HD s Adds more storage for collation, downloaded fonts, forms and overlays s Provides support for Secure Print and Proof Print jobs s Enables TIFF and PDF printing Automatic Duplex Unit Card Features s Easy to install s Token Ring connectivity Part Number Z35TR User Guide 7 - Xerox 1235/DX | User Guide - Page 24
alone or as a pair. They cannot be used in combination with any other size of memory. Printer Station Features s Ergonomic surface height s Provides storage for supplies Part Number ZCARTD Lower Tray to two lower tray assemblies can be installed Part Number 1235LTA 8 Phaser 1235 Color Printer - Xerox 1235/DX | User Guide - Page 25
e Enter button f Menu Up button d f h j e g i k 0730-17 g Menu Down button h Item Up button i Item Down button j Value Up button k Value Down button Front Panel User Guide 9 - Xerox 1235/DX | User Guide - Page 26
a description of the menu system, items and values, see The Menu System in the Advanced Features and Troubleshooting Manual on the CD-ROM. 1. Press Menu Up or Menu Down to scroll the available menus; until Menu Name press On-line to exit the menu and return to Ready. 10 Phaser 1235 Color Printer - Xerox 1235/DX | User Guide - Page 27
Manual on the CD-ROM: s Printing Printer Reports s Printing Secure Print and Proof Print Jobs s Deleting Secure Print and Proof Print Jobs s Setting Network Addressing s Canceling Print Jobs Note Changes made in the printer driver override front panel settings. Front Panel User Guide - Xerox 1235/DX | User Guide - Page 28
to print the page. The Menu Map page is printed and the printer is automatically ready for its next print job. Front Panel 12 Phaser 1235 Color Printer - Xerox 1235/DX | User Guide - Page 29
Menu System. Note You can select the Print-Quality mode in the front panel or software driver. Refer to the Advanced Features and Troubleshooting Manual for driver instructions, or see the on-line help in the driver. The software driver always overrides the front panel settings. Features User - Xerox 1235/DX | User Guide - Page 30
. Advanced Color Modes See the Advanced Features and Troubleshooting Manual for more detail. The Advanced Color Modes includes Mode in the front panel or software driver. For more detailed information on Color Modes, refer to the Advanced Features and Troubleshooting Manual on the CD-ROM, or see - Xerox 1235/DX | User Guide - Page 31
cyan, magenta, and yellow toner making blacks appear richer. Unspecified RGB Interpretation (Only available in the driver.) s Xerox RGB: Produces lighter color prints than sRGB. s sRGB: Settings that are defined by the sRGB be affected by this setting. Default mode is Off. Features User Guide 15 - Xerox 1235/DX | User Guide - Page 32
Damage caused by using non-supported media is not covered by the printer's warranty. Always use Xerox Phaser media that has been page 26. s For best results, use Xerox Phaser paper; it is guaranteed to produce excellent results on your Phaser 1235 printer. s A low-paper message is displayed - Xerox 1235/DX | User Guide - Page 33
s Always keep media in a sealed package to avoid the effects of humidity, which can affect print quality. s If you use non-Xerox paper, make sure that it meets the following criteria: s Weight range: 60 - 203 g/m2 (16 - 54 lb. bond) s Smooth surface s Intended for laser printers s Do - Xerox 1235/DX | User Guide - Page 34
these media sizes, which you select in the Print dialog box of a supported printer driver. Supported page sizes and print area Media Page size Image area Letter 8.5 x 11 in. 8.17 x 10.67 in. 215.9 x up output bin on the back of the printer. Refer to page 27. 18 Phaser 1235 Color Printer - Xerox 1235/DX | User Guide - Page 35
Paper Tips Supported page sizes and print area (Continued) Margins Media Page size Image area Top / Bottom Sides Monarch Envelope* 3.88 x 7.5 in. 90.1 x 182 mm 98.4 x Multi-Sheet Bypass Feeder (MBF). Open the Face-up output bin on the back of the printer. Refer to page 27. User Guide 19 - Xerox 1235/DX | User Guide - Page 36
Premium Color Printing Paper. Refer to page 5 for ordering supplies. s For supported paper sizes, see page 18. Note Specialty papers such as Xerox Phaser Glossy Coated Paper, envelopes, Xerox Phaser Color Laser Labels, and Xerox Phaser Business Cards must be loaded in the Multi-Sheet Bypass Feeder - Xerox 1235/DX | User Guide - Page 37
capacity for Premium Transparencies s For information on loading transparencies, refer to the instructions shipped in the Xerox Phaser 35 Series Transparency Film box. s Transparencies can be used in Tray 1 only (transparencies are not supported in Tray 2 or Tray 3). s Use only Premium or Standard - Xerox 1235/DX | User Guide - Page 38
the Face-up output bin at the rear of the printer holds up to 100 sheets of 75 g/m2 (20 lb.) bond paper. Note For supported page sizes, refer to page 18. To load a Universal tray, follow these steps: 1. Pull out the Universal Tray. 0730-25 2. Fan the media to release - Xerox 1235/DX | User Guide - Page 39
3. Adjust the width and length guides to match the size of your paper. Paper size is automatically detected from the tray settings. Trays 0730-27 To load transparencies: From the Tray 1 Type menu, select Transparency. Select the Transparency setting and tray in the printer driver. User Guide 23 - Xerox 1235/DX | User Guide - Page 40
the front of the tray. Trays 0730-29 s For information on loading transparencies, refer to the instructions shipped in the Xerox Phaser 35 Series Transparency Film box. 6. Re-insert the Universal Tray. 7. Set the Front (16-24 lb. bond) 60-90 g/m2 (16-24 lb. bond) 24 Phaser 1235 Color Printer - Xerox 1235/DX | User Guide - Page 41
the Enter button to save your selection. e. Press the On-line button to exit the Menu. Note To avoid possible print-quality and media-feed problems, make sure that the loaded media matches the tray type setting. Trays User - Xerox 1235/DX | User Guide - Page 42
sheets 50 sheets 10 envelopes s For information on loading transparencies, refer to the instructions shipped in the Xerox Phaser 35 Series Transparency Film box. Use Xerox Phaser 35 Series Transparencies only. s When sending a Manual Feed job to the MBF, all media must be removed and replaced each - Xerox 1235/DX | User Guide - Page 43
different media size is loaded in the MBF than what is selected in the driver, the printer stops and the front panel prompts you to load the correct media and adjust the guide for the media width: s For Xerox Phaser 35 Series Transparencies, refer to page 30. s For Xerox Phaser Color Laser Labels, - Xerox 1235/DX | User Guide - Page 44
lb. bond) 60-90 g/m2 (16-24 lb. bond) 121 - 203 g/m2 (45-75 lb. cover) 90-120 g/m2 (24-32 lb.bond) 28 Phaser 1235 Color Printer Multi-Sheet Bypass Feeder - Xerox 1235/DX | User Guide - Page 45
save your selection. See Supported page sizes and print From the driver: a. Select problems, make sure that the loaded media matches the tray type setting. 7. Send the job to the printer. Refer to Printing in the Advanced Features and Troubleshooting Manual. Multi-Sheet Bypass Feeder User Guide - Xerox 1235/DX | User Guide - Page 46
Loading Specialty Media in the Multi-Sheet Bypass Feeder (MBF) Xerox Phaser 35 Series Transparencies For information on loading transparencies, refer to the instructions shipped in the Xerox Phaser 35 Series Transparency Film box. Special Media 30 Phaser 1235 Color Printer - Xerox 1235/DX | User Guide - Page 47
face-up. c. Make a test print from your application to determine the correct orientation of your envelope. 0730-33 3. Adjust the Multi-Sheet Bypass Feeder (MBF) guides for the width of your envelopes. 4. Open the Face-up output bin at the rear of the printer. 5. Set the front panel to match the - Xerox 1235/DX | User Guide - Page 48
to exit the Menu. 7. From the driver: a. Select Multi-Sheet Bypass Feeder (MBF) as Paper Source. b. Select the appropriate size. c. Select Envelope as the media type. 8. Send the job to the printer. Refer to Printing in the Advanced Features and Troubleshooting Manual. 32 Phaser 1235 Color Printer - Xerox 1235/DX | User Guide - Page 49
. Note s s This printer is not made to handle high-capacity production envelope printing. Envelopes may wrinkle depending on weight and stiffness of the envelope. User Guide 33 - Xerox 1235/DX | User Guide - Page 50
-34 2. Adjust the Multi-Sheet Bypass Feeder (MBF) guides for the width of your Xerox Phaser Color Laser Labels or Xerox Phaser Business cards. 3. Open the Face-up output bin b. Press Enter to save your selection. See Supported page sizes and print area on page 18. c. Press the On-line button to - Xerox 1235/DX | User Guide - Page 51
the driver: a. Select Multi-Sheet Bypass Feeder (MBF) as Paper Source. b. Select the appropriate size for Labels. c. Select Labels or Card Stock (for business cards) as the media type. 7. Send the job to the printer. Refer to Printing in the Advanced Features and Troubleshooting Manual. Special - Xerox 1235/DX | User Guide - Page 52
. For letterhead printing: Place the first side to be printed face-up with the top of the page toward the back of the printer. Phaser 1235 2-Sided Prints 2. Re-insert the Universal Tray. 36 0730-35 Phaser - Xerox 1235/DX | User Guide - Page 53
3. From the driver: Under 2-Sided Printing, select the binding preference how the page turns. a. Long-Edge binding or Flip on long edge, orientation is (b). 0730-38 (a) 0730-39 (b) 4. Send the job to the printer. Refer to Printing in the Advanced Features and Troubleshooting Manual. User Guide 37 - Xerox 1235/DX | User Guide - Page 54
printing from a paper tray, use only laser bond paper for manual 2-sided prints. s For opacity and feed reliability, use laser Use the Multi-Sheet Bypass Feeder (MBF) for manual 2-sided printing on specialty media like light card Side-1 of a manual 2-sided print. Increase the top margin on Side - Xerox 1235/DX | User Guide - Page 55
with the first side to be printed face-down. b. Adjust the width and length guides to match the size of your paper. 0730-29 From the MBF: a. Load paper side to be printed face-up. b. Adjust the Multi-Sheet Bypass Feeder (MBF) guides to fit the width of your paper. 2-Sided Prints 0730-23 2. Set the - Xerox 1235/DX | User Guide - Page 56
to select the appropriate size. b. Press Enter to save your selection. See Supported page sizes and print area on page 18. (If printing from a Universal On-line button to exit the Menu System. 5. In the software driver, select the appropriate size, type and source. 6. Remove your prints from - Xerox 1235/DX | User Guide - Page 57
applications.) 1. From a tray: Insert paper with the second side to be printed face-down. Adjust the width and length guides to match the paper size. This example shows letterhead paper. Phaser 1235 2-Sided Prints 0730-42 From the MBF: Load the second side to be printed face-up. Adjust the width - Xerox 1235/DX | User Guide - Page 58
to select the appropriate size. b. Press Enter to save your selection. See Supported page sizes and print area on page 18. (If printing from a Universal On-line button to exit the Menu System. 5. In the software driver, select the appropriate size, type and source. 6. Remove your prints from - Xerox 1235/DX | User Guide - Page 59
and adjusting the Color Balance outlined in Cleaning the Printer in the Advanced Features and Troubleshooting Manual available on the CD-ROM. If the information provided in this section does not solve your print problem, refer to Getting Help on page 55. Print Defects and Potential Remedies Print - Xerox 1235/DX | User Guide - Page 60
Quality Problem 0730-45 0730-46 s If the problem occurs in only one color, an imaging drum may be s Remove and inspect the imaging drum of the problem color. Replace it if any scratches or damage are 46 Print Quality 0730-47 s If the problem occurs in only one color, an imaging drum may - Xerox 1235/DX | User Guide - Page 61
Print Defects and Potential Remedies Print Quality Problem Common Causes Potential Remedies Repeating Defects Marks recur uniformly at any of these evenly spaced intervals: s imaging drum are scratched or damaged. s Replace the corresponding imaging drum. 0730-49 Print Quality User Guide 45 - Xerox 1235/DX | User Guide - Page 62
has contamination. To clean up any residual toner, print blank sheets of paper. s If the problem persists, inspect the fuser for excess toner and replace. 0730-50 Color Misregistration Color has shifted misregistered. Replace if necessary. 0730-51 Print Quality 46 Phaser 1235 Color Printer - Xerox 1235/DX | User Guide - Page 63
or Multi-Sheet Bypass Feeder. s For supported media sizes refer to page 22. s For proper media loading instructions refer to page 30. What causes a media jam? Media jams occur most often in these conditions: s Incorrect media type selection in printer driver. s The media does not meet specifications - Xerox 1235/DX | User Guide - Page 64
is cleared, the print job completes. Note Inside the printer, all handles and points of user interaction for removing jammed media are green. 48 Phaser 1235 Color Printer - Xerox 1235/DX | User Guide - Page 65
Jams Area A Jam Follow these steps to clear a jam from Area A: 1. Open the top cover. Avoid touching or handling the LED bars. 0730-52 2. Using the green handles, lift out the toner cartridge/imaging drum assembly. 14lb 6.4kg 0730-53 User Guide 49 - Xerox 1235/DX | User Guide - Page 66
drums (or the bottom of the toner cartridge/imaging drum assembly) on the edge of the table or an uneven or rough surface. 50 Phaser 1235 Color Printer - Xerox 1235/DX | User Guide - Page 67
down the release lever, and (b) pulling out the media. If necessary, remove the fuser. Return the release lever to its original position when finished. User Guide 0730-57 51 - Xerox 1235/DX | User Guide - Page 68
Jams 5. Replace the toner cartridges/imaging drum assembly. 6. Slowly lower the top cover into place. 0730-58 0730-59 52 Phaser 1235 Color Printer - Xerox 1235/DX | User Guide - Page 69
, pull it out until it stops. Lift the lid, remove the jammed paper, then reinsert the duplex unit. 3. Close the front cover. 0730-61 User Guide 53 - Xerox 1235/DX | User Guide - Page 70
Jams 4. Pull to open the Universal Tray and remove any jammed paper or transparencies. 0730-62 5. Remove the Universal Tray from the printer. 0730-63 6. Remove any jammed paper or transparencies. 0730-64 7. Reinsert the Universal Tray. 54 Phaser 1235 Color Printer - Xerox 1235/DX | User Guide - Page 71
about your printer. Printer CD-ROM s Phaser 1235 Color Printer User Guide s Advanced Features and Troubleshooting Manual s Setup Guide poster s Printer drivers s Driver Installers (Mac, Windows, OS/2) s Read Me release notes s Internet Services Help (HTML documentation) s CentreWare Font Download - Xerox 1235/DX | User Guide - Page 72
www.xerox.com/officeprinting/infoSMART/ s infoSMART™ is the same troubleshooting knowledge base used by Xerox Customer Support services Subscribe to email update notices: www.colorconnection.xerox.com/ Technical Support www.xerox.com/officeprinting/support To find a local reseller See www.xerox - Xerox 1235/DX | User Guide - Page 73
Customer Support Center See www.xerox.com/officeprinting/contacts for the most updated information. U. S. and Canada 1-800-835-6100 Finland 0203 206 30 Norway 022 723 801 267 0440 UK 01 908 681 707 Ecuador 2 220 864 New Zealand 0 800 449 177 Venezuela 2 265 2625 Getting Help User Guide 57 - Xerox 1235/DX | User Guide - Page 74
Specifications Material Safety Data Sheets Color Toner Cartridges Manufacturer: Xerox Corporation, Office Printing Business P. O. Box 1000, 006R90295, 006R90305 006R90296, 006R90306 1235SS Product Use: XEROX Phaser ® 1235 Color Printers SECTION 2 - INFORMATION ON INGREDIENTS Ingredients - Xerox 1235/DX | User Guide - Page 75
: Water, dry chemical, carbon dioxide, or foam. FIRE FIGHTING INSTRUCTIONS: Avoid inhalation of smoke. As for any fire, wear protective - PERSONAL PROTECTION No special personal protection indicated, when used as intended in Xerox Phaser color printers. THRESHOLD LIMIT VALUE (TLV): 10 mg/m3 (total - Xerox 1235/DX | User Guide - Page 76
thermal decomposition or combustion. SECTION 11 - TOXICOLOGICAL INFORMATION This material has been evaluated by Xerox Corporation. The toxicity data noted below is based on test results of similar toners. Oral overloading, a generic response to excessive Specifications 60 Phaser 1235 Color Printer - Xerox 1235/DX | User Guide - Page 77
, A-0619, A-0620 Xerox Corporation Office Printing Business Environmental, Health & Safety P.O. Box 1000 Mail Stop 60-512 Wilsonville, Oregon 97070 Printer information: 1-800-835-6100 MSDS information: (503) 685-4093 Transportation Emergency (Chemtrec): 800-424-9300 Specifications User Guide 61 - Xerox 1235/DX | User Guide - Page 78
numbers: CHEMTREC (Transportation): 1-800-424-9300 Product Use: Xerox Phaser® 1235 Color Printer SECTION 2 - INFORMATION ON INGREDIENTS Component CAS INHALATION: Remove to fresh air. Keep at rest. Restore and/or support breathing as needed. Get prompt Medical attention. INGESTION: In the unlikely - Xerox 1235/DX | User Guide - Page 79
. Handle and store in a manner suitable for an OSHA class IB Flammable Liquid. Electrical services must meet applicable codes. Use non-sparking tools. SECTION 8 - EXPOSURE CONTROL - PERSONAL 13 - DISPOSAL CONSIDERATIONS Follow Federal, State and Local Regulations. Specifications User Guide 63 - Xerox 1235/DX | User Guide - Page 80
Health: Yes Fire Hazard: Yes Pressure Hazard: No Reactivity Hazard: No TSCA INVENTORY STATUS: All components listed are on the TSCA inventory. Specifications 64 Phaser 1235 Color Printer - Xerox 1235/DX | User Guide - Page 81
accordance with applicable federal, state and local laws and regulations. Prepared by: CleanTex Products 33 Murray Hill Drive Nanuet, NY 10954 June 1997 Specifications User Guide 65 - Xerox 1235/DX | User Guide - Page 82
Specifications 66 Phaser 1235 Color Printer - Xerox 1235/DX | User Guide - Page 83
black and white print mode 13 C cleaning kit part numbers 6 Color Connection 56 color correction 14 D duplex unit part number 7 E email notification service 56 enhanced print mode 13 envelopes printing 31 F fast color print mode 13 front panel help button 55 fuser part number 4 G getting help front - Xerox 1235/DX | User Guide - Page 84
internal hard drive part number 7 L labels part numbers 6 printing 34 M manual 2-sided printing 38 media loading Multi-Sheet Bypass Feeder (MBF) 27 supported sizes 18 universal tray usage 20 media jams prevention of 47 memory, additional part number 8 Multi-Sheet Bypass Feeder (MBF) loading 27 media - Xerox 1235/DX | User Guide - Page 85
numbers 3, 5 paper numbers paper feed roller kit 3, 5 part number additional memory 8 automatic 2-sided printing unit 7 cleaning kit 6 fuser 4 high capacity prepunched paper printing 36 print modes adjusting 13 print quality troubleshooting 43 printer station part number 8 printing tips labels 34 - Xerox 1235/DX | User Guide - Page 86
22 part numbers 5 universal tray usage 20 transparency print mode 13 troubleshooting getting help 55 print quality 43 using front panel help button 55 56 using printer CD-ROM contents 55 two-sided printing automatic 36 manual 38 U universal loading into universal tray 22 universal tray loading media - Xerox 1235/DX | User Guide - Page 87
- Xerox 1235/DX | User Guide - Page 88
Printed on recycled paper 071-0730-00
-
 1
1 -
 2
2 -
 3
3 -
 4
4 -
 5
5 -
 6
6 -
 7
7 -
8
-
9
-
10
-
11
-
12
-
13
-
14
-
15
-
16
-
17
-
18
-
19
-
20
-
21
-
22
-
23
-
24
-
25
-
26
-
27
-
28
-
29
-
30
-
31
-
32
-
33
-
34
-
35
-
36
-
37
-
38
-
39
-
40
-
41
-
42
-
43
-
44
-
45
-
46
-
47
-
48
-
49
-
50
-
51
-
52
-
53
-
54
-
55
-
56
-
57
-
58
-
59
-
60
-
61
-
62
-
63
-
64
-
65
-
66
-
67
-
68
-
69
-
70
-
71
-
72
-
73
-
74
-
75
-
76
-
77
-
78
-
79
-
80
-
81
-
82
-
83
-
84
-
85
-
86
-
87
-
88
 |
 |

P H A S E R
®
1 2 3 5
COLOR P R I NTE R
User Guide