Xerox 3635MFP Systems Administrator Guide - Page 120
Insert the Feature Enablement Key, Enable Network Accounting from the Machine, Location], Address]
 |
UPC - 095205741049
View all Xerox 3635MFP manuals
Add to My Manuals
Save this manual to your list of manuals |
Page 120 highlights
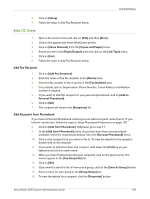
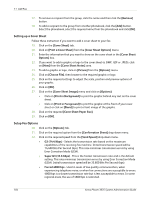
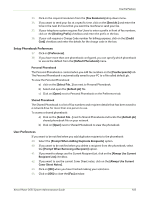
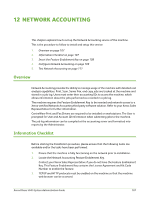
12 Network Accounting 4. Install and configure the Xerox-certified Network Accounting Solution Package on your network. Refer to the manufacturer's instructions with the network accounting package to complete this task. 5. Test communication between the accounting server and the machine: a) Go to your Network Accounting Server. b) Open a web browser and enter the IP Address of the machine in the [Location] or [Address] field. c) Press [Enter]. d) The machine's Internet Services web pages should appear. 6. If you do not have a web browser, test connectivity by pinging the IP address of the machine from your Network Accounting Server. Insert the Feature Enablement Key 1. Insert the Feature Enablement Key in the card reader at the rear of the machine. 2. Follow the instructions with the Feature Enablement Key to enable the Network Accounting option. 3. Remove the Feature Enablement Key when instructed to do so and store it in a safe location. Enable Network Accounting from the Machine 1. Press the button on the machine to enter the Tools Pathway. 2. Enter the Administrator's Password. The default is 1111. 3. Touch [Enter]. 4. Press the button. 5. Touch [Tools]. 6. Touch [Accounting]. 7. Touch [Accounting Enablement]. 8. Touch [Authentication Mode]. 9. Touch [On] under the Network Accounting option. 10. Touch [Save]. 11. Press the button. 12. Touch [Confirm] to exit the Tools Pathway. 108 Xerox Phaser 3635 System Administration Guide
-
 1
1 -
2
-
3
-
4
-
5
-
6
-
7
-
8
-
9
-
10
-
11
-
12
-
13
-
14
-
15
-
16
-
17
-
18
-
19
-
20
-
21
-
22
-
23
-
24
-
25
-
26
-
27
-
28
-
29
-
30
-
31
-
32
-
33
-
34
-
35
-
36
-
37
-
38
-
39
-
40
-
41
-
42
-
43
-
44
-
45
-
46
-
47
-
48
-
49
-
50
-
51
-
52
-
53
-
54
-
55
-
56
-
57
-
58
-
59
-
60
-
61
-
62
-
63
-
64
-
65
-
66
-
67
-
68
-
69
-
70
-
71
-
72
-
73
-
74
-
75
-
76
-
77
-
78
-
79
-
80
-
81
-
82
-
83
-
84
-
85
-
86
-
87
-
88
-
89
-
90
-
91
-
92
-
93
-
94
-
95
-
96
-
97
-
98
-
99
-
100
-
101
-
102
-
103
-
104
-
105
-
106
-
107
-
108
-
109
-
110
-
111
-
112
-
113
-
114
-
 115
115 -
 116
116 -
 117
117 -
 118
118 -
 119
119 -
 120
120 -
 121
121 -
 122
122 -
 123
123 -
 124
124 -
 125
125 -
126
-
127
-
128
-
129
-
130
-
131
-
132
-
133
-
134
-
135
-
136
-
137
-
138
-
139
-
140
-
141
-
142
-
143
-
144
-
145
-
146
-
147
-
148
-
149
-
150
-
151
-
152
-
153
-
154
-
155
-
156
-
157
-
158
-
159
-
160
-
161
-
162
-
163
-
164
-
165
-
166
-
167
-
168
-
169
-
170
-
171
-
172
-
173
-
174
-
175
-
176
-
177
-
178
-
179
-
180
-
181
-
182
-
183
-
184
-
185
-
186
-
187
-
188
-
189
-
190
-
191
-
192
-
193
-
194
-
195
-
196
-
197
-
198
-
199
-
200
-
201
-
202
-
203
-
204
-
205
-
206
-
207
-
208
-
209
-
210
-
211
-
212
 |
 |