Xerox 3635MFP Systems Administrator Guide - Page 170
Check the Server Configuration Address, Use Secure Access
 |
UPC - 095205741049
View all Xerox 3635MFP manuals
Add to My Manuals
Save this manual to your list of manuals |
Page 170 highlights
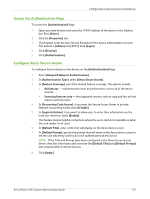
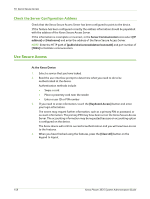
16 Xerox Secure Access Check the Server Configuration Address Check that the Xerox Secure Access Server has been configured to point to the device. If the feature has been configured correctly the address information should be populated with the address of the Xerox Secure Access Server. If the information is incomplete or incorrect, in the Server Communication area select [IP address] or [Hostname] and enter the address of the Xerox Secure Access Server. NOTE: Enter the HTTP path of [public/dce/xeroxvalidation/convauth] and port number of [1824] to facilitate communication. Use Secure Access At the Xerox Device: 1. Select a service that you have locked. 2. Read the user interface prompt to determine what you need to do to be authenticated at the device. Authentication methods include: • Swipe a card • Place a proximity card near the reader • Enter a user ID or PIN number 3. If you need to enter information, touch the [Keyboard Access] button and enter your login information. The screen may request further information, such as a primary PIN or password, or account information. The primary PIN may have been set on the Xerox Secure Access Server. The accounting information may be requested because an accounting option is configured on the device. The Xerox device will confirm successful authentication and you will now have access to the features. 4. When you have finished using the features, press the [Clear All] button on the keypad to logout. 158 Xerox Phaser 3635 System Administration Guide
-
 1
1 -
2
-
3
-
4
-
5
-
6
-
7
-
8
-
9
-
10
-
11
-
12
-
13
-
14
-
15
-
16
-
17
-
18
-
19
-
20
-
21
-
22
-
23
-
24
-
25
-
26
-
27
-
28
-
29
-
30
-
31
-
32
-
33
-
34
-
35
-
36
-
37
-
38
-
39
-
40
-
41
-
42
-
43
-
44
-
45
-
46
-
47
-
48
-
49
-
50
-
51
-
52
-
53
-
54
-
55
-
56
-
57
-
58
-
59
-
60
-
61
-
62
-
63
-
64
-
65
-
66
-
67
-
68
-
69
-
70
-
71
-
72
-
73
-
74
-
75
-
76
-
77
-
78
-
79
-
80
-
81
-
82
-
83
-
84
-
85
-
86
-
87
-
88
-
89
-
90
-
91
-
92
-
93
-
94
-
95
-
96
-
97
-
98
-
99
-
100
-
101
-
102
-
103
-
104
-
105
-
106
-
107
-
108
-
109
-
110
-
111
-
112
-
113
-
114
-
115
-
116
-
117
-
118
-
119
-
120
-
121
-
122
-
123
-
124
-
125
-
126
-
127
-
128
-
129
-
130
-
131
-
132
-
133
-
134
-
135
-
136
-
137
-
138
-
139
-
140
-
141
-
142
-
143
-
144
-
145
-
146
-
147
-
148
-
149
-
150
-
151
-
152
-
153
-
154
-
155
-
156
-
157
-
158
-
159
-
160
-
161
-
162
-
163
-
164
-
 165
165 -
 166
166 -
 167
167 -
 168
168 -
 169
169 -
 170
170 -
 171
171 -
 172
172 -
 173
173 -
 174
174 -
 175
175 -
176
-
177
-
178
-
179
-
180
-
181
-
182
-
183
-
184
-
185
-
186
-
187
-
188
-
189
-
190
-
191
-
192
-
193
-
194
-
195
-
196
-
197
-
198
-
199
-
200
-
201
-
202
-
203
-
204
-
205
-
206
-
207
-
208
-
209
-
210
-
211
-
212
 |
 |