Xerox 3635MFP Systems Administrator Guide - Page 30
Default DHCPv6 Dynamic Host Configuration Protocol Settings, Never use DHCP] - phaser manual
 |
UPC - 095205741049
View all Xerox 3635MFP manuals
Add to My Manuals
Save this manual to your list of manuals |
Page 30 highlights
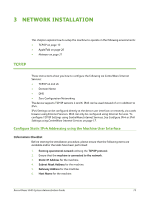
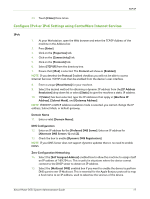
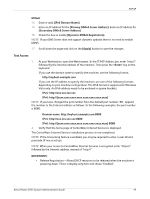
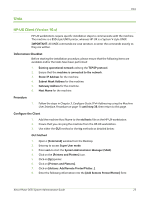
3 Network Installation IPv6 16. Scroll down the page and click on [Apply] to accept the changes. 1. At your Workstation, open the Web browser and enter the TCP/IP Address of the machine in the Address bar. 2. Press [Enter]. 3. Click on the [Properties] tab. 4. Click on the [Connectivity] link. 5. Click on the [Protocols] link. 6. Select [TCP/IP] from the directory tree. 7. Scroll down the page to TCP/IPv6 area, for the Protocol click the [Enabled] checkbox. Stateless Addresses The Link-Local Address is automatically populated. 8. The Host Name is populated when configured at the IPv4 screen. If you change the Host Name here it will also change it for IPv4. 9. Enter the required [Domain Name]. Default DHCPv6 (Dynamic Host Configuration Protocol) Settings The device performs auto-address DHCPv6 configuration every time it powers up. This is used for neighbour discovery and address resolution on the local IPv6 subnet. However, you can choose to use manual configuration, automatic configuration or a combination of automatic and manual configuration. 10. Select one of the following options: • [Use DHCP as directed by a router] - this option is fully automatic. The DHCPv6 Address will be obtained and displayed on the screen. • [Always Enable DHCP] - this option is fully automatic. The DHCPv6 Address will be obtained and displayed on the screen. • [Never use DHCP] - when this option is selected, you must configure the Manual Address Options and DNS separately. Manual Address Options The device can be configured with up to 4 manual IPv6 addresses. 11. Click the [Enabled] checkbox for Manual Address if required. 12. The Router Prefix is derived from router advertisements. Select a router address prefix from the list supplied in the [Router Prefix] menu. Click [Add] to populate the prefix for manual entry address. 13. Enter the manual IPv6 address (interfaceID) to append to the Router prefix. 18 Xerox Phaser 3635 System Administration Guide
-
 1
1 -
2
-
3
-
4
-
5
-
6
-
7
-
8
-
9
-
10
-
11
-
12
-
13
-
14
-
15
-
16
-
17
-
18
-
19
-
20
-
21
-
22
-
23
-
24
-
 25
25 -
 26
26 -
 27
27 -
 28
28 -
 29
29 -
 30
30 -
 31
31 -
 32
32 -
 33
33 -
 34
34 -
 35
35 -
36
-
37
-
38
-
39
-
40
-
41
-
42
-
43
-
44
-
45
-
46
-
47
-
48
-
49
-
50
-
51
-
52
-
53
-
54
-
55
-
56
-
57
-
58
-
59
-
60
-
61
-
62
-
63
-
64
-
65
-
66
-
67
-
68
-
69
-
70
-
71
-
72
-
73
-
74
-
75
-
76
-
77
-
78
-
79
-
80
-
81
-
82
-
83
-
84
-
85
-
86
-
87
-
88
-
89
-
90
-
91
-
92
-
93
-
94
-
95
-
96
-
97
-
98
-
99
-
100
-
101
-
102
-
103
-
104
-
105
-
106
-
107
-
108
-
109
-
110
-
111
-
112
-
113
-
114
-
115
-
116
-
117
-
118
-
119
-
120
-
121
-
122
-
123
-
124
-
125
-
126
-
127
-
128
-
129
-
130
-
131
-
132
-
133
-
134
-
135
-
136
-
137
-
138
-
139
-
140
-
141
-
142
-
143
-
144
-
145
-
146
-
147
-
148
-
149
-
150
-
151
-
152
-
153
-
154
-
155
-
156
-
157
-
158
-
159
-
160
-
161
-
162
-
163
-
164
-
165
-
166
-
167
-
168
-
169
-
170
-
171
-
172
-
173
-
174
-
175
-
176
-
177
-
178
-
179
-
180
-
181
-
182
-
183
-
184
-
185
-
186
-
187
-
188
-
189
-
190
-
191
-
192
-
193
-
194
-
195
-
196
-
197
-
198
-
199
-
200
-
201
-
202
-
203
-
204
-
205
-
206
-
207
-
208
-
209
-
210
-
211
-
212
 |
 |