Xerox 3635MFP Systems Administrator Guide - Page 48
Other Network File and Print Services], Print Services for Unix - driver windows 7
 |
UPC - 095205741049
View all Xerox 3635MFP manuals
Add to My Manuals
Save this manual to your list of manuals |
Page 48 highlights
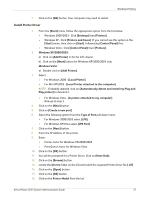
4 Print Drivers 7. Scroll down to [Other Network File and Print Services] and click on the checkbox to select it. 8. Click on [Details]. 9. If it is not selected, click on the [Print Services for Unix] checkbox. 10. Click on the [OK] button. 11. Click on the [Next] button. NOTE: If Print Services for Unix is not installed, refer to instructions from Microsoft to install this service. When you are finished, return to this page. 12. Click on the [Finish] button. 13. Close the [Add/Remove Programs] window. 14. Follow the steps in Chapter 4, LPR Printing, Install Printer Driver on page 37. Windows 2000/2003 1. From the Desktop, right-click the [My Network Places] icon and click on [Properties]. 2. Right-click on the [Local Area Connection] icon and click on [Properties]. 3. Verify that the [Internet Protocol (TCP/IP)] protocol has been loaded. If this software is not present, install it using the documentation provided by Microsoft. When you are finished, return to this page. 4. Verify that Print Services for Unix is loaded: a) Click on [Start], [Settings] then [Control Panel]. b) Double-click on the [Add/Remove Programs] icon. c) Click on [Add/Remove Win Components] in the far left column. d) Click on [Other Network File and Print Services]. e) Click on [Details]. f) Click on the [Print Services for Unix] checkbox. If Print Services for Unix is not installed, refer to instructions from Microsoft to install this service. When you are finished, return to this page. 5. Click on the [OK] button. 6. Click on the [Next] button. 7. Click on the [Finish] button. 8. Close the [Add/Remove Programs] window. Windows Vista 1. Click on [Start], [Control Panel] and double-click on [Programs and Features]. 2. Double-click on [Windows Features]. 3. In the [Turn Windows Features on and off] window, expand the [Print Services] menu. 4. Click on [LPR Port Monitor] to enable the service. 36 Xerox Phaser 3635 System Administration Guide
-
 1
1 -
2
-
3
-
4
-
5
-
6
-
7
-
8
-
9
-
10
-
11
-
12
-
13
-
14
-
15
-
16
-
17
-
18
-
19
-
20
-
21
-
22
-
23
-
24
-
25
-
26
-
27
-
28
-
29
-
30
-
31
-
32
-
33
-
34
-
35
-
36
-
37
-
38
-
39
-
40
-
41
-
42
-
 43
43 -
 44
44 -
 45
45 -
 46
46 -
 47
47 -
 48
48 -
 49
49 -
 50
50 -
 51
51 -
 52
52 -
 53
53 -
54
-
55
-
56
-
57
-
58
-
59
-
60
-
61
-
62
-
63
-
64
-
65
-
66
-
67
-
68
-
69
-
70
-
71
-
72
-
73
-
74
-
75
-
76
-
77
-
78
-
79
-
80
-
81
-
82
-
83
-
84
-
85
-
86
-
87
-
88
-
89
-
90
-
91
-
92
-
93
-
94
-
95
-
96
-
97
-
98
-
99
-
100
-
101
-
102
-
103
-
104
-
105
-
106
-
107
-
108
-
109
-
110
-
111
-
112
-
113
-
114
-
115
-
116
-
117
-
118
-
119
-
120
-
121
-
122
-
123
-
124
-
125
-
126
-
127
-
128
-
129
-
130
-
131
-
132
-
133
-
134
-
135
-
136
-
137
-
138
-
139
-
140
-
141
-
142
-
143
-
144
-
145
-
146
-
147
-
148
-
149
-
150
-
151
-
152
-
153
-
154
-
155
-
156
-
157
-
158
-
159
-
160
-
161
-
162
-
163
-
164
-
165
-
166
-
167
-
168
-
169
-
170
-
171
-
172
-
173
-
174
-
175
-
176
-
177
-
178
-
179
-
180
-
181
-
182
-
183
-
184
-
185
-
186
-
187
-
188
-
189
-
190
-
191
-
192
-
193
-
194
-
195
-
196
-
197
-
198
-
199
-
200
-
201
-
202
-
203
-
204
-
205
-
206
-
207
-
208
-
209
-
210
-
211
-
212
 |
 |