Xerox 3635MFP Systems Administrator Guide - Page 60
Con the Windows Printer Driver, Bi-Directional Communication
 |
UPC - 095205741049
View all Xerox 3635MFP manuals
Add to My Manuals
Save this manual to your list of manuals |
Page 60 highlights
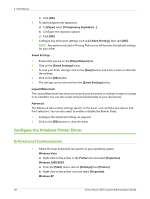
4 Print Drivers e) Click [OK]. 6. To add transparencies separators: a) In [Paper] select [Transparency Separators...]. b) Configure the separator options. c) Click [OK]. 7. Configure any other print settings, such as [2-Sided Printing], then click [OK]. NOTE: Any options selected in Printing Preferences will become the default settings for your driver. Saved Settings 1. Ensure that you are on the [Paper/Output] tab. 2. Click on the [Saved Settings] menu. 3. To save your driver settings, click on the [Save] button and enter a name to describe the settings. 4. Click on the [OK] button. 5. The settings can be selected from the [Saved Settings] menu. Layout/Watermark The Layout/Watermark tab allows you to print your document as multiple images on a page or as a booklet. You can also create and print watermarks on your documents. Advanced The Advanced tab contains settings specific to the driver, such as Postscript options and Font selections. You can also select to enable or disable the Banner Sheet. 1. Configure the advanced settings, as required. 2. Click on the [OK] button to close the driver. Configure the Windows Printer Driver Bi-Directional Communication 1. Follow the steps below that are specific to your operating system: Windows Vista a) Right-click on the printer in the Printers list and select [Properties]. Windows 2000/2003 a) From the [Start] menu, click on [Settings] then [Printers]. b) Right-click on the printer icon and select [Properties]. Windows XP 48 Xerox Phaser 3635 System Administration Guide
-
 1
1 -
2
-
3
-
4
-
5
-
6
-
7
-
8
-
9
-
10
-
11
-
12
-
13
-
14
-
15
-
16
-
17
-
18
-
19
-
20
-
21
-
22
-
23
-
24
-
25
-
26
-
27
-
28
-
29
-
30
-
31
-
32
-
33
-
34
-
35
-
36
-
37
-
38
-
39
-
40
-
41
-
42
-
43
-
44
-
45
-
46
-
47
-
48
-
49
-
50
-
51
-
52
-
53
-
54
-
 55
55 -
 56
56 -
 57
57 -
 58
58 -
 59
59 -
 60
60 -
 61
61 -
 62
62 -
 63
63 -
 64
64 -
 65
65 -
66
-
67
-
68
-
69
-
70
-
71
-
72
-
73
-
74
-
75
-
76
-
77
-
78
-
79
-
80
-
81
-
82
-
83
-
84
-
85
-
86
-
87
-
88
-
89
-
90
-
91
-
92
-
93
-
94
-
95
-
96
-
97
-
98
-
99
-
100
-
101
-
102
-
103
-
104
-
105
-
106
-
107
-
108
-
109
-
110
-
111
-
112
-
113
-
114
-
115
-
116
-
117
-
118
-
119
-
120
-
121
-
122
-
123
-
124
-
125
-
126
-
127
-
128
-
129
-
130
-
131
-
132
-
133
-
134
-
135
-
136
-
137
-
138
-
139
-
140
-
141
-
142
-
143
-
144
-
145
-
146
-
147
-
148
-
149
-
150
-
151
-
152
-
153
-
154
-
155
-
156
-
157
-
158
-
159
-
160
-
161
-
162
-
163
-
164
-
165
-
166
-
167
-
168
-
169
-
170
-
171
-
172
-
173
-
174
-
175
-
176
-
177
-
178
-
179
-
180
-
181
-
182
-
183
-
184
-
185
-
186
-
187
-
188
-
189
-
190
-
191
-
192
-
193
-
194
-
195
-
196
-
197
-
198
-
199
-
200
-
201
-
202
-
203
-
204
-
205
-
206
-
207
-
208
-
209
-
210
-
211
-
212
 |
 |