Xerox 7500DX Phaser 7500 User Guide - Page 32
Using the Control Panel, Changing or Modifying the IP Address Using CentreWare IS, Printer Setup
 |
UPC - 095205706048
View all Xerox 7500DX manuals
Add to My Manuals
Save this manual to your list of manuals |
Page 32 highlights
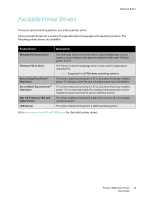
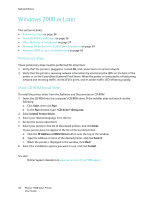
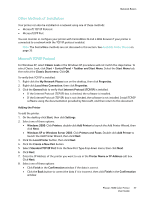
Network Basics Information Required for Manual IP Addressing Default Router/Gateway address Router address is required to communicate with the host device from anywhere other than the local network segment. Using the Control Panel To manually set the IP address: 1. On the control panel, select Printer Setup > Connection Setup > Network Setup > TCP/IPv4 Setup, then press the OK button. 2. Select DHCP/BOOTP, then press the OK button to select Off. 3. Select IPv4 Address, then press the OK button. 4. Enter the printer's IP address, then press the OK button. Changing or Modifying the IP Address Using CentreWare IS CentreWare IS provides a simple interface that enables you to manage, configure, and monitor networked printers from your desktop using an embedded Web server. For complete information about CentreWare IS, click the Help button in CentreWare IS to go to the CentreWare IS Online Help. After setting the printer's IP address, you can modify TCP/IP settings using CentreWare IS. 1. Launch your Web browser. 2. Enter the printer's IP address in the browser's Address field. 3. Click Properties. 4. Select the Protocols folder on the left navigation panel. 5. Select TCP/IP. 6. Enter or modify the settings, and then click Save Changes at the bottom of the page. See also: System Administrator Guide at www.xerox.com/office/7500docs 32 Phaser 7500 Color Printer User Guide
-
 1
1 -
2
-
3
-
4
-
5
-
6
-
7
-
8
-
9
-
10
-
11
-
12
-
13
-
14
-
15
-
16
-
17
-
18
-
19
-
20
-
21
-
22
-
23
-
24
-
25
-
26
-
 27
27 -
 28
28 -
 29
29 -
 30
30 -
 31
31 -
 32
32 -
 33
33 -
 34
34 -
 35
35 -
 36
36 -
 37
37 -
38
-
39
-
40
-
41
-
42
-
43
-
44
-
45
-
46
-
47
-
48
-
49
-
50
-
51
-
52
-
53
-
54
-
55
-
56
-
57
-
58
-
59
-
60
-
61
-
62
-
63
-
64
-
65
-
66
-
67
-
68
-
69
-
70
-
71
-
72
-
73
-
74
-
75
-
76
-
77
-
78
-
79
-
80
-
81
-
82
-
83
-
84
-
85
-
86
-
87
-
88
-
89
-
90
-
91
-
92
-
93
-
94
-
95
-
96
-
97
-
98
-
99
-
100
-
101
-
102
-
103
-
104
-
105
-
106
-
107
-
108
-
109
-
110
-
111
-
112
-
113
-
114
-
115
-
116
-
117
-
118
-
119
-
120
-
121
-
122
-
123
-
124
-
125
-
126
-
127
-
128
-
129
-
130
-
131
-
132
-
133
-
134
-
135
-
136
-
137
-
138
-
139
-
140
-
141
-
142
-
143
-
144
-
145
-
146
-
147
-
148
-
149
-
150
-
151
-
152
-
153
-
154
-
155
-
156
-
157
-
158
-
159
-
160
-
161
-
162
-
163
-
164
 |
 |