Xerox 7500DX Phaser 7500 User Guide - Page 86
Selecting Color Correction in a Supported Driver, Making Color Adjustments in a Supported Driver
 |
UPC - 095205706048
View all Xerox 7500DX manuals
Add to My Manuals
Save this manual to your list of manuals |
Page 86 highlights
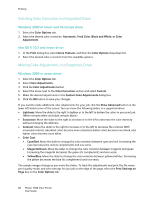
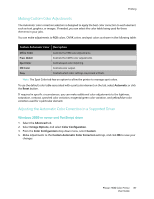
Printing Selecting Color Correction in a Supported Driver Windows 2000 or newer and PostScript driver 1. Select the Color Options tab. 2. Select the desired color correction: Automatic, Vivid Color, Black and White, or Color Adjustments. Mac OS X 10.3 and newer driver 1. In the Print dialog box, select Xerox Features, and then the Color Options drop-down list. 2. Select the desired color correction from the available options. Making Color Adjustments in a Supported Driver Windows 2000 or newer driver 1. Select the Color Options tab. 2. Select Color Adjustments. 3. Click the Color Adjustments button. 4. Select the arrow next to the Color Correction section and select Custom. 5. Make the desired adjustments in the Custom Color Adjustments dialog box. 6. Click the OK button to save your changes. If you need to make additional color adjustments for your job, click the Show Advanced button in the lower left-hand corner of the screen. You can move the following sliders in a supported driver: • Lightness: Move the slider to the right to lighten or to the left to darken the colors in your print job. (White remains white and black remains black.) • Saturation: Move the slider to the right to increase or to the left to decrease the color intensity without changing the darkness. • Contrast: Move the slider to the right to increase or to the left to decrease the contrast. With increased contrast, saturated colors become more saturated, darker colors become more black, and lighter colors become more white. • Color Cast: • Cyan/Red: Move the slider to change the color variation between cyan and red. Increasing the cyan decreases the red (its complement) and vice versa. • Magenta/Green: Move the slider to change the color variation between magenta and green. Increasing the magenta decreases the green (its complement) and vice versa. • Yellow/Blue: Move the slider to change the color variation between yellow and blue. Increasing the yellow decreases the blue (its complement) and vice versa. The sample images change as you move the sliders. To track the adjustments and print the file name, print-quality mode, and color settings for your job on the edge of the page, select the Print Settings on Page box on the Color Options tab. 86 Phaser 7500 Color Printer User Guide
-
 1
1 -
2
-
3
-
4
-
5
-
6
-
7
-
8
-
9
-
10
-
11
-
12
-
13
-
14
-
15
-
16
-
17
-
18
-
19
-
20
-
21
-
22
-
23
-
24
-
25
-
26
-
27
-
28
-
29
-
30
-
31
-
32
-
33
-
34
-
35
-
36
-
37
-
38
-
39
-
40
-
41
-
42
-
43
-
44
-
45
-
46
-
47
-
48
-
49
-
50
-
51
-
52
-
53
-
54
-
55
-
56
-
57
-
58
-
59
-
60
-
61
-
62
-
63
-
64
-
65
-
66
-
67
-
68
-
69
-
70
-
71
-
72
-
73
-
74
-
75
-
76
-
77
-
78
-
79
-
80
-
 81
81 -
 82
82 -
 83
83 -
 84
84 -
 85
85 -
 86
86 -
 87
87 -
 88
88 -
 89
89 -
 90
90 -
 91
91 -
92
-
93
-
94
-
95
-
96
-
97
-
98
-
99
-
100
-
101
-
102
-
103
-
104
-
105
-
106
-
107
-
108
-
109
-
110
-
111
-
112
-
113
-
114
-
115
-
116
-
117
-
118
-
119
-
120
-
121
-
122
-
123
-
124
-
125
-
126
-
127
-
128
-
129
-
130
-
131
-
132
-
133
-
134
-
135
-
136
-
137
-
138
-
139
-
140
-
141
-
142
-
143
-
144
-
145
-
146
-
147
-
148
-
149
-
150
-
151
-
152
-
153
-
154
-
155
-
156
-
157
-
158
-
159
-
160
-
161
-
162
-
163
-
164
 |
 |