Xerox 7500DX Phaser 7500 User Guide - Page 87
Making Custom Color Adjustments, Adjusting the Automatic Color Correction in a Supported Driver
 |
UPC - 095205706048
View all Xerox 7500DX manuals
Add to My Manuals
Save this manual to your list of manuals |
Page 87 highlights
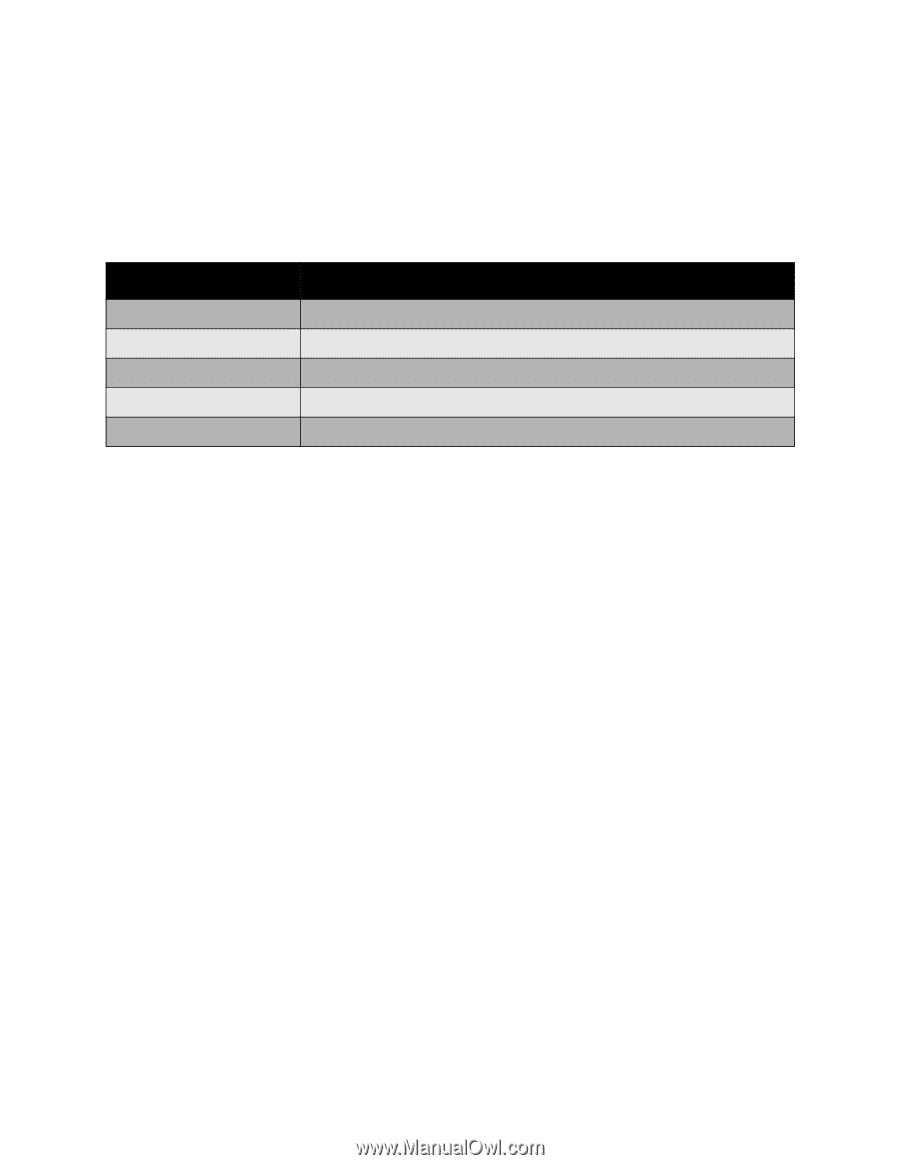
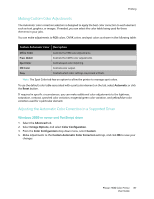
Printing Making Custom Color Adjustments The Automatic color correction selection is designed to apply the best color correction to each element such as text, graphics, or images. If needed, you can select the color table being used for these elements in your jobs. You can make adjustments to RGB colors, CMYK colors, and spot colors as shown in the following table: Custom Automatic Color Description Office Color Press Match Controls the RGB color adjustments. Controls the CMYK color adjustments. Spot Color Controls spot color matching. CIE Color Controls color output. Gray Controls which color settings are printed in black. Note: The Spot Color tab has an option to allow the printer to manage spot colors. To use the default color table associated with a particular element on the tab, select Automatic or click the Reset button. If required in specific circumstances, you can make additional color adjustments to the lightness, saturation, contrast, cyan/red color variation, magenta/green color variation, and yellow/blue color variation used for a particular element. Adjusting the Automatic Color Correction in a Supported Driver Windows 2000 or newer and PostScript driver 1. Select the Advanced tab. 2. Select Image Options, and select Color Configuration. 3. From the Color Configuration drop-down menu, select Custom. 4. Make adjustments to the Custom Automatic Color Correction settings, and click OK to save your changes. Phaser 7500 Color Printer 87 User Guide
-
 1
1 -
2
-
3
-
4
-
5
-
6
-
7
-
8
-
9
-
10
-
11
-
12
-
13
-
14
-
15
-
16
-
17
-
18
-
19
-
20
-
21
-
22
-
23
-
24
-
25
-
26
-
27
-
28
-
29
-
30
-
31
-
32
-
33
-
34
-
35
-
36
-
37
-
38
-
39
-
40
-
41
-
42
-
43
-
44
-
45
-
46
-
47
-
48
-
49
-
50
-
51
-
52
-
53
-
54
-
55
-
56
-
57
-
58
-
59
-
60
-
61
-
62
-
63
-
64
-
65
-
66
-
67
-
68
-
69
-
70
-
71
-
72
-
73
-
74
-
75
-
76
-
77
-
78
-
79
-
80
-
81
-
 82
82 -
 83
83 -
 84
84 -
 85
85 -
 86
86 -
 87
87 -
 88
88 -
 89
89 -
 90
90 -
 91
91 -
 92
92 -
93
-
94
-
95
-
96
-
97
-
98
-
99
-
100
-
101
-
102
-
103
-
104
-
105
-
106
-
107
-
108
-
109
-
110
-
111
-
112
-
113
-
114
-
115
-
116
-
117
-
118
-
119
-
120
-
121
-
122
-
123
-
124
-
125
-
126
-
127
-
128
-
129
-
130
-
131
-
132
-
133
-
134
-
135
-
136
-
137
-
138
-
139
-
140
-
141
-
142
-
143
-
144
-
145
-
146
-
147
-
148
-
149
-
150
-
151
-
152
-
153
-
154
-
155
-
156
-
157
-
158
-
159
-
160
-
161
-
162
-
163
-
164
 |
 |