Xerox 8860MFP User Guide - Page 73
Printing on Specialty Media, Phaser® 8560MFP/8860MFP Multifunction Printer
 |
UPC - 095205735574
View all Xerox 8860MFP manuals
Add to My Manuals
Save this manual to your list of manuals |
Page 73 highlights
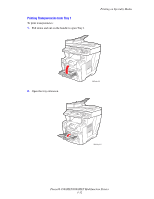
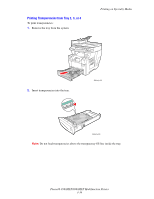
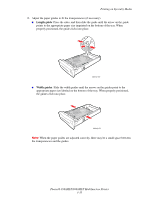
Printing on Specialty Media 3. Adjust the paper guides to fit the transparencies (if necessary). ■ Length guide: Press the sides, and then slide the guide until the arrow on the guide points to the appropriate paper size imprinted on the bottom of the tray. When properly positioned, the guide clicks into place. 8860mfp-030 ■ Width guides: Slide the width guides until the arrows on the guides point to the appropriate paper size labeled on the bottom of the tray. When properly positioned, the guides click into place. 8860mfp-031 Note: When the paper guides are adjusted correctly, there may be a small space between the transparencies and the guides. Phaser® 8560MFP/8860MFP Multifunction Printer 3-35
-
 1
1 -
2
-
3
-
4
-
5
-
6
-
7
-
8
-
9
-
10
-
11
-
12
-
13
-
14
-
15
-
16
-
17
-
18
-
19
-
20
-
21
-
22
-
23
-
24
-
25
-
26
-
27
-
28
-
29
-
30
-
31
-
32
-
33
-
34
-
35
-
36
-
37
-
38
-
39
-
40
-
41
-
42
-
43
-
44
-
45
-
46
-
47
-
48
-
49
-
50
-
51
-
52
-
53
-
54
-
55
-
56
-
57
-
58
-
59
-
60
-
61
-
62
-
63
-
64
-
65
-
66
-
67
-
 68
68 -
 69
69 -
 70
70 -
 71
71 -
 72
72 -
 73
73 -
 74
74 -
 75
75 -
 76
76 -
 77
77 -
 78
78 -
79
-
80
-
81
-
82
-
83
-
84
-
85
-
86
-
87
-
88
-
89
-
90
-
91
-
92
-
93
-
94
-
95
-
96
-
97
-
98
-
99
-
100
-
101
-
102
-
103
-
104
-
105
-
106
-
107
-
108
-
109
-
110
-
111
-
112
-
113
-
114
-
115
-
116
-
117
-
118
-
119
-
120
-
121
-
122
-
123
-
124
-
125
-
126
-
127
-
128
-
129
-
130
-
131
-
132
-
133
-
134
-
135
-
136
-
137
-
138
-
139
-
140
-
141
-
142
-
143
-
144
-
145
-
146
-
147
-
148
-
149
-
150
-
151
-
152
-
153
-
154
-
155
-
156
-
157
-
158
-
159
-
160
-
161
-
162
-
163
-
164
-
165
-
166
-
167
-
168
-
169
-
170
-
171
-
172
-
173
-
174
-
175
-
176
-
177
-
178
-
179
-
180
-
181
-
182
-
183
-
184
-
185
-
186
-
187
-
188
-
189
-
190
-
191
-
192
-
193
-
194
-
195
-
196
-
197
-
198
-
199
-
200
-
201
-
202
-
203
-
204
-
205
-
206
-
207
-
208
-
209
-
210
-
211
-
212
-
213
-
214
-
215
-
216
-
217
-
218
-
219
-
220
-
221
-
222
-
223
-
224
-
225
-
226
-
227
-
228
-
229
-
230
-
231
-
232
-
233
-
234
-
235
-
236
-
237
-
238
-
239
-
240
-
241
-
242
-
243
-
244
-
245
-
246
-
247
-
248
-
249
-
250
-
251
-
252
-
253
-
254
-
255
-
256
-
257
-
258
-
259
-
260
-
261
-
262
-
263
-
264
-
265
-
266
-
267
-
268
-
269
-
270
-
271
-
272
-
273
-
274
-
275
-
276
-
277
-
278
-
279
-
280
-
281
 |
 |
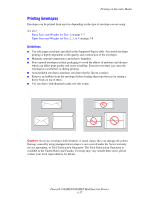
Printing on Specialty Media
Phaser® 8560MFP/8860MFP Multifunction Printer
3-35
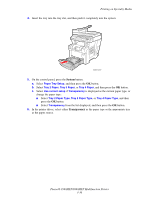
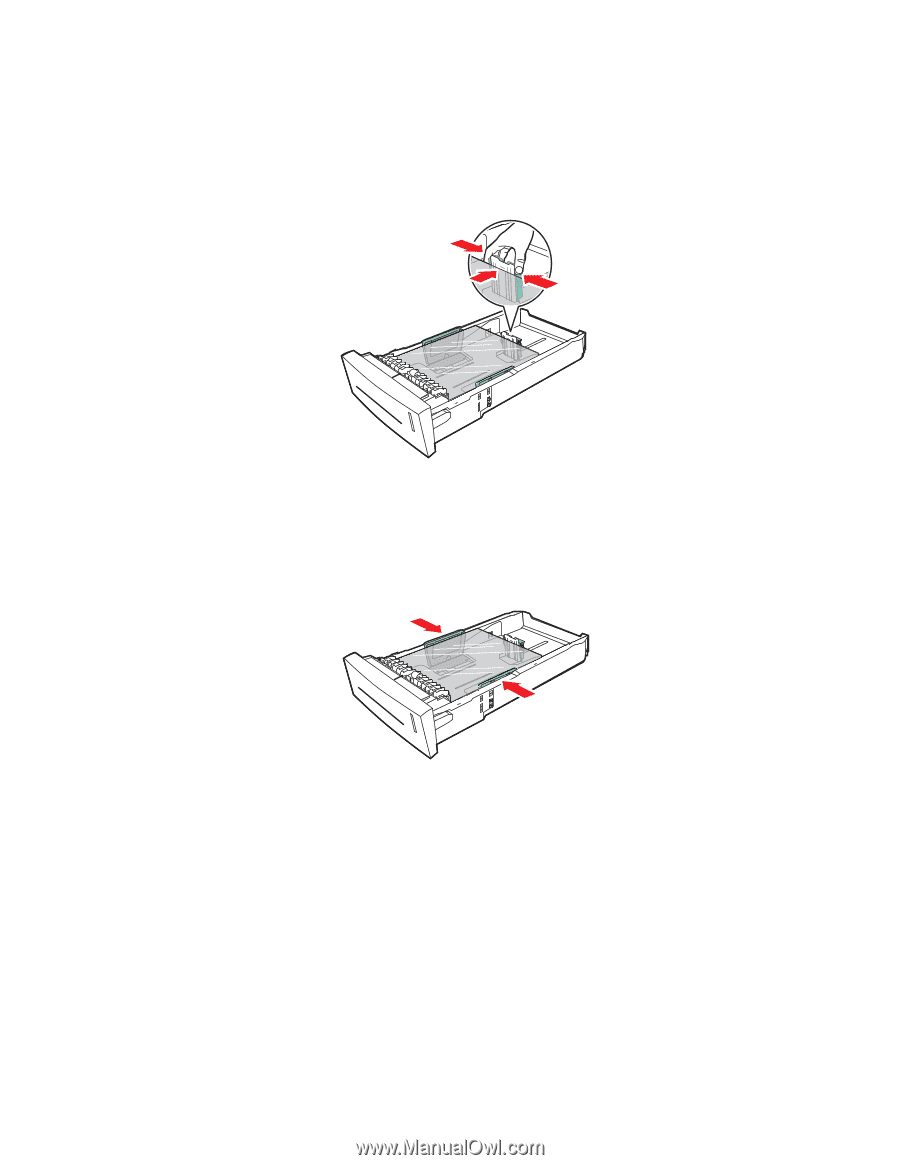
3.
Adjust the paper guides to fit the transparencies (if necessary).
■
Length guide
: Press the sides, and then slide the guide until the arrow on the guide
points to the appropriate paper size imprinted on the bottom of the tray. When
properly positioned, the guide clicks into place.
■
Width guides
: Slide the width guides until the arrows on the guides point to the
appropriate paper size labeled on the bottom of the tray. When properly positioned,
the guides click into place.
Note:
When the paper guides are adjusted correctly, there may be a small space between
the transparencies and the guides.
8860mfp-030
8860mfp-031