Xerox C123 Quick Reference Guide
Xerox C123 - Copycentre B/W Laser Manual
 |
View all Xerox C123 manuals
Add to My Manuals
Save this manual to your list of manuals |
Xerox C123 manual content summary:
- Xerox C123 | Quick Reference Guide - Page 1
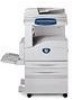
CopyCentre WorkCentre WorkCentre Pro Quick Reference Guide 604P18037 - Xerox C123 | Quick Reference Guide - Page 2
configurations with Fax and Scanning functions. The System Administration Guide provides instructions on how to connect the device to a network. Load the content of the CD on your computer's hard drive for future reference. Xerox CopyCentre/WorkCentre/WorkCentre Pro 123/128/133 Quick Reference - Xerox C123 | Quick Reference Guide - Page 3
Foreign Exchange and Foreign Trade of Japan and/or the export control regulations of the United States. You must obtain, if you wish to export this product, any appropriate from the U.S. Government or its agency. 2 Xerox CopyCentre/WorkCentre/WorkCentre Pro 123/128/133 Quick Reference Guide - Xerox C123 | Quick Reference Guide - Page 4
About License 18 Illegal Copies 20 USA 20 Canada 22 Other Countries 22 Product Recycling and Disposal 23 2 Product Overview 25 Machine Components 25 System Controls 27 Services and Features 28 Power On/Off 30 Xerox CopyCentre/WorkCentre/WorkCentre Pro 123/128/133 Quick Reference Guide 3 - Xerox C123 | Quick Reference Guide - Page 5
49 Auto Exposure 50 Scan Options - Copy 50 Bound Originals 51 2 Sided Book Copy 52 Original Size 52 Mixed Size Originals 53 Border Erase 54 Margin Shift 54 Image Rotation 56 Mirror Image/Negative Image 57 4 Xerox CopyCentre/WorkCentre/WorkCentre Pro 123/128/133 Quick Reference Guide - Xerox C123 | Quick Reference Guide - Page 6
Stop the Scan Job 78 6 Print ...79 Print Driver Features 80 7 Paper and Other Media 83 Loading Paper 83 Preparing Paper for Loading 83 Loading the Paper Trays 83 Bypass Tray (Tray 5 85 Tandem Tray Module (TTM 86 Auto Tray Switching 86 Xerox CopyCentre/WorkCentre/WorkCentre Pro 123/128/133 - Xerox C123 | Quick Reference Guide - Page 7
Jams in the Duplex Module Cover D (Optional 102 Paper Jams in the Finisher (Optional 103 Document Jams 104 Troubleshooting Tables 105 Fault Codes 109 Output Quality 109 Xerox Welcome Center 109 10 Index...111 6 Xerox CopyCentre/WorkCentre/WorkCentre Pro 123/128/133 Quick Reference Guide - Xerox C123 | Quick Reference Guide - Page 8
Xerox family of CopyCentre/WorkCentre products. This User Guide provides detailed information, technical specifications and procedures for using the integral features of the machine. Xerox Welcome Center problems faster. Xerox CopyCentre/WorkCentre/WorkCentre Pro 123/128/133 Quick Reference Guide 7 - Xerox C123 | Quick Reference Guide - Page 9
Information Sources The following additional sources of information are available for the machine. • Xerox CopyCentre/WorkCentre/WorkCentre Pro 123/128/133 User Guide • Xerox CopyCentre/WorkCentre/WorkCentre Pro 123/128/133 System Administration Guide • The On-line Help systems (Print Drivers and - Xerox C123 | Quick Reference Guide - Page 10
Service Provider for more information. Warning Markings All warning instructions marked on or supplied with the product should be followed. Warning This WARNING alerts users . Never remove these covers or guards. Xerox CopyCentre/WorkCentre/WorkCentre Pro 123/128/133 Quick Reference Guide 9 - Xerox C123 | Quick Reference Guide - Page 11
moved to a different location, contact a Xerox Service Representative or your authorized local representative or service support organization. Z Improper connection of the equipment- cable from the electrical outlet. 10 Xerox CopyCentre/WorkCentre/WorkCentre Pro 123/128/133 Quick Reference Guide - Xerox C123 | Quick Reference Guide - Page 12
ventilation is provided. Please contact your authorized local dealer for further information. • Never remove covers or guards that are fastened with screws. There are no operator serviceable areas within these covers. Xerox CopyCentre/WorkCentre/WorkCentre Pro 123/128/133 Quick Reference Guide 11 - Xerox C123 | Quick Reference Guide - Page 13
your Service Provider. For Consumables Store all consumables in accordance with the instructions given on the package or container. Z Keep all consumables away from the reach of children. Z Never throw toner, toner cartridges or toner containers into an open flame. 12 Xerox CopyCentre/WorkCentre - Xerox C123 | Quick Reference Guide - Page 14
the mutual recognition of their conformity. A full declaration of conformity, defining the relevant directives and referenced standards, can be obtained from your authorized local dealer. Xerox CopyCentre/WorkCentre/WorkCentre Pro 123/128/133 Quick Reference Guide 13 - Xerox C123 | Quick Reference Guide - Page 15
to a line, as determined by the total RENs, contact the local Telephone Company. For products approved after July 23, 2001, the REN for this 14 Xerox CopyCentre/WorkCentre/WorkCentre Pro 123/128/133 Quick Reference Guide - Xerox C123 | Quick Reference Guide - Page 16
service. If trouble is experienced with this Xerox equipment, for repair or warranty information, please contact the appropriate service center; details of which are displayed either on the machine or contained within the User Guide. If the equipment is causing harm to the telephone network - Xerox C123 | Quick Reference Guide - Page 17
specification for terminal equipment for use on analogue-switched telephone networks in the European Economic Area. This product provides a user-adjustable setting of the country code. laws or regulations as applicable. 16 Xerox CopyCentre/WorkCentre/WorkCentre Pro 123/128/133 Quick Reference Guide - Xerox C123 | Quick Reference Guide - Page 18
criteria, and exhibit compatibility with recycled supplies. Currently, Environmental ChoiceM has more than 1600 approved products and 140 licenses. Xerox has been a leader in offering EcoLogoM approved products. Xerox CopyCentre/WorkCentre/WorkCentre Pro 123/128/133 Quick Reference Guide 17 - Xerox C123 | Quick Reference Guide - Page 19
specific prior written permission. THIS SOFTWARE IS PROVIDED SUBSTITUTE GOODS OR SERVICES; LOSS OF USE source and binary forms, with or without modification, are permitted provided that the following conditions are met: 18 Xerox CopyCentre/WorkCentre/WorkCentre Pro 123/128/133 Quick Reference Guide - Xerox C123 | Quick Reference Guide - Page 20
that the holder is Tim Hudson ([email protected]). Copyright remains Eric Young's, and as such any Copyright notices in the code are not to be removed. If this package is used in a product, Eric Young should be given Xerox CopyCentre/WorkCentre/WorkCentre Pro 123/128/133 Quick Reference Guide 19 - Xerox C123 | Quick Reference Guide - Page 21
of fine or imprisonment may be imposed on those guilty of making such reproductions. 1. Obligations or Securities of the United States Government, such as: Certificates of Indebtedness National Bank Currency 20 Xerox CopyCentre/WorkCentre/WorkCentre Pro 123/128/133 Quick Reference Guide - Xerox C123 | Quick Reference Guide - Page 22
Cards, Passes, or Insignia carried by military personnel, or by members of the various Federal Departments, such as FBI, Treasury, etc. (unless photograph is ordered by the head of such department or bureau.) Xerox CopyCentre/WorkCentre/WorkCentre Pro 123/128/133 Quick Reference Guide - Xerox C123 | Quick Reference Guide - Page 23
making such reproductions. • Currency notes • Bank notes and cheques • Bank and government bonds and securities • Passports and identification cards • Copyright material or trademarks without the consent of the owner 22 Xerox CopyCentre/WorkCentre/WorkCentre Pro 123/128/133 Quick Reference Guide - Xerox C123 | Quick Reference Guide - Page 24
back your old equipment free of charge. Please ask your retailer for information. Other Countries Please contact your local waste authorities and request disposal guidance. Xerox CopyCentre/WorkCentre/WorkCentre Pro 123/128/133 Quick Reference Guide 23 - Xerox C123 | Quick Reference Guide - Page 25
1 Before Using the Machine 24 Xerox CopyCentre/WorkCentre/WorkCentre Pro 123/128/133 Quick Reference Guide - Xerox C123 | Quick Reference Guide - Page 26
2 Product Overview This machine is not simply a conventional copier but a digital device capable of copying, faxing, printing and scanning, depending on the configuration. The touch screens shown in this manual are from a fully configured machine to cover all the features. The content of the touch - Xerox C123 | Quick Reference Guide - Page 27
jack. Finisher Allows you to staple or sort copies automatically. The Finisher Tray can hold 1,000 be added to the standard 2-tray configuration to provide high volume paper sources. Tray 3 can hold a maximum of manual. 26 Xerox CopyCentre/WorkCentre/WorkCentre Pro 123/128/133 Quick Reference Guide - Xerox C123 | Quick Reference Guide - Page 28
dial codes. 10 Deletes a numeric value or the last digit entered, and replaces the current value with a default value. Also cancels suspended jobs. 11 Inserts a pause while dialing a fax number. Xerox CopyCentre/WorkCentre/WorkCentre Pro 123/128/133 Quick Reference Guide 27 - Xerox C123 | Quick Reference Guide - Page 29
you to send scanned documents by e-mail in various ways. For example, you can set the density for scanning, or specify the file format for saving the documents. For more information, refer to the Scan/E-mailUser Guide . 28 Xerox CopyCentre/WorkCentre/WorkCentre Pro 123/128/133 Quick Reference - Xerox C123 | Quick Reference Guide - Page 30
to Job Templates - Network Scanning in the Scan/Email chapter and Services in the CentreWare Internet Services chapter on User Guide. Scan to Mailbox Enables the Setups chapter and the Stored Programming chapter on User Guide. Xerox CopyCentre/WorkCentre/WorkCentre Pro 123/128/133 Quick Reference - Xerox C123 | Quick Reference Guide - Page 31
copies about 12 seconds after powering on (varies with machine configuration). For more information, refer to Machine Specifications in the Specifications chapter on User Guide down completely. NOTE: Wait at least 20 seconds Xerox CopyCentre/WorkCentre/WorkCentre Pro 123/128/133 Quick Reference Guide - Xerox C123 | Quick Reference Guide - Page 32
copy, fax, scan, or print print job is received by the machine. The factory default setting of 2 minutes is customer changeable within the range of 2 to 60 minutes. For more information, refer to Auto Power Saver in the Setups chapter on User Guide. Xerox CopyCentre/WorkCentre/WorkCentre Pro 123/128 - Xerox C123 | Quick Reference Guide - Page 33
button is pressed, or a fax or print job is received by the machine. The factory Saver in the Setups chapter on User Guide. NOTE: By default, the machine password. The default password is "x-admin". button 32 Xerox CopyCentre/WorkCentre/WorkCentre Pro 123/128/133 Quick Reference Guide - Xerox C123 | Quick Reference Guide - Page 34
the required option. 8. Select [Change Settings]. 9. Change the value using the scroll buttons or select required options. 10. Select [Save]. Changing the Default Time Settings Xerox CopyCentre/WorkCentre/WorkCentre Pro 123/128/133 Quick Reference Guide 33 - Xerox C123 | Quick Reference Guide - Page 35
machine. NOTE: The arrangement of service icons displayed on the screen can be changed by the Key Operator. 1. Press the button on the control panel. 2. Use the scroll buttons to switch between screens. 34 Xerox CopyCentre/WorkCentre/WorkCentre Pro 123/128/133 Quick Reference Guide - Xerox C123 | Quick Reference Guide - Page 36
to return to the previous copy, fax, and scan feature screen. The copy, fax, or scan feature screen does not change, toner cartridge or print various reports. For more information, refer to the User Guide Print Queue. Xerox CopyCentre/WorkCentre/WorkCentre Pro 123/128/133 Quick Reference Guide 35 - Xerox C123 | Quick Reference Guide - Page 37
paper with 20% post consumer content which can be obtained both through Xerox and other office suppliers. Contact your Xerox representative or go to www.xerox.com for more information on other types of recycled paper. 36 Xerox CopyCentre/WorkCentre/WorkCentre Pro 123/128/133 Quick Reference Guide - Xerox C123 | Quick Reference Guide - Page 38
the Copy Job - page 40 5. Confirm the Copy Job in the Job Status - page 40 Stop the Copy Job manually enter the document size. For information on how to enter a document size manually, refer to Original Size on page 52. Xerox CopyCentre/WorkCentre/WorkCentre Pro 123/128/133 Quick Reference Guide - Xerox C123 | Quick Reference Guide - Page 39
The document feeder senses standard sizes or you can manually enter a size using the [Scan Options] tab. For information on how to copy mixed size originals using the document feeder, refer to and 15-432 mm for length. 38 Xerox CopyCentre/WorkCentre/WorkCentre Pro 123/128/133 Quick Reference Guide - Xerox C123 | Quick Reference Guide - Page 40
password (if one is set up). If you need assistance, contact the Key Operator. 3. Select the button for the feature required. If [More] is selected, select [Save] to confirm the selected feature or [Cancel] to return to the previous screen. Xerox CopyCentre/WorkCentre/WorkCentre Pro 123/128/133 - Xerox C123 | Quick Reference Guide - Page 41
the next job. While the machine is warming up, you can also program the next job. 5. Confirm the Copy Job in the Job Status 1. Press the button on the control panel to display the [Job Status] screen. 40 Xerox CopyCentre/WorkCentre/WorkCentre Pro 123/128/133 Quick Reference Guide - Xerox C123 | Quick Reference Guide - Page 42
2 Sided - page 45 Copy Output - page 46 1. Press the button on the control panel. 2. Select [Copy] on the touch screen. Ensure that the [Basic Copying] screen is displayed. 3. Select the required option. Xerox CopyCentre/WorkCentre/WorkCentre Pro 123/128/133 Quick Reference Guide 41 - Xerox C123 | Quick Reference Guide - Page 43
enlarge/reduce ratios. The presets are set up by the Key Operator. • Copy All - Reduces the image of documents slightly than the selected reduction/ enlargement ratio to copy the complete document onto the paper. 42 Xerox CopyCentre/WorkCentre/WorkCentre Pro 123/128/133 Quick Reference Guide - Xerox C123 | Quick Reference Guide - Page 44
the width and length to fit on the paper. • Auto(Copy All) - Enables the [Auto] feature and reduces the image . For information on the sizes and types of media supported for the machine, refer to the Paper and Other Xerox CopyCentre/WorkCentre/WorkCentre Pro 123/128/133 Quick Reference Guide 43 - Xerox C123 | Quick Reference Guide - Page 45
including the bypass tray. 1. Select [More] for the [Paper Supply] feature on the [Basic Copying] screen. 2. Select the required option. 3. Select [Save]. Auto Refer to the [Auto] -432 mm (3.9-17.0 inches) for length. 44 Xerox CopyCentre/WorkCentre/WorkCentre Pro 123/128/133 Quick Reference Guide - Xerox C123 | Quick Reference Guide - Page 46
printed on one side (i.e., scrap paper). 1 J 1 Sided Produces single-sided copies from single-sided documents. 1 J 2 (H to H) Produces double-sided copies to scan the next document. More Displays the [2 Sided] screen. Xerox CopyCentre/WorkCentre/WorkCentre Pro 123/128/133 Quick Reference Guide 45 - Xerox C123 | Quick Reference Guide - Page 47
size paper is not loaded in the machine when the stapling feature is applied to a copy or print job, a paper size error may occur while processing the job. When this happens, Staples the top left corner of the output. 46 Xerox CopyCentre/WorkCentre/WorkCentre Pro 123/128/133 Quick Reference Guide - Xerox C123 | Quick Reference Guide - Page 48
[Auto] option explained previously. • Collated - Delivers the specified number of copy sets in the same order as the documents. For example, two copies of a three-page document are delivered in the order 1-2-3, 1-2-3. Xerox CopyCentre/WorkCentre/WorkCentre Pro 123/128/133 Quick Reference Guide 47 - Xerox C123 | Quick Reference Guide - Page 49
[Copy] on the touch screen. 3. Select the [Image Quality] tab. 4. Select the required option. Original Type This feature allows you to copy at optimum image quality by selecting the type of the original documents. 48 Xerox CopyCentre/WorkCentre/WorkCentre Pro 123/128/133 Quick Reference Guide - Xerox C123 | Quick Reference Guide - Page 50
and difficult to see and are therefore printed darker. Lighten/Darken This feature allows you to select the density for copying documents. 1. Select [Lighten/Darken] on 2. Select the sharpness level. 3. Select [Save]. Xerox CopyCentre/WorkCentre/WorkCentre Pro 123/128/133 Quick Reference Guide 49 - Xerox C123 | Quick Reference Guide - Page 51
- page 58 1. Press the button on the control panel. 2. Select [Copy] on the touch screen. 3. Select the [Scan Options] tab. Use the side tabs to switch between screens. 4. Select the required option. 50 Xerox CopyCentre/WorkCentre/WorkCentre Pro 123/128/133 Quick Reference Guide - Xerox C123 | Quick Reference Guide - Page 52
Erases printing of the central gutter area of the book that tends to be shadowed. Use the scroll buttons to specify the area to be erased from the center of an open book within the range of 0-50 mm (0.0-2.0 inches) in 1 mm or 0.1 inch increments. Xerox CopyCentre/WorkCentre/WorkCentre Pro 123/128 - Xerox C123 | Quick Reference Guide - Page 53
automatically detected, selected from a list of preset sizes, or manually specified using the custom option. If Custom is used, documents will be copied according to the specified size regardless of their actual size. 52 Xerox CopyCentre/WorkCentre/WorkCentre Pro 123/128/133 Quick Reference Guide - Xerox C123 | Quick Reference Guide - Page 54
[Scan Options] screen. 2. Select [On] to enable the feature. 3. Select [Save]. NOTE: If you disable this feature and make copies of the mixed sized originals, the size of the first page will be the size for all the copies. Xerox CopyCentre/WorkCentre/WorkCentre Pro 123/128/133 Quick Reference Guide - Xerox C123 | Quick Reference Guide - Page 55
each edge or the center of the copy. NOTE: If you do not use this feature when copying bound documents or copying documents with the cover open [Scan Options] screen. 2. Select the required option. 3. Select [Save]. 54 Xerox CopyCentre/WorkCentre/WorkCentre Pro 123/128/133 Quick Reference Guide - Xerox C123 | Quick Reference Guide - Page 56
Scan Options - Copy No Shift Disables the feature. Auto Center Automatically moves images to the center of the paper. Margin Shift/Variable Shift Automatically This feature allows you to move images on the Side 2 page. Xerox CopyCentre/WorkCentre/WorkCentre Pro 123/128/133 Quick Reference Guide 55 - Xerox C123 | Quick Reference Guide - Page 57
match the orientation of the paper in the tray. 1. Select [Image Rotation] on the [Scan Options] screen. 2. Select the required option. 3. Select [Save]. Off Disables the feature. Always On Rotates an image every time. 56 Xerox CopyCentre/WorkCentre/WorkCentre Pro 123/128/133 Quick Reference Guide - Xerox C123 | Quick Reference Guide - Page 58
Scan Options - Copy On during Auto Rotates an image only when selecting [Auto] in the [Paper Supply] or [Reduce/Enlarge] features. to invert all the black images on the page to white and all the white images to black. Xerox CopyCentre/WorkCentre/WorkCentre Pro 123/128/133 Quick Reference Guide 57 - Xerox C123 | Quick Reference Guide - Page 59
Original Orientation] on the [Scan Options] screen. 2. Select Services> button on the control panel. 2. Select [Copy] on the touch screen. 3. Select the [Output Format] tab. Use the side tabs to switch between screens. 58 Xerox CopyCentre/WorkCentre/WorkCentre Pro 123/128/133 Quick Reference Guide - Xerox C123 | Quick Reference Guide - Page 60
- Copy Booklet Creation This feature allows you to print the images side by side, on both sides of each page in the correct order to make a booklet. Fold the copies in 50 mm (0.0-2.0 inches) using the scroll buttons. Xerox CopyCentre/WorkCentre/WorkCentre Pro 123/128/133 Quick Reference Guide 59 - Xerox C123 | Quick Reference Guide - Page 61
tray. When selected, the [Printed Covers] option becomes available. Printed Covers • Off - Adds a blank cover to the booklet automatically. • On - Copies the first page of the the required option. 3. Select [Save]. 60 Xerox CopyCentre/WorkCentre/WorkCentre Pro 123/128/133 Quick Reference Guide - Xerox C123 | Quick Reference Guide - Page 62
documents. • On - Copies the first and last pages of the documents onto the cover stock. If you want only the front or the back cover to be blank, add a blank sheet to the first or last of the documents accordingly. Xerox CopyCentre/WorkCentre/WorkCentre Pro 123/128/133 Quick Reference Guide 61 - Xerox C123 | Quick Reference Guide - Page 63
Transparency Separators This feature allows you to copy onto transparency stock, to place dividers between the pages, and to make hard copy sets for handouts. 1. Select [Transparency (Bypass)] Screen on page 44. 62 Xerox CopyCentre/WorkCentre/WorkCentre Pro 123/128/133 Quick Reference Guide - Xerox C123 | Quick Reference Guide - Page 64
you to divide and enlarge an original document, and to copy each divided part onto multiple sheets of paper. You can paste them all copying to allow for cutting and pasting. The overlap width is set at 10 mm (0.4 inch). Xerox CopyCentre/WorkCentre/WorkCentre Pro 123/128/133 Quick Reference Guide - Xerox C123 | Quick Reference Guide - Page 65
feature allows you to print an original image repeatedly to manually enter the Copies the repeated images equally on the paper. • Bias - Copies the repeated images on the paper with no spaces between the images. 64 Xerox CopyCentre/WorkCentre/WorkCentre Pro 123/128/133 Quick Reference Guide - Xerox C123 | Quick Reference Guide - Page 66
the page. Page Number Displays the [Annotation - Page Number] screen. Use this screen to print page numbers on the copies. The following options are available. • Off - Disables the feature. • On - Enables the feature. Xerox CopyCentre/WorkCentre/WorkCentre Pro 123/128/133 Quick Reference Guide 65 - Xerox C123 | Quick Reference Guide - Page 67
feature. • On - Enables the feature. Select [Copy Prohibited], [Copy] or [Duplicate] for the phrase. User Account Number Prints the User Account No when the Authentication or Auditron Administration feature is enabled. 66 Xerox CopyCentre/WorkCentre/WorkCentre Pro 123/128/133 Quick Reference Guide - Xerox C123 | Quick Reference Guide - Page 68
you to check the print result and adjust the settings if necessary. 1. Select [Build Job] on the [Job Assembly] screen. 2. Select the required option. 3. Select [Save]. Off Disables the feature. On Enables the feature. Xerox CopyCentre/WorkCentre/WorkCentre Pro 123/128/133 Quick Reference Guide 67 - Xerox C123 | Quick Reference Guide - Page 69
. Last Original Select this option to indicate that you have finished scanning the whole job. Next Original Select this option to sequentially scan more sections for the job. Start Starts scanning the next section. 68 Xerox CopyCentre/WorkCentre/WorkCentre Pro 123/128/133 Quick Reference Guide - Xerox C123 | Quick Reference Guide - Page 70
Spain Sweden United Kingdom North American countries: Canada USA Enter the System Settings mode, select [Common Settings], then select [Other Settings]. In the [Other Settings] screen, scroll down to and select [Country], then select Xerox CopyCentre/WorkCentre/WorkCentre Pro 123/128/133 Quick - Xerox C123 | Quick Reference Guide - Page 71
the User Guide. NOTE , refer to Fax Driver On-line Help on the scan feature has the following limitations. • Only available when using the document feeder. • Allows you to scan up to 600 mm (23.62 inches) in length. 70 Xerox CopyCentre/WorkCentre/WorkCentre Pro 123/128/133 Quick Reference Guide - Xerox C123 | Quick Reference Guide - Page 72
- User Guide 3. Specify the Destination The following explains how to specify a destination. The machine allows the following dialing methods (fax numbers or e-mail addresses). • Using the keypad on the control panel Xerox CopyCentre/WorkCentre/WorkCentre Pro 123/128/133 Quick Reference Guide 71 - Xerox C123 | Quick Reference Guide - Page 73
card, press the button. When you dial manually, is not required. You can simply wait for a voice prompt and proceed accordingly. For more information, refer to Special Characters on User Guide Xerox CopyCentre/WorkCentre/WorkCentre Pro 123/128/133 Quick Reference Guide - Xerox C123 | Quick Reference Guide - Page 74
manually cancel an activated fax/Internet Fax job. 1. Select [Stop] on the touch screen or press the button on the control panel to suspend the fax job while the document is being scanned transmission starts. Xerox CopyCentre/WorkCentre/WorkCentre Pro 123/128/133 Quick Reference Guide 73 - Xerox C123 | Quick Reference Guide - Page 75
4 Fax/Internet Fax 74 Xerox CopyCentre/WorkCentre/WorkCentre Pro 123/128/133 Quick Reference Guide - Xerox C123 | Quick Reference Guide - Page 76
below. 1. Load the Documents - page 76 2. Select the Features - page 76 3. Start the Scan Job - page 77 4. Confirm the Scan Job in the Job Status - page 77 5. Save the Scanned Data - page 77 Stop the Scan Job - page 78 Xerox CopyCentre/WorkCentre/WorkCentre Pro 123/128/133 Quick Reference Guide 75 - Xerox C123 | Quick Reference Guide - Page 77
need assistance, contact the Key Operator. button button 3. Press the button once on the control panel to cancel any previous selections. 4. Perform the necessary operations. 76 Xerox CopyCentre/WorkCentre/WorkCentre Pro 123/128/133 Quick Reference Guide - Xerox C123 | Quick Reference Guide - Page 78
is an application on the CentreWare CDROM supplied with the machine. For information on how to install Mailbox Viewer2, refer to the CentreWare CD-ROM. Xerox CopyCentre/WorkCentre/WorkCentre Pro 123/128/133 Quick Reference Guide 77 - Xerox C123 | Quick Reference Guide - Page 79
refer to the Mailbox Viewer2 On-line Help. Stop the Scan Job Follow the steps below to manually cancel an activated scan job. 1. Select [Stop] on the touch screen or delete the suspended job. button button 78 Xerox CopyCentre/WorkCentre/WorkCentre Pro 123/128/133 Quick Reference Guide - Xerox C123 | Quick Reference Guide - Page 80
allows you to print documents at the specified time within 24 hours. The documents will be printed automatically at the specified time. For more information, refer to Delayed Print in the Job Status chapter on User Guide. Xerox CopyCentre/WorkCentre/WorkCentre Pro 123/128/133 Quick Reference - Xerox C123 | Quick Reference Guide - Page 81
unit is installed, both sides of the paper can be printed automatically. You can select [Flip on Long Edge] to align to the long edge of the paper, or [Flip on Short Edge] to align to the short edge of the paper. 80 Xerox CopyCentre/WorkCentre/WorkCentre Pro 123/128/133 Quick Reference Guide - Xerox C123 | Quick Reference Guide - Page 82
E-mail Specifies whether you want to be notified by e-mail when your print job is finished. Specify Job Owner Selects how the job owner is specified. This job owner is used when print job tabulation functions are used. Xerox CopyCentre/WorkCentre/WorkCentre Pro 123/128/133 Quick Reference Guide 81 - Xerox C123 | Quick Reference Guide - Page 83
6 Print 82 Xerox CopyCentre/WorkCentre/WorkCentre Pro 123/128/133 Quick Reference Guide - Xerox C123 | Quick Reference Guide - Page 84
Supported Paper Sizes and Types on page 87. For information on the acceptable range of paper sizes and capacity for each tray, refer to Paper Supply in the Specifications chapter on User Guide paper tray towards you. Xerox CopyCentre/WorkCentre/WorkCentre Pro 123/128/133 Quick Reference Guide 83 - Xerox C123 | Quick Reference Guide - Page 85
User Guide copies on perforated paper, load the paper so that the opposite side to the perforations feeds first. Feeding the perforated edge first may cause paper jams. 4. If the paper guides have been moved, slide the guides Xerox CopyCentre/WorkCentre/WorkCentre Pro 123/128/133 Quick Reference Guide - Xerox C123 | Quick Reference Guide - Page 86
manually specify the required size. For more information, refer to Paper Size in the Setups chapter on User Guide first might cause paper jams. NOTE: When making copies or prints on thick-stock paper and the paper will Xerox CopyCentre/WorkCentre/WorkCentre Pro 123/128/133 Quick Reference Guide 85 - Xerox C123 | Quick Reference Guide - Page 87
machine automatically switches from one tray to another under the following conditions. • When printing and the active tray runs out of paper. • When the paper size sensed Priority in the Setups chapter on User Guide. 86 Xerox CopyCentre/WorkCentre/WorkCentre Pro 123/128/133 Quick Reference - Xerox C123 | Quick Reference Guide - Page 88
Supported Paper Sizes The following table lists the paper sizes supported for each paper tray, duplex module and the finisher. NOTE: For the capacity of each tray, refer to the Specifications chapter on User Guide O O Xerox CopyCentre/WorkCentre/WorkCentre Pro 123/128/133 Quick Reference Guide 87 - Xerox C123 | Quick Reference Guide - Page 89
O X O O O X O O X X O O O X O O X X O O X X O O X X O O O X O O O X O X X X O X X X O O X X O X X X O O X X O X X X O X X X O X X X O X X X O X X 88 Xerox CopyCentre/WorkCentre/WorkCentre Pro 123/128/133 Quick Reference Guide - Xerox C123 | Quick Reference Guide - Page 90
Supported Paper Sizes and Types Paper Size Dimensions (mm) LEF/SEF C5 Envelope 162.0 229.0 LEF Tray 1, 2/Tray 3, 4 (Two Tray Module 127 to 432 mm (for Tray 5 (Bypass)) 182 to 432 mm (for Tray 1-4) Not Available Xerox CopyCentre/WorkCentre/WorkCentre Pro 123/128/133 Quick Reference Guide 89 - Xerox C123 | Quick Reference Guide - Page 91
fuser unit when printing. Select this option when paper curls or other pritning problems occur due to high temperature in the fuser unit when it sets toner machine properly, or print quality may be negatively affected. 90 Xerox CopyCentre/WorkCentre/WorkCentre Pro 123/128/133 Quick Reference Guide - Xerox C123 | Quick Reference Guide - Page 92
drum/toner cartridge recommended service any of the parts that are behind these covers and guards. Do not attempt any maintenance procedure that is not specifically described in the documentation supplied with the machine. Xerox CopyCentre/WorkCentre/WorkCentre Pro 123/128/133 Quick Reference Guide - Xerox C123 | Quick Reference Guide - Page 93
now to insure continuous operation. Instructions for replacing the drum cartridge are included with the replacement cartridge and in the User Guide on the Documentation CD-ROM or on the website: www.office.xerox.com/support 92 Xerox CopyCentre/WorkCentre/WorkCentre Pro 123/128/133 Quick Reference - Xerox C123 | Quick Reference Guide - Page 94
reorder code for your machine. Instructions for replacing the toner cartridge are included with the replacement cartridge and in the User Guide on the Documentation CD-ROM or on the website: www.office.xerox.com/support Country North and South America Europe, Asia and Africa All Countries Part - Xerox C123 | Quick Reference Guide - Page 95
8 Maintenance 94 Xerox CopyCentre/WorkCentre/WorkCentre Pro 123/128/133 Quick Reference Guide - Xerox C123 | Quick Reference Guide - Page 96
: If fax jobs are queued in the machine not equipped with the hard disk and a loss of power occurs, the machine will print a Power Off Report when the machine is switched on. This will show a list of the fax jobs lost. Xerox CopyCentre/WorkCentre/WorkCentre Pro 123/128/133 Quick Reference Guide 95 - Xerox C123 | Quick Reference Guide - Page 97
locations. Document Feeder Cover Cover E Cover A Duplex Module Cover D Tray 5 (Bypass) Cover B Cover C Document Feeder Tray Center Output Tray Front Cover Tray 1 Tray 2 Tray 3, 4 - Two Tray Module (Optional) 96 Xerox CopyCentre/WorkCentre/WorkCentre Pro 123/128/133 Quick Reference Guide - Xerox C123 | Quick Reference Guide - Page 98
recommended media. Refer to Supported Paper Sizes in the Paper and Other Media chapter on page 87 and Machine Specifications in the Specifications chapter on User Guide for a list of is torn, wrinkled, or folded. Xerox CopyCentre/WorkCentre/WorkCentre Pro 123/128/133 Quick Reference Guide 97 - Xerox C123 | Quick Reference Guide - Page 99
lifting up the release lever. 2. If the jammed paper is inside the fuser unit, rotate the green lever A1 in the direction of the arrow to feed the paper from the top then open Cover A while lifting up the release lever. 98 Xerox CopyCentre/WorkCentre/WorkCentre Pro 123/128/133 Quick Reference Guide - Xerox C123 | Quick Reference Guide - Page 100
fuser unit cover. 3. If the jammed paper is found in the fuser unit, hold the green lever and carefully remove the paper from the machine. NOTE: Do not touch the fuser unit press the center of the cover to close it.. Xerox CopyCentre/WorkCentre/WorkCentre Pro 123/128/133 Quick Reference Guide 99 - Xerox C123 | Quick Reference Guide - Page 101
9 Problem Solving Paper Jams in Cover C Follow the steps below to clear paper jams in Cover C. 1. Open Cover C while , and then open Cover A while lifting up the release lever. 2. Lift up the handle to open Cover E. 100 Xerox CopyCentre/WorkCentre/WorkCentre Pro 123/128/133 Quick Reference Guide - Xerox C123 | Quick Reference Guide - Page 102
clear paper jams in the Tandem Tray Module. In Tray 3 1. Pull out Tray 3 of the Tandem Tray Module. 2. Remove the jammed paper. 3. Close the Tray 3. Xerox CopyCentre/WorkCentre/WorkCentre Pro 123/128/133 Quick Reference Guide 101 - Xerox C123 | Quick Reference Guide - Page 103
9 Problem Solving In Tray 4 1. Pull out Tray 4 of the Tandem Tray Module. 2. Remove the jammed paper. 3. If 3. Remove the jammed paper inside the Duplex Module. 4. Close the Duplex Module Cover D until it latches. 102 Xerox CopyCentre/WorkCentre/WorkCentre Pro 123/128/133 Quick Reference Guide - Xerox C123 | Quick Reference Guide - Page 104
the Finisher Top Cover to open it. 2. Remove the jammed paper. 3. Close the Finisher Top Cover. In Finisher Transport Cover F 1. Open the Finisher Transport Cover F. Xerox CopyCentre/WorkCentre/WorkCentre Pro 123/128/133 Quick Reference Guide 103 - Xerox C123 | Quick Reference Guide - Page 105
cover, open it and turn the green wheel to remove the document. 3. Close the inner cover, and then the document feeder cover. Inner Cover 104 Xerox CopyCentre/WorkCentre/WorkCentre Pro 123/128/133 Quick Reference Guide - Xerox C123 | Quick Reference Guide - Page 106
full, print and delete unnecessary files. The machine displays a memory full error message. • Check with the Key Operator about available memory. • Divide the remaining pages of the job into several small jobs and run the job again. Xerox CopyCentre/WorkCentre/WorkCentre Pro 123/128/133 Quick - Xerox C123 | Quick Reference Guide - Page 107
new drum cartridge. • Reinstall the drum cartridge and the toner cartridge. • Replace the drum cartridge. • Replace the toner cartridge if more prints until the copy quality improves. • Replace the drum cartridge. 106 Xerox CopyCentre/WorkCentre/WorkCentre Pro 123/128/133 Quick Reference Guide - Xerox C123 | Quick Reference Guide - Page 108
] on the [Reduce/Enlarge] screen. • Select [Auto Center] in [Margin Shift]. Output does not reflect the selections made • Select [Save] after each selection on the on the touch screen. touch screen, if one exists. Xerox CopyCentre/WorkCentre/WorkCentre Pro 123/128/133 Quick Reference Guide 107 - Xerox C123 | Quick Reference Guide - Page 109
for procedures. Cannot store a document for secure polling • Cancel the operation and try again later due to full memory. when additional memory is available. 108 Xerox CopyCentre/WorkCentre/WorkCentre Pro 123/128/133 Quick Reference Guide - Xerox C123 | Quick Reference Guide - Page 110
information, refer to the Job Status chapter in the User Guide. Xerox Welcome Center For additional help. If you need any additional help on using your CopyCentre copier or WorkCentre copier/printer, you can: 1) Refer to this User Guide 2) Contact the Key Operator 3) Visit our Customer Web Site - Xerox C123 | Quick Reference Guide - Page 111
9 Problem Solving 1. Press the button on the control panel. - Xerox C123 | Quick Reference Guide - Page 112
jams 99 Cover C, paper jams 100 Cover E, paper jams 100 Covers - Copy 61 D Date 65 Delayed Print 79 Dial Pause button 27 Direct printing 79 disposing of product 23 document jams 104 Document Feeder 25, 38 Xerox CopyCentre/WorkCentre/WorkCentre Pro 123/128/133 Quick Reference Guide 111 - Xerox C123 | Quick Reference Guide - Page 113
91 components 25 control panel 27 status 35 maintenance 91 maintenance safety 12 Margin Shift - Copy 54 Mirror Image/Negative Image - Copy 57 Mixed Size Originals - Copy 53 modes 34 Multiple-Up - Copy 63 112 Xerox CopyCentre/WorkCentre/WorkCentre Pro 123/128/133 Quick Reference Guide - Xerox C123 | Quick Reference Guide - Page 114
16 related information sources 8 Repeat Image - Copy 64 replacing drum cartridge 92 toner cartridge 93 resources 8 Print 79 Scan Options - Copy 50 Scan/E-mail 75 scanning stopping job 78 scanning procedure 75 Xerox CopyCentre/WorkCentre/WorkCentre Pro 123/128/133 Quick Reference Guide - Xerox C123 | Quick Reference Guide - Page 115
4 paper jams 101 troubleshooting tables 105 turning on/off 30 Two Tray Module 25, 26 U USA, illegal copies 20 W warnings 10 website, Xerox 7 welcome center, Xerox 7 X Xerox website 7 Xerox Welcome Center 7 114 Xerox CopyCentre/WorkCentre/WorkCentre Pro 123/128/133 Quick Reference Guide
-
 1
1 -
 2
2 -
 3
3 -
 4
4 -
 5
5 -
 6
6 -
 7
7 -
8
-
9
-
10
-
11
-
12
-
13
-
14
-
15
-
16
-
17
-
18
-
19
-
20
-
21
-
22
-
23
-
24
-
25
-
26
-
27
-
28
-
29
-
30
-
31
-
32
-
33
-
34
-
35
-
36
-
37
-
38
-
39
-
40
-
41
-
42
-
43
-
44
-
45
-
46
-
47
-
48
-
49
-
50
-
51
-
52
-
53
-
54
-
55
-
56
-
57
-
58
-
59
-
60
-
61
-
62
-
63
-
64
-
65
-
66
-
67
-
68
-
69
-
70
-
71
-
72
-
73
-
74
-
75
-
76
-
77
-
78
-
79
-
80
-
81
-
82
-
83
-
84
-
85
-
86
-
87
-
88
-
89
-
90
-
91
-
92
-
93
-
94
-
95
-
96
-
97
-
98
-
99
-
100
-
101
-
102
-
103
-
104
-
105
-
106
-
107
-
108
-
109
-
110
-
111
-
112
-
113
-
114
-
115
 |
 |
CopyCentre
WorkCentre
WorkCentre Pro
Quick Reference Guide
604P18037