Yamaha 230 Owner's Manual
Yamaha 230 Manual
 |
UPC - 027108105857
View all Yamaha 230 manuals
Add to My Manuals
Save this manual to your list of manuals |
Yamaha 230 manual content summary:
- Yamaha 230 | Owner's Manual - Page 1
plate cuando la unidad sale de fábrica. Keyboard-Ständers erhalten Sie in den Anweisungen Pour obtenir des informations sur l'assemblage du support du clavier, reportez-vous aux instructions à la fin de ce manuel. montaje del soporte del teclado, consulte las instrucciones al final de este manual - Yamaha 230 | Owner's Manual - Page 2
) are not covered by the manufacturer's warranty, and are therefore the owners responsibility. Please study this manual carefully and consult your dealer before requesting service. NAME PLATE LOCATION: The graphic below indicates the location of the name plate. The model number, serial number, power - Yamaha 230 | Owner's Manual - Page 3
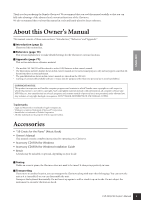
Book) • Owner's Manual This manual contains complete instructions for operating your Clavinova. • Accessory CD-ROM for Windows • Accessory CD-ROM for Windows Installation Guide • Bench A bench may be included or optional, depending on your locale. Tuning Unlike an acoustic piano, the Clavinova does - Yamaha 230 | Owner's Manual - Page 4
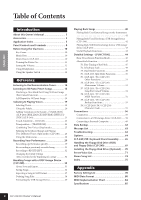
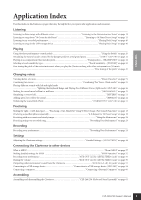
Using the Clavinova 10 Key Cover 10 Music Rest 10 Music Braces (CLP-240 10 Turning the Power On 11 Setting the Volume 12 Using Headphones 12 Using the Speaker Switch 12 Reference Listening to the Demonstration Tunes 14 Listening to 50 Piano Preset Songs 15 Practicing a One-Hand Part Using - Yamaha 230 | Owner's Manual - Page 5
Using the three performance control pedals Using the Pedals" on page 20 Simulating the natural sustain created by the damper pedal on a real grand piano part....... "Practicing a One-Hand Part Using 50 Preset Songs (Part Outputting 230: Keyboard Stand Assembly" on page 65 CLP-240/230 Owner's Manual 5 - Yamaha 230 | Owner's Manual - Page 6
them in any way. The instrument contains no user-serviceable parts. If it should appear to be malfunctioning, discontinue use immediately and have it inspected by qualified Yamaha service personnel. Water warning • Do not expose the instrument to rain, use it near water or in damp or wet conditions - Yamaha 230 | Owner's Manual - Page 7
, metallic, or other objects into the gaps on the key cover, panel or keyboard. If this happens, turn off the power immediately and unplug the power cord from the AC outlet. Then have the instrument inspected by qualified Yamaha service personnel. • Do not place vinyl, plastic or rubber objects on - Yamaha 230 | Owner's Manual - Page 8
resonance of an acoustic grand piano's soundboard and strings when the damper pedal is pressed, and "Keyoff Samples" that add the subtle sound produced when the keys are released. The CLP-240/230 also utilizes a "GH3 (Graded Hammer 3)" Keyboard that varies the key weight according to the key - Yamaha 230 | Owner's Manual - Page 9
turning the left- and right-hand parts on or off as required so you can practice the corresponding part (the part that is turned off) on the keyboard. 7 [PLAY/PAUSE], [STOP] pedals on an acoustic piano. The left pedal can also be assigned to a variety of functions. CLP-240/230 Owner's Manual 9 - Yamaha 230 | Owner's Manual - Page 10
of metal or paper on top of the key cover. Small objects placed on the key cover may fall inside the unit when the cover is opened and may be supports (at the rear of the music rest). 3. Gently lower the music rest backward until it is all the way down. CAUTION Do not try to use 230 Owner's Manual - Yamaha 230 | Owner's Manual - Page 11
sure your CLP-240/230 is rated for the AC voltage supplied in the area in which it is to be used (voltage rating appears on the name plate on the bottom panel off. NOTE Power indicator If you close the key cover without turning the power off, the power indicator remains lit, indicating that the power is - Yamaha 230 | Owner's Manual - Page 12
use the Clavinova at a high volume level for a long period of time, or your hearing may be damaged. TERMINOLOGY MASTER VOLUME: The volume level of the entire keyboard sound NOTE You can also adjust the [PHONES] output sound. OFF The speakers produce no sound. 12 CLP-240/230 Owner's Manual - Yamaha 230 | Owner's Manual - Page 13
50 Piano Preset Songs 15 Practicing a One-Hand Part Using 50 Preset Songs (Part Cancel songs from a USB storage device (CLP-240 43 Useful Playback Functions 43 Detailed Settings - [FUNCTION 44 Basic Message List 63 Troubleshooting 64 Options 64 CLP-240/230: Keyboard Stand Assembly 65 Handling - Yamaha 230 | Owner's Manual - Page 14
PIANO 1 GRAND PIANO 2 E.PIANO 1 E.PIANO 2 HARPSI- E.CLAVICHORD CHORD VIBRAPHONE VARIATION CHURCH JAZZ ORGAN ORGAN STRINGS CHOIR GUITAR WOOD BASS E.BASS SPLIT ROOM CHORUS BRIGHT HALL 1 PHASER HARD the tempo of demo songs. You cannot use the part cancel function (page 17) or the song - Yamaha 230 | Owner's Manual - Page 15
/OTHER VALUE - / NO + / YES GRAND GRAND E.PIANO E.PIANO HARPSI- E.CLAVI- VIBRA- PIANO1 PIANO 2 1 2 CHORD CHORD PHONE VARIATION CHURCH JAZZ ORGAN ORGAN STRINGS CHOIR GUITAR WOOD BASS E.BASS SPLIT ROOM CHORUS BRIGHT HALL 1 PHASER HARD NORMAL HALL 2 TREMOLO MEDIUM MELLOW STAGE - Yamaha 230 | Owner's Manual - Page 16
ENGLISH Listening to 50 Piano Preset Songs 4. Exit from Preset Song mode. Press the [SONG SELECT] button to exit Preset Song mode. The indicator turns off, and the unit returns to normal play mode. How to use the practice functions You can turn the left- and right-hand parts on or off as required - Yamaha 230 | Owner's Manual - Page 17
TEMPO/OTHER VALUE - / NO + / YES GRAND PIANO 1 GRAND PIANO 2 E.PIANO 1 E.PIANO 2 HARPSI- E.CLAVICHORD CHORD VIBRAPHONE VARIATION CHURCH JAZZ ORGAN ORGAN STRINGS CHOIR GUITAR WOOD BASS E.BASS SPLIT ROOM CHORUS BRIGHT HALL 1 PHASER HARD NORMAL HALL 2 TREMOLO MEDIUM MELLOW STAGE - Yamaha 230 | Owner's Manual - Page 18
PIANO 1 GRAND PIANO 2 E.PIANO E.PIANO 1 2 HARPSI- E.CLAVICHORD CHORD VIBRAPHONE VARIATION CHURCH ORGAN JAZZ ORGAN STRINGS CHOIR GUITAR WOOD BASS E.BASS SPLIT ROOM CHORUS BRIGHT HALL 1 PHASER HARD An automatic lead-in (to help guide you into the phrase) starts at the A point of the - Yamaha 230 | Owner's Manual - Page 19
PIANO 1 GRAND PIANO 2 E.PIANO 1 E.PIANO 2 HARPSI- E.CLAVICHORD CHORD VIBRAPHONE VARIATION CHURCH JAZZ ORGAN ORGAN STRINGS CHOIR GUITAR WOOD BASS E.BASS SPLIT ROOM CHORUS BRIGHT HALL 1 PHASER HARD instruments. Refer to "Preset Voice List" on page 71. CLP-240/230 Owner's Manual 19 - Yamaha 230 | Owner's Manual - Page 20
Samples" to accurately recreate the unique resonance of an acoustic grand piano's soundboard and strings. A "half-pedal" effect lets you use the damper pedal to create partial sustain effects, depending on how far ) via the "Left Pedal Mode" described on page 51. 20 CLP-240/230 Owner's Manual - Yamaha 230 | Owner's Manual - Page 21
PIANO 1 GRAND PIANO 2 E.PIANO 1 E.PIANO 2 HARPSI- E.CLAVICHORD CHORD VIBRAPHONE VARIATION CHURCH JAZZ ORGAN ORGAN STRINGS CHOIR GUITAR WOOD BASS E.BASS SPLIT ROOM CHORUS BRIGHT HALL 1 PHASER HARD used to change the tonality or "timbre" of the sound output at a high level the sound - Yamaha 230 | Owner's Manual - Page 22
you hear a simulation of the sustain sound of the damper pedal on a grand piano, as you press the damper pedal and play the keyboard. This effect is applied to the entire sound of the instrument. Procedure Pressing the Depth 0: no effect Depth 20: maximum DDE depth 22 CLP-240/230 Owner's Manual - Yamaha 230 | Owner's Manual - Page 23
TEMPO/OTHER VALUE - / NO + / YES GRAND PIANO 1 GRAND PIANO 2 E.PIANO E.PIANO 1 2 HARPSI- E.CLAVICHORD CHORD VIBRAPHONE VARIATION CHURCH ORGAN JAZZ ORGAN STRINGS CHOIR GUITAR WOOD BASS E.BASS SPLIT ROOM CHORUS BRIGHT HALL 1 PHASER HARD NORMAL HALL 2 TREMOLO MEDIUM MELLOW STAGE - Yamaha 230 | Owner's Manual - Page 24
TEMPO/OTHER VALUE - / NO + / YES GRAND PIANO 1 GRAND PIANO 2 E.PIANO E.PIANO 1 2 HARPSI- E.CLAVICHORD CHORD VIBRAPHONE VARIATION CHURCH ORGAN JAZZ ORGAN STRINGS CHOIR GUITAR WOOD BASS E.BASS SPLIT ROOM CHORUS BRIGHT HALL 1 PHASER HARD NORMAL HALL 2 TREMOLO MEDIUM MELLOW STAGE - Yamaha 230 | Owner's Manual - Page 25
numbering priority 1234567 GRAND PIANO 1 GRAND PIANO 2 E.PIANO 1 E.PIANO 2 HARPSI- E.CLAVICHORD CHORD VIBRAPHONE CHURCH JAZZ ORGAN ORGAN STRINGS CHOIR GUITAR WOOD BASS E.BASS VOICE 8 9 10 11 12 13 14 The CLP-240/230 the [VARIATION] button can be used to turn the variation for both - Yamaha 230 | Owner's Manual - Page 26
PIANO 1 GRAND PIANO 2 E.PIANO 1 E.PIANO 2 HARPSI- E.CLAVICHORD CHORD VIBRAPHONE VARIATION CHURCH JAZZ ORGAN ORGAN STRINGS CHOIR GUITAR WOOD BASS E.BASS SPLIT ROOM CHORUS BRIGHT HALL 1 PHASER HARD by a high bar if sharp followed by a low bar if flat 26 CLP-240/230 Owner's Manual - Yamaha 230 | Owner's Manual - Page 27
indicator of the right voice lights in Split mode. The [VARIATION] can be used to turn the variation for the right voice on or off as required. be decided according to the depth default value of the voice combination. However, using function F4 (page 50) you can change the depth value for each voice - Yamaha 230 | Owner's Manual - Page 28
TEMPO/OTHER VALUE - / NO + / YES GRAND PIANO 1 GRAND PIANO 2 E.PIANO E.PIANO 1 2 HARPSI- E.CLAVICHORD CHORD VIBRAPHONE VARIATION CHURCH ORGAN JAZZ ORGAN STRINGS CHOIR GUITAR WOOD BASS E.BASS SPLIT ROOM CHORUS BRIGHT HALL 1 PHASER HARD NORMAL HALL 2 TREMOLO MEDIUM MELLOW STAGE - Yamaha 230 | Owner's Manual - Page 29
TEMPO/OTHER VALUE - / NO + / YES GRAND PIANO 1 GRAND PIANO 2 E.PIANO 1 E.PIANO 2 HARPSI- E.CLAVICHORD CHORD VIBRAPHONE VARIATION CHURCH JAZZ ORGAN ORGAN STRINGS CHOIR GUITAR WOOD BASS E.BASS SPLIT ROOM CHORUS BRIGHT HALL 1 PHASER HARD NORMAL HALL 2 TREMOLO MEDIUM MELLOW STAGE - Yamaha 230 | Owner's Manual - Page 30
will stop automatically. (All recorded data up to that point will be retained.) NOTE Pressing the SONG [PLAY/ PAUSE] button to start recording, then pressing the SONG [STOP] button to stop recording will erase all previously- recorded data on the selected part. 30 CLP-240/230 Owner's Manual - Yamaha 230 | Owner's Manual - Page 31
Re-engage Record Ready mode. Press the [REC] button, again. The selected part's indicator lights in red. Follow the procedure from Step 3 in "Recording a signature, reverb type, or effect type when re-recording a part or when recording to another part, do so after you engage Record Ready mode. NOTE - Yamaha 230 | Owner's Manual - Page 32
you record (for example, when you want to record a song different from what you recorded on the previous part), press the playback part button before pressing the [REC] button so that its indicator is turned off. NOTE For more information on recording, see page 33. 32 CLP-240/230 Owner's Manual - Yamaha 230 | Owner's Manual - Page 33
to the notes and voices you play is recorded. This data includes "Individual Parts" and "Entire Song." See below. Individual Parts • Notes played • Voice selection • [VARIATION] ON/OFF (CLP-240) OFF) • [EFFECT] type (including OFF) Recording Your Performance ENGLISH CLP-240/230 Owner's Manual 33 - Yamaha 230 | Owner's Manual - Page 34
press the [E. PIANO 2] button. When you wish to change the damper/ soft pedal depth, press and hold the pedal. Be careful not to press the SONG [PLAY/PAUSE] button or a key on the keyboard, either of which will start recording and erase all previously-recorded data on the selected part. 3. Press the - Yamaha 230 | Owner's Manual - Page 35
. With this file format, you can re-record each part on the CLP-240. Songs cannot be directly played back use another device. NOTE The "A" indication at the top of the User file name means "All" - all three songs in the instrument are saved into one container. NOTE The file numbers 230 Owner's Manual 35 - Yamaha 230 | Owner's Manual - Page 36
TEMPO/OTHER VALUE - / NO + / YES GRAND PIANO 1 GRAND PIANO 2 E.PIANO 1 E.PIANO 2 HARPSI- E.CLAVICHORD CHORD VIBRAPHONE VARIATION CHURCH JAZZ ORGAN ORGAN STRINGS CHOIR GUITAR WOOD BASS E.BASS SPLIT ROOM CHORUS BRIGHT HALL 1 PHASER HARD NORMAL HALL 2 TREMOLO MEDIUM MELLOW STAGE - Yamaha 230 | Owner's Manual - Page 37
TEMPO/OTHER VALUE - / NO + / YES GRAND PIANO 1 GRAND PIANO 2 E.PIANO E.PIANO 1 2 HARPSI- E.CLAVICHORD CHORD VIBRAPHONE VARIATION CHURCH JAZZ ORGAN ORGAN STRINGS CHOIR GUITAR WOOD BASS E.BASS SPLIT ROOM CHORUS BRIGHT HALL 1 PHASER HARD NORMAL HALL 2 TREMOLO MEDIUM MELLOW STAGE - Yamaha 230 | Owner's Manual - Page 38
TEMPO/OTHER VALUE - / NO + / YES GRAND PIANO 1 GRAND PIANO 2 E.PIANO E.PIANO 1 2 HARPSI- E.CLAVICHORD CHORD VIBRAPHONE VARIATION CHURCH JAZZ ORGAN ORGAN STRINGS CHOIR GUITAR WOOD BASS E.BASS SPLIT ROOM CHORUS BRIGHT HALL 1 PHASER HARD NORMAL HALL 2 TREMOLO MEDIUM MELLOW STAGE - Yamaha 230 | Owner's Manual - Page 39
PIANO 1 GRAND PIANO 2 E.PIANO E.PIANO 1 2 HARPSI- E.CLAVICHORD CHORD VIBRAPHONE VARIATION CHURCH JAZZ ORGAN ORGAN STRINGS CHOIR GUITAR WOOD BASS E.BASS SPLIT ROOM CHORUS BRIGHT HALL 1 PHASER HARD the file operation mode. (The FILE indicators turn off.) CLP-240/230 Owner's Manual 39 - Yamaha 230 | Owner's Manual - Page 40
to a part other than channel 2. NOTE For the USB storage device, folder directories on this instrument can be recognized up to two levels. However, the level is not displayed and song numbers 001-999 are displayed whichever level the song contains. NOTE If the metronome is being used during playback - Yamaha 230 | Owner's Manual - Page 41
song for two pianos, then playing the other part while the recorded part plays back. NOTE If you have External songs in the instrument, you can use the repeat function. ALL: Play all External songs in sequence. rnd: Play all External songs continuously in random order. CLP-240/230 Owner's Manual 41 - Yamaha 230 | Owner's Manual - Page 42
PIANO 1 GRAND PIANO 2 E.PIANO E.PIANO 1 2 HARPSI- E.CLAVICHORD CHORD VIBRAPHONE VARIATION CHURCH ORGAN JAZZ ORGAN STRINGS CHOIR GUITAR WOOD BASS E.BASS SPLIT ROOM CHORUS BRIGHT HALL 1 PHASER HARD start loading. When loading is started the file number. CAUTION When Start and stop playback. - Yamaha 230 | Owner's Manual - Page 43
TEMPO/OTHER VALUE - / NO + / YES GRAND PIANO 1 GRAND PIANO 2 E.PIANO E.PIANO 1 2 HARPSI- E.CLAVICHORD CHORD VIBRAPHONE VARIATION CHURCH ORGAN JAZZ ORGAN STRINGS CHOIR GUITAR WOOD BASS E.BASS SPLIT ROOM CHORUS BRIGHT HALL 1 PHASER HARD NORMAL HALL 2 TREMOLO MEDIUM MELLOW STAGE - Yamaha 230 | Owner's Manual - Page 44
- [FUNCTION] You can set various parameters to make the best use of Clavinova functions, such as fine tuning the pitch or selecting a scale, etc. The following parameters are available. The CLP-240 has nine main functions, and the CLP-230 has eight main functions. Some of these main functions consist - Yamaha 230 | Owner's Manual - Page 45
TEMPO/OTHER VALUE - / NO + / YES GRAND PIANO 1 GRAND PIANO 2 E.PIANO 1 E.PIANO 2 HARPSI- E.CLAVICHORD CHORD VIBRAPHONE VARIATION CHURCH JAZZ ORGAN ORGAN STRINGS CHOIR GUITAR WOOD BASS E.BASS SPLIT ROOM CHORUS BRIGHT HALL 1 PHASER HARD NORMAL HALL 2 TREMOLO MEDIUM MELLOW STAGE - Yamaha 230 | Owner's Manual - Page 46
mode. Select a desired function. Engage the respective sub-mode. Select a desired sub-mode. - /NO +/ YES LED indication Change the value. 5. After using the function, exit the function mode. To exit the Function mode, press the [TEMPO/FUNCTION#] button so that its [TEMPO] indicator lights - Yamaha 230 | Owner's Manual - Page 47
of measurement refers to the frequency of a sound and represents the number of times a sound wave vibrates in a second. NOTE You can also use the keyboard to set the pitch (in any mode other than Function mode procedure, the display returns to the previous indication. CLP-240/230 Owner's Manual 47 - Yamaha 230 | Owner's Manual - Page 48
Equal Temperament is the most common contemporary piano tuning scale. However, history has use the [TEMPO/ FUNCTION# ▼, ▲] buttons to select the desired sub-mode. Press the [-/NO] and [+/YES] buttons to select the number high bar if sharp followed by a low bar if flat 48 CLP-240/230 Owner's Manual - Yamaha 230 | Owner's Manual - Page 49
the Function mode and select . 2. Press the [+/YES] button to engage the Dual mode function's sub-mode, then use the [TEMPO/FUNCTION# ▼, ▲] buttons to select the desired sub-mode. Press the [-/NO] [+/ YES] button #] button so that the TEMPO indicator lights up. CLP-240/230 Owner's Manual 49 - Yamaha 230 | Owner's Manual - Page 50
can engage the split point by pressing the appropriate key on the keyboard. • If Function mode is not engaged, you can change the name indication for a split point (F 2) (G2) (A 2) followed by a high bar if sharp followed by a low bar if flat F4.2: Split Balance Setting range 230 Owner's Manual - Yamaha 230 | Owner's Manual - Page 51
and select (CLP-240)/ (CLP-230). 2. Press the [+/YES] button to engage the other functions' sub-mode, then use the [TEMPO/ FUNCTION# ▼, ▲] buttons 12 The GRAND PIANO 1 voice features special "Sustain Samples" that recreate the unique resonance of an acoustic grand piano's soundboard and strings - Yamaha 230 | Owner's Manual - Page 52
230) Song Part Cancel Volume This function sets the volume at which a "canceled" part is played during song playback. Adjust the part volume to a comfortable level and use the "canceled" part as a guide number relative to the specifi channel number relative songs, Disklavier Piano Soft songs, - Yamaha 230 | Owner's Manual - Page 53
simultaneous reception of different parts on all 16 230's panel settings or the notes you play on the keyboard 230) Program Change ON/OFF Normally the CLP-240/230 will respond to MIDI program change numbers received from an external keyboard or other MIDI device, causing the correspondingly-numbered - Yamaha 230 | Owner's Manual - Page 54
which the setup data was transmitted previously. 2. Start sending the setup data from the device. The to the owner's manual for the connected MIDI device. F8.7: (CLP-240)/F7.7: (CLP-230) Initial Setup Send the performance is played back. You can also use this function to change the settings of a - Yamaha 230 | Owner's Manual - Page 55
be used. ( )/F8.1: (CLP-230) Voice • Voice (Keyboard, Dual, and 230) settings>) • Song Part Cancel Volume ( / settings) F9.2: (CLP-240)/F8.2: (CLP-230) MIDI The MIDI functions ( 230> settings) (expect for the - Yamaha 230 | Owner's Manual - Page 56
below and use audio cables output from the AUX OUT (LEVEL FIXED) jacks. NOTE When the sound from the AUX OUT jacks is routed to the AUX IN jacks, the input sound will be output from the speaker of the CLP. The output sound may be excessively loud and may cause noise. 56 CLP-240/230 Owner's Manual - Yamaha 230 | Owner's Manual - Page 57
stereo outputs from another instrument can be connected to these jacks, allowing the sound of an external instrument to be reproduced via the Clavinova's speakers. Refer to the diagram below and use audio The Clavinova's MIDI Implementation Chart appears on page 84. CLP-240/230 Owner's Manual 57 - Yamaha 230 | Owner's Manual - Page 58
devices to both USB [TO DEVICE] terminals, the devices may not operate properly. NOTE Though the instrument supports the USB 1.1 standard, you can connect and use a USB 2.0 storage device with the instrument. However, note that the transfer speed is that of USB 1.1. 58 CLP-240/230 Owner's Manual - Yamaha 230 | Owner's Manual - Page 59
a computer Once you've saved data to a USB storage device, you can copy the data to the hard disk of your computer, then archive and organize the files as desired. Simply reconnect the device as shown TO DEVICE] terminal Instrument USB storage device Connections CLP-240/230 Owner's Manual 59 - Yamaha 230 | Owner's Manual - Page 60
to the Clavinova. CAUTION If you are not using the connection between the Clavinova and your computer, MIDI driver to connect the computer and the instrument. Use a USB cable to connect the USB port on time after the USB connection is made. • When using a USB cable to connect the instrument to your - Yamaha 230 | Owner's Manual - Page 61
] terminal. - Quit any open applications (such as Voice Editor, Multi Part Editor, and sequencer software). - Make sure that data is not being the instrument. (Data is transmitted only by playing notes on the keyboard or playing back a song.) • While a USB device is connected /230 Owner's Manual 61 - Yamaha 230 | Owner's Manual - Page 62
Yamaha recommends that you save your important data to your computer by using Installation Guide. For connection, see page 56. 2. Move the data to the computer. By using the Instruments" to the computer via the MSD. For instruction on using the MSD, see the Help in the MSD. 230 Owner's Manual - Yamaha 230 | Owner's Manual - Page 63
song data in the instrument, including external songs (page 40). Displayed when Musicsoft Downloader is started on a computer connected to the instrument. When this message appears, you cannot operate the Indicates that the USB storage device or media is protected. CLP-240/230 Owner's Manual 63 - Yamaha 230 | Owner's Manual - Page 64
Troubleshooting Troubleshooting Problem use of a mobile phone in close proximity to the Clavinova. Turn off the mobile phone, or use level using the " (page 12). • Make 12). by Yamaha (page use the devices whose compatibility has been confirmed by Yamaha Yamaha Clavinova. HPE-160 Stereo Headphones High - Yamaha 230 | Owner's Manual - Page 65
ENGLISH CLP-240/230: Keyboard Stand Assembly CLP-240/230: Keyboard Stand Assembly CAUTION • Be careful not to confuse parts, and be sure to install all parts in the correct direction. Please assemble the unit in the appropriate sequence. • Assembly should be carried out by at least two persons. • - Yamaha 230 | Owner's Manual - Page 66
ENGLISH CLP-240/230: Keyboard Stand Assembly 2. Attach B. 2-1 Place the bottom edges of B on the feet's protrud- ing edges of D and E, then, secure the top part in alignment with the protruding edges. 2-2 Temporarily secure the top part using 4 x 12 mm thin screws. 2-2 3-2 Cover the top of D and E - Yamaha 230 | Owner's Manual - Page 67
in steps 2-2 and 2-3 above (assembly B). Tighten these in order starting with the top side first, then the bottom. Make sure as you do this that the spaces on the left and right sides (indicated by 1 and 2 below) are even. 2 CLP-230 CLP-240/230: Keyboard Stand Assembly 5-1 MIDIPC-1 PMCa-c2 PEDAL - Yamaha 230 | Owner's Manual - Page 68
using included two screws (4 x 10mm) as shown in the figure. After completing the assembly, please check the following. • Are there any parts left over? Review key cover or top portion. Improper handling can result in damage to the instrument or personal injury. 68 CLP-240/230 Owner's Manual Hold - Yamaha 230 | Owner's Manual - Page 69
CLP-240. For instructions on installing the fl up dust and dirt that can cause Yamaha recommends that you use a commercially-available dry-type head cleaning disk to clean the head about once a month. Ask your Yamaha use. • Do not expose the disk to direct sunlight, extremely high 230 Owner's Manual 69 - Yamaha 230 | Owner's Manual - Page 70
disk drive can be installed to the bottom of the CLP-240 by using the included floppy disk drive case and screws. Have a Phillips-head 3. Attach the drive and case assembly to the left underside of the instrument, using the included four screws (4mm x 10mm). Dual-sided adhesive tape 2. Fold the - Yamaha 230 | Owner's Manual - Page 71
Uses a rotary speaker effect with a different speed. The variations speed is faster. If the variation is selected while holding a chord, the speed of the effect will gradually change. STRINGS Stereo-sampled, large-scale strings ensemble with realistic reverb. Try combining this voice with piano - Yamaha 230 | Owner's Manual - Page 72
combining this voice with a piano or electric piano in the DUAL mode. Warm and natural-sounding nylon guitar. Enjoy the quiet ambience of nylon strings. Bright, brilliant steel guitar. Suitable for popular music. that is produced when the keys are released. ENGLISH 72 CLP-240/230 Owner's Manual - Yamaha 230 | Owner's Manual - Page 73
for standard popular music. E.PIANO 2 The sound of an electric piano using hammer-struck metallic "tines". Soft tone when played lightly, and an aggressive tone when played hard. HARPSICHORD 1 The definitive instrument for baroque music. Since harpsichord uses plucked strings, there is no touch - Yamaha 230 | Owner's Manual - Page 74
PIANO1 HARPSICHORD HARPSICHORD1 HARPSICHORD2 CLP-240 CLP-230 Title "Eintritt" Waldszenen Op.82 Gavotte Invention All other songs are original (©2005 Yamaha Corporation). Piano Voice Demo Description (CLP- Piano Voice Demo Stereo sampling Monaural sampling Dynamic sampling; mezzo piano Dynamic - Yamaha 230 | Owner's Manual - Page 75
Piano 15 50 Piano Preset Songs 15 A A-B Repeat 18 Adjust Tempo (50 Piano Preset Songs 15 Tempo (Recorded Songs 41 Volume (50 Piano FUNCTION 47-55 Basic Procedure 45 K Key Cover 10 L [LEFT] button 17, 32 -73 Load 42 M [MASTER VOLUME] slider 12 Message List 63 METRONOME [ON/OFF] button 28 - Yamaha 230 | Owner's Manual - Page 76
Pedal 20, 51 Song Part Cancel Volume 52 Song playback 40 [SONG SELECT] button 15, 41, 42 Sostenuto Pedal 20 76 CLP-240/230 Owner's Manual [SPEAKER] switch 12 Specifications 85 SPLIT (CLP-240) (Function 50 [SPLIT] button (CLP-240 26 [STOP] button 15, 41 Sustain Pedal 51 Sync Start 17, 43 - Yamaha 230 | Owner's Manual - Page 77
Chart MIDI Implementierung stabelle Feuille d'implantation MIDI Gráfica de implementación MIDI 84 Specifications Technische Daten Caractéristiques techniques Especificaciones 85 CLP-240/230 Owner's Manual 77 - Yamaha 230 | Owner's Manual - Page 78
Time Signature Tempo Transpose Default GRAND PIANO 1 OFF OFF OFF WOOD BASS CLP-230 F8.1 - F9.1 F8.1 - F9.4 F8.4 F9.1 F8.1 F9.4 - F9.1 - F9.3 - - F8.1 - F8.3 Function CLP-240 CLP-230 Function Volume Song Part Cancel Volume 12 10 ALL 10 5 Backup Group CLP-240 CLP-230 F9.3 F8.3 F9 - Yamaha 230 | Owner's Manual - Page 79
CLP-240 CLP-230 Function F8.1 F8.2 F8.3 F8.4 F8.5 F9 F7.1 F7.2 F7.3 F7.4 F7.5 F8 MIDI Transmit Channel MIDI Receive Channel .5 F8.5 Character Code Default 1 ALL ON ON ON Voice: OFF MIDI - Others: ON En Backup Group CLP-240 CLP-230 F9.2 F8.2 Always backed up CLP-240/230 Owner's Manual 79 - Yamaha 230 | Owner's Manual - Page 80
(n = channel number) kk = Note number: 00H ~ 7FH = C-2 ~ G8 vv = Velocity * If received value exceeds the supported range for the all the notes that are currently ON on the spec- ified channel. Any notes being held by number is supplied with "All Note Off" transmission). 80 CLP-240/230 Owner's Manual - Yamaha 230 | Owner's Manual - Page 81
change number P.C.#=Program Change number CLP-240 GRANDPIANO 1 VARIATION GRANDPIANO 2 VARIATION E.PIANO 1 VARIATION E.PIANO 2 VARIATION HARPSICHORD VARIATION E. CLAVICHORD VARIATION VIBRAPHONE VARIATION CHURCH ORGAN VARIATION JAZZ ORGAN VARIATION STRINGS VARIATION CHOIR VARIATION GUITAR VARIATION - Yamaha 230 | Owner's Manual - Page 82
= ByteCount hhH = Address High mmH = Address Mid llH -240/230 another of a bulk block. Only the top address of the block (00H, 00H Yamaha ID 73H = Clavinova ID 7FH = Extended Product ID xxH = Product ID 49H 11H = Special control 0nH = Control MIDI change (n=channel number) cc = Control number - Yamaha 230 | Owner's Manual - Page 83
- XG SYSTEM ON RESET ALL PARAMETERS Description -50 - +50[cent] 1st bit 3 - 0 ➝ bit 15 - 12 2nd bit 3 - 0 ➝ bit 11 - 8 3rd bit 3 - 0 ➝ bit 7 - 4 4th bit 3 Change table (MULTI PART) Address (H) Size (H) Data (H) 08 nn 11 1 00 - 7F nn = Part Number Parameter DRY LEVEL 230 Owner's Manual 83 - Yamaha 230 | Owner's Manual - Page 84
230 MIDI Implementation Chart Date :16-DEC-2004 Version : 1.0 Function... Transmitted Recognized Remarks Basic Channel Default 1 - 16 Changed ˛ Mode Default 3 Messages ˛ Altered Note 0 - 127 Number CLP-240/230 Owner's Manual Mode 2 : OMNI ON ,MONO Mode 4 : OMNI OFF,MONO Ø : Yes ˛ : - Yamaha 230 | Owner's Manual - Page 85
Device Main Amplifiers Speakers Dimensions (W × D × H) (with music rest) Weight Accessories CLP-240 CLP-230 GH3 keyboard 88 keys (A-1 - C7) Transpose, Touch (Hard/Medium/Soft/Fixed), Functions, Speaker ON/OFF 2-part recording/playback (three user songs), Tempo Adjustment, Sync Start Damper (with - Yamaha 230 | Owner's Manual - Page 86
instructions. The required supply voltage is printed on the name plate. For name plate location, please refer to the graphic found in the Special Message Section of this manual. 8. This product was NOT designed for use 12. Electrical/electronic products should be serviced by a qualified service - Yamaha 230 | Owner's Manual - Page 87
instructions contained in this manual, meets FCC requirements. Modifications not expressly approved by Yamaha may void your authority, granted by the FCC, to use the product. 2. IMPORTANT: When connecting this product to accessories and/or another product use only high the problem by using one of - Yamaha 230 | Owner's Manual - Page 88
MEMO - Yamaha 230 | Owner's Manual - Page 89
(Madrid), Spain Tel: 91-639-8888 GREECE Philippos Nakas S.A. The Music House 147 Skiathou Street, 112-55 Athens, Greece Tel: 01-228 2160 SWEDEN Yamaha Scandinavia AB J. A. Wettergrens Gata 1 Box 30053 S-400 43 Göteborg, Sweden Tel: 031 89 34 00 DENMARK YS Copenhagen Liaison Office Generatorvej 6A DK - Yamaha 230 | Owner's Manual - Page 90
Clavinova Web site http://music.yamaha.com/homekeyboard Yamaha Manual Library http://www.yamaha.co.jp/manual/ U.R.G., Pro Audio & Digital Musical Instrument Division, Yamaha Corporation © 2005 Yamaha Corporation WH96240 612MWAP5.3-02B0 Printed in China
-
 1
1 -
 2
2 -
 3
3 -
 4
4 -
 5
5 -
 6
6 -
 7
7 -
8
-
9
-
10
-
11
-
12
-
13
-
14
-
15
-
16
-
17
-
18
-
19
-
20
-
21
-
22
-
23
-
24
-
25
-
26
-
27
-
28
-
29
-
30
-
31
-
32
-
33
-
34
-
35
-
36
-
37
-
38
-
39
-
40
-
41
-
42
-
43
-
44
-
45
-
46
-
47
-
48
-
49
-
50
-
51
-
52
-
53
-
54
-
55
-
56
-
57
-
58
-
59
-
60
-
61
-
62
-
63
-
64
-
65
-
66
-
67
-
68
-
69
-
70
-
71
-
72
-
73
-
74
-
75
-
76
-
77
-
78
-
79
-
80
-
81
-
82
-
83
-
84
-
85
-
86
-
87
-
88
-
89
-
90
 |
 |

ES
FR
DE
EN
IMPORTANT
—Check your power supply—
Make sure that your local AC
mains voltage matches the
voltage specified on the name
plate on the bottom panel. In
some areas a voltage selector
may be provided on the bottom
panel of the main keyboard unit
near the power cord. Make sure
that the voltage selector is set for
the voltage in your area. The
voltage selector is set at 240V
when the unit is initially shipped.
To change the setting use a
"minus" screwdriver to rotate the
selector dial so that the correct
voltage appears next to the
pointer on the panel.
For information on assembling
the keyboard stand, refer to the
instructions at the end of this
manual.
WICHTIG
—Überprüfen Sie Ihren
Netzanschluss—
Vergewissern Sie sich, dass die
Spannung in Ihrem örtlichen
Stromnetz mit der Spannung
übereinstimmt, die auf dem
Typenschild auf der Unterseite
des Instruments angegeben ist. In
bestimmten Regionen ist auf der
Unterseite des Keyboards in der
Nähe des Netzkabels ein
Spannungswähler angebracht.
Vergewissern Sie sich, dass der
Spannungswähler auf die
Spannung Ihres lokalen
Stromnetzes eingestellt ist. Dieser
Spannungswähler ist bei
Auslieferung auf 240 V
eingestellt. Sie können die
Einstellung mit einem
Schlitzschraubenzieher ändern.
Drehen Sie dazu den
Wählschalter, bis der Pfeil auf
dem Instrument auf die richtige
Spannung zeigt.
Weitere Informationen über die
Montage des Keyboard-Ständers
erhalten Sie in den Anweisungen
am Ende dieses Handbuchs.
IMPORTANT
—Contrôler la source
d'alimentation—
Vérifiez que la tension spécifiée
sur le panneau inférieur
correspond à la tension du
secteur. Dans certaines régions,
l'instrument peut être équipé d'un
sélecteur de tension situé sur le
panneau inférieur du clavier à
proximité du cordon
d'alimentation.
Vérifiez que ce sélecteur est bien
réglé en fonction de la tension
secteur de votre région. Le
sélecteur de tension est réglé sur
240 V au départ d'usine. Pour
modifier ce réglage, utilisez un
tournevis à lame plate pour
tourner le sélecteur afin de mettre
l'indication correspondant à la
tension de votre région vis à vis
du repère triangulaire situé sur le
panneau.
Pour obtenir des informations sur
l'assemblage du support du
clavier, reportez-vous aux
instructions à la fin de ce manuel.
IMPORTANTE
—Verifique la alimentación de
corriente—
Asegúrese de que tensión de
alimentación de CA de su área
corresponde con la tensión
especificada en la placa de
características del panel inferior.
En algunas zonas puede haberse
incorporado un selector de
tensión en el panel inferior de la
unidad del teclado principal,
cerca del cable de alimentación.
Asegúrese de que el selector de
tensión esté ajustado a la tensión
de su área. El selector de tensión
se ajusta a 240V cuando la
unidad sale de fábrica. Para
cambiar el ajuste, emplee un
destornillador de cabeza "recta"
para girar el selector de modo
que aparezca la tensión correcta
al lado del indicador del panel.
Para información sobre el
montaje del soporte del teclado,
consulte las instrucciones al final
de este manual.
CLP-240/230
MODE D’EMPLOI
BEDIENUNGSANLEITUNG
MANUAL DE INSTRUCCIONES
OWNER'S MANUAL
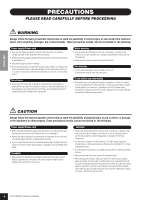
Before using the Clavinova, be sure to read “PRECAUTIONS” on pages 6-7.
Achten Sie darauf, vor Einsatz des Clavinova die “VORSICHTSMASSNAHMEN” auf Seite 6-7 durchzulesen.
Avant d'utiliser le Clavinova, lire attentivement la section «PRECAUTIONS D'USAGE» aux pages 6-
7.
Antes de utilizar el Clavinova, lea las “PRECAUCIONES” que debe tener en cuenta en las páginas 6-7.
ENGLISH
DEUTSCH
FRANÇAIS
ESPAÑOL