Yamaha 503 Owner's Manual
Yamaha 503 Manual
 |
View all Yamaha 503 manuals
Add to My Manuals
Save this manual to your list of manuals |
Yamaha 503 manual content summary:
- Yamaha 503 | Owner's Manual - Page 1
CVP-509 / 505 / 503 / 501 Owner's Manual Thank you for purchasing this Yamaha Clavinova! We recommend that you read this manual carefully so that you can fully take advantage of the advanced and convenient functions of the instrument. We also recommend that you keep this manual in a safe and handy - Yamaha 503 | Owner's Manual - Page 2
located on this plate. You should record the model number, serial number, and the date of purchase in the spaces provided below and retain this manual as a permanent record of your purchase. Model Serial No. Purchase Date 2 CVP-509/505/503/501 Owner's Manual - Yamaha 503 | Owner's Manual - Page 3
servicing) instructions in the literature accompanying the product. IMPORTANT SAFETY INSTRUCTIONS 1 Read these instructions. 2 Keep these instructions. 3 Heed all warnings. 4 Follow all instructions your waste disposal service or the point of sale where you CVP-509/505/503/501 Owner's Manual 3 - Yamaha 503 | Owner's Manual - Page 4
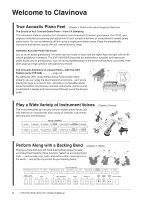
sound, with full, natural dynamic range. Authentic Acoustic Piano-like Touch Just as on an actual grand piano, the lower keys are heavy in touch and the higher keys are light, with all the natural gradations in between. The CVP-509/505/503 provide the performance functions and expressive power found - Yamaha 503 | Owner's Manual - Page 5
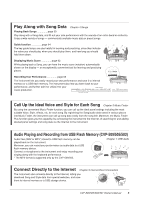
- commercially available music data or preset songs. Guide function page 64 The key guide lamps are also helpful in learning and practicing, since your singing along with the keyboard performance. * The MP3 format is supported only by the CVP-509/505. Chapter 7 CVP-509/505/503/501 Owner's Manual 5 - Yamaha 503 | Owner's Manual - Page 6
the AC outlet. Then have the instrument inspected by qualified Yamaha service personnel. • Never insert or remove an electric plug with AC outlet you are using is easily accessible. If some trouble or malfunction occurs, immediately turn off the power switch and CVP-509/505/503/501 Owner's Manual - Yamaha 503 | Owner's Manual - Page 7
important data onto two USB storage devices. Yamaha cannot be held responsible for damage caused by improper use or modifications to the instrument, or data that is lost or destroyed. Always turn the power off when the instrument is not in use. (1)B-13 2/2 CVP-509/505/503/501 Owner's Manual 7 - Yamaha 503 | Owner's Manual - Page 8
Yamaha the Clavinova, CVP-509/505/503) This product is manufactured under license of U.S. Patents No.5231671, No.5301259, No.5428708, and No.5567901 from IVL Audio Inc. • (CVP-509/505) MPEG Layer-3 audio coding technology licensed from Fraunhofer IIS and Thomson. 8 CVP-509/505/503/501 Owner's Manual - Yamaha 503 | Owner's Manual - Page 9
Included Accessories Included Accessories • Accessory CD-ROM for Windows • Owner's Manual • Data List • Accessory CD-ROM for Windows Installation Guide • "50 greats for the Piano" Music Book • My Yamaha Product User Registration *The PRODUCT ID on the sheet will be needed when you fill out the User - Yamaha 503 | Owner's Manual - Page 10
This instrument has the following documents and instructional materials. Included Documents Owner's Manual (this book) Provides overall explanations of the Clavinova basic functions. See "How to use this Owner's Manual" below. Data List Contains various important preset content lists such as - Yamaha 503 | Owner's Manual - Page 11
Stand Assembly 114 CVP-501: Keyboard Stand Assembly 116 Installing the Floppy Disk Drive (Optional) (CVP-509/505)118 Handling the Floppy Disk Drive (FDD) and Floppy Disks 119 Troubleshooting 120 Panel Button Chart 123 Specifications 125 Index 128 CVP-509/505/503/501 Owner's Manual 11 - Yamaha 503 | Owner's Manual - Page 12
[PIANO RESET] button Page 30 Recalls the grand piano keyboard performance. ¢ Power switch Page 14 Turns the instrument's power on or off. ∞ Drum Kit icons Page 40 These indicate drum instruments assigned to each key when the Standard Kit 1 is selected. 12 CVP-509/505/503/501 Owner's Manual - Yamaha 503 | Owner's Manual - Page 13
I/O connectors Page 99 CVP-503/501 Music rest Page 15 Key cover Page 14 I/O connectors Page 99 Sheet music braces Page 15 Guide lamps Page 64 Power switch Page 14 Pedals Page 32 Sheet music braces Page 15 Guide lamps Page 64 Power switch Page 14 Pedals Page 32 CVP-509/505/503/501 Owner's Manual 13 - Yamaha 503 | Owner's Manual - Page 14
end of the keyboard lights up. key cover may fall inside the unit when the cover is opened and may be nearly impossible to remove. This could cause electric shock, short circuit, fire or other serious damage to the instrument. The power indicator lights up. 14 CVP-509/505/503/501 Owner's Manual - Yamaha 503 | Owner's Manual - Page 15
playing the keyboard, adjust the volume level by using the [MASTER VOLUME] located at the left of the panel. Starting Up 5 After you use the instrument, press the power switch to turn the power off. The screen and the power indicator turn off. 6 Close the key cover. CVP-509/505/503: Grip the - Yamaha 503 | Owner's Manual - Page 16
far as it will go, raise the two metal supports, then gently lower the music rest backward until it these jacks.). CVP-509/505/503 INPUT VOLUME MIN MAX MIC. LINE IN MIC. LINE PHONES CVP-501 CAUTION x 10mm) as shown in the figure. CVP-509/505 CVP-503/501 CAUTION Do not hang anything other than - Yamaha 503 | Owner's Manual - Page 17
[E][F] OWNER 1 NOTE Throughout this manual, arrows are used in the instructions, indicating in shorthand the process of calling up certain displays and functions. 2 2 Use the [4 ▲▼]/[5 ▲▼] buttons to select the desired language. Adjusting the Contrast of the Display CVP-509 CVP-505 CVP-503 CVP - Yamaha 503 | Owner's Manual - Page 18
as sound demonstrations. 1 Press the [DEMO] button to start the Demos. Overview Demo will play back continuously, calling up the various displays in sequence. 18 CVP-509/505/503/501 Owner's Manual - Yamaha 503 | Owner's Manual - Page 19
sub menu. NOTE To return to the higher level menu, press the [EXIT] button. 4 Press the [EXIT] button several times to exit from the Demos. CVP-509/505/503/501 Owner's Manual 19 - Yamaha 503 | Owner's Manual - Page 20
files. • Example 2 The [A] and [B] buttons are used to move the cursor up or down. The [C], [D], [H] and [I] buttons are used to select the corresponding parameter. 20 CVP-509/505/503/501 Owner's Manual - Yamaha 503 | Owner's Manual - Page 21
menu appears, use the [1 ▲▼] - [8 ▲▼] button to select the desired item. If a parameter appears in slider (or knob) form, use the [1 ▲▼] - [8 ▲▼] button to adjust the value. CVP-509/505/503/501 Owner's Manual 21 - Yamaha 503 | Owner's Manual - Page 22
the [EXIT] button returns you to the previously indicated display. Pressing the [EXIT] button several times returns to the default Main display (page 24). 22 CVP-509/505/503/501 Owner's Manual - Yamaha 503 | Owner's Manual - Page 23
setting display to instantly call up that display. For example, pressing the [GUIDE] button calls up the display in which the Guide mode can be set. Refer to the separate Data List for a list of the displays that can be called up with the Direct Access function. CVP-509/505/503/501 Owner's Manual 23 - Yamaha 503 | Owner's Manual - Page 24
display is the one you'll usually see when you play the keyboard. 7 ) 9 8 7 ) 8 1 1 2 4 6 3 5 3 5 6 2 4 CVP-509/505/503 CVP-501 1 Voice name Displays the Voice names currently selected for [EXIT] button to show the Volume Balance display. 24 CVP-509/505/503/501 Owner's Manual - Yamaha 503 | Owner's Manual - Page 25
(tempo/bar/beat) in Style playback or Song playback. 9 USB Audio information (CVP-509/505/503) Displays information for the selected audio file (file name, time, etc.) While the Registration Sequence, refer to the Reference manual on the website. Starting Up CVP-509/505/503/501 Owner's Manual 25 - Yamaha 503 | Owner's Manual - Page 26
data files (copy, move, delete, etc.) from this menu. For detailed instructions, refer to pages 68 - 71. NOTE Hereafter in this manual, any USB storage device such as USB flash memory, floppy disk drive USB] button. [USB] → [A] SONG/[B] STYLE/[C] REGIST/[F] VOICE. 26 CVP-509/505/503/501 Owner's Manual - Yamaha 503 | Owner's Manual - Page 27
shown. Each folder shown in this display contains appropriately categorized Voices. Entering Characters The instructions that follow show you how to enter characters for naming your files/ folders, inputting in, some types of characters cannot be entered." CVP-509/505/503/501 Owner's Manual 27 - Yamaha 503 | Owner's Manual - Page 28
case" may be entered. NOTE When entering a password for a website or the WEP key for wireless LAN connection, the characters are converted to asterisks (*) for security purposes. NOTE selected icon. NOTE To cancel the operation, press the [8 ▼] (CANCEL) button. 28 CVP-509/505/503/501 Owner's Manual - Yamaha 503 | Owner's Manual - Page 29
Settings While holding the C7 key (right-most key on the keyboard), turn the power on. including Internet Direct Connection settings. For maximum data security Yamaha recommends that you copy or save your important data to the Reference Manual on the website. CVP-509/505/503/501 Owner's Manual 29 - Yamaha 503 | Owner's Manual - Page 30
the [PIANO RESET] button for three seconds or longer. A message appears prompting you to enable Piano Lock. 2 Press the [F] (OK) button to enable Piano Lock. To turn Piano Lock off, press and hold down the [PIANO RESET] button again for three seconds or longer. 30 CVP-509/505/503/501 Owner's Manual - Yamaha 503 | Owner's Manual - Page 31
to the way you play the keys). This setting does not change the weight of the keyboard. The touch sensitivity type becomes KEYBOARD/PANEL → [A] 1 INITIAL TOUCH 2 Use the [1 ▲▼]/[2 ▲▼] buttons to specify the touch response. 1 Perform the piano songs by Clavinova CVP-509/505/503/501 Owner's Manual 31 - Yamaha 503 | Owner's Manual - Page 32
three pedals. CVP-509/505 1 CVP-503/501 Perform the piano songs by Clavinova 1 Right Pedal (Sostenuto Pedal) When the Piano Voice is selected, if you play a note or chord on the keyboard and press this pedal while holding Reference Manual on the website. 32 CVP-509/505/503/501 Owner's Manual - Yamaha 503 | Owner's Manual - Page 33
. NOTE You can also change the time signature and volume of the metronome sound: [FUNCTION] → [J] UTILITY → TAB [E][F] CONFIG 1 → [B] 2 METRONOME For details, refer to the Reference Manual on the website. CVP-509/505/503/501 Owner's Manual 33 - Yamaha 503 | Owner's Manual - Page 34
button to turn the iAFC on. iAFC uses Yamaha's EMR (Electronic Microphone Rotator) technology to ensure stability against acoustic feedback. Perform the piano songs by Clavinova 3 3 Use the [3 ▲▼] - [6 spatial characteristics of performing together on stage. 34 CVP-509/505/503/501 Owner's Manual - Yamaha 503 | Owner's Manual - Page 35
automatic adjustment is being performed, do not make audible noises in the vicinity of the Clavinova. NOTE If desired, you can restore the default calibration setting by pressing the [J] (BASIC SETTING) button in step 4. Perform the piano songs by Clavinova CVP-509/505/503/501 Owner's Manual 35 - Yamaha 503 | Owner's Manual - Page 36
piano pedals. Before using the compound, make sure to read the instructions the keyboard horizontally. Clavinova so that its rear panel is at least 10 cm away from the wall. • (When using the SPATIAL EFFECT) Perform the automatic adjustment of the iAFC function. 36 CVP-509/505/503/501 Owner's Manual - Yamaha 503 | Owner's Manual - Page 37
realistic instrumental Voices, including piano, guitar, strings, brass, wind instruments and more. 2 Playing Preset Voices Selecting a Voice (RIGHT 1) and playing the keyboard 1 Press one of on the VOICE category selection buttons, refer to page 40. CVP-509/505/503/501 Owner's Manual 37 - Yamaha 503 | Owner's Manual - Page 38
start the Demo for the selected Voice. To stop the demo, press the [8 ▼] button again. 4 Play the keyboard. Playing Two Voices Simultaneously 1 Make sure that PART ON/OFF [RIGHT 1] button is turned on. 2 Press the settings to Registration Memory. See page 79. 38 CVP-509/505/503/501 Owner's Manual - Yamaha 503 | Owner's Manual - Page 39
the RIGHT 1 and 2 Voices can be played over the entire keyboard. When the LEFT part is on, keys lower than F#2 (the Split Point) are set for playing the on the Main display. (CVP-509/ 505) For the part selected, "E" or "F" is displayed next to the Voice name. CVP-509/505/503/501 Owner's Manual 39 - Yamaha 503 | Owner's Manual - Page 40
the Concert Guitar Voice, the D note would sound as a "hammer on," without the string being plucked again. Depending on how you play, other effects such as shake or breath noises (for the Trumpet Voice), or finger noises (for the Guitar Voice) will be produced. 40 CVP-509/505/503/501 Owner's Manual - Yamaha 503 | Owner's Manual - Page 41
to best play each SA and SA2 Voice, call up the information window (pressing the [7 ▲] (INFO) button in the Voice Selection display). 2 AEM Technology When you play the piano, pressing a "C" key produces a definite data in real time during your performance. CVP-509/505/503/501 Owner's Manual 41 - Yamaha 503 | Owner's Manual - Page 42
TUNE/SCALE TUNE. You can also adjust the pitch for each part (keyboard parts, Style parts and Song parts) on the TUNE page of the Mixing Console display (page 88). For details, refer to the Reference Manual on the website. Voices - Playing the keyboard - 42 CVP-509/505/503/501 Owner's Manual - Yamaha 503 | Owner's Manual - Page 43
saxophone Voice can produce breath noises or key noises, while doing the same for a guitar Voice can produce fret 2 noises or SA/SA2 Voices for two or more keyboard parts, pressing a pedal simultaneously affects all parts on which SA/SA2 Voices are selected. CVP-509/505/503/501 Owner's Manual - Yamaha 503 | Owner's Manual - Page 44
1 Call up the operation display. [DIRECT ACCESS] → [EXIT] 2 Select the desired part for which you want to add effects. CVP-509/505/503 2 CVP-501 Voices - Playing the keyboard - 3 Press the [VOICE EFFECT] button to call up the VOICE EFFECT display. 4 1 2 3 44 CVP-509/505/503/501 Owner's Manual - Yamaha 503 | Owner's Manual - Page 45
keys are released. Nondecaying Voices such as strings are held continuously, while decay-type Voices such as piano - Playing the keyboard - 3 [4 note played on the keyboard to the next. in DSP changes rently selected keyboard part. • The DSP refer to the Reference Manual on the website. NOTE - Yamaha 503 | Owner's Manual - Page 46
is produced by pipes of different lengths (in feet). 1 3 2 4 5 Voices - Playing the keyboard - If you want, you can select the Organ type, change the Rotary Speaker speed and adjust the Page and EFFECT/EQ Page, see the Reference Manual on the website. 46 CVP-509/505/503/501 Owner's Manual - Yamaha 503 | Owner's Manual - Page 47
off without executing the Save operation. 2 Voices - Playing the keyboard - Advanced Features Refer to the Reference Manual on the website, Chapter 2. Selecting GM/XG or other TAB [E][F] VOICE SET [ORGAN FLUTES] → TAB [E][F] VOLUME/ ATTACK or EFFECT/EQ CVP-509/505/503/501 Owner's Manual 47 - Yamaha 503 | Owner's Manual - Page 48
or pressing the same STYLE button again can call up the other display page. 3 Confirm that the [ACMP ON/OFF] button is off. 48 CVP-509/505/503/501 Owner's Manual - Yamaha 503 | Owner's Manual - Page 49
Accompaniment. Styles - Playing Rhythm and Accompaniment - The specific left-hand section of the keyboard (page 39) becomes the Chord section, and chords played in this section are automatically detected You can transpose the Style (accompaniment). See page 42. CVP-509/505/503/501 Owner's Manual 49 - Yamaha 503 | Owner's Manual - Page 50
. • Free Play (F) (CVP-509/505): These Styles are These special Styles provide piano-only accompaniment. Just by compatibility The CVP-509/505/503/501 uses the SFF GE file format (page 9). The CVP509/505/503/501 le is saved (or pasted) in the CVP-509/505/ 503/501. Please keep in mind that the - Yamaha 503 | Owner's Manual - Page 51
piano - produces appropriate accompaniment. You don't have to worry about specifying the chords. (Depending on the song arrangement, AI Full Keyboard may not always produce appropriate accompaniment.) For other types, refer to the Reference Manual on the website. CVP-509/505/503/501 Owner's Manual - Yamaha 503 | Owner's Manual - Page 52
You can start and stop the Style anytime you want by simply playing or releasing the keys in the chord section of the keyboard. Make sure that the [ACMP ON/OFF] button is on, press the [SYNC STOP] playing, a fill-in automatically plays before the ENDING/rit [I]. 52 CVP-509/505/503/501 Owner's Manual - Yamaha 503 | Owner's Manual - Page 53
desired tempo. When the Style is stopped, tapping the [TAP TEMPO] button (four times for a 4/4 time signature) starts Style playback at the tempo you tapped. CVP-509/505/503/501 Owner's Manual 53 - Yamaha 503 | Owner's Manual - Page 54
currently selected Style. Before using the Repertoire function, you need to import Music Finder records (see instructions on page 73). 1 Select the desired Style from the Style Selection display (steps 1 - . Styles - Playing Rhythm and Accompaniment - 54 CVP-509/505/503/501 Owner's Manual - Yamaha 503 | Owner's Manual - Page 55
Link function, turn the [OTS LINK] button on. NOTE You can also create your own One Touch Setting setups. For details, refer to the Reference Manual on the website. NOTE You can change the timing in which the One Touch Settings change with MAIN VARIATION [A] - [D] change. Refer to the Reference - Yamaha 503 | Owner's Manual - Page 56
] button then pressing one of the ONE TOUCH SETTING [1] - [4] buttons. 3 2 Press the [F] (CLOSE) button to close the Information display. Styles - Playing Rhythm and Accompaniment - 56 CVP-509/505/503/501 Owner's Manual - Yamaha 503 | Owner's Manual - Page 57
the Style. • CHD1/2 (Chord 1/ 2): These are the rhythmic chord backing, commonly used with piano or guitar Voices. • PAD: This part is used for sustained instruments such as strings, organ, choir, Press the [EXIT] button to close the CHANNEL ON/OFF display. CVP-509/505/503/501 Owner's Manual 57 - Yamaha 503 | Owner's Manual - Page 58
[7 ▲▼] buttons, you can adjust the volume of Song, Style, MIC (for the CVP-509/505/503) and keyboard parts. NOTE In the Mixing Console display, you 3 can adjust the volume for each [E][F] CHANNEL • Making Style File Format Settings: → TAB [E][F] PARAMETER 58 CVP-509/505/503/501 Owner's Manual - Yamaha 503 | Owner's Manual - Page 59
Clavinova, "Song" refers to the MIDI songs which include preset songs, commercially available MIDI format files, etc. Not only can you play back a Song and listen to it, but you can also play the keyboard by "double-clicking" on one of the [A] - [J] buttons. CVP-509/505/503/501 Owner's Manual 59 - Yamaha 503 | Owner's Manual - Page 60
4 Operations During Playback • Synchro Start You can start playback as soon as you start playing the keyboard. While playback is stopped, hold down the SONG [STOP] button and press the [PLAY/PAUSE] it again resumes Song playback from the current position. 60 CVP-509/505/503/501 Owner's Manual - Yamaha 503 | Owner's Manual - Page 61
and Disklavier Piano Soft Songs. These cannot be copied/moved/saved to external devices. • Prot. 2 Orig: Indicates Yamaha-protection- Songs, visit the Yamaha website. NOTE You can adjust the Song volume balance between the Song and Keyboard. See page 58. CVP-509/505/503/501 Owner's Manual 61 - Yamaha 503 | Owner's Manual - Page 62
notation of complicated passages or many short notes. 4 You can change the displayed notation style by using the [1 ▲▼] - [8 ▲▼] buttons. For details, refer to the Reference manual on the website. Songs - Playing, Practice and Recording Songs - 62 CVP-509/505/503/501 Owner's Manual - Yamaha 503 | Owner's Manual - Page 63
return to the Lyrics display, press the [1 ▲▼] (LYRICS) button again. For more information about the Lyrics/Text display, refer to the Reference manual on the website. NOTE (CVP-509/505) The Lyrics (text) can be displayed on the external monitor. See page 101. CVP-509/505/503/501 Owner's Manual 63 - Yamaha 503 | Owner's Manual - Page 64
playback, press the same button again. 4 One-handed Practice with the Guide Lamps The key guide lamps indicate the notes you should play, when you should play them, Practice the muted part using the guide lamps. After your practice, turn the [GUIDE] button off. 64 CVP-509/505/503/501 Owner's Manual - Yamaha 503 | Owner's Manual - Page 65
Guide features, for practicing the timing of playing the keys (Any Key mode) or for Karaoke. [FUNCTION] → [B] SONG SETTING → [A]/[B] GUIDE MODE For more information, refer to the Reference Manual B location. 4. Press the [REPEAT] button again to specify Point B. CVP-509/505/503/501 Owner's Manual 65 - Yamaha 503 | Owner's Manual - Page 66
the following channels. Keyboard parts: Ch. 1-3 Style parts: Ch. 9-16 A message prompting you to save the recorded performance appears. To close the message, press the [EXIT] button. 5 Press the SONG [PLAY/PAUSE] button to play back the recorded performance. 66 CVP-509/505/503/501 Owner's Manual - Yamaha 503 | Owner's Manual - Page 67
be saved in the Song Selection display. Refer to "Saving Files" on page 68 for instructions. CAUTION The recorded Song will be lost if you change to another Song or you turn and record other parts as desired. Songs - Playing, Practice and Recording Songs - CVP-509/505/503/501 Owner's Manual 67 - Yamaha 503 | Owner's Manual - Page 68
the files in alphabetical order. NOTE If you want to cancel the Save operation, press the [8 ▼] (CANCEL) button. Songs - Playing, Practice and Recording Songs - 68 CVP-509/505/503/501 Owner's Manual - Yamaha 503 | Owner's Manual - Page 69
display for a new folder. 3 Input the name of the new folder (see page 27). NOTE The following marks cannot be entered for a file/folder name CVP-509/505/503/501 Owner's Manual 69 - Yamaha 503 | Owner's Manual - Page 70
operation appears at the bottom of the display. NOTE Files in the PRESET tab cannot be moved. They can only be copied. Copy Cut 70 CVP-509/505/503/501 Owner's Manual - Yamaha 503 | Owner's Manual - Page 71
the on-display instructions. • YES • YES ALL • NO • CANCEL Delete the file/folder Delete all selected files/folders Leave the file/folder as is without deleting Cancel the Delete operation NOTE To cancel the Delete operation, press the [8 ▼] (CANCEL) button. CVP-509/505/503/501 Owner's Manual 71 - Yamaha 503 | Owner's Manual - Page 72
related parameters: [FUNCTION] → [B] SONG SETTING • Keyboard and Vocal Practice Using the Guide Function: → [A]/[B] GUIDE MODE • Playing Backing Parts with the Performance Assistant 1-16, SYS/EX. or LYRICS Songs - Playing, Practice and Recording Songs - 72 CVP-509/505/503/501 Owner's Manual - Yamaha 503 | Owner's Manual - Page 73
recommend that you load the panel settings from the website following the instructions below. http://services.music.yamaha.com/musicfinder/ 1 Download the Music Finder panel settings file 4 Press the [7 ▲▼] (FILES) button to call up the File Selection display. CVP-509/505/503/501 Owner's Manual 73 - Yamaha 503 | Owner's Manual - Page 74
Styles, Voices, etc. • Song (SONG) Song data which is registered to the Music Finder from the Song Selection display (page 59) • Audio (AUDIO) (CVP-509/505/503) Audio data which is registered to the Music Finder from the USB Audio Selection display (page 84) NOTE For information on registering the - Yamaha 503 | Owner's Manual - Page 75
the cursor to the first record. 3 Play the chords in the left-hand section of the keyboard. NOTE If you want to avoid changing the Tempo during Style playback when selecting another record, turn - Calling Up Ideal Setups (Voice, Style, etc.) for Each Song - CVP-509/505/503/501 Owner's Manual 75 - Yamaha 503 | Owner's Manual - Page 76
you wish to search another criteria, press the [6 ▼] (SEARCH 2) button in the Music Finder display. The search result is displayed in the SEARCH 2 display. 76 CVP-509/505/503/501 Owner's Manual - Yamaha 503 | Owner's Manual - Page 77
data saved in various places (Song Selection display: page 59; USB Audio Selection display (CVP-509/505/503): page 84) into Music Finder, the instrument can call up song data easily from the . Press the [8 ▼] (CANCEL) button to cancel the registration. CVP-509/505/503/501 Owner's Manual 77 - Yamaha 503 | Owner's Manual - Page 78
more details about this service, refer to the following website. http://services.music.yamaha.com/musicfinder/ Advanced Features Refer to the Reference Manual on the website, Chapter on the Internet (MUSIC FINDER Plus): [MUSIC FINDER] → [J] (MUSIC FINDER +) 78 CVP-509/505/503/501 Owner's Manual - Yamaha 503 | Owner's Manual - Page 79
using the [2▲▼] - [7▲▼] buttons, then enter or remove the checkmark by using the [8▲] (MARK ON)/ [8▼] (MARK OFF) buttons. To cancel the operation, press the [I] (CANCEL) button. CVP-509/505/503/501 Owner's Manual 79 Registration Memory - Saving and Recalling Custom Panel Setups - - Yamaha 503 | Owner's Manual - Page 80
key (right-most B key on the keyboard). CVP-509/505/503/501. However, the data may not be perfectly compatible, depending on the specifications of each model. 1 2 2 Press the [6 ▼] (SAVE) button to save the Bank file. For instructions on saving, refer to page 68. 80 CVP-509/505/503/501 Owner's Manual - Yamaha 503 | Owner's Manual - Page 81
. NOTE If some Voice part is set to off (CVP509/505), the Voice name for corresponding part is shown in gray. (On the CVP-503/501, the Voice part name for corresponding part is shown in gray.) Registration Memory - Saving and Recalling Custom Panel Setups - CVP-509/505/503/501 Owner's Manual 81 - Yamaha 503 | Owner's Manual - Page 82
Advanced Features Refer to the Reference Manual on the website, Chapter 6. Disabling recall of specific items: [FUNCTION] → [E] REGIST SEQUENCE/FREEZE/ → TAB [E][F] REGISTRATION SEQUENCE 6 Registration Memory - Saving and Recalling Custom Panel Setups - 82 CVP-509/505/503/501 Owner's Manual - Yamaha 503 | Owner's Manual - Page 83
CVP-509/505/503 Files CVP-509 CVP-505 CVP-503 CVP-501 CVP-509 CVP-505 CVP-503 NOTE The instrument cannot be play back DRM protected files. .mp3 44.1/48.0 kHz sample rate, 64-320 kbps and variable bit CVP-509 rate, mono/stereo CVP . USB Audio (CVP-509/505/503) - Playback and - Yamaha 503 | Owner's Manual - Page 84
attempt to disconnect the USB flash memory or turn the power off during playback. Doing so may corrupt the USB flash memory data. 7 USB Audio (CVP-509/505/503) - Playback and Recording Audio Files - 84 CVP-509/505/503/501 Owner's Manual - Yamaha 503 | Owner's Manual - Page 85
the [7 ▼] (VOL.) button then adjust the volume for audio files by using the [7 ▲▼] buttons. To close the setting display, press the [8 ▲▼] (CLOSE) button. USB Audio (CVP-509/505/503) - Playback and Recording Audio Files - CVP-509/505/503/501 Owner's Manual 85 - Yamaha 503 | Owner's Manual - Page 86
CVP-509 CVP-505 CVP-503 CVP-501 Try recording your performance as audio data (WAV file) to a USB flash memory. For example, you can record an ensemble performance of guitar and keyboard drive. USB Audio (CVP-509/505/503) - Playback and Recording Audio Files - 86 CVP-509/505/503/501 Owner's Manual - Yamaha 503 | Owner's Manual - Page 87
the [EXIT] button. Press the [E] (RECORDER) button to call up the Recording display again, then stop the recording by pressing the [J] (STOP) button. USB Audio (CVP-509/505/503) - Playback and Recording Audio Files - CVP-509/505/503/501 Owner's Manual 87 - Yamaha 503 | Owner's Manual - Page 88
intuitive control over aspects of the keyboard parts and Song/Style channels, For details about each display Page, refer to the Reference Manual on the 8 website. • VOL/VOICE Changes the Voice the tone or timbre of the sound. • CMP (CVP-509) This is the Master Compressor setting which determines - Yamaha 503 | Owner's Manual - Page 89
relevant parts. The part name is indicated at the top of the display. Song, Style, MIC (CVP-509/505/503), Keyboard parts (Left, Right 1, 2) Rhythm 1, 2, Bass, Chord 1, 2, Pad, Phrase 1, 2 Song Song Selection display for saving your data, then save it (page 68). CVP-509/505/503/501 Owner's Manual 89 - Yamaha 503 | Owner's Manual - Page 90
Adjusting Panning/Volume for Each Part You can change the Voice and adjust panning and volume for each keyboard part, Style channel or Song channel. Changing the Voice for each part 1 Same operation as in data, channel 10 can only be used for a Drum kit Voice. 90 CVP-509/505/503/501 Owner's Manual - Yamaha 503 | Owner's Manual - Page 91
to select the VOLUME parameter. PANPOT VOLUME 3 Use the [1 ▲▼] - [8 ▲▼] buttons to adjust panning/volume for the desired part. 4 Save your settings (step 5 on page 89). 8 CVP-509/505/503/501 Owner's Manual 91 - Yamaha 503 | Owner's Manual - Page 92
desired part. 8 4 Save your settings (step 5 on page 89). NOTE You can change the effect type by pressing the [F] (TYPE) button. Refer to the Reference Manual. 92 CVP-509/505/503/501 Owner's Manual - Yamaha 503 | Owner's Manual - Page 93
CVP-509 CVP-505 CVP-503 CVP-501 Compressor is an effect commonly used to limit and compress the dynamics (softness/loudness) of an audio signal. For signals that vary widely in dynamics, such as vocals and guitar 5 [7 ▲▼] GAIN OFFSET Determines the output level. CVP-509/505/503/501 Owner's Manual 93 - Yamaha 503 | Owner's Manual - Page 94
selected in the same way as 8 the preset types. Advanced Features Refer to the Reference Manual on the website, Chapter 8. Converting XG Song Voice to this instrument's Voice (Song EFFECT → [F] TYPE Editing EQ parameters: [MIXING CONSOLE] → TAB [E][F] EQ 94 CVP-509/505/503/501 Owner's Manual - Yamaha 503 | Owner's Manual - Page 95
Guide on the computer's browser. (The computer must be connected to the internet.) 1 Access the Manual Library website on the computer browser. Click "Manual Library" from the menu of included CD-ROM, or enter the following URL directly. http://www.yamaha.co.jp/manual/ CVP-509/505/503/501 Owner - Yamaha 503 | Owner's Manual - Page 96
Wireless LAN Adaptor USB TO DEVICE terminal *Here, "modem" refers to an ADSL modem, optical network unit (ONU) or cable modem. NOTE (CVP-509/505) Two [USB TO DEVICE] terminals are provided: one on the panel and the other at the lower left of the keyboard. 96 CVP-509/505/503/501 Owner's Manual - Yamaha 503 | Owner's Manual - Page 97
Clavinova Directly to the Internet - Operations in the Special Website After connecting the instrument to the internet, use these operations to take advantage of Internet services ) button to reload a web page and press the [6 ▲] (STOP) to cancel loading. 9 CVP-509/505/503/501 Owner's Manual 97 - Yamaha 503 | Owner's Manual - Page 98
- Connecting the Clavinova Directly to the Manual on the website, Chapter 9. 9 Editing the Browser settings: [INTERNET] → [5 ▼] SETTING → [D] BROWSER SETTINGS Registering bookmarks of your favorite pages: [INTERNET] → [4 ▲▼] BOOKMARK → [3 ▲▼] ADD 98 CVP-509/505/503/501 Owner's Manual - Yamaha 503 | Owner's Manual - Page 99
Right (higher-key side) Left (lower-key side) Left (lower-key side) Right (higher-key side) Connections - Using Your Instrument with Other Devices - Connections - Using Your Instrument with Other Devices - CVP-509/505 CVP-503/501 Front (keyboard side) CVP-509 Only Front (keyboard side) CAUTION - Yamaha 503 | Owner's Manual - Page 100
amplify the instrument's sound by using the AUX OUT [L/L+R]/[R] jacks. When using the CVP-509/505/503, the microphone or guitar sound connected to the instrument's [MIC./LINE IN] jack is output at the ] setting affects the input signal from the [AUX IN] jacks. 100 CVP-509/505/503/501 Owner's Manual - Yamaha 503 | Owner's Manual - Page 101
or text files are output, regardless of the display that is called up on the instrument. LCD: The currently selected display is output. 10 NOTE (CVP-509) When NTSC is selected, the lower part of the screen might not be displayed. CVP-509/505/503/501 Owner's Manual 101 - Yamaha 503 | Owner's Manual - Page 102
guitar sounds through the built-in speakers. The following instructions show how to connect a microphone. Please note that when connecting a guitar indicate that an audio signal is being received. Make sure to adjust the INPUT ] jack. 102 CVP-509/505/503/501 Owner's Manual NOTE Set the [INPUT VOLUME - Yamaha 503 | Owner's Manual - Page 103
display. [FUNCTION] → [G] MIC SETTING/VOCAL HARMONY 2 Press the [6 ▲]/[7 ▲] buttons to turn the harmony vocals (Vocal Harmony) on. 3 2 Connections - Using Your Instrument with Other Devices - 10 CVP-509/505/503/501 Owner's Manual 103 - Yamaha 503 | Owner's Manual - Page 104
with Other Devices - 6 Play and hold down chords in the left-hand section of the keyboard or play back a Song which contains chord data, as you sing along with it. The : [FUNCTION] → [G] MIC SETTING/VOCAL HARMONY → [H] VOCAL HARMONY TYPE → [8 ▼] (EDIT) 104 CVP-509/505/503/501 Owner's Manual - Yamaha 503 | Owner's Manual - Page 105
Yamaha performance data played on the keyboard by the foot controller. Manual on the website, Chapter 10. Assigning specific functions to each foot pedal: [FUNCTION] → [D] CONTROLLER → TAB [E][F] PEDAL Connections - Using Your Instrument with Other Devices - 10 CVP-509/505/503/501 Owner's Manual - Yamaha 503 | Owner's Manual - Page 106
from the device, and do NOT turn the power off to either device. Doing so may corrupt the data on either or both devices. 106 CVP-509/505/503/501 Owner's Manual - Yamaha 503 | Owner's Manual - Page 107
to the Internet By using the [LAN] or [USB TO DEVICE] terminal, you can connect the instrument to the Internet. For instructions on connecting, refer to page 96 and Internet Connection Guide downloadable from the Yamaha website. CVP-509/505 CVP-503/501 10 CVP-509/505/503/501 Owner's Manual 107 - Yamaha 503 | Owner's Manual - Page 108
the instrument. CVP-509/505 CVP-503/501 IMPORTANT Guide. NOTE You can also use the MIDI IN/OUT terminals to connect to a computer. In this case, a MIDI interface (such as the Yamaha UX16) is needed. For more information, refer to the owner's manual - ing notes on the keyboard or playing back a song - Yamaha 503 | Owner's Manual - Page 109
to connect external MIDI devices (keyboard, sequencer, etc.). • MIDI IN Receives MIDI messages from another MIDI Yamaha website). Advanced Features Refer to the Reference Manual on the website, Chapter 10. MIDI settings: [FUNCTION] → [I] MIDI → [8 ▼] EDIT 10 CVP-509/505/503/501 Owner's Manual - Yamaha 503 | Owner's Manual - Page 110
, such as formatting (page 107) and confirmation of memory size. • OWNER Settings of Owner name (page 17) and Message language (page 17). Parameter setting backup/restore . For details of the Utility settings, refer to the Reference Manual on the website. 110 CVP-509/505/503/501 Owner's Manual - Yamaha 503 | Owner's Manual - Page 111
screws x 10 4 x 20 mm thin screws x 3 Protective pads x 2 Protective pads CAUTION Please do not touch the speaker net. Doing so may damage the speaker inside. CVP-509/505: Keyboard Stand Assembly CVP-509/505/503/501 Owner's Manual 111 - Yamaha 503 | Owner's Manual - Page 112
position. Use the front legs as support to raise A. CAUTION • Be careful not to pinch your fingers. • When you raise the unit, do not hold the key cover. A A B 4 Fix backside of A. F 4 Attach F. Use three thin screws. CVP-509/505: Keyboard Stand Assembly 112 CVP-509/505/503/501 Owner's Manual - Yamaha 503 | Owner's Manual - Page 113
following. • Are there any parts left over? → Review the assembly procedure and correct any errors. • Is the bottom of the main unit. CAUTION Do not hold the key cover or top portion. Improper handling can result in damage CVP-509/505: Keyboard Stand Assembly CVP-509/505/503/501 Owner's Manual 113 - Yamaha 503 | Owner's Manual - Page 114
the model of digital piano you purchased, the keyboard in any position other than the position shown in the illustration. Be sure to place your hands at least 10 cm from either end of A when positioning it. A At least 10 cm CVP-503: Keyboard Stand Assembly 114 CVP-509/505/503/501 Owner's Manual - Yamaha 503 | Owner's Manual - Page 115
Review the assembly procedure and correct any errors. • Is the Clavinova clear of doors and other movable fixtures? → Move the Clavinova to an appropriate location. • Does the Clavinova Do not hold the key cover or top portion. CVP-503: Keyboard Stand Assembly CVP-509/505/503/501 Owner's Manual 115 - Yamaha 503 | Owner's Manual - Page 116
4 Cord holders x 2 C D 3 1 L 3 Attach B. Depending on the model of digital piano you purchased, the surface color of one side of the rear panel may be different from the other attached in Step 2-3. C Tighten the screws. CVP-501: Keyboard Stand Assembly 116 CVP-509/505/503/501 Owner's Manual - Yamaha 503 | Owner's Manual - Page 117
instrument after assembly, always hold the bottom of the main unit. CAUTION Do not hold the key cover or top portion. Improper handling can result in damage to the instrument or personal injury. CVP-501: Keyboard Stand Assembly Hold here. Do not hold here. CVP-509/505/503/501 Owner's Manual 117 - Yamaha 503 | Owner's Manual - Page 118
3 Installing the Floppy Disk Drive (Optional) (CVP-509/505) The floppy disk drive can be installed to the bottom of the instrument by using adhesive tape 2 Fold the USB cable inside the case as shown. Installing the Floppy Disk Drive (Optional) (CVP-509/505) 118 CVP-509/505/503/501 Owner's Manual - Yamaha 503 | Owner's Manual - Page 119
and Floppy Disks (The floppy disk drive is optional. For instructions on installing the floppy disk drive, see page 127.) The Yamaha recommends that you keep two copies of important data on separate floppy disks. Handling the Floppy Disk Drive (FDD) and Floppy Disks CVP-509/505/503/501 Owner's Manual - Yamaha 503 | Owner's Manual - Page 120
or deleted. Manually rename the file, adding the appropriate extension, on a computer. Data files with names of more than 50 characters cannot be handled by the instrument. Rename the file, reducing the number of characters to 50 or less. 120 CVP-509/505/503/501 Owner's Manual Troubleshooting - Yamaha 503 | Owner's Manual - Page 121
/OFF] button on and play left-hand section on the keyboard to sound the accompaniment part of the Style. Make sure ). Any notes outside of the 88-key range cannot be indicated by the Guide lamps. The Guide lamps sometimes light an octave or two Troubleshooting CVP-509/505/503/501 Owner's Manual 121 - Yamaha 503 | Owner's Manual - Page 122
may not be compatible with the instrument. The compatible formats are: MP3 and WAV (CVP-509/505), WAV (CVP-503). The DRM protected files cannot be played back. The audio playback volume has been adjusted by using the [MASTER VOLUME] control. Troubleshooting 122 CVP-509/505/503/501 Owner's Manual - Yamaha 503 | Owner's Manual - Page 123
- 52 - 52 - 52 - 75 - 78 ● 76 - 76 - 17 - 90, 91 ● 88 ● 88 ● 92 ● 88 ● 93 - 64 - 58 - 21 - 20 - 23 - 22 - 21 - 22 - 22 - 83 - CVP-509/505/503/501 Owner's Manual 123 Panel Button Chart - Yamaha 503 | Owner's Manual - Page 124
]/[FF] [EXTRA TRACKS] [TRACK 2 (L)] [TRACK 1 (R)] [SCORE] [LYRICS/TEXT] (CVP-509/505/503) [LYRICS](CVP-501) [GUIDE] [REPEAT] ( [PIANO RESET] º REGISTRATION REGIST BANK [-]/[+] MEMORY [MEMORY] [1] - [8] ¡ VOICE CONTROL [PIANO] - [PERC. & DRUM KIT] [ORGAN FLUTES] ™ ONE TOUCH SETTING - Yamaha 503 | Owner's Manual - Page 125
Technology AWM Dynamic Stereo Sampling Pure CF Sampling Yes Number of Dynamic Levels 5 4 3 Stereo Sustain Samples Yes - Key-off Samples Yes - String Resonance Yes - Polyphony Number of Polyphony (Max.) 128 + 128 128 Specifications CVP-509/505/503/501 Owner's Manual 125 - Yamaha 503 | Owner's Manual - Page 126
Setting (OTS) 4 for each Style Number of Preset Songs 120 61 Number of Tracks 16 Data Capacity 300KB Recording Function Quick Recording, Multi Recording, Step Recording Playback SMF (Format 0 & 1), ESEQ, XF Recording SMF (Format 0) Specifications 126 CVP-509/505/503/501 Owner's Manual - Yamaha 503 | Owner's Manual - Page 127
CVP-509 CVP-505 CVP-503 8 Regist. Sequence, Freeze Follow Lights, Any Key, Karao-Key, Vocal CueTIME Yes CVP-501 Follow Lights, Any Key, Karao-Key • Owner's Manual • Data List • Accessory CD-ROM for Windows Installation Guide • "50 greats for the Piano" Music Book • My Yamaha Product User - Yamaha 503 | Owner's Manual - Page 128
58 GS 9 GUIDE 64 Guide lamp 13, 64 GUIDE MODE 65 Guitar 102 H Half pedal 32 HARMONY/ECHO 45 Headphone Hanger 16 Headphones 16 HOME 97 I iAFC 34 INFO (Voice 38, 41 INFO. (Registration Memory 81 INITIAL TOUCH 31 Initialize (Factory Reset 29 128 CVP-509/505/503/501 Owner's Manual Index - Yamaha 503 | Owner's Manual - Page 129
Rhythm 48 RIGHT 1-2 39 Right Pedal 32 ROTARY SP SPEED 46 S SA Voice 40 SA2 Voice 41 SAVE 68 Scale 42 SCALE TUNE 47 SCORE 62 SCREEN CONTENT 101 SCREEN OUT 101 SEARCH (Music Finder 76 Section 53 Session 50 SFF 9 SFF GE 50 Sheet 15 Index CVP-509/505/503/501 Owner's Manual 129 - Yamaha 503 | Owner's Manual - Page 130
Touch response 31 Touch sensitivity 31 TRACK 1 (R 64 TRACK 2 (L 64 TRANSPOSE 42 TRANSPOSE ASSIGN 47 Troubleshooting 120 TUNE 88 USB TO HOST 108 USB Wireless LAN Adaptor 96 USB-MIDI driver 108 USER 26 83 USB Storage Device 106 USB TO DEVICE 106 130 CVP-509/505/503/501 Owner's Manual - Yamaha 503 | Owner's Manual - Page 131
notices for fifty seven (57) of the songs pre-installed in this instrument (CVP-509/505/ 503): Alfie Theme from the Paramount Picture ALFIE Words by Hal David Music by Burt Bacharach . All Rights Reserved International Copyright Secured Used by Permission CVP-509/505/503/501 Owner's Manual 131 - Yamaha 503 | Owner's Manual - Page 132
© 1959 by Richard Rodgers and Oscar Hammerstein II Copyright Renewed WILLIAMSON MUSIC owner of publication and allied rights throughout the world International Copyright Secured All Rights Reserved Copyright Secured All Rights Reserved Used by Permission 132 CVP-509/505/503/501 Owner's Manual - Yamaha 503 | Owner's Manual - Page 133
the form of standard music notation, without the express written permission of the copyright owner. Somewhere, My Love Lara's Theme from DOCTOR ZHIVAGO Lyric by Paul Francis Webster Music Publishing Ltd. International Copyright Secured All Rights Reserved CVP-509/505/503/501 Owner's Manual 133 - Yamaha 503 | Owner's Manual - Page 134
134 CVP-509/505/503/501 Owner's Manual - Yamaha 503 | Owner's Manual - Page 135
CVP-509/505/503/501 Owner's Manual 135 - Yamaha 503 | Owner's Manual - Page 136
, and 2) this device must accept any interference received including interference that may cause undesired operation. See user manual instructions if interference to radio reception is suspected. * This applies only to products distributed by YAMAHA CORPORATION OF AMERICA. (FCC DoC) The serial - Yamaha 503 | Owner's Manual - Page 137
Music Europe Branch Benelux Clarissenhof 5-b, 4133 AB Vianen, The Netherlands Tel: 0347-358 040 FRANCE Yamaha Musique France BP 70-77312 Marne-la-Vallée Cedex 2, France Tel: 01-64-61-4000 ITALY Yamaha Musica Italia S.P.A. Viale Italia 88, 20020 Lainate (Milano), Italy Tel: 02-935-771 SPAIN/PORTUGAL - Yamaha 503 | Owner's Manual - Page 138
Yamaha Home Keyboards Home Page http://music.yamaha.com/homekeyboard/ Yamaha Manual Library http://www.yamaha.co.jp/manual/ U.R.G., Pro Audio & Digital Musical Instrument Division, Yamaha Corporation © 2009 Yamaha Corporation WR05330 911MWAP5.2-04D0 Printed in China
-
 1
1 -
 2
2 -
 3
3 -
 4
4 -
 5
5 -
 6
6 -
 7
7 -
8
-
9
-
10
-
11
-
12
-
13
-
14
-
15
-
16
-
17
-
18
-
19
-
20
-
21
-
22
-
23
-
24
-
25
-
26
-
27
-
28
-
29
-
30
-
31
-
32
-
33
-
34
-
35
-
36
-
37
-
38
-
39
-
40
-
41
-
42
-
43
-
44
-
45
-
46
-
47
-
48
-
49
-
50
-
51
-
52
-
53
-
54
-
55
-
56
-
57
-
58
-
59
-
60
-
61
-
62
-
63
-
64
-
65
-
66
-
67
-
68
-
69
-
70
-
71
-
72
-
73
-
74
-
75
-
76
-
77
-
78
-
79
-
80
-
81
-
82
-
83
-
84
-
85
-
86
-
87
-
88
-
89
-
90
-
91
-
92
-
93
-
94
-
95
-
96
-
97
-
98
-
99
-
100
-
101
-
102
-
103
-
104
-
105
-
106
-
107
-
108
-
109
-
110
-
111
-
112
-
113
-
114
-
115
-
116
-
117
-
118
-
119
-
120
-
121
-
122
-
123
-
124
-
125
-
126
-
127
-
128
-
129
-
130
-
131
-
132
-
133
-
134
-
135
-
136
-
137
-
138
 |
 |

CVP-509 / 505 / 503 / 501
Owner's Manual
Thank you for purchasing this Yamaha Clavinova!
We recommend that you read this manual carefully so that you can fully take advantage of the advanced
and convenient functions of the instrument.
We also recommend that you keep this manual in a safe and handy place for future reference.
Before using the instrument, be sure to read “PRECAUTIONS” on pages 6-7.
EN
IMPORTANT
—Check your power supply—
Make sure that your local AC mains voltage matches the voltage specified on the name plate on the
bottom panel. In some areas a voltage selector may be provided on the bottom panel of the main
keyboard unit near the power cord. Make sure that the voltage selector is set for the voltage in your area.
The voltage selector is set at 240V when the unit is initially shipped. To change the setting use a "minus"
screwdriver to rotate the selector dial so that the correct voltage appears next to the pointer on the panel.
For information on assembling the keyboard stand, refer to the instructions at the end of this manual.
Owner's Manual