Yamaha CLP-F01 Owner's Manual
Yamaha CLP-F01 Manual
 |
View all Yamaha CLP-F01 manuals
Add to My Manuals
Save this manual to your list of manuals |
Yamaha CLP-F01 manual content summary:
- Yamaha CLP-F01 | Owner's Manual - Page 1
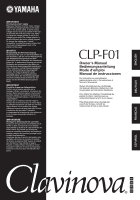
la tensión correcta al lado del indicador del panel. CLP-F01 Owner's Manual Bedienungsanleitung Mode d'emploi Manual de instrucciones For information on assembling the keyboard stand, refer to the instructions at the end of this manual. Weitere Informationen über die Montage des Keyboard-Ständers - Yamaha CLP-F01 | Owner's Manual - Page 2
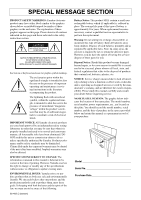
intended to alert the user to the presence of important operating and maintenance (servicing) instructions in the literature be affected. SPECIFICATIONS SUBJECT TO CHANGE: The information contained in this manual is believed to be correct at the time of printing. However, Yamaha reserves the right - Yamaha CLP-F01 | Owner's Manual - Page 3
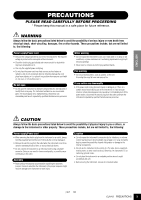
BEFORE PROCEEDING * Please keep this manual in a safe place for future contains no user-serviceable parts. If it should appear to be malfunctioning, discontinue use immediately and have it inspected by qualified Yamaha service personnel. all connected cables. (1)B-7 1/2 CLP-F01 PRECAUTIONS 3 - Yamaha CLP-F01 | Owner's Manual - Page 4
key cover does not pinch your fingers, and key cover, panel or keyboard. If this happens, turn off the power immediately and unplug the power cord from the AC outlet. Then have the instrument inspected by qualified Yamaha service media such as the Yamaha MDF3 MIDI data external media. Yamaha cannot be held - Yamaha CLP-F01 | Owner's Manual - Page 5
Appendix (page 67): This section introduces reference material. * The models CLP-F01 will be referred to as the CLP/Clavinova in this Owner's Manual. * The illustrations and LED displays shown in this owner's manual are for instructional purposes only and may appear somewhat different from those on - Yamaha CLP-F01 | Owner's Manual - Page 6
8 Features 9 Before Using the Clavinova 10 Key Cover 10 Music Rest 11 Turning the Troubleshooting 58 Keyboard Stand Assembly 59 Preset Voice List 62 Demo Song List 64 Index 65 Appendix Factory Setting List 68 MIDI Data Format 69 MIDI Implementation Chart 73 Specifications 74 6 CLP-F01 - Yamaha CLP-F01 | Owner's Manual - Page 7
AUX OUT jacks" on page 52 Outputting other instruments' sound from the Clavinova AUX IN jacks" on page 53 Connecting a computer Connecting a Personal Computer" on page 54 Assembling Assembling and disassembling the Clavinova Keyboard Stand Assembly" on pages page 59-61 CLP-F01 Application Index 7 - Yamaha CLP-F01 | Owner's Manual - Page 8
ENGLISH Accessories • "50 Greats for the Piano" (Music Book) • Owner's Manual This manual contains complete instructions for operating your Clavinova. • Bench A bench may be included or optional, depending on your locale. Tuning Unlike an acoustic piano, the Clavinova does not need to be tuned. It - Yamaha CLP-F01 | Owner's Manual - Page 9
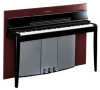
Features The Yamaha Clavinova CLP-F01 digital piano offers unmatched sonic realism and natural grand-piano type playability as well as Yamaha's original "AWM Dynamic Stereo Sampling" tone-generation technology for rich, musical voices, and a newly wooden keyboard that provides graded key weight and - Yamaha CLP-F01 | Owner's Manual - Page 10
the key cover with both hands when opening or closing it, and do not release it until it is fully opened or closed. Be careful to avoid catching fingers (yours or others, and especially those of children) in folding portion or between the cover and main unit. 10 CLP-F01 Before Using the Clavinova - Yamaha CLP-F01 | Owner's Manual - Page 11
ENGLISH Music Rest The music rest is attached to the inside of the key cover. To position the music rest for use: Pull the music rest on the cover down and toward yourself. To replace the music rest: Lift the music rest up and against the cover. CLP-F01 Before Using the Clavinova 11 - Yamaha CLP-F01 | Owner's Manual - Page 12
to turn off the power, press the [POWER] button again. • The display and the power indicator turn off. TIP Power indicator If you close the key cover without turning the power off, the power indicator remains lit, indicating that the power is still on. 12 CLP-F01 Before Using the Clavinova - Yamaha CLP-F01 | Owner's Manual - Page 13
level. MIN The level decreases. MAX MASTER VOLUME The level increases. CAUTION Do not use the Clavinova at a high volume level for a long period of time, or your hearing may be damaged. The speakers always produce sound. OFF The speakers produce no sound. CLP-F01 Before Using the Clavinova 13 - Yamaha CLP-F01 | Owner's Manual - Page 14
ENGLISH MEMO 14 CLP-F01 Before Using the Clavinova - Yamaha CLP-F01 | Owner's Manual - Page 15
for the Clavinova's various functions. Panel Controls and Terminals 16 Listening to the Demonstration Tunes 18 Listening to 50 Piano Preset Songs 19 Connecting a Personal Computer 54 Troubleshooting 58 Keyboard Stand Assembly 59 Preset Voice List 62 Demo Song List 64 Index 65 CLP-F01 15 - Yamaha CLP-F01 | Owner's Manual - Page 16
DEMO START/STOP TEMPO FUNCTION METRONOME TEMPO/FUNCTION TEMPO/OTHER VALUE - NO YES + PRESET USER 1 USER 2 USER 3 TRACK 1 TRACK START/STOP REC 2 SONG GRAND PIANO 1 GRAND PIANO 2 GRAND PIANO 3 E.PIANO 1 E.PIANO P24 N Damper (Right) Pedal P23 16 CLP-F01 Panel Controls and Terminals - Yamaha CLP-F01 | Owner's Manual - Page 17
as you proceed. • The display indicates different values, as shown below, depending on the operation. Tempo (Normal indication) A song number of "50 Greats for the Piano" Function number Parameter value CLP-F01 Panel Controls and Terminals 17 - Yamaha CLP-F01 | Owner's Manual - Page 18
the CLP-F01's voices. 25 4 3 MIN MAX MASTER VOLUME MELLOW BRIGHT BRILLIANCE DEMO START/STOP TEMPO FUNCTION METRONOME TEMPO/FUNCTION TEMPO/OTHER VALUE - NO YES + PRESET USER 1 USER 2 USER 3 TRACK 1 TRACK START/STOP REC 2 SONG GRAND PIANO 1 GRAND PIANO 2 GRAND PIANO 3 E.PIANO - Yamaha CLP-F01 | Owner's Manual - Page 19
be engaged while the unit is in Demo Song mode (page 18), while a song is playing back (page 37), or when the user song recorder (page 32) is in use. TERMINOLOGY Song: On the CLP-F01, performance data is called a "Song." This includes demonstration tunes and piano preset tunes. TIP You can play the - Yamaha CLP-F01 | Owner's Manual - Page 20
DEMO START/STOP TEMPO FUNCTION METRONOME TEMPO/FUNCTION TEMPO/OTHER VALUE - NO YES + PRESET USER 1 USER 2 USER 3 TRACK 1 TRACK START/STOP REC 2 SONG GRAND PIANO 1 GRAND PIANO 2 GRAND PIANO 3 E.PIANO 1 E.PIANO ". The normal setting is "5". 20 CLP-F01 Listening to 50 Piano Preset Songs - Yamaha CLP-F01 | Owner's Manual - Page 21
" function described on page 46. 3 Stop playback. When playback is complete, it automatically stops and the Clavinova locates the top of the song. If you wish to stop playback in the middle of a song, turned ON whenever a new song is selected. ENGLISH CLP-F01 Listening to 50 Piano Preset Songs 21 - Yamaha CLP-F01 | Owner's Manual - Page 22
(to help guide you into the phrase) starts at the A point of the song. However, when the A point is set at the beginning of the song, the automatic lead-in is not played. NOTE The A and B points are automatically canceled when a new song is selected. 22 CLP-F01 Listening to 50 Piano Preset Songs - Yamaha CLP-F01 | Owner's Manual - Page 23
DEMO START/STOP TEMPO FUNCTION METRONOME TEMPO/FUNCTION TEMPO/OTHER VALUE - NO YES + PRESET USER 1 USER 2 USER 3 TRACK 1 TRACK START/STOP REC 2 SONG GRAND PIANO 1 GRAND PIANO 2 GRAND PIANO 3 E.PIANO 1 E.PIANO you select the GRAND PIANO 1 or 3 voice on the CLP-F01, pressing the damper - Yamaha CLP-F01 | Owner's Manual - Page 24
DEMO START/STOP TEMPO FUNCTION METRONOME TEMPO/FUNCTION TEMPO/OTHER VALUE - NO YES + PRESET USER 1 USER 2 USER 3 TRACK 1 TRACK START/STOP REC 2 SONG GRAND PIANO 1 GRAND PIANO 2 GRAND PIANO 3 E.PIANO 1 E.PIANO various digital to the Clavinova. TIP The CLP-F01 Selecting & Playing Voices - Yamaha CLP-F01 | Owner's Manual - Page 25
Even if the REVERB effect is OFF, a "Soundboard Reverb" effect will be applied when the GRAND PIANO 1, 2, or 3 voice is selected. Adjusting Reverb Depth Adjust the reverb depth for the selected voice TIP Default depth settings are different for each voice. CLP-F01 Selecting & Playing Voices 25 - Yamaha CLP-F01 | Owner's Manual - Page 26
with relatively light key pressure. All DEMO START/STOP TEMPO FUNCTION METRONOME TEMPO/FUNCTION TEMPO/OTHER VALUE - NO YES + PRESET USER 1 USER 2 USER 3 TRACK 1 TRACK START/STOP REC 2 SONG GRAND PIANO 1 GRAND PIANO 2 GRAND PIANO 3 E.PIANO 1 E.PIANO CLP-F01 Selecting & Playing Voices - Yamaha CLP-F01 | Owner's Manual - Page 27
Clavinova will transpose it to the key of F. [-/NO] [+/YES] [TRANSPOSE] MIN MAX MASTER VOLUME MELLOW BRIGHT BRILLIANCE DEMO START/STOP TEMPO FUNCTION METRONOME TEMPO/FUNCTION TEMPO/OTHER VALUE - NO YES + PRESET USER 1 USER 2 USER 3 TRACK 1 TRACK START/STOP REC 2 SONG GRAND PIANO - Yamaha CLP-F01 | Owner's Manual - Page 28
as Voice 2). Voice numbering priority 123456 7 GRAND PIANO 1 GRAND PIANO 2 GRAND PIANO 3 E.PIANO 1 E.PIANO 2 HARPSICHORD VIBRAPHONE CHURCH JAZZ ORGAN ORGAN STRINGS CHOIR GUITAR/ CLAVI. WOOD BASS E.BASS VOICE 8 9 10 11 12 13 14 The CLP-F01 Function mode provides access to a number of - Yamaha CLP-F01 | Owner's Manual - Page 29
VOLUME MELLOW BRIGHT BRILLIANCE DEMO START/STOP TEMPO FUNCTION METRONOME TEMPO/FUNCTION TEMPO/OTHER VALUE - NO YES + PRESET USER 1 USER 2 USER 3 TRACK 1 TRACK START/STOP REC 2 SONG GRAND PIANO 1 GRAND PIANO 2 GRAND PIANO 3 E.PIANO 1 E.PIANO 2 HARPSICHORD VIBRAPHONE VARIATION - Yamaha CLP-F01 | Owner's Manual - Page 30
panel controls (i.e. pressing the [-/NO] or [+/YES] buttons while holding the [EFFECT] button - see page 25) will be applied to the right voice only. 30 CLP-F01 Selecting & Playing Voices - Yamaha CLP-F01 | Owner's Manual - Page 31
DEMO START/STOP TEMPO FUNCTION METRONOME TEMPO/FUNCTION TEMPO/OTHER VALUE - NO YES + PRESET USER 1 USER 2 USER 3 TRACK 1 TRACK START/STOP REC 2 SONG GRAND PIANO 1 GRAND PIANO 2 GRAND PIANO 3 E.PIANO 1 E.PIANO function in Function mode (page 47). CLP-F01 Selecting & Playing Voices 31 - Yamaha CLP-F01 | Owner's Manual - Page 32
is in Demo Song or Preset Song mode, Record mode cannot be engaged. NOTE To avoid erasing data from the track: If the track contains data, the track indicator lights up green when you press the [USER 1/2/ 3] button. Note that recording new data on this track will erase the existing data. 32 CLP-F01 - Yamaha CLP-F01 | Owner's Manual - Page 33
available for recording on the Clavinova. You can record up to a maximum of about 9,400 notes on the CLPF01 depending on pedal usage and other factors. TIP If a user song ([USER 1/2/3]) is not selected ( erase all previously-recorded data on the selected track. CLP-F01 Recording Your Performance 33 - Yamaha CLP-F01 | Owner's Manual - Page 34
recorded on the previous track), press the playback track button before pressing the [REC] button (step 2, above) so that its indicator is turned off. 34 CLP-F01 Recording Your Performance - Yamaha CLP-F01 | Owner's Manual - Page 35
ENGLISH The user song recorder records the following data: Data in addition to the notes and voices you play is recorded. (F4) • Split octave shift (F4) Entire Song • Tempo • Time signature (beat) • [REVERB] type (including OFF) • [EFFECT] type (including OFF) CLP-F01 Recording Your Performance 35 - Yamaha CLP-F01 | Owner's Manual - Page 36
wish to change the recorded voice from [E. PIANO 1] to [E. PIANO 2], press the [E. PIANO 2] button. Be careful not to press the SONG [START/STOP] button or a key on the keyboard, either of which will made to the data shared by two tracks are also canceled.) 36 CLP-F01 Recording Your Performance - Yamaha CLP-F01 | Owner's Manual - Page 37
DEMO START/STOP TEMPO FUNCTION METRONOME TEMPO/FUNCTION TEMPO/OTHER VALUE - NO YES + PRESET USER 1 USER 2 USER 3 TRACK 1 TRACK START/STOP REC 2 SONG GRAND PIANO 1 GRAND PIANO 2 GRAND PIANO 3 E.PIANO 1 E.PIANO , the Clavinova automatically stops CLP-F01 Playing Back Recorded Songs 37 - Yamaha CLP-F01 | Owner's Manual - Page 38
TRACK 2] or both) are lit in green. While the Clavinova is playing or stopped, pressing these track buttons turns off the adjust the volume of a part of a song from "50 Greats for the Piano" for which playback is turned off (pages 20, 47). During recorder playback, CLP-F01 Playing Back Recorded Songs - Yamaha CLP-F01 | Owner's Manual - Page 39
FUNCTION] You can set various parameters to make the best use of Clavinova functions, such as fine tuning the pitch, selecting a voice for the metronome, repeating playback, etc. The following parameters are available. The CLP-F01 has nine main functions. Some of these main functions consist of a set - Yamaha CLP-F01 | Owner's Manual - Page 40
you first turn on the power to the Clavinova) is recalled by pressing the [-/ NO] and [+/YES] buttons simultaneously. TIP After you select the function, the current setting will be displayed when the [-/NO] or [+/YES] button is pressed for the first time. 40 CLP-F01 Detailed Settings - [FUNCTION] - Yamaha CLP-F01 | Owner's Manual - Page 41
. 5 Do the following when you finish using the func- tion. To exit Function mode, press the [TEMPO/FUNCTION#] button so that its [TEMPO] indicator lights. CLP-F01 Detailed Settings - [FUNCTION] 41 - Yamaha CLP-F01 | Owner's Manual - Page 42
play the Clavinova along keys (two white keys at the left end) simultaneously and press the [-/NO] [+/YES] buttons simultaneously. (During the procedure described above, the display indi- cates a value in Hz < ... >. After the procedure, the display returns to the previous indication.) 42 CLP-F01 - Yamaha CLP-F01 | Owner's Manual - Page 43
You can experience these tunings with the Clavinova. Equal One octave is divided into twelve equal intervals. Currently the most popular piano tuning scale. PureMajor/PureMinor Based on (A ) followed by a high bar if sharp followed by a low bar if flat CLP-F01 Detailed Settings - [FUNCTION] 43 - Yamaha CLP-F01 | Owner's Manual - Page 44
Dual mode voice buttons. To exit Function mode, you still need to press the [TEMPO/ FUNCTION#] button so that the TEMPO indicator lights up. 44 CLP-F01 Detailed Settings - [FUNCTION] - Yamaha CLP-F01 | Owner's Manual - Page 45
the point on the keyboard that separates the right and left-hand sections (split point). The pressed key is included in the left-hand range. • Instead of pressing the [-/NO] [+/YES] buttons, you / FUNCTION#] button so that the TEMPO indicator lights up. CLP-F01 Detailed Settings - [FUNCTION] 45 - Yamaha CLP-F01 | Owner's Manual - Page 46
Volume Setting range: 0 - 20 Normal setting: 10 You can adjust the volume of the keyoff sound (the subtle sound produced when the keys are released) for voices [GRAND PIANO 1, 3], [HARPSICHORD] (including their variations) and variation of [GUITAR/CLAVI.]. 46 CLP-F01 Detailed Settings - [FUNCTION] - Yamaha CLP-F01 | Owner's Manual - Page 47
level and use the "canceled" part as a guide with which to play along. 1. Engage Function mode to specify the channel on which the Clavinova transmits MIDI data. Setting range: 1 Demo/preset song data and recorder playback data are not transmitted via MIDI. CLP-F01 Detailed Settings - [FUNCTION] 47 - Yamaha CLP-F01 | Owner's Manual - Page 48
, enabling the Clavinova to play 1 and 2 channel song data received from a music computer or sequencer. TIP Program change and other like channel messages received will not affect the CLP-F01's panel settings or the notes you play on the keyboard. NOTE No MIDI reception occurs when Demo/Preset Song - Yamaha CLP-F01 | Owner's Manual - Page 49
cannot be executed when Demo/Preset Song mode or the user song recorder is in operation, or when Function mode is engaged. TIP For more information on transmitting and receiving bulk data via MIDI, refer to the owner's manual for the connected MIDI device. CLP-F01 Detailed Settings - [FUNCTION] 49 - Yamaha CLP-F01 | Owner's Manual - Page 50
turn off the power to the Clavinova. If the backup function is turned key (right-most key on the keyboard) while turning the [POWER] button ON. This also erases all user song recorder data, and sets all backup on/off settings (F9) to "OFF". (The factory setting list is found on page 68.) 50 CLP-F01 - Yamaha CLP-F01 | Owner's Manual - Page 51
Digital Interface) is a standard format for data transmission/reception. It enables the transfer of performance data and commands between MIDI devices and personal computers. Using MIDI, you can control a connected MIDI device from the Clavinova books and other publications. CLP-F01 About MIDI 51 - Yamaha CLP-F01 | Owner's Manual - Page 52
(with standard phone plugs), you can use the [MASTER VOLUME] control to adjust the volume of the sound output to the external device. NOTE The Clavinova's [MASTER VOLUME] and [BRILLIANCE] control setting does not affect the signal output from the AUX OUT (LEVEL FIXED) jacks. 52 CLP-F01 Connections - Yamaha CLP-F01 | Owner's Manual - Page 53
from the AUX IN jacks, but the [REVERB] and [EFFECT] settings do not. NOTE If you connect the Clavinova to a monaural device, use only the AUX IN [L/L+R] jack or AUX OUT [L/L+R] jack. 3 TO HOST jack This connectors. (Refer to "About MIDI" on page 51 for more information.) CLP-F01 Connections 53 - Yamaha CLP-F01 | Owner's Manual - Page 54
le (in English) at the following Internet address. Yamaha Manual Library: http://www2.yamaha.co.jp/manual/english/ There are three methods by which to connect the Clavinova to a personal computer: 1. Connect the serial port since no data is transferred via the [TO HOST] jack. 54 CLP-F01 Connections - Yamaha CLP-F01 | Owner's Manual - Page 55
for Windows users (regarding the MIDI driver) To transfer data via the computer's serial port and the Clavinova's TO HOST jack, you need to install a specific MIDI driver (the Yamaha CBX-MIDI 1 8-pin 2 3 4 8 5 5 (CTS) 4 (RTS) 3 (RxD) 7 (GND) D-sub 25-pin 2 (TxD) CLP-F01 Connections 55 - Yamaha CLP-F01 | Owner's Manual - Page 56
operation manual and set Clavinova Mac MIDI THRU OUT IN PC-1 PC-2 HOST SELECT MIDI MIDI OUT MIDI IN MIDI OUT MIDI IN MIDI OUT MIDI interface MIDI IN MIDI interface Windows Clavinova HOST SELECT switch setting Set the Clavinova HOST SELECT switch to "MIDI." Macintosh 56 CLP-F01 - Yamaha CLP-F01 | Owner's Manual - Page 57
interface Clavinova MIN MAX MASTER VOLUME MELLOW BRIGHT BRILLIANCE DEMO START/STOP TEMPO FUNCTION METRONOME TEMPO/FUNCTION TEMPO/OTHER VALUE - NO YES + PRESET USER 1 USER 2 USER 3 TRACK 1 TRACK START/STOP REC 2 SONG GRAND PIANO 1 GRAND PIANO 2 GRAND PIANO 3 E.PIANO 1 E.PIANO - Yamaha CLP-F01 | Owner's Manual - Page 58
Troubleshooting Problem Possible Cause and Solution The Clavinova does not turn on. The Clavinova has not been plugged in properly. Securely insert the female plug into the socket on the Clavinova, and has occurred. In this case, contact your Yamaha dealer. ENGLISH 58 CLP-F01 Troubleshooting - Yamaha CLP-F01 | Owner's Manual - Page 59
Main unit 1 Insert the rear panel (center). Position the rear panel (center) so that the word "Clavinova" faces the front (keyboard side). Then insert the projections on the panel into the holes on top of the rear panel (center), allowing it to fall or be damaged. CLP-F01 Keyboard Stand Assembly 59 - Yamaha CLP-F01 | Owner's Manual - Page 60
and right). 1 2 1 2 Edges must be flush. 3 3 Do not allow a gap. 60 CLP-F01 Keyboard Stand Assembly Cord holders Voltage Selector Before connecting the AC power cord, check the setting of the voltage selector setting can cause serious damage to the Clavinova or result in improper operation. - Yamaha CLP-F01 | Owner's Manual - Page 61
all screws. When you move the assembled instrument, be sure to grasp the handles and the bottom of the keyboard. CAUTION Do not hold the key cover. Improper handling can result in damage to the instrument or personal injury. Key cover Hold here. Do not hold here. CLP-F01 Keyboard Stand Assembly 61 - Yamaha CLP-F01 | Owner's Manual - Page 62
sound when the keys are released. piano or electric piano in the DUAL mode. CHOIR A big, spacious choir voice. Perfect for creating rich harmonies in slow pieces. VARIATION A choir voice with a slow attack. Try combining this voice with a piano or electric piano in the DUAL mode. 62 CLP-F01 - Yamaha CLP-F01 | Owner's Manual - Page 63
heard in funk and soul music. Its tone is noted for the unique sound produced when the keys are released. WOOD BASS An upright bass played fingerstyle. Ideal for jazz and Latin music. VARIATION Contains a very subtle sample that is produced when the keys are released. CLP-F01 Preset Voice List 63 - Yamaha CLP-F01 | Owner's Manual - Page 64
VIBRAPHONE CHURCH ORGAN JAZZ ORGAN Piano Voice Demo Stereo sampling Monaural sampling Dynamic sampling; mezzo piano Dynamic sampling; mezzo forte Dynamic sampling; forte With sustain sampling Without sustain sampling With key-off sampling Without key-off sampling 64 CLP-F01 Demo Song List - Yamaha CLP-F01 | Owner's Manual - Page 65
18, 24 Tempo (50 Piano Preset Songs 19 Tempo (Recorded Songs 37 Volume (50 Piano Preset Songs 19 Volume (Demo 18 Volume (Metronome 47 ALL 53, 56 HST (LED display 54 K Key Cover 10 L LED display 16 Left Pedal 16, 24, 46 List Demo Song 64 Factory Setting 68 Functions 39 CLP-F01 Index 65 - Yamaha CLP-F01 | Owner's Manual - Page 66
16, 51 TOUCH 16, 26 Touch Sensitivity 26 TRACK 1/2 (50 Piano Preset Songs 20 TRACK 1/2 (Recording 33 Track Playback On and Off 38 Transporting 8 TRANSPOSE 16, 27 Troubleshooting 58 Tuning ➝ Fine Tuning of the Pitch 42 U USB 57 USER 1/2/3 32 V VARIATION 24 VOICE 16, 23 66 CLP-F01 Index - Yamaha CLP-F01 | Owner's Manual - Page 67
MIDI Implementation Chart / MIDI Implementierung stabelle / Feuille d'implantation MIDI / Gráfica de implementación MIDI 73 Specifications / Technische Daten / Caractéristiques techniques / Especificaciones 74 CLP-F01 67 - Yamaha CLP-F01 | Owner's Manual - Page 68
Local Control Program Change Send & Receive Control Change Send & Receive MIDI Transmit Transpose Backup GRAND PIANO 1 OFF OFF OFF WOOD BASS Preset for each voice Preset for each voice Preset for each F9.1 - F9.1 - F9.3 Backup Group F9.3 F9.1 F9.4 F9.1 F9.2 Always backed up 68 CLP-F01 Appendix - Yamaha CLP-F01 | Owner's Manual - Page 69
the CLP-F01. Key ON = 01H ~ 7FH, Key OFF = 00H) Data format: [8nH] -> [kk] -> [vv] (reception only) 8nH = Note OFF event (n = channel number) kk = Note number: 00H ~ 7FH = C-2 ~ G8 vv = Velocity * If received value exceeds the supported that are currently ON on the spec- ified channel. Any notes - Yamaha CLP-F01 | Owner's Manual - Page 70
VARIATION E.PIANO 1 VARIATION E.PIANO 2 turned off and an All Note Off occurs. 6. SYSTEM EXCLUSIVE MESSAGES (Yamaha MIDI Format) Panel Data Transmit Data format: [F0H] -> [43H] low byte (32) Absolute tempo high byte (33) Key-Off Sampling Depth • Panel data send requests cannot be CLP-F01 Appendix - Yamaha CLP-F01 | Owner's Manual - Page 71
before sending the CLP-F01 another message. = Exclusive status 43H = Yamaha ID 73H = Clavinova ID 01H = Product ID (CLP common) or 7FH= Extended Expression is received for Reserve On, they will be effective from the next Key On. Reserve Off is normal. 11. SYSTEM EXCLUSIVE MESSAGES (Others) - Yamaha CLP-F01 | Owner's Manual - Page 72
2 01H 11H STAGE 03H 10H Sound board 03H 12H EFFECT MSB LSB CHORUS 42H 10H PHASER 48H 10H TREMOLO 46H 10H DELAY 05H 10H 72 CLP-F01 Appendix - Yamaha CLP-F01 | Owner's Manual - Page 73
Model CLP-F01 MIDI Implementation Chart Date : 21,June 2004 Version : 1.0 Function... Transmitted Basic Channel Default 1 Changed 1 - 16 Mode Default 3 Messages ˛ Altered Note 9 - 120 Number : True voice Velocity Note ON Ø 9nH,v=1-127 Note OFF ˛ 9nH,v=0 After Touch Key's ˛ Ch - Yamaha CLP-F01 | Owner's Manual - Page 74
-3/16"] Weight 71kg (156lbs., 8oz) Accessories Owner's Manual, "50 greats for the Piano" (Music Book), Bench (included or optional depending on locale) * Specifications and descriptions in this owner's manual are for information purposes only. Yamaha Corp. reserves the right to change or modify - Yamaha CLP-F01 | Owner's Manual - Page 75
MEMO CLP-F01 Appendix 75 - Yamaha CLP-F01 | Owner's Manual - Page 76
MEMO 76 CLP-F01 Appendix - Yamaha CLP-F01 | Owner's Manual - Page 77
over and try again. If the problem persists, contact an electrician to have the owners manual, on the name plate, or specifically recommended by Yamaha. 5. service this product beyond that described in the user-maintenance instructions. All other servicing should be referred to qualified service - Yamaha CLP-F01 | Owner's Manual - Page 78
, if not installed and used according to the instructions found in the users manual, may cause interference harmful to the operation of can not locate the appropriate retailer, please contact Yamaha Corporation of America, Electronic Service Division, 6600 Orangethorpe Ave, Buena Park, CA90620 - Yamaha CLP-F01 | Owner's Manual - Page 79
AUSTRALIA Yamaha Music Australia Pty. Ltd. Level 1, 99 Queensbridge Street, Southbank, Victoria 3006, Australia Tel Yamaha Corporation, Asia-Pacific Music Marketing Group Nakazawa-cho 10-1, Hamamatsu, Japan 430-8650 Tel: +81-53-460-2312 [CL] 35 HEAD OFFICE Yamaha Corporation, Pro Audio & Digital - Yamaha CLP-F01 | Owner's Manual - Page 80
Clavinova Web site (English only) http://www.yamahaclavinova.com/ Yamaha Manual Library http://www2.yamaha.co.jp/manual/english/ U.R.G., Pro Audio & Digital Musical Instrument Division, Yamaha Corporation ©2004 Yamaha Corporation WC51170 409APZC?.?-01A0 Printed in Indonesia
-
 1
1 -
 2
2 -
 3
3 -
 4
4 -
 5
5 -
 6
6 -
 7
7 -
8
-
9
-
10
-
11
-
12
-
13
-
14
-
15
-
16
-
17
-
18
-
19
-
20
-
21
-
22
-
23
-
24
-
25
-
26
-
27
-
28
-
29
-
30
-
31
-
32
-
33
-
34
-
35
-
36
-
37
-
38
-
39
-
40
-
41
-
42
-
43
-
44
-
45
-
46
-
47
-
48
-
49
-
50
-
51
-
52
-
53
-
54
-
55
-
56
-
57
-
58
-
59
-
60
-
61
-
62
-
63
-
64
-
65
-
66
-
67
-
68
-
69
-
70
-
71
-
72
-
73
-
74
-
75
-
76
-
77
-
78
-
79
-
80
 |
 |
ES
FR
DE
EN
IMPORTANT
Check your power supply
Make sure that your local AC mains voltage
matches the voltage specified on the name
plate on the bottom panel. In some areas a
voltage selector may be provided on the rear
of the main unit near the power cord. Make
sure that the voltage selector is set for the
voltage in your area. The voltage selector is
set at 240V when the unit is initially shipped.
To change the setting use a "minus"
screwdriver to rotate the selector dial so that
the correct voltage appears next to the
pointer on the panel.
WICHTIG
Überprüfung der Stromversorgung
Vergewissern Sie sich vor dem Anschließen an
das Stromnetz, daß die örtliche Netzspannung
den Betriebsspannungswerten auf dem
Typenschild an der Unterseite des Instruments
entspricht. In bestimmten Regionen ist auf der
Rückseite des Instruments in der Nähe des
Netzkabels ein Spannungswähler angebracht.
Falls vorhanden, muß der Spannungswähler
auf die örtliche Netzspannung eingestellt
werden. Der Spannungswähler wurde
werkseitig auf 240 V voreingestellt. Zum
Verstellen drehen Sie den Spannungsregler
mit einem Schlitzschraubendreher, bis der
Zeiger auf den korrekten Spannungswert
weist.
IMPORTANT
Contrôler la source d'alimentation
Vérifiez que la tension spécifiée sur le
panneau inférieur correspond
à la tension du
secteur. Dans certaines régions, l’instrument
peut être équipé d’un sélecteur de tension à
l’arrière de l’unité principale, à côté du cordon
d'alimentation.
Vérifiez que ce sélecteur est bien réglé en
fonction de la tension secteur de votre région.
Le sélecteur de tension est réglé sur 240 V au
départ d'usine. Pour modifier ce réglage,
utilisez un tournevis à lame plate pour tourner
le sélecteur afin de mettre l'indication
correspondant à la tension de votre région vis
à vis du repère triangulaire situé sur le
panneau.
IMPORTANTE
Verifique la alimentación de corriente
Asegúrese de que tensión de alimentación de
CA de su área corresponde con la tensión
especificada en la placa de características del
panel inferior. Es posible que en algunas
zonas se suministre un selector de tensión en
la parte posterior de la unidad principal, junto
al cable de alimentación.
Asegúrese de que el selector de tensión esté
ajustado a la tensión de su área. El selector
de tensión se ajusta a 240V cuando la unidad
sale de fábrica. Para cambiar el ajuste,
emplee un destornillador de cabeza "recta"
para girar el selector de modo que aparezca
la tensión correcta al lado del indicador del
panel.
CLP-F01
For information on assembling the
keyboard stand, refer to the instructions at
the end of this manual.
Weitere Informationen über die Montage
des Keyboard-Ständers erhalten Sie in den
Anweisungen am Ende dieses Handbuchs.
Pour obtenir les détails sur l'assemblage du
pupitre du clavier, reportez-vous aux
instructions figurant à la fin de ce manuel.
Para información sobre el montaje del
soporte del teclado, consulte las
instrucciones al final de este manual.
Owner's Manual
Bedienungsanleitung
Mode d'emploi
Manual de instrucciones