Yamaha CVP-206M Owner's Manual
Yamaha CVP-206M Manual
 |
View all Yamaha CVP-206M manuals
Add to My Manuals
Save this manual to your list of manuals |
Yamaha CVP-206M manual content summary:
- Yamaha CVP-206M | Owner's Manual - Page 1
CVP-206/204 OOWWNNEERR''SS MMAANNUUAALL - Yamaha CVP-206M | Owner's Manual - Page 2
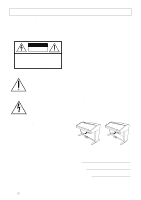
page and those indicated in the safety instruction section. CAUTION RISK OF ELECTRIC SHOCK DO NOT OPEN CAUTION: TO REDUCE THE RISK OF ELECTRIC SHOCK. DO NOT REMOVE COVER (OR BACK). NO USER-SERVICEABLE PARTS INSIDE. REFER SERVICING TO QUALIFIED SERVICE PERSONNEL. See bottom of Keyboard enclosure for - Yamaha CVP-206M | Owner's Manual - Page 3
way. The instrument contains no user-serviceable parts. If it should appear to be malfunctioning, discontinue use immediately and have it inspected by qualified Yamaha service personnel. Water warning • Do circulation, and possibly result in the instrument overheating. (1)B-7 1/2 CVP-206/204 3 - Yamaha CVP-206M | Owner's Manual - Page 4
Yamaha service or stand on USER drive or using the factory reset operation (page 146). Yamaha cannot be held responsible for damage caused by improper use or modifications to the instrument, or data that is lost or destroyed. Always turn the power off when the instrument is not in use. 4 CVP-206/204 - Yamaha CVP-206M | Owner's Manual - Page 5
. Data List : Voice List, MIDI Data Format, etc. * The models CVP-206/204 will be referred to as the CVP/Clavinova in this Owner's Manual. * The illustrations and LCD screens as shown in this owner's manual are for instructional purposes only, and may appear somewhat different from those on your - Yamaha CVP-206M | Owner's Manual - Page 6
the Piano" Disk (and Music Book) ■ Recording disk Use this blank disk to save your performance. ■ Owner's Manual This manual contains complete instructions for operating your Clavinova. ■ Data List This manual contains lists left of the drive) lights to indicate the drive can be used. 6 CVP-206/204 - Yamaha CVP-206M | Owner's Manual - Page 7
objects may cause damage to the disk drive or floppy disks. Data backup • For maximum data security Yamaha recommends that you keep two copies of important data on separate floppy disks. This gives you a backup partially or completely erase data on the disk, rendering it unreadable. CVP-206/204 7 - Yamaha CVP-206M | Owner's Manual - Page 8
the instructions as shown Clavinova Web Site (English only)........ http://www.yamahaclavinova.com/ Yamaha Manual Library (Electronic Musical Instruments) ......... http://www2.yamaha.co.jp/manual stand it up on its side. Do not subject the instrument to excessive vibration or shock. 8 CVP-206/204 - Yamaha CVP-206M | Owner's Manual - Page 9
Clavinova 14 Setting Up the Clavinova 16 Key cover 16 Music Rest 16 Sheet Music Braces (CVP-206 only 16 Turning the Power On and Off 17 Using headphones 17 Panel Controls and Terminals 18 Quick Guide 20 Playing the Demos the Demos 56 Voices 58 Selecting a Voice 58 One-touch Piano Play - Yamaha CVP-206M | Owner's Manual - Page 10
Specific Parts - Track1/Track2/Extra Tracks 81 Repeat Playback of a Specific Range 81 Using the Practice Functions - Guide 82 Practice Functions 82 Practicing Music with the Guide Functions Presets - Registration Sequence.......... 137 Maintaining Panel Settings - Freeze 137 10 CVP-206/204 - Yamaha CVP-206M | Owner's Manual - Page 11
Settings of the CVP-206/204 - System Reset 146 Using Your Clavinova with Other Devices CVP-206: Keyboard Stand Assembly 156 CVP-204: Keyboard Stand Assembly 158 Troubleshooting 160 Specifications 162 Index 164 Introduction Quick Guide Basic Operations - Organizing Your Data Playing the Demos - Yamaha CVP-206M | Owner's Manual - Page 12
demo songs...page 56 Listening to the demo of the selected voices page 58 Listening to songs with the special voices of the Clavinova page 123 Playing Calling up the piano page 73 Practicing Muting the right- or left-hand part ...page 83 Practicing with an accurate and steady tempo CVP-206/204 - Yamaha CVP-206M | Owner's Manual - Page 13
AUX IN jacks)" on page 148 Connecting a computer Connecting a computer (USB terminal, MIDI terminal)" on page 149 Assembling Assembling and disassembling the Clavinova CVP-206: Keyboard Stand Assembly" on page 156 "CVP-204: Keyboard Stand Assembly" on page 158 Quick solution Basic functions of the - Yamaha CVP-206M | Owner's Manual - Page 14
your performances (page 96, 112) With the powerful and easy-to-use song recording features, you can record your own keyboard performances, and create your own complete, fully orchestrated compositions - which you can then save to the USER drive or a floppy disk for future recall. 14 CVP-206/204 - Yamaha CVP-206M | Owner's Manual - Page 15
software. Connections and setup are exceptionally easy, and you can play back your computer recorded parts with different instrument sounds - all from a single Clavinova! IN OUT THRU CVP-206 L/L+R R L/L+R R (LEVEL FIXED) L R MIDI USB AUX PEDAL VIDEO OUT AUX IN AUX OUT CVP-206/204 - Yamaha CVP-206M | Owner's Manual - Page 16
Clavinova go. 2 Raise the two metal supports until they are flat against the rear to remove. This could cause electric shock, short circuit, fire down before releasing it. Sheet Music Braces (CVP-206 only) These braces are for holding the Flip down the two metal supports at the left and the right - Yamaha CVP-206M | Owner's Manual - Page 17
pin configuration of the AC wall outlets in your area. CVP-206 CVP-204 Setting the volume Use the [MASTER VOLUME] dial to adjust the volume to an appropriate level. MASTER VOLUME FADE IN / OUT MIN MAX CAUTION Do not use the Clavinova at a high volume level for a long period of time, or your - Yamaha CVP-206M | Owner's Manual - Page 18
GUIDE DEMO 37 32 HELP A 33 FUNCTION B DIGITAL C STUDIO 34 SOUND CREATOR D 35 DIGITAL RECORDING 36 MIXING CONSOLE E BALANCE 38 PART CHANNEL ON / OFF 39 PART 40 DIRECT ACCESS 45 1 2 3 4 65 66 67 68 INPUT VOLUME MIC. LINE IN MIC. LINE PHONES MIN MAX CVP-206 68 CVP-204 - Yamaha CVP-206M | Owner's Manual - Page 19
, and creates SFF styles using the Style Creator feature. USB USB is an abbreviation for Universal Serial Bus. It is a serial interface for connecting a computer with peripheral devices. It allows "hot swapping" (connecting peripheral devices while the power to the computer is on). CVP-206/204 19 - Yamaha CVP-206M | Owner's Manual - Page 20
rsthand how to effectively use the Clavinova in your own music. Demo button 1 Press the [DEMO] button to call up the menu for selecting a Demo song. MENU DEMO HELP FUNCTION For this example, VOICE is selected. Voice Demos showcase the voices of the CVP-206/204. 2 Press the [BACK]/[NEXT] button to - Yamaha CVP-206M | Owner's Manual - Page 21
available software. Song related buttons BALANCE and CHANNEL buttons Floppy disk drive Make sure that the Language setting for the instrument (page 146) is the same as that of the file name of the song that you are playing back. The following songs are compatible for playback on the CVP-206/204 - Yamaha CVP-206M | Owner's Manual - Page 22
DISK Press the [BACK]/[NEXT] button to select the drive. 3 PRESET only Press the [A] button to select the preset songs (Song Book) folder. A B C D E 22 Quick Guide - Yamaha CVP-206M | Owner's Manual - Page 23
of the song, press the [REW] or [FF] button. • With song data software (Standard MIDI format 0) that includes lyrics, you can view the lyr- ics on the corresponding to the channel you wish to turn on or off. CHANNEL ON / OFF PART 1 2 3 4 5 6 7 8 1 2 3 4 5 6 7 8 If the STYLE - Yamaha CVP-206M | Owner's Manual - Page 24
the levels of the individual parts - the song, the style, your singing (CVP-206 only), and your playing. 1) Press the [BALANCE] button. 2) Press the [1 - 8▲▼] button corresponding to the part of which the volume you wish starting and stopping the song, as well as the accompaniment. 24 Quick Guide - Yamaha CVP-206M | Owner's Manual - Page 25
Playing Voices Playing Voices Reference The Clavinova features a stunning variety of over 800 dynamic and LEFT parts are turned off. 2 Select a voice group. VOICE PIANO & HARPSI. E.PIANO ORGAN & ACCORDION PERCUSSION BRASS WOODWIND STRINGS CHOIR & PAD GUITAR SYNTH. BASS XG USER For this - Yamaha CVP-206M | Owner's Manual - Page 26
Demo of the voice plays automatically. Playing Two Voices Simultaneously 1 Press the VOICE PART ON/OFF [LAYER] button to turn the LAYER part on. 2 Press the [G] button to select the LAYER part. VOICE PART other voice-related features: • Instant setup of the Clavinova for piano play - with the - Yamaha CVP-206M | Owner's Manual - Page 27
1 Press the VOICE PART ON/OFF [LEFT] button to turn the LEFT part on. LAYER 2 Press the [H] button to select the LEFT part. LEFT 3 Select hand. VOICE PIANO & HARPSI. E.PIANO ORGAN & ACCORDION PERCUSSION GUITAR BASS BRASS WOODWIND STRINGS CHOIR & PAD SYNTH. XG USER 4 Select Guide 27 - Yamaha CVP-206M | Owner's Manual - Page 28
The Clavinova has a huge variety of musical "styles" that you can call upon to back up your own performance. They give you anything from a simple, yet effective piano backing or . A B C D E For this example, Dance is selected. A B C D E For this example, EuroTrance is selected. 28 Quick Guide - Yamaha CVP-206M | Owner's Manual - Page 29
of the keyboard is called the "split point." Refer to page 133 for instructions on setting the split point. 4 Turn SYNC.START on. SYNC.START 5 button (page 55). And there's much more. Check out these other style-related features: • Easily create your own original styles (page 112). • Set up your - Yamaha CVP-206M | Owner's Manual - Page 30
Echo effects This powerful performance feature lets you automatically add notes in the right-hand range of the keyboard. The CVP-206/204 has various Harmony/Echo types (page 138). The Harmony/Echo section. This is used for playing the main part of the song. It plays an accompaniment pattern Guide - Yamaha CVP-206M | Owner's Manual - Page 31
is playing. • If you press the [BREAK] button while the ending is playing, the break will immediately start playing, continuing with the main section. Quick Guide 31 - Yamaha CVP-206M | Owner's Manual - Page 32
Touch Setting One Touch Setting is a powerful and convenient feature that automatically calls up the most appropriate panel settings (voice button. This is a wonderful way to instantly reconfigure all the settings on the Clavinova to match the style you want to play. 1 Select a style (page 28 Guide - Yamaha CVP-206M | Owner's Manual - Page 33
convenient Music Finder can help you out. Simply select the song name from the Music Finder and the CVP-206/204 automatically makes all appropriate panel settings to let you play in that music style! Using the Music Finder 72) and set the OTS LINK TIMING (page 133) to "REAL TIME." Quick Guide 33 - Yamaha CVP-206M | Owner's Manual - Page 34
the song title. For this example, ANY is selected. 5 Enter the song title, then press the [8▲] (OK) button. Refer to page 49 for instructions on entering characters. 3 Press the [F], [G] and [H] to clear the previous conditions, if necessary. For this example, ALL is selected. 6 Press the - Yamaha CVP-206M | Owner's Manual - Page 35
-206 and the CVP-204. In the instructions above, all Music Finder data is handled together. Besides this, when you save or load style files, the Music Finder data that uses the relevant style file(s) is stored or added automatically. When you copy or move a style file on a floppy disk to the USER drive - Yamaha CVP-206M | Owner's Manual - Page 36
Clavinova In this section, try using the Clavinova's song playback features to cancel or mute the right-hand melody while you play the part part. TRACK 1 (R) To cancel the left hand part the part. REC Guide Clavinova playing the melody part as well, check the channel setting for the melody part - Yamaha CVP-206M | Owner's Manual - Page 37
Playing and Practicing with the Songs Recording The Clavinova lets you record, too - quickly and easily. Try out the Quick Recording feature now and capture your keyboard performance. 1 - 3 Select a voice for recording. Use , you'll need to save them to the User drive or floppy disk. Quick Guide 37 - Yamaha CVP-206M | Owner's Manual - Page 38
notes. 1 - 6 Use the same operations as in "Playing Along with the Clavinova" on page 36. For this example, you practice the right hand part of "Playing Along with the Clavinova." 7 Press the [GUIDE] button. GUIDE Before Practicing Before starting a practice session, play back the entire song - Yamaha CVP-206M | Owner's Manual - Page 39
Part (page 58) The voice selected for the Main part is displayed. A Layer Part (page 60) The voice selected for the Layer part is displayed. B Left Part (page 61) The voice selected for the Left part is displayed here. E Volume balance of the parts (page 65) You can change the volume balance by - Yamaha CVP-206M | Owner's Manual - Page 40
basic operations of the display controls in handling and organizing the data of the CVP-206/204 in files and folders. Files can be opened, saved, named, moved MAIN display (page 146). G • SYSTEM SETUP H • MIDI SETUP • USER EFFECT I • MUSIC FINDER J If the MAIN screen is not displayed, press - Yamaha CVP-206M | Owner's Manual - Page 41
). USER drive Files kept here are those containing your own original data, created or edited using the various functions of the CVP206/204. They are stored internally to the CVP-206/204. FLOPPY DISK drive You can also store your original data to floppy disk. Commercially available disk software can - Yamaha CVP-206M | Owner's Manual - Page 42
drive Voice Style Song Registration Memory Bank System Setup MIDI Setup User Effect Music Finder This is the Voice Open/Save display called up by pressing the [PIANO] button in the VOICE section. BACK NEXT Select a Memory even if style or song files are saved to the floppy disk. 42 CVP-206/204 - Yamaha CVP-206M | Owner's Manual - Page 43
Features Sound Creator Style Creator Panel settings Edit Record/ Assemble Register Register Creating a New Record Song Creator MIDI Record Edit User settings USER drive User Effect User Effect CAUTION • The data in the USER necessary data in memory to the User drive or the Floppy Disk drive - Yamaha CVP-206M | Owner's Manual - Page 44
press the VOICE [PIANO & HARPSI] button The CVP-206/204 already contains a variety of voices in the PRESET section. You can store your own original voices created with the Sound Creator function to the USER or FLOPPY DISK section. BACK NEXT 1 Select "PRESET," "USER problems. - Yamaha CVP-206M | Owner's Manual - Page 45
If there are Preset files/folders you wish to rename, copy them beforehand (page 47) and use them as User files/folders. 1 Press the [1▼] (NAME) button (page 40). The NAME display appears. A file/folder (page 49). Press the [8▲] (OK) button. To cancel, press the [8▼] (CANCEL) button. CVP-206/204 45 - Yamaha CVP-206M | Owner's Manual - Page 46
. If you want to do this, cut and paste the file or folder from the first floppy disk to the USER page, then change disks and paste it to the FLOPPY DISK page. All files/folders in a floppy disk can be the specific files which can be handled in the current Open/ Save display will be pasted. 46 CVP-206/204 - Yamaha CVP-206M | Owner's Manual - Page 47
/folder again. Press the [6▼] (ALL) button to select all the files/folders in the displayed page (PRESET/USER/ FLOPPY DISK). When the [6▼] (ALL) button is pressed, the [6▼] button changes to "ALL OFF," letting selected items at once. CANCEL ... Exits from the prompt without deleting. CVP-206/204 47 - Yamaha CVP-206M | Owner's Manual - Page 48
name for the new file (page 49). The internal memory capacity of the Clavinova is about 1.5MB. Memory capacity for 2DD and 2HD floppy disks is about 720KB commercially available DOC software and Yamaha Disklavier software, and their edited files on the CVP-206/204, can be stored in the USER page, but - Yamaha CVP-206M | Owner's Manual - Page 49
Basic Operations - Organizing Your Data Entering Characters The instructions that follow show you how to enter characters in naming your files and folders. The method call up the mark list by pressing the [6▼] button after selecting a character (before actual entry of a character). CVP-206/204 49 - Yamaha CVP-206M | Owner's Manual - Page 50
dial adjusts the volume of the part in reverse display (highlight). To adjust the volume of another part, first select the part by pressing the [▲▼] button corresponding to the part, then rotate DATA ENTRY the the selected item by pressing the [ENTER] button on the panel. 50 CVP-206/204 - Yamaha CVP-206M | Owner's Manual - Page 51
REW FF REPEAT GUIDE MIN STYLE ACMP MAX DEMO HELP A FUNCTION B DIGITAL STUDIO SOUND CREATOR DIGITAL RECORDING MIXING CONSOLE C D E BALANCE PART CHANNEL ON / OFF PART BACK NEXT VOICE PART PIANO REGISTRATION MEMORY FREEZE 1 2 3 4 GUITAR SYNTH. 3 5 6 BASS XG USER CVP-206/204 51 - Yamaha CVP-206M | Owner's Manual - Page 52
E TRANSPOSE [E] [] MENU [DEMO] [HELP] [FUNCTION] DIGITAL STUDIO [SOUND CREATOR] [DIGITAL RECORDING] [MIXING CONSOLE] [BALANCE] [CHANNEL ON/OFF] [DIRECT ACCESS] [NEXT] [BACK] [ENTER] [EXIT] VOICE PART [LAYER] [LEFT] VOICE 125 138 124 133 138 74 136 137 89 137 134 52 CVP-206/204 - Yamaha CVP-206M | Owner's Manual - Page 53
explanations and descriptions of all the main functions and features of the CVP-206/204. HELP POWER ON OFF METRONOME START STOP SONG DEMO HELP A FUNCTION B DIGITAL STUDIO SOUND CREATOR DIGITAL RECORDING MIXING CONSOLE C D E BALANCE PART CHANNEL ON / OFF PART BACK NEXT VOICE PART - Yamaha CVP-206M | Owner's Manual - Page 54
STOP REW FF REPEAT GUIDE MIN STYLE ACMP DEMO HELP A FUNCTION B DIGITAL STUDIO SOUND CREATOR DIGITAL RECORDING MIXING CONSOLE C D E BALANCE PART CHANNEL ON / OFF PART BACK NEXT VOICE PART PIANO REGISTRATION MEMORY FREEZE 1 2 3 4 GUITAR SYNTH. 3 5 6 BASS XG USER CVP-206/204 - Yamaha CVP-206M | Owner's Manual - Page 55
useful feature lets (unless the tempo has been changed manually). Indicates the current tempo for the style (unless the tempo has been changed manually). Hitting the [TAP TEMPO] button produces you tapped. While a song is set to Sync. Start stand-by (page 64, 78), tapping the [TAP TEMPO] - Yamaha CVP-206M | Owner's Manual - Page 56
showcasing the stunning sound and features of the CVP-206/204. MENU POWER ON OFF MASTER VOLUME MIN STYLE ACMP MAX AUTO FILLIN OTS LINK METRONOME START STOP SONG EXTRA TRACKS (STYLE) TRACK 2 (L) TRACK 1 (R) REC TOP START / STOP REW FF DEMO HELP REPEAT GUIDE FADE IN / OUT BREAK INTRO - Yamaha CVP-206M | Owner's Manual - Page 57
appears in the display and the Demo starts playing. This example shows the Voices in the FUNCTION demo. BACK NEXT VOICE PART F ON / OFF G LAYER / STOP] button again. Rewind and fast-forward can also be used with the Demo songs (page 80). Select the desired word or item by using the [DATA ENTRY - Yamaha CVP-206M | Owner's Manual - Page 58
Voices The CVP-206/204 gives you an enormous selection of authentic voices, including various keyboard instruments, strings and brass - and many, many more. VOICE PIANO & HARPSI. E.PIANO ORGAN & ACCORDION PERCUSSION BRASS WOODWIND STRINGS CHOIR & PAD GUITAR SYNTH. BASS XG USER POWER ON - Yamaha CVP-206M | Owner's Manual - Page 59
/key Assignment List) for a listing of the sounds in each drum/SFX kit. One-touch Piano Play This convenient, easy-to-use feature completely and automatically reconfigures the entire CVP-206/204 for optimum piano performance. No matter what settings you've made from the panel, you can instantly call - Yamaha CVP-206M | Owner's Manual - Page 60
START / STOP D MENU DEMO HELP A FUNCTION B DIGITAL STUDIO SOUND CREATOR DIGITAL RECORDING MIXING CONSOLE C D E BALANCE PART CHANNEL ON / OFF PART BACK NEXT VOICE PART F ON / OFF G , and the second becomes the LAYER. 60 CVP-206/204 END Press this to return to the EXIT MAIN display. - Yamaha CVP-206M | Owner's Manual - Page 61
DEMO HELP A FUNCTION B DIGITAL STUDIO SOUND CREATOR DIGITAL RECORDING MIXING CONSOLE C D E BALANCE PART CHANNEL ON / OFF PART BACK NEXT VOICE PART PIANO REGISTRATION MEMORY FREEZE 1 2 3 4 GUITAR SYNTH. 3 5 6 BASS XG USER CVP-206/204 features a variety of dynamic built-in digital - Yamaha CVP-206M | Owner's Manual - Page 62
at a time) or polyphonically for each part (MAIN/LAYER/LEFT). This is set the Pedals The CVP-206/204 features three pedals. Left sostenuto pedal. ■ Left Pedal When the Piano voice is selected, pressing this pedal ■ Foot Controller/Footswitch An optional Yamaha foot controller (FC7) or footswitch - Yamaha CVP-206M | Owner's Manual - Page 63
CVP-206/204 features REW FF REPEAT GUIDE MIN STYLE ACMP DEMO HELP A FUNCTION B DIGITAL STUDIO SOUND CREATOR DIGITAL RECORDING MIXING CONSOLE C D E BALANCE PART CHANNEL ON / OFF PART BACK NEXT VOICE PART PIANO REGISTRATION MEMORY FREEZE 1 2 3 4 GUITAR SYNTH. 3 5 6 BASS XG USER - Yamaha CVP-206M | Owner's Manual - Page 64
piano-only accompaniment - effectively recreating the left-hand performance of an accomplished pianist. Just by playing the proper chords with your left hand, you can automatically add complicated arpeggios and bass/chord patterns - such as difficult-to-play stride piano parts. 64 CVP-206/204 - Yamaha CVP-206M | Owner's Manual - Page 65
CHANNEL ON / OFF PART Call up the Channel ON/ OFF display. BALANCE display STYLE part (Auto Accompaniment section) SONG part Adjust the output level of the Part. MIC part Parts played from the keyboard channels are assigned as shown below. Song 1 - 16 Accompaniment Style 9 - 16 CVP-206/204 65 - Yamaha CVP-206M | Owner's Manual - Page 66
When this advanced auto accompaniment mode is engaged, the CVP-206/204 will automatically create appropriate accompaniment while you play just many songs, some arrangements may not be suitable for use with this feature. This mode is similarto FULL KEYBOARD, with the exception that less than - Yamaha CVP-206M | Owner's Manual - Page 67
will sometimes not change when related chords are played in sequence (e.g. some minor chords followed by the minor seventh). • You can also have the CVP-206/204 "teach" you how to play Fingered chords. From the CHORD FINGERING display (page 134), specify the chord you want to learn, and the notes - Yamaha CVP-206M | Owner's Manual - Page 68
Styles Arranging the Style Pattern (SECTIONS: MAIN A/B/C/D, INTRO, ENDING, BREAK) The CVP-206/204 features various types of Auto Accompaniment Sections that allow you to vary the arrangement of the Style. (eighth note) of the measure, the fill-in will begin from the next measure. 68 CVP-206/204 - Yamaha CVP-206M | Owner's Manual - Page 69
set to on when the fingering mode is set to Full Keyboard/AI Keyboard or the auto accompaniment on the panel is set to off. CVP-206/204 69 - Yamaha CVP-206M | Owner's Manual - Page 70
pressing the selected MAIN button again. You can temporarily disable Auto Fill In during a performance by pressing the next Main section's button twice quickly. 70 CVP-206/204 - Yamaha CVP-206M | Owner's Manual - Page 71
FF REPEAT GUIDE MIN STYLE ACMP DEMO HELP A FUNCTION B DIGITAL C STUDIO SOUND CREATOR D DIGITAL RECORDING E MIXING CONSOLE BALANCE PART CHANNEL ON / OFF PART BACK NEXT VOICE PART PIANO REGISTRATION MEMORY FREEZE 1 2 3 4 GUITAR SYNTH. 3 5 6 BASS XG USER CVP-206/204 71 - Yamaha CVP-206M | Owner's Manual - Page 72
panel settings (page 40, 48). Unless you store the panel settings here, the registered settings will be deleted when you select a different accompaniment style. 72 CVP-206/204 - Yamaha CVP-206M | Owner's Manual - Page 73
feature FF REPEAT GUIDE MIN STYLE ACMP DEMO HELP A FUNCTION B DIGITAL STUDIO SOUND CREATOR DIGITAL RECORDING MIXING CONSOLE C D E BALANCE PART CHANNEL ON / OFF PART BACK NEXT VOICE PART PIANO REGISTRATION MEMORY FREEZE 1 2 3 4 GUITAR SYNTH. 3 5 6 BASS XG USER CVP-206/204 73 - Yamaha CVP-206M | Owner's Manual - Page 74
preset genres, and any genres you've entered yourself (page 73). ■ [8▼] CANCEL Press this to cancel the operation and return to the previous display. 74 CVP-206/204 - Yamaha CVP-206M | Owner's Manual - Page 75
. NO Press this to close the display without clearing the record. CANCEL........... Press this to close the message box and return to the previous display. CVP-206/204 75 - Yamaha CVP-206M | Owner's Manual - Page 76
no saved, the data will be lost when another Music Finder file is called up or the factory-programmed settings are restored (page 146). 76 CVP-206/204 - Yamaha CVP-206M | Owner's Manual - Page 77
the Clavinova, see page 154. Disks having this logo mark feature song data compatible with Yamaha's DOC (Disk Orchestra Collection) format. Disks having this logo mark feature song data compatible with Yamaha's original MIDI file format. • Songs you recorded (page 96) and stored to the CVP-206/204 - Yamaha CVP-206M | Owner's Manual - Page 78
it again at the end of the song to fade out. 3 The song starts. REC TOP START / STOP REW FF REPEAT GUIDE NEW SONG SYNC.START Adjust the tempo by using the TEMPO [ ][ ] buttons (page 54) or the [TAP TEMPO] button as that of the file name of the song that you are playing back. 78 CVP-206/204 - Yamaha CVP-206M | Owner's Manual - Page 79
replaced with accompaniment style channels - allowing you to use the auto accompaniment styles and features in place of the accompaniment parts of the song. Make the settings below and play your own chord substitutions in styles are automatically started when starting song playback. CVP-206/204 79 - Yamaha CVP-206M | Owner's Manual - Page 80
in the "Playing the Internal Songs" instructions (page 78), except that you should Some song data for the Clavinova has been recorded with Muting Specific Channels BALANCE CHANNEL ON / OFF PART Press this button to call up the BALANCE display CVP-206/204. Song 1 - 16 Accompaniment Style 9 - 16 80 - Yamaha CVP-206M | Owner's Manual - Page 81
button to turn on/off the right-hand part. Use this button to turn on/off the left-hand part. You can change the channel assignments for Track GUIDE NEW SONG SYNC.START END START / STOP To stop the song, press the button again. Repeat Playback of a Specific Range This feature CVP-206/204 81 - Yamaha CVP-206M | Owner's Manual - Page 82
Guide These fun features make it easy to learn new music. The key guide lamps indicate the notes you should play, when you should play them, and how long you should hold them down. Also, when you sing and play along with a song using a connected microphone (CVP-206 only), the Clavinova guide parts - Yamaha CVP-206M | Owner's Manual - Page 83
- and left-hand parts recorded to the song data have not been properly separated, the practice functions may not work as expected. 5 REC TOP START / STOP REW FF REPEAT NEW SONG SYNC.START Stop the song. GUIDE END GUIDE To turn the practice function, press the button again. CVP-206/204 83 - Yamaha CVP-206M | Owner's Manual - Page 84
feature, you can have the notation automatically shown on the display as the song plays. This can be used with your own recordings as well as the internal Demo 84 CVP-206/204 The displayed notation is generated by the Clavinova based the other items to be displayed (parts, lyrics, chords, etc.). n - Yamaha CVP-206M | Owner's Manual - Page 85
are displayed in piano format (two connected staves). ■ [1▲▼] LEFT CH/[2▲▼] RIGHT CH This determines the Left channel (channel for the left-hand part) and Right channel (channel for the right-hand part). This setting than the Note resolution will not be displayed in the notation. CVP-206/204 85 - Yamaha CVP-206M | Owner's Manual - Page 86
the panel. You can select the display pages (one before and after) by the using the [BACK]/ [NEXT] buttons or the pedal (page 134). 86 CVP-206/204 - Yamaha CVP-206M | Owner's Manual - Page 87
input is available only on the CVP-206. 1 Select the desired song 2 GUIDE The contents of the display can also be shown on a connected TV (CVP-206 only ; page 139, 148). 5 The lyrics are in reverse display along with song playback. END REC TOP START / STOP REW FF REPEAT GUIDE - Yamaha CVP-206M | Owner's Manual - Page 88
REPEAT GUIDE DEMO HELP A REGISTRATION MEMORY FADE IN / OUT NEW SONG TEMPO SYNC.START TRANSPOSE FUNCTION B DIGITAL PART F ON / OFF G LAYER ENTER VOICE PIANO & HARPSI. E.PIANO ORGAN & ACCORDION PERCUSSION BRASS WOODWIND STRINGS CHOIR & PAD GUITAR SYNTH. BASS XG USER CVP-206/204 - Yamaha CVP-206M | Owner's Manual - Page 89
01 All settings registered to buttons [1][8] are referred to as a "bank." The banks can be saved to "USER" or "FLOPPY DISK" as Registration bank files. Keep in mind that the size of the Registration bank files to the REGISTRATION BANK display and pressing the [8▼] (UP) button. CVP-206/204 89 - Yamaha CVP-206M | Owner's Manual - Page 90
BACK][NEXT] buttons or the pedal (page 137). Selecting the Freeze Settings 1 MENU 2 DEMO HELP FUNCTION Call up the "FREEZE" page from the REGIST.SEQUENCE/ FREEZE/VOICE SET are green) to recall the desired settings. REGISTRATION MEMORY FREEZE 1 2 3 4 5 6 7 8 MEMORY 90 CVP-206/204 - Yamaha CVP-206M | Owner's Manual - Page 91
Editing Voices - Sound Creator The CVP-206/204 has a Sound Creator feature that allows you to create your own voices by editing some parameters of the existing voices. Once you've created a voice, you can save it as a USER voice for future recall. POWER ON OFF METRONOME START STOP SONG EXTRA - Yamaha CVP-206M | Owner's Manual - Page 92
the Natural piano voice is selected affect only the Main part's voice. Common parameter CVP-206/204 are two different tone generation sources, Natural and XG. The Natural tone generation source and its voices feature groups. One is the original set of Clavinova voices (Cool!, Sweet!, Live!), and - Yamaha CVP-206M | Owner's Manual - Page 93
PIANO (Piano Voice has been selected) The explanations here apply to step #3 on page 91. Determines the tuning curve, especially for piano voices. Select "FLAT" if you feel the tuning curve of the piano pianos than piano part part's voice is used, the M/LYR parameter is available; when the Left part - Yamaha CVP-206M | Owner's Manual - Page 94
- such as the quick attack and decay of percussion sounds, or the long release of a sustained piano tone. • ATTACK ...... Determines how quickly the sound reaches its maximum Level level after the key is increase the delay of the Vibrato onset. Level DELAY SPEED DEPTH Time 94 CVP-206/204 - Yamaha CVP-206M | Owner's Manual - Page 95
This parameter enables you to select whether the sound is sustained while you press the keys on the keyboard ("PIANO LIKE"), or the sound is sustained only while you press and hold down the sustain pedal, like playing as for HARMONY/ECHO display of FUNCTION. For details, see page 139. CVP-206/204 95 - Yamaha CVP-206M | Owner's Manual - Page 96
PIANO REGISTRATION MEMORY FREEZE 1 2 3 4 GUITAR SYNTH. 3 5 6 BASS XG USER 4 7 8 MEMORY SONG EXTRA TRACKS (STYLE) TRACK 2 (L) TRACK 1 (R) DIRECT ACCESS 1 2 3 4 5 6 7 8 EXIT DIGITAL RECORDING REC TOP START / STOP REW FF REPEAT GUIDE 106) The CVP-206/204 also lets you - Yamaha CVP-206M | Owner's Manual - Page 97
recording and playing back a piano song you're practicing, to store it to internal memory (USER drive) or floppy disk (page , the corresponding Layer and Left parts are automatically recorded to different channels also use the metronome click as a guide while recording. The sound of the CVP-206/204 97 - Yamaha CVP-206M | Owner's Manual - Page 98
Parts parts parts Bass part uses piano or guitar voices. Pad .......... This part features part is used for various embellishments and riffs that enhance the song, such as brass section accents and chord arpeggios. CAUTION If you wish to save the recording, make sure to store it to internal memory (USER - Yamaha CVP-206M | Owner's Manual - Page 99
monitor them while you record a new part. Continue in this way until you have a finished song. You can edit the recorded song data from the SONG CREATOR (1 - 16) displays (page 109). Press the [6▼] button from the Open/Save display for Song to store the recorded data (page 40, 48). CVP-206/204 99 - Yamaha CVP-206M | Owner's Manual - Page 100
. 2 Press the [DIGITAL RECORDING] button. DIGITAL STUDIO SOUND CREATOR DIGITAL RECORDING MIXING CONSOLE PART 4 Using the [BACK CVP-206/204 Any voice, effect and other settings you make in the Mixing Console are automatically cancelled when you call up the CHD (Chord) page. The voices in the USER - Yamaha CVP-206M | Owner's Manual - Page 101
playing 127 111 95 79 63 47 31 15 strength ■ Gate Time The following settings are available: Normal 80% Tenuto 99% Staccato 40% Staccatissimo 20% Manual The gate time (note length) can be specified as a percentage by using the [DATA ENTRY] dial - Yamaha CVP-206M | Owner's Manual - Page 102
Recording Melodies - Step Record (Note) In this section, we'll show you how to use Step Recording by guiding you through this actual music example, shown at right. The operations here apply to step 6 on page 101. data can be edited from the SONG CREATOR (1 - 16) display (page 109). 102 CVP-206/204 - Yamaha CVP-206M | Owner's Manual - Page 103
Recording Chord Changes for the Auto Accompaniment - Step Record (Chord) The Chord Step recording feature makes it possible to record auto accompaniment chord changes one at a time with precise timing :3:000 002:4:000 Select this note value and play the chords indicated at right. CVP-206/204 103 - Yamaha CVP-206M | Owner's Manual - Page 104
is input, the End mark is set two measures after the final section. The End mark can be freely set to any position desired. 104 CVP-206/204 - Yamaha CVP-206M | Owner's Manual - Page 105
the current function assignment of the sostenuto pedal is cancelled. About Punch In/Out This feature is useful primarily for re-recording or replacing a specific section of an already recorded 1 2 3 4 5 6 7 8 Previously recorded data Newly recorded data Deleted data CVP-206/204 105 - Yamaha CVP-206M | Owner's Manual - Page 106
recorded a song using Quick Recording, Multi Recording, or Step Recording, you can use the editing features to change the song data. Editing Channel-related Parameters - Channel Calling up the operations here apply , both the straight and triplet notes will be quantized correctly. 106 CVP-206/204 - Yamaha CVP-206M | Owner's Manual - Page 107
into which the mix or copy results will be placed. If "COPY" is selected here, the data from Source 1 is copied to the Destination channel. CVP-206/204 107 - Yamaha CVP-206M | Owner's Manual - Page 108
which playback features and functions Guide Setting Stores the settings of the practice functions. When the settings are stored, selecting a song automatically turns on the Guide functions. Mic. Setting Stores the microphone settings in the mixing console (CVP-206 only). 108 CVP-206/204 - Yamaha CVP-206M | Owner's Manual - Page 109
the pitch bend value. Determines the after touch value. The sound of the voices recorded with Step recording may sound slightly different from the original. CVP-206/204 109 - Yamaha CVP-206M | Owner's Manual - Page 110
song. This does not let you change the actual contents of the data; however, it lets you delete, cut, copy, and paste the data. 110 CVP-206/204 - Yamaha CVP-206M | Owner's Manual - Page 111
up/down to the top or the bottom. When "CONTROL CHANGE FILTER" is selected, these select the item, scrolling up/down eight items at a time. CVP-206/204 111 - Yamaha CVP-206M | Owner's Manual - Page 112
DEMO HELP A FUNCTION B DIGITAL STUDIO SOUND CREATOR DIGITAL RECORDING MIXING CONSOLE C D E BALANCE PART CHANNEL ON / OFF PART BACK NEXT VOICE PART PIANO REGISTRATION MEMORY FREEZE 1 2 3 4 GUITAR SYNTH. 3 5 6 BASS XG USER 117) With the editing features, you can custom CVP-206/204 - Yamaha CVP-206M | Owner's Manual - Page 113
File Format (SFF) combines all of Yamaha's auto accompaniment know-how into a the [C] button. 2 DIGITAL STUDIO SOUND CREATOR DIGITAL RECORDING MIXING CONSOLE PART 4 Record and edit the USER or FLOPPY DISK page. END Press the [EXIT] button to close the STYLE CREATOR display. CVP-206/204 113 - Yamaha CVP-206M | Owner's Manual - Page 114
Creating Accompaniment Styles - Style Creator Realtime Recording - Basic You can use the Realtime Recording features to create your own accompaniment style - either from scratch or based on the preset PHR 2), all voices with the exception of the Drum Kit/SFX Kit can be selected. 114 CVP-206/204 - Yamaha CVP-206M | Owner's Manual - Page 115
, Control Change, etc.) and the Control display (System Exclusive, etc.). Make sure to set the record channel from another display (e.g., BASIC display; page 114) beforehand. CVP-206/204 115 - Yamaha CVP-206M | Owner's Manual - Page 116
channel. If the selected channel is set to ON in the REC CHANNEL display (page 114), OFF does not appear and is not available. 116 CVP-206/204 - Yamaha CVP-206M | Owner's Manual - Page 117
Edit the Created Accompaniment Style Change the Rhythmic Feel - Groove and Dynamics These versatile features give you a wide variety of tools for changing the rhythmic feel of your created produce minimum effect, "B" types produce medium effect, and "C" types produce maximum effect. CVP-206/204 117 - Yamaha CVP-206M | Owner's Manual - Page 118
how strongly you play the keyboard. The more strongly you play the keyboard, the higher the velocity value and, hence, the louder the sound. 118 CVP-206/204 - Yamaha CVP-206M | Owner's Manual - Page 119
Event This function lets you remove specific events from the selected channel. Use the [4▲▼] - [6▲▼] (EVENT) buttons to select the desired event type to be removed. CVP-206/204 119 - Yamaha CVP-206M | Owner's Manual - Page 120
, E3 and G3 in the key of C become C3, F3 and A3 when they are transposed to F. Use this setting for channels that contain chord parts. 120 CVP-206/204 - Yamaha CVP-206M | Owner's Manual - Page 121
chord transposition. Use for the Chord 1 and Chord 2 channels, especially when they contain piano or guitar-like chordal parts. Bass Suitable for bass line transposition. This table is basically similar to the Melody next chord. However, the octave of the new note remains the same. CVP-206/204 121 - Yamaha CVP-206M | Owner's Manual - Page 122
settings related to the volume and voice of each part/channel. Here you can also enable the Auto Revoice feature - which automatically plays XG-compatible songs (page 155) with the rich and dynamic voices that are exclusive to the CVP-206/204. This gives you much more authentic and realistic - Yamaha CVP-206M | Owner's Manual - Page 123
DIGITAL STUDIO SOUND CREATOR DIGITAL RECORDING MIXING CONSOLE BALANCE PART CHANNEL ON / OFF PART Each press of this button switches among the various parts /Song part is selected, User voices CVP-206/204. PIANO and BASIC can be called up simultaneously. PIANO REVOICE Replaces only the piano - Yamaha CVP-206M | Owner's Manual - Page 124
the Filter, see page 94. DIGITAL STUDIO SOUND CREATOR DIGITAL RECORDING MIXING CONSOLE BALANCE PART CHANNEL ON / OFF PART Each press of this button switches among the various parts/ channels. n When a over two octaves up or down. TUNING Determines the pitch of the instrument. 124 CVP-206/204 - Yamaha CVP-206M | Owner's Manual - Page 125
effect (page 125, 126). DIGITAL STUDIO SOUND CREATOR DIGITAL RECORDING MIXING CONSOLE BALANCE PART CHANNEL ON / OFF PART Each press of this button switches among the various parts/channels. Switches among the that are available may differ depending on the selected block. CVP-206/204 125 - Yamaha CVP-206M | Owner's Manual - Page 126
if for naming the User you adjust the effect param- Effect ( parts are being played simultaneously. - In addition to reverb and chorus effects, this 3 section features a variety of special effects, including distortion. - Changes the brightness and clarity of the sound. - 126 CVP-206/204 - Yamaha CVP-206M | Owner's Manual - Page 127
Voices - Mixing Console Effect Structure The CVP-206/204 features the following digital effect systems, which can be applied independently -206/204. For Regular Voices (REVERB1, CHORUS1, DSP1) For Natural Voices (REVERB2, CHORUS2, DSP2) When DSP is set as an Insertion effect (here, PART is set - Yamaha CVP-206M | Owner's Manual - Page 128
RESET ENDING / rit. SYNC.STOP SYNC.START START / STOP D MENU DEMO HELP A FUNCTION B DIGITAL C STUDIO SOUND CREATOR D MENU DIGITAL RECORDING E MIXING CONSOLE BALANCE PART CHANNEL ON / OFF PART BACK NEXT VOICE PART F ON / OFF G LAYER H LEFT I J LCD CONTRAST ENTER DATA ENTRY - Yamaha CVP-206M | Owner's Manual - Page 129
Clavinova Display on a TV - Video Out (CVP-206 only) (page 139) These settings determine the display characteristics when outputting the CVP-206's 142) This determines how the parts of the CVP-206/204 respond to data from connected MIDI devices - i.e., which parts are assigned to which MIDI Receive - Yamaha CVP-206M | Owner's Manual - Page 130
affect the Drum Kit or SFX Kit voices. Determines the overall pitch of the CVP-206/ 204, from 414.8 - 466.8 Hz. Press the 4 or 5 [▲▼] buttons the REGISTRATION MEMORY display (page 88). Selects which parts should be affected by the scale setting. Select the part to be set by pressing 6 or 7 - Yamaha CVP-206M | Owner's Manual - Page 131
each octave is divided equally into twelve parts, with each half-step evenly spaced and Pythagorean scales. The main feature of this scale is that .2 -3.9 -11.7 Arabic1 0.0 0 -50.0 0.0 0.0 0.0 0.0 0.0 0.0 -50.0 0.0 0.0 Arabic2 0.0 0 0.0 0.0 -50.0 0.0 0.0 0.0 0.0 0.0 0.0 -50.0 CVP-206/204 131 - Yamaha CVP-206M | Owner's Manual - Page 132
Quick Start is set to "ON," the CVP-206/204 reads all initial non-note data of the song 1 - 16 Accompaniment Style 9 - 16 n The guide lamps light in response to song channel assigned to Tracks parameters to the appropriate right- and left-hand parts. n Phrase Mark This data specifies a certain - Yamaha CVP-206M | Owner's Manual - Page 133
Accompaniment-related Parameters - Style Setting and Split Point These select the part to which the split point setting is applied: accompaniment, left-hand strength (in the Auto Accompaniment section of the keyboard). The CVP-206/204 lets you automatically enable Sync Stop (page 69) simply by - Yamaha CVP-206M | Owner's Manual - Page 134
if another method is actually selected. Chord Tutor The Chord Tutor feature is essentially an electronic "chord book" that shows you appropriate Functions" on page 135. If necessary, you can turn the corresponding part ON/ OFF or set the control depth (see the next page). 134 CVP-206/204 - Yamaha CVP-206M | Owner's Manual - Page 135
of notes played. It only applies to certain voices - PIANO, for example. GLIDE When the pedal is pressed the LEFT" automatically appear in the display. SONG, STYLE, MIC (CVP-206 These specify the part(s) that will be affected by the pedal. only), LEFT, Yamaha FC7 Foot Controller. CVP-206/204 135 - Yamaha CVP-206M | Owner's Manual - Page 136
/Panel Keyboard Touch The Touch feature lets you control the volume Determines whether touch is on or not for the corresponding parts. The TOUCH setting affects all voices globally. Keep in singing in D, and you are accustomed to playing the keyboard part in C. To match up the keys, keep the Master - Yamaha CVP-206M | Owner's Manual - Page 137
END Execute the settings by pressing the [EXIT] button. Registration Sequence data is included as part of the Registration Memory bank file. To save your newly programmed Registration Sequence, store the , even when changing Registration Memory presets. For details, see page 90. CVP-206/204 137 - Yamaha CVP-206M | Owner's Manual - Page 138
called up. From this page, you can set the on/off status for each part. For example, each of the preset voices has its own LEFT PEDAL setting; when Echo, Tremolo, or Trill is selected in Type above. 138 CVP-206/204 Determines the lowest velocity value at which the harmony note will sound. This - Yamaha CVP-206M | Owner's Manual - Page 139
to separate parts (voices). parts (voices). For example, if the Main and Layer parts part. Layer Harmony is applied only to the Layer part. When the Layer part is turned off, Harmony is not applied. Showing the Clavinova Display on a TV - Video Out (CVP-206 not show the CVP-206's display contents as - Yamaha CVP-206M | Owner's Manual - Page 140
page 128. 1 Select the desired template. 3 Call up the User display and press this button to save the newly edited MIDI settings IN terminal receives MIDI clock and Clavinova synchronizes with a external MIDI device. part on or off. When Local Control is set to "ON," the keyboard of the CVP-206/204 - Yamaha CVP-206M | Owner's Manual - Page 141
the external device must be connected to the CVP-206/204 MIDI IN terminal, and must be transmitting an Data - Transmit This determines which parts will send MIDI data and over 135. After Touch (AT)* With this function, the Clavinova senses how much pressure you apply to the keys while playing - Yamaha CVP-206M | Owner's Manual - Page 142
part is controlled by the MIDI data received on the corresponding channel. KEYBOARD MIDI note data received by the Clavinova The MIDI IN/OUT terminals and Port 1 of the USB terminal correspond to channels 1 - 16. Port 2 of the USB terminal corresponds to channels 17 - 32. When several CVP-206/204 - Yamaha CVP-206M | Owner's Manual - Page 143
, Cuatro) Determines the time signature of the metronome sound. When you start the song or accompaniment style, the values matching to them are automatically set. CVP-206/204 143 - Yamaha CVP-206M | Owner's Manual - Page 144
tap sound. Making Settings for the Display, Speaker System, and Voice Number Indication - CONFIG 2 Determines the brightness of the backlit display. 144 CVP-206/204 HEADPHONE SW (SWITCH) Speaker sounds normally, but is cut off when headphones are inserted to the PHONES jack. ON Speaker sound is - Yamaha CVP-206M | Owner's Manual - Page 145
to "ON," the Clavinova automatically calls up the data before editing. For instructions, see "Copying from Disk software is purposely copy-protected and cannot be copied. Formatting a Disk When using an unformatted disk for the first time, make sure to properly format it on the CVP-206/204 - Yamaha CVP-206M | Owner's Manual - Page 146
enter an Owner name (page 17; for instructions on naming see page 49). This name is problems to those above. Restoring the Factory-programmed Settings of the CVP-206/204 - System Reset This operation lets you restore the CVP-206/204 les and folders stored in the User page. Executes the Factory Reset - Yamaha CVP-206M | Owner's Manual - Page 147
Before connecting the Clavinova to other electronic components, turn off the power to all the components. Before turning the power on or off to all components, set all volume levels to minimum (0). Otherwise, electrical shock or damage to the components may occur. CVP-206 CVP-204 INPUT VOLUME - Yamaha CVP-206M | Owner's Manual - Page 148
139. The default setting is "PAL." • Use an audio-video cable with good high-frequency characteristics and RCA-type pin jacks to connect the Clavinova to a television or video monitor. RCA pin plug L L+R R AUX PEDAL VIDEO OUT AUX IN CVP-206 RCA pin plug VIDEO IN Television 148 CVP-206/204 - Yamaha CVP-206M | Owner's Manual - Page 149
specific models). The document is available as a PDF file (in English) at the following Internet address: Clavinova Web site (English only): http://www.yamahaclavinova.com/ Yamaha Manual Library http://www2.yamaha.co.jp/manual/english/ • Never use MIDI cables longer than 15 meters. CVP-206/204 149 - Yamaha CVP-206M | Owner's Manual - Page 150
the USB logo. Clavinova USB cable NEC MultiSync PC-9821 AS NEC About the USB driver You must install the specified USB driver (YAMAHA USB MIDI Driver) to your computer before you can transfer data between the computer and the CVP-206/ 204. You can download a copy of the YAMAHA USB MIDI Driver - Yamaha CVP-206M | Owner's Manual - Page 151
recording as audio data, and this is recorded to CD. When you play back that CD on your audio system, you can hear the actual piano performance. The piano itself is not necessary, since the recording contains the actual sounds of the piano, and your speakers reproduce them. CVP-206/204 151 - Yamaha CVP-206M | Owner's Manual - Page 152
(strong) Panel operations on the CVP-206/204, such as playing the keyboard and selecting voices, are processed and stored as MIDI data. The auto accompaniment styles and songs also consist of MIDI data. MIDI is an acronym that stands for Musical Instrument Digital Interface, which allows electronic - Yamaha CVP-206M | Owner's Manual - Page 153
Record performance data (1-16 channels) using the CVP-206/204 Auto Accompaniment features on a external sequencer (such as a personal computer). After recording, edit the data with the sequencer, then play it again on the CVP-206/204 (playback). Clavinova MIDI receive MIDI IN MIDI OUT MIDI OUT - Yamaha CVP-206M | Owner's Manual - Page 154
into problems CVP-206/204 is automatically saved as SMF Format 0 regardless of the original format. ■ ESEQ This sequence format is compatible with many of Yamaha's MIDI devices, including the Clavinova series instruments.This is a common format used with various Yamaha software. ■ XF The Yamaha - Yamaha CVP-206M | Owner's Manual - Page 155
on the CVP-206/204 using voices in the [XG] category is XG-compatible. ■ DOC This voice allocation format is compatible with many of Yamaha's MIDI devices, including the Clavinova series instruments. This is also a common format used with various Yamaha software. Using Your Clavinova with Other - Yamaha CVP-206M | Owner's Manual - Page 156
CVP-206: Keyboard Stand Assembly CAUTION ■ Be careful not to confuse parts, and be sure to install all parts in the correct direction. Please assemble in accordance with the sequence given below. ■ Assembly should . * Use the front hole on the front brackets to attach the screws. 156 CVP-206/204 - Yamaha CVP-206M | Owner's Manual - Page 157
connect the power cord. CVP-206: Keyboard Stand Assembly Voltage Selector Before parts left over? → Review the assembly procedure and correct any errors. • Is the Clavinova clear of doors and other movable fixtures? → Move the Clavinova to an appropriate location. • Does the Clavinova CVP-206/204 157 - Yamaha CVP-206M | Owner's Manual - Page 158
CVP-204: Keyboard Stand Assembly CAUTION ■ Be careful not to confuse parts, and be sure to install all parts in the correct direction. Please assemble in accordance with the sequence given below. ■ Assembly should be either end of the main unit when positioning it. At least 10 cm 158 CVP-206/204 - Yamaha CVP-206M | Owner's Manual - Page 159
Clavinova or result in improper operation. CVP-204: Keyboard Stand Assembly 8 Set the adjuster. Rotate the adjuster until it comes in firm contact with the floor surface. ■ After completing the assembly, please check the following. • Are there any parts left over? → Review Key cover CVP-206/204 159 - Yamaha CVP-206M | Owner's Manual - Page 160
Troubleshooting Problem • The Clavinova does not turn on; there is no power. • A click or pop is heard when the power is turned on or off. • Noise is heard from the Clavinova the [MASTER VOLUME] dial. • The volume of the individual parts may be set too low. Raise the volume of MAIN, LAYER CVP-206/204 - Yamaha CVP-206M | Owner's Manual - Page 161
Troubleshooting Problem USB cable from the Clavinova's USB selected User voice. When a User voice is registered to the User drive or parts are set to "ON," and both parts are set to play the same voice. Set the Layer part to "OFF" (page 60) or change the voice for each part (page 58). CVP-206/204 - Yamaha CVP-206M | Owner's Manual - Page 162
Styles Piano Combo Styles Fingering Style Creator OTS (One Touch Setting) OTS link Music Finder Edit Format Preset Songs Guide Guide Lamp Lyrics Score Recording Record Channels Floppy Disk (2HD, 2DD) Flash Memory (internal) Flash Availability Tempo Range Tap Tempo Metronome Sound 162 CVP-206/204 - Yamaha CVP-206M | Owner's Manual - Page 163
CVP-206 CVP-204 8 Function, Voice, Style 6 languages (English, Japanese, German, French, Spanish, Italian) Keyboard/Song/Master Flat/Stretch (Natural Piano Specifications and descriptions in this owner's manual are for information purposes only. Yamaha Corp. reserves the right to change or - Yamaha CVP-206M | Owner's Manual - Page 164
Specific Channels ... 80 Adjusting values 50 AI 66 AI FINGERED 66 AI FULL KEYBOARD 66 Any Key 82 Append 75 Applying Voice Effects 61 Appropriate Panel Setting for the Selected Style 71 Arabic 131 Arranging the Style Pattern 68 Assembling an Accompaniment Style 116 Assembling the CVP-204 - Yamaha CVP-206M | Owner's Manual - Page 165
Time 101 GENRE 74, 76 GENRE NAME 76 GM System Level 1 19, 155 Groove 117 Groove parameters 117 [GUIDE] button 14, 18, 82 H Handling the Floppy Disk Drive (FDD) and Floppy Disk.........6 Harmonic Content 94 for the Display, Speaker System, and Voice Number Indication 144 CVP-206/204 165 - Yamaha CVP-206M | Owner's Manual - Page 166
107 [MIXING CONSOLE] button 18, 122 [MONO] button 19, 62 Moving Files/Folders 46 MULTI FINGER 66 Multi Recording 98 [MUSIC FINDER] button 15, 19, 33, 73 Music Finder Record Edit 75 Music Finder Search 74 Music Rest 16 Muting Specific Parts Receiving MIDI Data 142 Record 73 166 CVP-206/204 - Yamaha CVP-206M | Owner's Manual - Page 167
Playback of a Specific Range 81 [REPEAT] button 18, 81 Replace 75 Resonance 94 Restoring the Factory-programmed Settings of the CVP-206/204 146 [REVERB] Setting the volume 17 SFX 59 Sheet Music Braces (CVP-206 only 16 Showing the Clavinova Display on a TV 139, 148 Simultaneously Playing a - Yamaha CVP-206M | Owner's Manual - Page 168
Index U UP 48 USB 19 [USB] terminal 15, 19, 149 USER drive 41, 42, 43 USER EFFECT 126, 146 Using Your Clavinova with Other Devices 147 15, 19, 58 Voice Characteristics 59 Voice Effects 61 VOICE PART ON / OFF [LAYER] button 18, 60 VOICE PART ON / OFF [LEFT] button 18, 60 Voice Set 138 - Yamaha CVP-206M | Owner's Manual - Page 169
the owners manual, on the name plate, or specifically recommended by Yamaha. 5. 12. Electrical/electronic products should be serviced by a qualified service person service this product beyond that described in the user-maintenance instructions. All other servicing should be referred to qualified service - Yamaha CVP-206M | Owner's Manual - Page 170
if not installed and used according to the instructions found in the users manual, may cause interference harmful to the operation (2 wires) • This applies only to products distributed by Yamaha-Kemble Music (U.K.) Ltd. CAUTION: TO PREVENT ELECTRIC SHOCK, MATCH WIDE BLADE OF PLUG TO WIDE SLOT, FULLY - Yamaha CVP-206M | Owner's Manual - Page 171
Yamaha Musical do Brasil LTDA. Av. Rebouças 2636, São Paulo, Brasil Tel: 011-853-1377 ARGENTINA Yamaha Yamaha Yamaha Yamaha Musica Italia S.P.A. Combo Division Viale Italia 88, 20020 Lainate (Milano), Italy Tel: 02-935-771 SPAIN/PORTUGAL Yamaha Yamaha Yamaha Yamaha Yamaha Yamaha Corporation, Yamaha Yamaha - Yamaha CVP-206M | Owner's Manual - Page 172
Clavinova Web site (English only) http://www.yamahaclavinova.com/ Yamaha Manual Library http://www2.yamaha.co.jp/manual/english/ M.D.G., Pro Audio & Digital Musical Instrument Division, Yamaha Corporation © 2003 Yamaha Corporation WA55440 ???AP?????.?-01A0 Printed in Indonesia
-
 1
1 -
 2
2 -
 3
3 -
 4
4 -
 5
5 -
 6
6 -
 7
7 -
8
-
9
-
10
-
11
-
12
-
13
-
14
-
15
-
16
-
17
-
18
-
19
-
20
-
21
-
22
-
23
-
24
-
25
-
26
-
27
-
28
-
29
-
30
-
31
-
32
-
33
-
34
-
35
-
36
-
37
-
38
-
39
-
40
-
41
-
42
-
43
-
44
-
45
-
46
-
47
-
48
-
49
-
50
-
51
-
52
-
53
-
54
-
55
-
56
-
57
-
58
-
59
-
60
-
61
-
62
-
63
-
64
-
65
-
66
-
67
-
68
-
69
-
70
-
71
-
72
-
73
-
74
-
75
-
76
-
77
-
78
-
79
-
80
-
81
-
82
-
83
-
84
-
85
-
86
-
87
-
88
-
89
-
90
-
91
-
92
-
93
-
94
-
95
-
96
-
97
-
98
-
99
-
100
-
101
-
102
-
103
-
104
-
105
-
106
-
107
-
108
-
109
-
110
-
111
-
112
-
113
-
114
-
115
-
116
-
117
-
118
-
119
-
120
-
121
-
122
-
123
-
124
-
125
-
126
-
127
-
128
-
129
-
130
-
131
-
132
-
133
-
134
-
135
-
136
-
137
-
138
-
139
-
140
-
141
-
142
-
143
-
144
-
145
-
146
-
147
-
148
-
149
-
150
-
151
-
152
-
153
-
154
-
155
-
156
-
157
-
158
-
159
-
160
-
161
-
162
-
163
-
164
-
165
-
166
-
167
-
168
-
169
-
170
-
171
-
172
 |
 |

OWNER’
S MANUAL
OWNER
’
S MANUAL
CVP-206/204
CVP-206/204
CVP-206/204