Yamaha CVP-85A Owner's Manual - Page 38

Adding New Tracks

Page 38 highlights

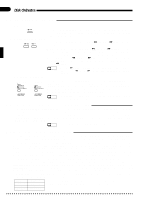
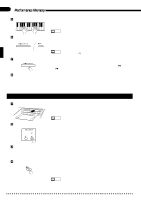
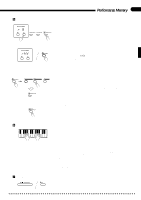
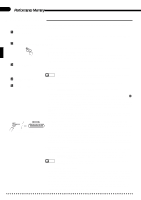
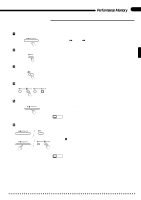
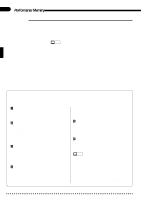
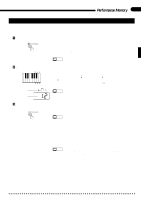
34 Performance Memory s Adding New Tracks When you've finished recording the first track, you can simply play it back as described in the previous section or add a new track to your song. To record a new track: ZSelect a Voice ...Select a voice and other parameters for the new track. Try out the voice and selected parameters before proceeding. XEngage the Record Ready Mode ... Press the [REC] button to engage the record ready mode. REC q Monitoring Previously Recorded Tracks All previously recorded tracks are automatically selected for playback when the record mode is engaged. You can turn these tracks on or off as required by pressing the corresponding track button(s) before pressing the [REC] button. CSelect a Track ...Select a track other than the one you used to record the previous track. The indicator of the track selected for recording should glow red. NOTES • Remember that if you record on a track that has already been recorded, the previous material will be erased and the new material will be recorded in its place. VStart Recording ...Play on the keyboard or press the [START/STOP] button to start recording. BStop Recording ...Press the [START/STOP] button or the [REC] button to stop recording. MIDI/ TRANSPOSE BASS MIN Volume of each track q Changing the Initial Parameter Values The initial values of parameters marked with asterisks (*) in the lists given in step N on page 33 can be changed for each track or the entire song by engaging the record mode for the desired track, changing the parameters as required, and then disengaging the record mode (press the [REC] button again) without actually recording. To cancel any initial parameter values you've made, select a different track and then press the [REC] button to disengage the record mode. To change individual ABC part volume settings engage any ABC mode after turning [REC] on, set the RHYTHM, CHORD 1, CHORD 2, and/or BASS volume control as required, then disengage the record mode. The BASS volume control can be used while holding the [MIDI/TRANSPOSE] MAX button to independently adjust the volume of each track (except the rhythm track). The volume of the rhythm track is adjusted via the RHYTHM volume control. Please note that volume settings can only be decreased. Individual track reverb depth can be adjusted by using the BASS volume while holding the [REVERB] button, and the overall reverb depth can be adjusted by using the TEMPO [v] and [w] buttons while holding the [REVERB] button. Also note that the tempo, reverb type, style, style variation, fill-in, and intro/ending settings are common to all tracks and cannot be set independently for different tracks. q Erasing the Tracks Individual tracks - except the rhythm track - can be completely erased by starting and stopping recording without actually playing or changing any parameters (i.e. press the [START/STOP] button twice). The same procedure can be used to erase the rhythm track if the RHYTHM volume control is set to its minimum position. NOTES • Tracks 3-10 can be erased by engaging the record mode, turning ABC on, and then pressing the [START/STOP] button twice. q Recording Without a Disk The Clavinova has enough internal RAM memory to allow recording for a while even if a disk is not loaded (up to approximately 1,600 notes if no other data is recorded). If you accidentally record without loading a disk, make sure you use the COPY function (described on page 39) to copy the recorded data to disk if you want to keep the recorded data (the internal RAM memory is not backed up). This is necessary because the internal RAM memory is cleared automatically when a Disk Orchestra Collection, Disklavier PianoSoft, or Style Disk is loaded, or a performance disk is loaded and the [SONG SELECT] button is pressed.

  • 1
  • 2
  • 3
  • 4
  • 5
  • 6
  • 7
  • 8
  • 9
  • 10
  • 11
  • 12
  • 13
  • 14
  • 15
  • 16
  • 17
  • 18
  • 19
  • 20
  • 21
  • 22
  • 23
  • 24
  • 25
  • 26
  • 27
  • 28
  • 29
  • 30
  • 31
  • 32
  • 33
  • 34
  • 35
  • 36
  • 37
  • 38
  • 39
  • 40
  • 41
  • 42
  • 43
  • 44
  • 45
  • 46
  • 47
  • 48
  • 49
  • 50
  • 51
  • 52
  • 53
  • 54
  • 55
  • 56
  • 57
  • 58
  • 59
  • 60
  • 61
  • 62
  • 63
  • 64
  • 65
  • 66
  • 67
  • 68
  • 69
  • 70
  • 71
  • 72
  • 73
  • 74
  • 75
  • 76

34
Performance Memory
Adding New Tracks
When you’ve finished recording the first track, you can simply play it back as described in the previous section or
add a new track to your song. To record a new track:
Z
Select a Voice
.........................................................................................................................................
Select a voice and other parameters for the new track. Try out the voice and selected
parameters before proceeding.
X
Engage the Record Ready Mode
...........................................................................................................
REC
Press the
[REC]
button to engage the record ready mode.
Monitoring Previously Recorded Tracks
All previously recorded tracks are automatically selected for playback when the
record mode is engaged. You can turn these tracks on or off as required by pressing
the corresponding track button(s) before pressing the
[REC]
button.
C
Select a Track
.........................................................................................................................................
B
Stop Recording
.......................................................................................................................................
Press the
[START/STOP]
button or the
[REC]
button to stop recording.
Changing the Initial Parameter Values
The initial values of parameters marked with asterisks (*) in the lists given in step
N
on page 33 can be changed for each track or the entire song by engaging the record
mode for the desired track, changing the parameters as required, and then disengaging
the record mode (press the
[REC]
button again) without actually recording. To cancel
any initial parameter values you’ve made, select a different track and then press the
[REC]
button to disengage the record mode.
To change individual ABC part volume settings engage any ABC mode after turning
[REC]
on, set the
RHYTHM
,
CHORD 1
,
CHORD 2
, and/or
BASS
volume control
as required, then disengage the record mode.
The
BASS
volume control can be used while holding the
[MIDI/TRANSPOSE]
button to independently adjust the volume of each track (except the rhythm track).
The volume of the rhythm track is adjusted via the
RHYTHM
volume control. Please
note that volume settings can only be decreased.
Individual track reverb depth can be adjusted by using the
BASS
volume while hold-
ing the
[REVERB]
button, and the overall reverb depth can be adjusted by using the
TEMPO [
]
and
[
]
buttons while holding the
[REVERB]
button.
Also note that the tempo, reverb type, style, style variation, fill-in, and intro/ending
settings are common to all tracks and cannot be set independently for different tracks.
Erasing the Tracks
Individual tracks — except the rhythm track — can be completely erased by starting
and stopping recording without actually playing or changing any parameters (i.e.
press the
[START/STOP]
button twice). The same procedure can be used to erase the
rhythm track if the
RHYTHM
volume control is set to its minimum position.
NOTES
Tracks 3-10 can be erased by engaging the record mode, turning ABC on, and then
pressing the [START/STOP] button twice.
Recording Without a Disk
The Clavinova has enough internal RAM memory to allow recording for a while even
if a disk is not loaded (up to approximately 1,600 notes if no other data is recorded).
If you accidentally record without loading a disk, make sure you use the COPY func-
tion (described on page 39) to copy the recorded data to disk if you want to keep the
recorded data (the internal RAM memory is not backed up). This is necessary
because the internal RAM memory is cleared automatically when a Disk Orchestra
Collection, Disklavier PianoSoft, or Style Disk is loaded, or a performance disk is
loaded and the
[SONG SELECT]
button is pressed.
Select a track other than the one you used to record the previous track. The indicator
of the track selected for recording should glow red.
NOTES
Remember that if you record on a track that has already been recorded, the previous
material will be erased and the new material will be recorded in its place.
Play on the keyboard or press the
[START/STOP]
button to start recording.
V
Start Recording
.......................................................................................................................................
BASS
MIN
MAX
MIDI/
TRANSPOSE
Volume of each track