Yamaha CVP-85A Owner's Manual - Page 40
Playback
 |
View all Yamaha CVP-85A manuals
Add to My Manuals
Save this manual to your list of manuals |
Page 40 highlights
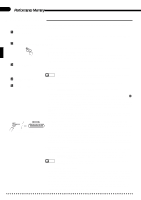
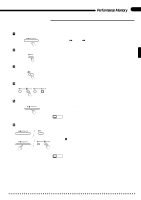
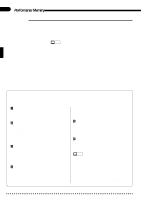
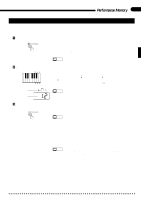
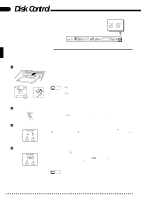
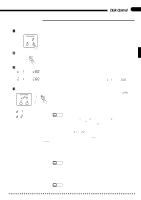
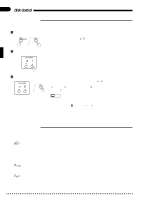
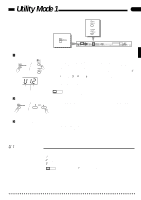
36 Performance Memory s Playback Original Performance Memory recordings can be played back and controlled in the same way as described in the Disk Orchestra section, beginning on page 26. You can individually select tracks to play back (page 27), use the guide function (and the keyboard guide lamps on the CVP-87A) with the data recorded on tracks 1 and 2 (page 28), and use the A-B repeat function (page 29). NOTES • The playback voice cannot be changed when playing back Performance Memory data (the voice played via the keyboard can be changed). q Volume Control The RHYTHM, CHORD 1, CHORD 2, and BASS volume controls can be used to adjust the volume of the corresponding accompaniment parts when playing back data that was recorded with ABC. When playing back data that was recorded without ABC, however, these volume controls have the following track assignments. RHYTHM: RHYTHM track CHORD 1: 4 - 10 tracks CHORD 2: 1 & 2 tracks BASS: 3 track q Multi-timbre Recording via MIDI Data from an external MIDI device such as a sequencer or music computer can also be recorded to the Performance Memory as follows: ZMake the Required MIDI Connections Connect the MIDI OUT terminal of the transmitting device to the Clavinova's MIDI IN terminal using a standard MIDI cable. XSelect the External Clock Mode To select the external clock mode press the [ORGAN] VOICE button while holding the [MIDI/ TRANSPOSE] button. When selected, the [ORGAN] indicator will light while the [MIDI/TRANSPOSE] button is pressed. In this mode the Clavinova is controlled by an external MIDI clock signal. CSelect a Song Number Select the song number to which you want to record the data by using the SONG NUMBER [v] and [w] buttons (of course, a properly formatted floppy disk must already be loaded in the disk drive). VEngage the MIDI Record Ready Mode Press the [REC] button while holding the [MIDI/TRANSPOSE] button to engage the MIDI record ready mode. In this mode all tracks (1 through 15) can be recorded at the same time via the correspondingly numbered MIDI channels. That is, MIDI data received on channel 1 will be recorded on track 1, data received via channel 2 will be recorded on track 2, etc. BMatch the Time Signature & Tempo Select a style having a time signature that matches that of the data you are going to record (e.g. 4/4, 3/4), and match the Clavinova tempo setting to that of the data to be recorded. NRecord the MIDI Data Play back the MIDI data on the sequencer, music computer, or other device. Recording will start and stop automatically. NOTES • Please note that the Clavinova's internal styles cannot be played during multi-timbre recording. • Any notes played on the keyboard and other setting changes will be recorded on track 1 during multi-timbre recording. • Initial panel settings will not be recorded unless the settings are changed in the record ready mode. • Previous data on all tracks will be erased when new data is recorded in the multi-timbre mode. • Be sure to turn the multi-timbre and external clock modes off when you're finished multi-timbre recording (see pages 49 and 50).
-
 1
1 -
2
-
3
-
4
-
5
-
6
-
7
-
8
-
9
-
10
-
11
-
12
-
13
-
14
-
15
-
16
-
17
-
18
-
19
-
20
-
21
-
22
-
23
-
24
-
25
-
26
-
27
-
28
-
29
-
30
-
31
-
32
-
33
-
34
-
 35
35 -
 36
36 -
 37
37 -
 38
38 -
 39
39 -
 40
40 -
 41
41 -
 42
42 -
 43
43 -
 44
44 -
 45
45 -
46
-
47
-
48
-
49
-
50
-
51
-
52
-
53
-
54
-
55
-
56
-
57
-
58
-
59
-
60
-
61
-
62
-
63
-
64
-
65
-
66
-
67
-
68
-
69
-
70
-
71
-
72
-
73
-
74
-
75
-
76
 |
 |