Yamaha CVP-85A Owner's Manual - Page 43

Copying Songs

Page 43 highlights

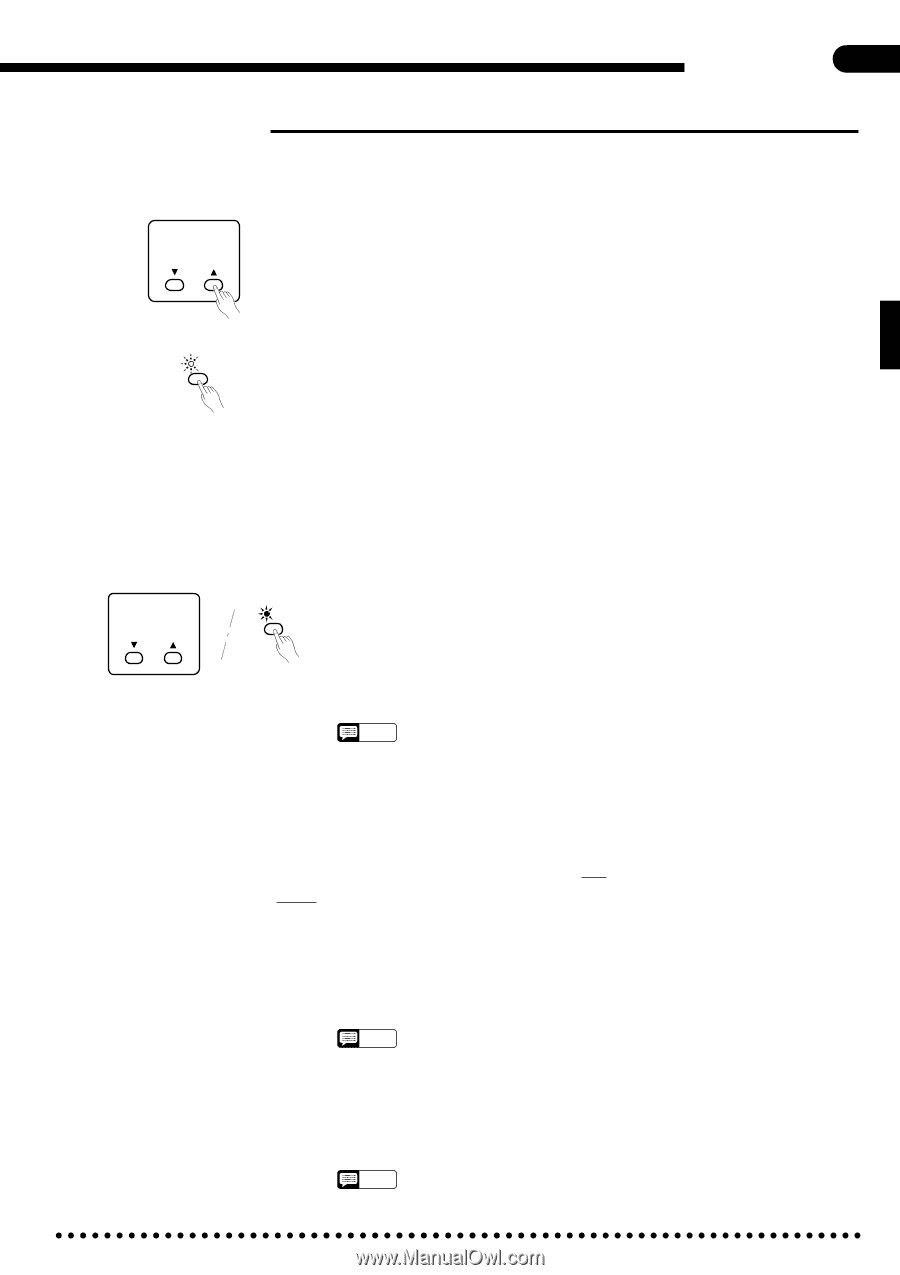
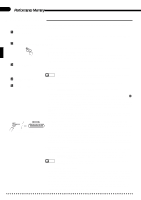
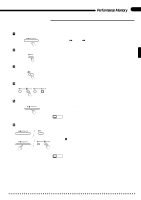
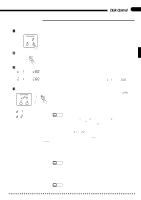
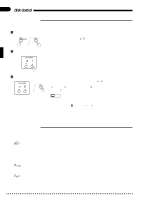
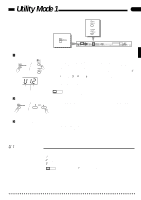
Disk Control 39 s Copying Songs Song data can be "backed up" by copying to a new song number or a different disk, as follows: ZSelect the Source Song ... SONG NUMBER 2 Press the [SONG SELECT] button and use the [v] and [w] buttons below the SONG NUMBER display to select the number of the song you wish to copy. XEngage the Copy Function ... COPY Press the [COPY] button. The [COPY] button LED will flash. CSelect the Destination Song ... c81 ....... c60 Copy to same disk %81 ....... %60 Copy to different disk (Song number greater than 60) Use the [v] and [w] buttons below the SONG NUMBER display to select the song number you wish to copy to (i.e. the destination song number). If you select a song number that already contains data, that data will be overwritten by the new song data. If you select a song number greater than 60 (%61 through %60 will appear on the display), the copy will be made to a different disk. VStart Copying ... SONG NUMBER COPY cPY d81 Insert source disk. d82 Insert destination disk. • While the data is being copied the number of times the disks will have to be exchanged to complete the copy operation will be shown on the display. Press the [COPY] button again to begin the actual copy operation. "cPY" will appear on the SONG NUMBER display and the [COPY] indicator will light continuously during the copy operation. If you chose to copy to a different disk, you may have to exchange the source and destination disks a few times if the song being copied is long and complex. In this case, the Clavinova will prompt you to insert the source and destination disks with the displays shown to the left. NOTES • If you copy to a song number that already contains data, the Clavinova will ask you to confirm the copy operation. Use the SONG NUMBER [v] and [w] buttons to select either "n" (NO) or "Y" (YES) on the display. "Y" if you intend to execute the copy operation or "n" if you wish to cancel the operation. The copy operation will begin automatically if you select "Y". • The copy operation can be aborted at any time prior to actually starting the copy operation (i.e. while the [COPY] indicator is flashing) or during the disk exchange display ("d 1 " or "d 2 ") by pressing the [START/STOP] button. q Copying Disk Orchestra Disks ([ORCH/3-10TR] and [RHYTHM] parts only All Disk Orchestra data except the right-hand and left-hand parts can be copied to a separate disk by following the standard copy procedure outlined above. The copied data cannot, however, be copied a second time to another disk. q Copying the Style Disk Data ...All Style Disk data can be copied to a separate disk by following the standard copy procedure outlined above. A single disk can hold up to 50 styles. Style Disk data can only be copied to a newly formatted disk (i.e. no other data can be previously recorded on the disk) or a disk which already contains copied style data. NOTES • Data from the Style Disk cannot be copied to a disk that contains Performance Memory or Disk Orchestra Collection data. The reverse is also true: Performance Memory and Disk Orchestra Collection data cannot be copied to a disk that contains data copied from the Style Disk. q Copying Data Recorded Without a Disk If you've used the performance memory to record data without first loading a disk: press the [COPY] button, insert a formatted disk, then select the destination song number and copy as described above. NOTES • Data cannot be copied from Disklavier disks, or Standard MIDI File disks. Data cannot be copied to any write protected disk. It is also not possible to copy from one song number to another within the same Disk Orchestra disk.

  • 1
  • 2
  • 3
  • 4
  • 5
  • 6
  • 7
  • 8
  • 9
  • 10
  • 11
  • 12
  • 13
  • 14
  • 15
  • 16
  • 17
  • 18
  • 19
  • 20
  • 21
  • 22
  • 23
  • 24
  • 25
  • 26
  • 27
  • 28
  • 29
  • 30
  • 31
  • 32
  • 33
  • 34
  • 35
  • 36
  • 37
  • 38
  • 39
  • 40
  • 41
  • 42
  • 43
  • 44
  • 45
  • 46
  • 47
  • 48
  • 49
  • 50
  • 51
  • 52
  • 53
  • 54
  • 55
  • 56
  • 57
  • 58
  • 59
  • 60
  • 61
  • 62
  • 63
  • 64
  • 65
  • 66
  • 67
  • 68
  • 69
  • 70
  • 71
  • 72
  • 73
  • 74
  • 75
  • 76

39
Copying Songs
Song data can be “backed up” by copying to a new song number or a different disk, as follows:
Z
Select the Source Song
.........................................................................................................................
Press the
[SONG SELECT]
button and use the
[
]
and
[
]
buttons below the
SONG NUMBER
display to select the number of the song you wish to copy.
Disk Control
SONG NUMBER
2
X
Engage the Copy Function
....................................................................................................................
Press the
[COPY]
button. The
[COPY]
button LED will flash.
C
Select the Destination Song
..................................................................................................................
Use the
[
]
and
[
]
buttons below the
SONG NUMBER
display to select the
song number you wish to copy to (i.e. the destination song number). If you select a
song number that already contains data, that data will be overwritten by the new
song data. If you select a song number greater than 60 (
%
6
1
through
%60
will
appear on the display), the copy will be made to a different disk.
COPY
V
Start Copying
..........................................................................................................................................
Press the
[COPY]
button again to begin the actual copy operation. “
cPY
” will
appear on the
SONG NUMBER
display and the
[COPY]
indicator will light con-
tinuously during the copy operation.
If you chose to copy to a different disk, you may have to exchange the source
and destination disks a few times if the song being copied is long and complex. In
this case, the Clavinova will prompt you to insert the source and destination disks
with the displays shown to the left.
NOTES
If you copy to a song number that already contains data, the Clavinova will ask
you to confirm the copy operation. Use the SONG NUMBER [
] and [
] buttons
to select either “
n
” (NO) or “
Y
” (YES) on the display. “
Y
” if you intend to execute
the copy operation or “
n
” if you wish to cancel the operation. The copy operation
will begin automatically if you select “
Y
”.
The copy operation can be aborted at any time prior to actually starting the copy
operation (i.e. while the [COPY] indicator is flashing) or during the disk exchange
display (“
d1
” or “
d2
”) by pressing the [START/STOP] button.
COPY
SONG NUMBER
cPY
d
8
1
Insert source disk.
d
8
2
Insert destination disk.
• While the data is being copied the
number of times the disks will have to
be exchanged to complete the copy
operation will be shown on the display.
c
8
1
.......
c60
Copy to same disk
%
8
1
.......
%60
Copy to different disk (Song number
greater than 60)
Copying Disk Orchestra Disks
([ORCH/3-10TR] and [RHYTHM] parts
only)
....................................................
All Disk Orchestra data
except the right-hand and left-hand parts can be copied to a separate disk by following the
standard copy procedure outlined above. The copied data cannot, however, be copied a second time to another disk.
Copying the Style Disk Data
..................................................................................................................
All Style Disk data can be copied to a separate disk by following the standard copy procedure outlined above. A sin-
gle disk can hold up to 50 styles. Style Disk data can only be copied to a newly formatted disk (i.e. no other data can be
previously recorded on the disk) or a disk which already contains copied style data.
NOTES
Data from the Style Disk cannot be copied to a disk that contains Performance
Memory or Disk Orchestra Collection data. The reverse is also true: Performance
Memory and Disk Orchestra Collection data cannot be copied to a disk that con-
tains data copied from the Style Disk.
Copying Data Recorded Without a Disk
...............................................................................................
If you’ve used the performance memory to record data without first loading a disk: press the
[COPY]
button, insert a
formatted disk, then select the destination song number and copy as described above.
NOTES
Data cannot be copied from Disklavier disks, or Standard MIDI File disks. Data
cannot be copied to any write protected disk. It is also not possible to copy from
one song number to another within the same Disk Orchestra disk.