Yamaha DD-75 DD-75 Owners Manual
Yamaha DD-75 Manual
 |
View all Yamaha DD-75 manuals
Add to My Manuals
Save this manual to your list of manuals |
Yamaha DD-75 manual content summary:
- Yamaha DD-75 | DD-75 Owners Manual - Page 1
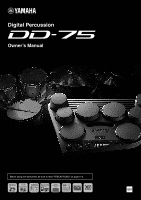
Digital Percussion Owner's Manual Before using the instrument, be sure to read "PRECAUTIONS" on page 5-6. EN - Yamaha DD-75 | DD-75 Owners Manual - Page 2
For DD-75 SPECIAL MESSAGE SECTION This product utilizes batteries or an external power supply (adapter). DO NOT connect this product to any power supply or adapter other than one described in the manual, on the name plate, or specifically recommended by Yamaha. WARNING: Do not place this product - Yamaha DD-75 | DD-75 Owners Manual - Page 3
and DD-75 FCC INFORMATION (U.S.A.) 1. IMPORTANT NOTICE: DO NOT MODIFY THIS UNIT! This product, when installed as indicated in the instructions contained in this manual, meets FCC requirements. Modifications not expressly approved by Yamaha may void your authority, granted by the FCC, to use the - Yamaha DD-75 | DD-75 Owners Manual - Page 4
power cord from being walked on or pinched particularly at plugs, convenience receptacles, and the point where they exit from the apparatus. 11 Only use attachments/accessories specified by the manufacturer. 12 Use only with the cart, stand TO RAIN OR MOISTURE. (UL60065_03) 4 DD-75 Owner's Manual - Yamaha DD-75 | DD-75 Owners Manual - Page 5
Then have the device inspected by Yamaha service personnel. - The power cord or plug becomes frayed or damaged. - It emits unusual smells or smoke. - Some object has been dropped into the instrument. - There is a sudden loss of sound during use of the instrument. DMI-5 1/2 DD-75 Owner's Manual 5 - Yamaha DD-75 | DD-75 Owners Manual - Page 6
following: Power supply/AC adaptor • Do not connect the instrument to an electrical outlet using a multiple using these contents is recorded, and the permission of Yamaha Corporation is not required in such cases. About this manual • The illustrations as shown in this manual are for instructional - Yamaha DD-75 | DD-75 Owners Manual - Page 7
https://download.yamaha.com/ Included Accessories • Owner's Manual (this book) • Drum stick (1 pair) • Foot Pedal 1 & 2 • AC adaptor* • Warranty* • Online Member Product Registration *: May not be included depending on your particular locale. Check with your Yamaha dealer. DD-75 Owner's Manual 7 - Yamaha DD-75 | DD-75 Owners Manual - Page 8
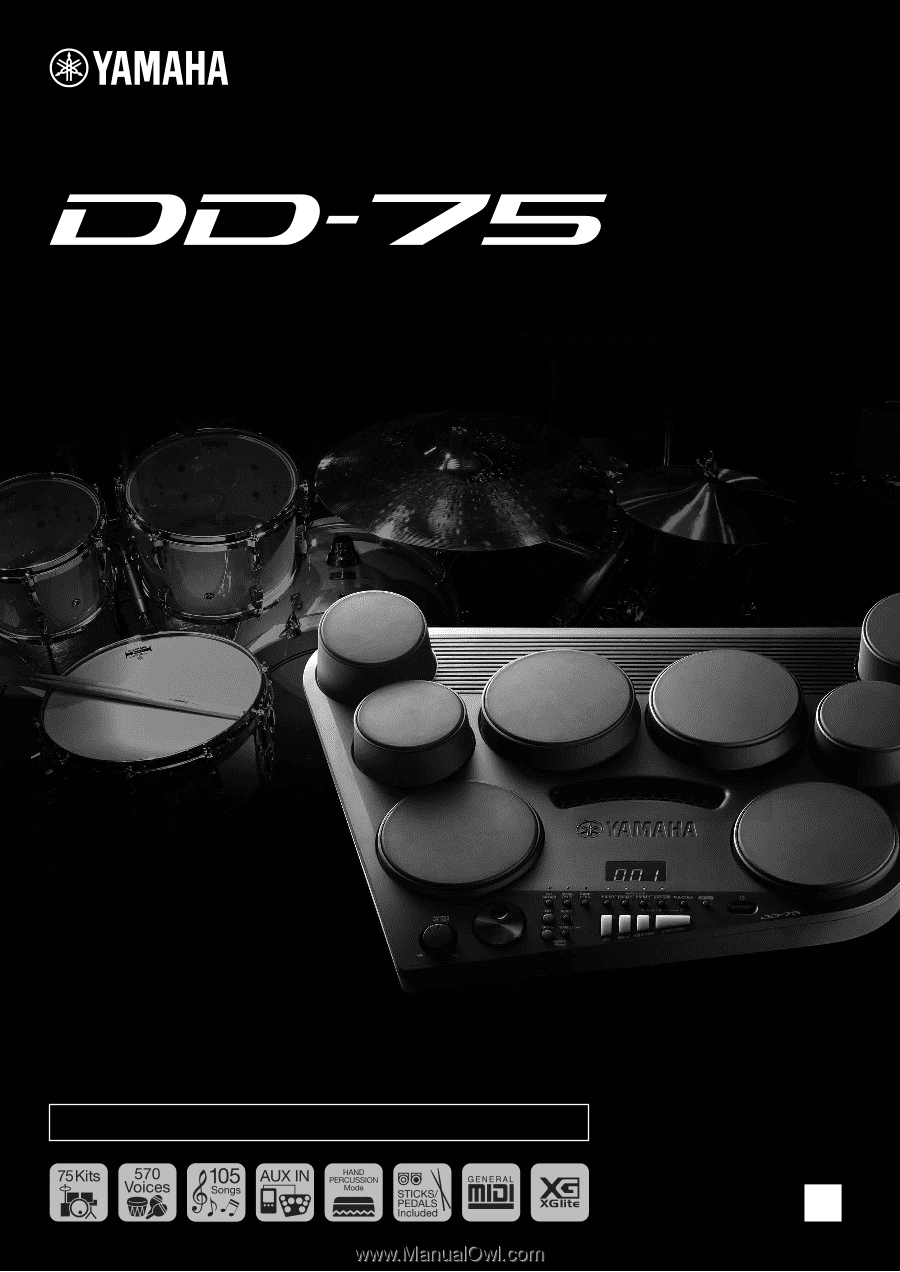
percussion sound of Japanese drum, Asia, Latin America and beyond. 75 Drum kits The instrument contains 75 drum kits of different genres for you to choose from. Moreover, the Voices can be assigned to each drum pads and pedals to create your own original drum kits. 105 Songs The instrument - Yamaha DD-75 | DD-75 Owners Manual - Page 9
External Speaker 14 Using a Snare Drum Stand 15 Basic Operations Playing the Demo Song 16 Play the Pads/Pedals 17 Pad Names 17 Setting the Hand Percussion ON/OFF .......... 18 Hand Percussion Lock 18 Selecting and Playing a Drum Kit 19 Assigning Voices to Individual Pads and Pedals and Saving - Yamaha DD-75 | DD-75 Owners Manual - Page 10
28 o TEMPO/TAP button 29 !0 PART MUTE DRUM 1-3, BACKING buttons .....33 !1 FUNCTION button 40 !2 DEMO button 16 !3 [ ] (Standby/On) switch 13 !4 REC button 35 !5 BREAK button 33 !6 A-B REPEAT button 34 !7 START/STOP button 28 !8 Display 13 !9 Drum pads (8 17 10 DD-75 Owner's Manual - Yamaha DD-75 | DD-75 Owners Manual - Page 11
avoid using this instrument near a television or computer monitor, since interference may result. Rear Panel @0 DC IN 12V (AC Adaptor) jack 12 @1 AUX IN jack 39 @2 PHONES/OUTPUT jack 14 @3 PEDAL 2 • HI-HAT jack 13 @4 PEDAL 1 • KICK jack 13 @5 MIDI IN/OUT terminals 38 DD-75 Owner's Manual - Yamaha DD-75 | DD-75 Owners Manual - Page 12
ones or already recharged ones. NOTE • This instrument cannot charge the batteries. Use only an appropriate charger device when charging. • Power will be automatically drawn from the AC adaptor if an AC adaptor is connected while batteries are installed in the instrument. 12 DD-75 Owner's Manual - Yamaha DD-75 | DD-75 Owners Manual - Page 13
"dd" item appears. Drum Kit number "1" is normally selected. 3 Press and hold the [ ] (Standby/On) switch for about a second to turn the power off. NOTICE • Failure to set the appropriate battery type may shorten the battery life. Make sure to set the battery type correctly. DD-75 Owner's Manual - Yamaha DD-75 | DD-75 Owners Manual - Page 14
pad/pedal sound, use the [MASTER VOLUME] dial while striking the pads or pressing the pedals DRUM power to the instrument, then to the external device. When turning off the power, do so in reverse order: first turn off the power to the external device, then to the instrument. 14 DD-75 Owner's Manual - Yamaha DD-75 | DD-75 Owners Manual - Page 15
installed. • Remove the snare drum stand from the instrument before moving the instrument. • Do not use the snare drum stand other than designated ones (page 54). Setting Up A Arms B C Pipe D E Legs Snare drum stand Player Keep horizontal B: Faces the player DD-75 Owner's Manual 15 - Yamaha DD-75 | DD-75 Owners Manual - Page 16
the song will automatically be selected. (See the "Setting the Auto Kit Select ON/OFF" on page 31.) 2 Select a Demo Song. Use the dial to select a demo song ("001"-"005"). 3 Stop the Demo Song. To stop playback, press the [DEMO] button again or press the [START/STOP] button. 16 DD-75 Owner's Manual - Yamaha DD-75 | DD-75 Owners Manual - Page 17
different sound.) NOTE • When using Pedal 2, touch response does not function. Pedal 1 3: Maple Bass Drum 3 Pedal 1 features touch response; the volume responds to how hard you press the pedal. NOTE • If your pressing of the pedal is too slow or soft, there may be no sound. DD-75 Owner's Manual 17 - Yamaha DD-75 | DD-75 Owners Manual - Page 18
song (057) and drum kit (51) are automatically called up. NOTE • Be sure to strike the pads only with your hands when HAND PERCUSSION is on. Hand Percussion Lock If you perform on the instrument solely with your hands, we recommend that you use this operation to lock the Hand Percussion so that it - Yamaha DD-75 | DD-75 Owners Manual - Page 19
that you've assigned the desired voices to each pad and pedal, then saved the entire assignments as a Kit. The initial settings of "C01"- "C10" are Drum Kit number 1. (See "Assigning Voices to Individual Pads and Pedals and Saving to a Custom Kit ("C01"-"C10")" on page 20.) DD-75 Owner's Manual 19 - Yamaha DD-75 | DD-75 Owners Manual - Page 20
), and voice numbers will increase. Turn the dial to the left (counter-clockwise), and voice numbers will decrease. To cancel, simply press the [KIT] button. See the "Drum Voice List" on page 43. Repeat the previous steps 3 and 4 for any or all of the pads and pedals. 20 DD-75 Owner's Manual - Yamaha DD-75 | DD-75 Owners Manual - Page 21
to the pad/pedal. To call up the saved Custom Kit, press the [KIT] button and use the dial to select a Custom Kit number. NOTE • The Reverb Type of the currently assigned Drum Kit will be carried 1 Plate 2 3 Press the [FUNCTION] button to exit from the Function mode. DD-75 Owner's Manual 21 - Yamaha DD-75 | DD-75 Owners Manual - Page 22
. 2 Turn the dial and select a sensitivity value. NOTE • Default value is "A-2" (2). • The settings "S01" to "S10" let you set the sensitivity for each of the pads and pedal. 3 Press the [KIT] button to exit from the Sensitivity set- ting mode. 22 DD-75 Owner's Manual - Yamaha DD-75 | DD-75 Owners Manual - Page 23
range is from F (Fix) and 1 to 4. To cancel the setting, press the [KIT] button. Pad number/ Pedal number -F Pad number/ Pedal number -4 Unlit 4 Press the [SENSITIVITY] button to save the setting. 5 Press the [KIT] button to exit from the Sensitivity set- ting mode. DD-75 Owner's Manual 23 - Yamaha DD-75 | DD-75 Owners Manual - Page 24
intense power is required to make a larger sound. Max. Pads Sensitivity Max. Pedal Sensitivity Sound volume Sound volume Min. Pressure Max. Min. Pressure Max. NOTE • If the pedal sound volume is unstable, we recommend that you set the value to "P-F". • With an Electronic drum pad KP65 - Yamaha DD-75 | DD-75 Owners Manual - Page 25
Play the Pads/Pedals Setting the Click ON/OFF The 1 Enter the numerator value setting function. Press the [FUNCTION] button once, then press the [DRUM 3] or [BACKING] button a number of times until the "CLn" indication appears. After ] button to exit from the Function mode. DD-75 Owner's Manual 25 - Yamaha DD-75 | DD-75 Owners Manual - Page 26
] button once, then press the [DRUM 3] or [BACKING] button a number of times until the "CLL" indication appears. After a while, the current click volume will appear next to the "CLL" indication. 2 Set the click volume by using the dial. 26 DD-75 Owner's Manual 3 Press the [FUNCTION] button to - Yamaha DD-75 | DD-75 Owners Manual - Page 27
the Pads/Pedals Setting the click voice Set the click voice to Metronome, Cowbell, Stick or Human voice. 1 Enter the click voice setting function. Press the [FUNCTION] button once, then press the [DRUM mode. Press the [CLICK] button to listen to the click voice. DD-75 Owner's Manual 27 - Yamaha DD-75 | DD-75 Owners Manual - Page 28
measure will be shown in the display. Try playing the pads and pedals along with the song. To stop playback of the song, press the [START/STOP] button once again. NOTE • Songs "001"-"005" have no lead-ins. • You can also use the Tap Start function to start songs (page 29). 28 DD-75 Owner's Manual - Yamaha DD-75 | DD-75 Owners Manual - Page 29
used to adjust the balance between the song accompaniment and your own performance. Enter the Function mode by pressing the [FUNCTION] button, then press the [DRUM will playback at the tempo with which the pads are struck or the pedals are pressed. The song tempo can be set DD-75 Owner's Manual 29 - Yamaha DD-75 | DD-75 Owners Manual - Page 30
-clockwise to set it to OFF. NOTE • Default setting is OFF. 3 Press the [FUNCTION] button to exit from the Function mode. The dot flashes, indicating Pad Start is enabled. NOTE • When the Pad Start is set to ON, press the [START/STOP] button to stop the song. 30 DD-75 Owner's Manual - Yamaha DD-75 | DD-75 Owners Manual - Page 31
will appear next to the "AtS" indication. 2 Turn Auto Kit Select On/Off. Turn the dial clockwise to set to ON, and turn it counter-clockwise to set it to OFF. Auto Kit Select on NOTE • Default setting is ON. 3 Press the [FUNCTION] button to exit from the Function mode. DD-75 Owner's Manual 31 - Yamaha DD-75 | DD-75 Owners Manual - Page 32
and turn it to the left (counter-clockwise) to decrease the value. When you use the [TEMPO/TAP] button to change the TEMPO in the case of a song in 4/4, press the [TEMPO/TAP] button four times, and the during demo playback, recording, or when external clock is set to on. 32 DD-75 Owner's Manual - Yamaha DD-75 | DD-75 Owners Manual - Page 33
. Strike any pad or pedal during song playback, and the accompaniment will mute until the end of the measure you played in. You can play a drum fill or drum solo during this break. The instrument plays back the song from the next measure when the Break measure is completed. DD-75 Owner's Manual 33 - Yamaha DD-75 | DD-75 Owners Manual - Page 34
mode is also exited when the song is stopped. NOTE • The Break does not function if DEMO is started. Using A-B Repeat If you want to practice a particular section of a song, you can specify that section's "A" ( , pressing the [A-B REPEAT] button cancels the A-B Repeat points. 34 DD-75 Owner's Manual - Yamaha DD-75 | DD-75 Owners Manual - Page 35
a preset song or a recorded User Song, the track indicator lamps of DRUM 1/DRUM 2/DRUM 3 will light off. 3 Turn the dial and select a User song "U01"-"U05" for saving. Go to step 4 if you have selected a User Song at step 1. To cancel the recording, press the [REC] button. DD-75 Owner's Manual 35 - Yamaha DD-75 | DD-75 Owners Manual - Page 36
is being recorded (a "-" mark appears and moves from left to right on the display), never interrupt the power supply (e.g., remove the batteries or unplug the AC adaptor). Doing so can result in a loss of data. "-"U05") are located to next to the number "105" (before "001"). 36 DD-75 Owner's Manual - Yamaha DD-75 | DD-75 Owners Manual - Page 37
operation will be executed. NOTICE • While the data is being cleared (a "-" mark appears and moves from left to right on the display), never interrupt the power supply (e.g., by removing the batteries or unplugging the AC adaptor). Doing so can result in loss of data. DD-75 Owner's Manual 37 - Yamaha DD-75 | DD-75 Owners Manual - Page 38
be used on those other MIDI devices or computer, and also the performance data from other MIDI devices and computer can be received and sounded with this instrument. USB terminal DD-75 USB- a computer from the instrument • User songs ("U01"(SONG001.mid)-"U05"(SONG005.mid)) 38 DD-75 Owner's Manual - Yamaha DD-75 | DD-75 Owners Manual - Page 39
By connecting an audio device such as a portable music player to the instrument's [AUX IN] power to the external device, and then to the instrument. When turning off the power, first turn off the power to the instrument, and then to the external device. Stereo mini plug DD-75 Owner's Manual - Yamaha DD-75 | DD-75 Owners Manual - Page 40
(min.) Specifies the time that will elapse before the instrument's power is automatically turned off. 14 Alkalinemanganese (ALn) Selects the type of batteries you have installed to this instrument. 13 * The appropriate value is automatically set for each song or kit. 40 DD-75 Owner's Manual - Yamaha DD-75 | DD-75 Owners Manual - Page 41
Kit "C01"-"C10" • Pad/Pedal Sensitivity* • Click Volume • Click Voice • Auto Kit Select ON/OFF • Song Volume • Pad computer by using Musicsoft power on by pressing the [ ] (Standby/On) switch while holding the [FUNCTION] button. "CLr" appears, followed by song number "001" DD-75 Owner's Manual 41 - Yamaha DD-75 | DD-75 Owners Manual - Page 42
"FUL" appears and recording is stopped. The amount of recorded data has exceeded the limit of 7,000 notes per song. Song is automatically started when pad is struck (or pedal is pressed). Pad Start is set to ON. Set Pad Start to OFF (page 30). 42 DD-75 Owner's Manual - Yamaha DD-75 | DD-75 Owners Manual - Page 43
Analog 2 Tom Analog 1 Tom Jazz 6 Tom Jazz 5 Tom Jazz 4 Tom Jazz 3 Tom Jazz 2 Tom Jazz 1 Tom Brush 6 Tom Brush 5 Tom Brush 4 Tom Brush 3 Tom Brush 2 DD-75 Owner's Manual 43 - Yamaha DD-75 | DD-75 Owners Manual - Page 44
Pedal Dark Hi-Hat Open Dark Hi-Hat Closed Dark 2 Hi-Hat Pedal Dark 2 Hi-Hat Open Dark 2 Hi-Hat Closed Power Hi-Hat Pedal Power Hi-Hat Open Power Hi-Hat Closed Power 2 Hi-Hat Closed Hi-Hat Pedal DD-75 Owner's Manual Power Side Stick Side Stick Analog Hand Clap Hand Clap 2 Clap T9 Khaligi Clap 1 Hand - Yamaha DD-75 | DD-75 Owners Manual - Page 45
Drum Voice List Voice No. 334 335 Pandeiro L Slap Pandeiro Open Pandeiro Tip Pandeiro Slap Repique Anel Thumb Rim Left Hand Repique Anel Thumb Rim Right Hand Repique Anel Mute Repique Anel Open Repique de Mao Slap Repique de Mao Thmb Closed Dafli Open Dafli Rim Dhol 1 Open DD-75 Owner's Manual 45 - Yamaha DD-75 | DD-75 Owners Manual - Page 46
sound. NOTE: • Phrase data cannot be transmitted. • The pan data for each voice is fixed and cannot be changed, regardless of the pad assignments. For example, if a voice containing a "left" pan setting is assigned to a right pad, the actual sound will come from the left. 46 DD-75 Owner's Manual - Yamaha DD-75 | DD-75 Owners Manual - Page 47
March Saeidy Maksoum Demo: These songs demonstrate the drum sounds and rhythms. Pattern: These are special loop-repeating patterns for drum practice. Song: These include drum and fill-in patterns. There is no loop Disco Jazz Funk Blues Shuffle Funk Bossa Nova Latin Fusion DD-75 Owner's Manual 47 - Yamaha DD-75 | DD-75 Owners Manual - Page 48
Drum Kit List Pad 5 Pad 6 Pad 2 Pad 3 Pad 7 Pad 8 Pedal 2 Pad 1 Pad 4 Pedal 1 Kit No. Kit Name 1 Maple Kit 1 2 Maple Kit 2 3 Maple Kit 3 4 Maple Kit 4 5 Oak Kit 1 6 Oak Kit 2 7 Oak Kit 3 8 Oak Kit 4 9 Hard Rock Kit 1 10 Hard Rock Kit 2 11 Hard Rock Kit 3 12 Hard Rock Kit 4 - Yamaha DD-75 | DD-75 Owners Manual - Page 49
Drum Kit List Kit Voice No. No. Pad 4 1 105 Maple Tom 2 2 105 Maple Tom 2 3 105 178 Tom Vox 1 18 123 Tom Power 2 19 124 Tom Power 1 20 123 Tom Power 2 21 246 Side Stick Power 22 123 Tom Power 2 23 124 Tom Power 1 24 247 Side Stick 25 249 Hand Clap 257 Tambourine DD-75 Owner's Manual 49 - Yamaha DD-75 | DD-75 Owners Manual - Page 50
Kit 74 SE Kit 1 75 SE Kit 2 Voice No. Pedal 1 19 Bass Drum Analog H 20 Kick Techno Q Voice No. Pedal 2 196 Hi-Hat Closed Analog 2 199 Hi-Hat Closed Analog 4 13 Bass Drum 193 Hi-Hat Pedal 21 Kick Techno L 199 Hi-Hat Closed Analog 4 23 Bass Drum Jazz 193 Hi-Hat Pedal Voice No. Pad - Yamaha DD-75 | DD-75 Owners Manual - Page 51
Riq Brass 1 406 Pandeiro L Slap 368 Cuica L Short 406 Pandeiro L Slap 496 Mondira Open 494 Jhanji Open 491 Hatheli Short 491 Hatheli Short 542 Talking Drum Open 235 Splash Cymbal 360 Claves 534 Xiaoluo Open 567 Owl 555 Scratch L DD-75 Owner's Manual 51 - Yamaha DD-75 | DD-75 Owners Manual - Page 52
Cymbal (RIDE) Hi-Hat (H.H.) Open Close Crash Cymbal Snare Drum Snare Drum (Brush Slap) High Tom Mid Tom Low Tom Hi-Hat Cymbal (PEDAL) Bass Drum High Low The following is an actual rhythm pattern using the notation. 8 Beat (song No.021) 16 Beat (song No.023) 52 DD-75 Owner's Manual - Yamaha DD-75 | DD-75 Owners Manual - Page 53
4 Beat (song No.045) (RIDE) Drum Score In the notation above, eighth notes are to be played with a triplet feel (as shown in the notation below). For the triplet indication since it is easier to read. Shuffle (song No.034) Play the above pattern with a swing feel. DD-75 Owner's Manual 53 - Yamaha DD-75 | DD-75 Owners Manual - Page 54
Electronic drum pad: KP65 • Snare drum stand: SS662/SS740A * The contents of this manual apply to the latest specifications as of the publishing date. To obtain the latest manual, access the Yamaha website then download the manual file. Since specifications, equipment or separately sold accessories - Yamaha DD-75 | DD-75 Owners Manual - Page 55
38 O Online Member Product Registration 7 P Pad 17 Pad Start 30 Pedal 13, 17 R Recording 35 Reverb type 21 S Sensitivity 22 Song Clear 37 Song List 47 Song Volume 29 Specifications 54 T Tap Start 29 Tempo 32 Time Signature 25 Track 33 Troubleshooting 42 DD-75 Owner's Manual 55 - Yamaha DD-75 | DD-75 Owners Manual - Page 56
your local municipality, your waste disposal service or the point of sale where you purchased the items. For business used in combination with a chemical symbol. In this case it complies with the requirement set by the EU Battery Directive for the chemical involved. (weee_battery_eu_en_02) 56 DD-75 - Yamaha DD-75 | DD-75 Owners Manual - Page 57
or operation or failure to follow instructions according to the Owner's Manual for this product; any shipment of the product (claims must be presented to the carrier); repair or attempted repair by anyone other than Yamaha or an authorized Yamaha Service Center; (b) any unit which has been - Yamaha DD-75 | DD-75 Owners Manual - Page 58
58 DD-75 - Yamaha DD-75 | DD-75 Owners Manual - Page 59
Vietnam Tel: +84-28-3818-1122 OTHER ASIAN COUNTRIES https://asia-latinamerica-mea.yamaha.com/ index.html OCEANIA AUSTRALIA Yamaha Music Australia Pty. Ltd. Level 1, 80 Market Street, South Melbourne, VIC 3205 Australia Tel: +61-3-9693-5111 NEW ZEALAND Music Works LTD P.O.BOX 6246 Wellesley, Auckland - Yamaha DD-75 | DD-75 Owners Manual - Page 60
Yamaha Global Site https://www.yamaha.com/ Yamaha Downloads https://download.yamaha.com/ Manual Development Group © 2017 Yamaha Corporation Published 03/2019 POMA*.*-**D0 ZW55120
-
 1
1 -
 2
2 -
 3
3 -
 4
4 -
 5
5 -
 6
6 -
 7
7 -
8
-
9
-
10
-
11
-
12
-
13
-
14
-
15
-
16
-
17
-
18
-
19
-
20
-
21
-
22
-
23
-
24
-
25
-
26
-
27
-
28
-
29
-
30
-
31
-
32
-
33
-
34
-
35
-
36
-
37
-
38
-
39
-
40
-
41
-
42
-
43
-
44
-
45
-
46
-
47
-
48
-
49
-
50
-
51
-
52
-
53
-
54
-
55
-
56
-
57
-
58
-
59
-
60
 |
 |
EN
Owner’s Manual
Before using the instrument, be sure to read “PRECAUTIONS” on page 5–6.
Digital Percussion